Yes, potato grow bags work well, and bulb-type crops are genuinely easy to grow in them. Fabric grow bags give potatoes excellent drainage, natural air pruning to prevent root circling, and the rolled-cuff design makes hilling almost effortless. For flower bulbs and bulbous vegetables like onions and garlic, a grow bag delivers the sharp drainage these plants demand and is often better than a solid pot. University extension trials have recorded typical home-garden bag yields of around 7 lb of potatoes per bag with good technique, and replicated grow-bag studies report usable yields of 900–1,050 g per bag depending on variety. This is not a novelty method, it is a practical, legitimate growing system that happens to work especially well for tuber and bulb crops.
Bulbs Are Easy in Potato Grow Bags: Complete How-To Guide
Do potato grow bags actually work? Quick verdict
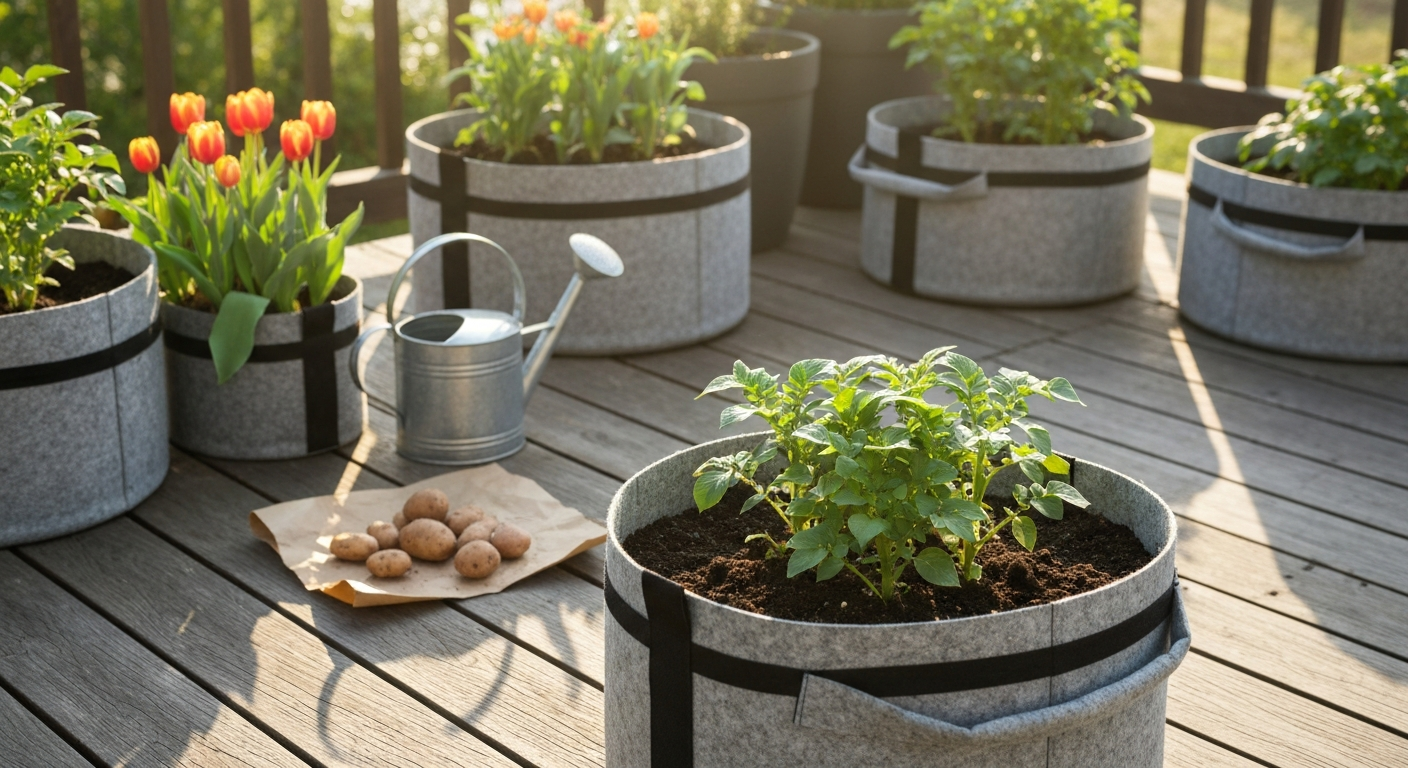
The short verdict: yes for potatoes, and yes for most bulb crops, with a few honest caveats. Fabric grow bags excel at the two things potatoes and bulbs need most: drainage that prevents waterlogging and root-zone aeration that discourages rot. For potatoes specifically, the rolled-cuff design lets you hill soil upward in stages without needing a deep pre-filled container, which matches exactly how potato tubers form, along buried stems, not at a fixed root zone. The RHS specifically recommends early potato varieties for container culture, and land-grant extensions like Penn State and Oregon State both validate 10–15 gallon containers as a practical home-garden setup.
For true bulbs, corms, and bulbous vegetables, the dynamic is slightly different. These plants do not need hilling, they tolerate modest container depth, and their primary vulnerability is sitting in wet soil after flowering. A breathable fabric bag that drains freely is often a better choice than a solid ceramic or plastic pot for exactly that reason. So when growers ask whether bulbs are easy in a potato grow bag, the answer is: yes, as long as you match bag size to bulb type and respect the planting depth rules specific to each species.
One honest caveat: container trial results do not always scale directly to open-field production. Research on 63 potato genotypes found the growing substrate had a larger effect on tuber size and yield structure than container size alone. This means choosing the right soil mix matters as much as picking the right bag, something covered in detail later in this guide.
Who grow bags are best for: beginners and experienced growers compared
Grow bags are genuinely good for beginners because they are hard to overwater once you pick the right size and mix. The fabric breathes, excess water drains freely, and the physical cues for when to water (the bag feels light, the surface is dry an inch down) are easier to read than a solid plastic pot where moisture can hide. The hilling technique for potatoes sounds complicated in writing but takes about five minutes in practice: just unroll the cuff, add a few inches of mix, and roll it back up. That approachability is real. For another relevant comparison, see do potato grow bags work.
For experienced growers, grow bags offer space flexibility, easy rotation between crops, and the ability to dial in substrate for each plant without digging up a bed. If you have grown potatoes in the ground and want to extend your season on a patio, or experiment with varieties you cannot fit in your plot, grow bags are a practical tool rather than a compromise.
| Factor | Beginners | Experienced Growers |
|---|---|---|
| Setup complexity | Low — just fill, plant, roll cuff up as plants grow | Low to medium — can optimize mix and hilling timing |
| Overwatering risk | Lower than solid pots due to fabric drainage | Familiar risk, easier to manage than in-ground beds |
| Space flexibility | Excellent for balconies, patios, rented gardens | Good for crop rotation without permanent beds |
| Cost | Higher per-unit than direct sowing but reusable | Worth it for variety trialing and season extension |
| Disease management | Less soilborne carryover than in-ground | Requires substrate replacement between seasons |
| Yield vs in-ground | Slightly lower but very acceptable (~7 lb/bag) | Can match field yields with good substrate and care |
| Harvest ease | Very easy — tip the bag and tubers fall out | Faster than digging; good for clean variety separation |
Grow bags vs pots vs in-ground: which wins for potatoes and bulbs?
Each method has a genuine use case. In-ground growing gives potatoes the most lateral room for stolons and the most stable moisture environment, so it typically produces the highest yields per plant. But it also ties up bed space for three to four months, makes harvest a real dig, and concentrates soilborne pathogens year after year. Solid containers (plastic pots, buckets, smart pots) work well and are often cheaper per unit, but they trap moisture more easily and roots can circle in smooth-sided plastic. Fabric grow bags sit between these options: better drainage than plastic pots, more portability than in-ground, and air pruning that keeps roots healthy rather than circling.
Oregon State Extension emphasizes that container depth directly determines how many tubers you get: shallower containers consistently produce fewer potatoes. Their guidance points to containers at least 18 inches wide and around 3 feet deep for maximum output. Most 15–20 gallon fabric grow bags hit that depth when filled, which is why they are the sweet spot recommendation for potatoes. For bulbs, a solid pot and a fabric bag perform comparably, but the fabric bag's breathability is a real advantage if your site gets heavy rain or if you tend to over-irrigate.
| Method | Drainage | Air Pruning | Portability | Yield Potential | Disease Risk | Cost |
|---|---|---|---|---|---|---|
| Fabric grow bag | Excellent | Yes | High | Good (~7 lb/bag) | Low (disposable substrate) | Medium ($5–25/bag) |
| Plastic/solid pot | Moderate (drain holes only) | No | Medium | Good | Medium (if soil reused) | Low–Medium ($3–20) |
| In-ground | Site-dependent | No | None | Highest | Higher (pathogen buildup) | Very low (just seed cost) |
| Raised bed | Good | No | None | High | Medium | High (setup cost) |
Recommended grow bags: sizes, materials, and brand notes
For potatoes, the practical minimum is a 10-gallon bag, but a 15–20 gallon bag consistently outperforms it because depth determines tuber count. Penn State Extension puts the home-garden container sweet spot at 10–15 gallons, while OSU's guidance pushes toward deeper and wider for maximum yield. My recommendation: use a 15-gallon bag for early varieties (2–3 plants per bag) and a 20-gallon or larger bag for maincrop varieties where you want a serious harvest.
For flower bulbs (tulips, daffodils, hyacinths, crocus), a 5–10 gallon bag is usually plenty. For bulbous vegetables, onions, garlic, shallots, a 10-gallon bag lets you fit a useful number of plants without crowding. For something like elephant garlic or large alliums, step up to 15 gallons.
On materials: the two types you will encounter most are non-woven polypropylene (lighter, less expensive, common in budget packs) and recycled PET felt (heavier, more insulating, longer-lasting). Both provide air pruning and drainage. The difference is durability. A non-woven polypropylene bag rated around 120–150 g/m² typically lasts 2–3 seasons. A heavier recycled-PET bag at 200–300 g/m² can run 4–5 seasons with reasonable care. For a one-season trial, the cheaper option is fine. If you plan to reuse, pay for the heavier fabric. Root Pouch is one of the better-known brands in the recycled-PET category; their bags are made from recycled water bottles, UV-treated, and come in sizes from 1 to 100 gallons with consistent dimensional specs (a 15-gallon Root Pouch measures approximately 17 x 15 inches). Always look for reinforced stitched handles, not just punched holes, handles take real stress at harvest.
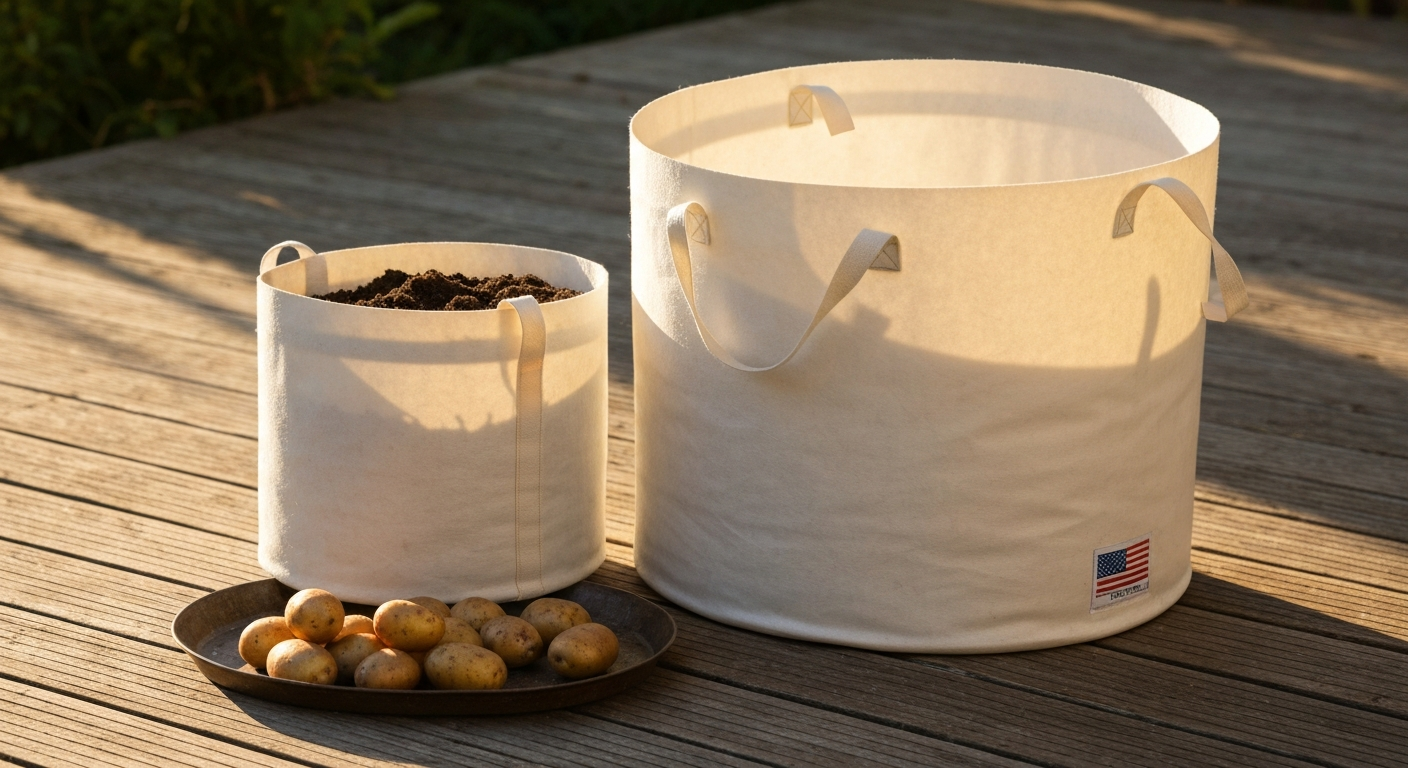
Gardener's Supply Company's Gardener's Best potato grow bag is worth a specific mention. It is a purpose-designed fabric bag with a rollable cuff and a flap at the base for checking tuber development, which beginners find reassuring. It is available directly through Gardener's Supply and widely stocked at garden retailers. Gardener's Supply Company's Gardener's Best potato grow bag is a purpose-built option with a rollable cuff and inspection flap that many gardeners prefer for hilling and checking tuber development. If you want a bag built specifically for the potato hilling method rather than a generic fabric container, it is a well-made option. For where to buy grow bags for potatoes more broadly, garden centers, hardware stores, and online retailers all carry the main brands, worth comparing on fabric weight specs rather than brand name alone.
Bag size guide by crop
| Crop | Minimum Bag Size | Recommended Size | Plants per Bag |
|---|---|---|---|
| Early potatoes | 10 gal (38 L) | 15 gal (56 L) | 2–3 |
| Maincrop potatoes | 15 gal (56 L) | 20 gal (76 L) | 2–3 |
| Tulips / daffodils | 5 gal (19 L) | 7–10 gal (26–38 L) | 6–10 bulbs |
| Hyacinths / crocus | 3–5 gal (11–19 L) | 5 gal (19 L) | 6–12 bulbs |
| Onions | 10 gal (38 L) | 10–15 gal (38–56 L) | 8–12 |
| Garlic / shallots | 5 gal (19 L) | 10 gal (38 L) | 6–10 |
Quick-buy checklist before you start
Before you order anything, work out your crop list and bag sizes from the table above. Then tick off the following before planting day:
- Grow bags: 15–20 gal for maincrop potatoes; 10–15 gal for early varieties; 5–10 gal for flower bulbs and alliums. Check fabric weight (aim for 150 g/m² or above for reuse).
- Seed potatoes: chitted (sprouted) tubers from a certified disease-free source; 2–3 per 15-gallon bag.
- Flower bulbs or allium sets: sourced from a reputable supplier, firm and blemish-free.
- Potting mix: a purpose-made soilless mix or a DIY blend (see soil section below). Do not use straight garden soil.
- Perlite: to blend into your mix if it is not already well-draining (approximately 20–30% of total volume).
- Balanced granular fertilizer: a 5-10-5 or 10-10-5 formula to pre-incorporate into the mix.
- Slow-release or liquid feed: for in-season top-ups once plants are established.
- Watering can or hose with a gentle rose attachment.
- Saucers or raised feet (optional): to keep bags off solid surfaces for better base drainage.
- Labels and a permanent marker: vital once you have more than two bags going.
Step-by-step: planting seed potatoes in grow bags
Timing
Plant seed potatoes once your last frost date has passed and nighttime temperatures are reliably above 7–10°C (45–50°F). In most of the UK, that is late March to April. In the US, timing varies by region but broadly follows the same frost-free window. Early varieties go in first (March–April in the UK; February–March in mild US zones); maincrop varieties follow two to three weeks later. If you are growing under cover, you can start even earlier.
Chitting
Chit your seed potatoes for 4–6 weeks before planting. Stand them rose-end up (the end with the most eyes) in an egg box or shallow tray in a cool, bright, frost-free spot. You want short, stubby green sprouts of about 1–2 cm, not long pale ones. Chitted tubers establish faster and tend to produce more uniform yields.
Planting step by step
- Roll the cuff of the grow bag down to its lowest position so the bag is at roughly one-third of its full height.
- Add approximately 4 inches (10 cm) of your prepared soil mix to the base.
- Place 2–3 chitted seed potato pieces on the mix, spacing them evenly (roughly 20–25 cm / 8–10 inches apart). Sprouts should face upward.
- Cover with a further 4 inches (10 cm) of mix, burying the tubers to about 4 inches total depth below the surface.
- Water gently until moisture just begins to show at the base of the bag. Do not saturate at this stage.
- Place the bag in full sun (6+ hours per day). Keep it in a frost-free spot if late frosts are possible — bags have no soil insulation buffer the way in-ground beds do.
- As shoots emerge and grow to about 6–8 inches above the mix surface, begin the hilling process (see the hilling section below).
Step-by-step: planting bulb flowers and bulbous vegetables in grow bags
Before getting into the specifics, it is worth clarifying a common point of confusion: potatoes are tubers (modified stems), not true bulbs. True bulbs (tulips, daffodils, hyacinths) have a basal plate and fleshy scales. Corms (crocus) are solid storage organs. Garlic, onions, and shallots are true bulbs. These differences matter for planting depth and whether hilling applies, none of the bulb types described here need hilling the way potatoes do.
Tulips
Plant tulip bulbs in autumn (October–November in temperate zones) for spring flowering. Planting depth is 3 times the bulb height, typically 6–8 inches deep for a standard tulip bulb. Space bulbs 4–6 inches apart. In a 10-gallon bag you can comfortably fit 8–10 bulbs. Fill the bag to about two-thirds, place bulbs pointy-end up at the correct depth, cover with mix, and water in. Tulips in bags benefit from a cold period (vernalization) of at least 12–16 weeks below 9°C (48°F), if you are in a mild-winter zone, pre-chill bulbs in a paper bag in the fridge for 8–12 weeks before planting.
Daffodils
Plant in September–October, also for spring flowering. Depth is 2–3 times the bulb diameter, roughly 6 inches for most standard daffodil bulbs. Space about 3–6 inches apart. Daffodils are more tolerant of moisture than tulips but still need sharp drainage, which a fabric bag provides naturally. They can be left in the bag after flowering to die back naturally before lifting or storing.
Hyacinths
Plant in autumn at about 4 inches deep and 3 inches apart. Hyacinths are particularly prone to rotting in wet conditions, making a fabric grow bag a genuinely good choice. Wear gloves when handling, the outer skin can irritate skin. A 5-gallon bag works well for a cluster of 6 bulbs, which makes a nice patio display.
Crocus
Crocus corms are small and can be planted in autumn at about 3–4 inches deep and 2–3 inches apart. A 5-gallon bag can hold 12 or more corms easily. They naturalize well and can stay in the bag year to year if you bring it somewhere dry after the foliage dies back.
Onions, garlic, and shallots
Onion sets and shallot sets go in from early spring (March–April in the UK; February–March in mild US zones) at just 1 inch deep, with tips barely showing above soil, spaced 4 inches apart. Garlic cloves are planted slightly deeper, about 2 inches, with the flat base down and the pointy tip up, spaced 6 inches apart. Autumn planting (October–November) is also an option for garlic and certain overwintering onion sets. A 10-gallon bag is the practical minimum for a productive onion or garlic crop. Feed with a balanced nitrogen fertilizer early in the season to encourage leaf growth, then switch to a low-nitrogen, higher-potassium feed as bulbs begin to swell.
Soil mix and amendments: exact proportions
Do not use straight garden soil in grow bags. It compacts, drains poorly, and can introduce soilborne pathogens. A good container substrate is light, well-draining, and retains just enough moisture between waterings. Research data consistently points to soilless mixes with high organic content and coarse particles as the best performers for container tuber and bulb crops.
A practical DIY mix for potatoes and bulbous vegetables: 50% quality peat-based or coir-based potting compost, 25% well-rotted garden compost or composted bark (for nutrients and structure), and 25% perlite (for drainage and aeration). For flower bulbs, you can increase perlite to 30% and reduce compost accordingly to ensure sharper drainage. Target a pH of 5.5–6.5 for potatoes and 6.0–7.0 for most bulb flowers. If using peat-based mixes, they tend to be slightly acidic, add a small amount of garden lime or dolomitic limestone if your pH reads below 5.5.
Pre-incorporate a balanced granular fertilizer at label rates before planting. Extension guidance commonly cites a 5-10-5 or 10-10-5 formula as a solid starting point for home-garden containers. Mix it thoroughly into the substrate rather than concentrating it at the base. Avoid nitrogen-heavy feeds at planting for potatoes, too much nitrogen early pushes leafy growth at the expense of tuber formation.
Watering, feeding, and general care
Grow bags dry out faster than solid containers and much faster than in-ground beds because all surfaces are permeable. In mild weather, check moisture daily and water every 2–3 days. In hot weather (above 25°C / 77°F), you may need to water daily. UC Cooperative Extension specifically notes that in hot weather, potato grow bags may need irrigation every day. The check: push a finger 1–2 inches into the mix. If it feels dry, water. If it feels moist, wait.
When you water, water thoroughly enough that moisture appears at the base of the bag, this ensures the full root zone is reached. Light, frequent surface watering can leave lower roots dry and cause uneven growth. For a 15-gallon bag, a thorough watering typically means adding around 5–8 litres at a time until you see drainage.
For feeding: potatoes need a follow-up feed once foliage is actively growing, about 3–4 weeks after emergence. Use a balanced liquid fertilizer or a granular side-dressing at label rates. Once flowering starts, switch to a higher-potassium formula (like a tomato feed) to push tuber development. For bulb flowers, UGA Extension recommends feeding after flowering with approximately 2 lb per 100 sq ft of a 5-10-5 or 12-12-12 fertilizer, this restores energy reserves in the bulb for next year's bloom. For onions and garlic, feed with nitrogen early, then ease off as bulb swelling begins.
Signs of underwatering and overwatering
| Symptom | Likely Cause | Fix |
|---|---|---|
| Wilting in afternoon heat, dry bag when squeezed | Underwatering | Water immediately and deeply; consider a morning watering routine |
| Yellowing lower leaves, soggy bag base | Overwatering or poor drainage | Reduce watering frequency; check bag is not sitting in a saucer of water |
| Cracked or misshapen tubers at harvest | Irregular watering (wet-dry-wet cycles) | Maintain consistent moisture, especially during tuber bulking |
| Stunted growth, pale leaves despite watering | Nutrient deficiency or compacted mix | Feed with balanced liquid fertilizer; check mix is not compacted |
| Soft, black stem base (blackleg) | Overwatering or infected seed potato | Remove affected plant; do not reuse the substrate |
Hilling potatoes in grow bags: when, how much, and why
Hilling is the single most important technique to understand for growing potatoes in bags. Potato tubers do not form at a fixed root zone, they form along buried stems (stolons) above the original seed potato. The more buried stem length you create, the more tubers the plant can set. This is the entire logic behind the rolled-cuff design of purpose-built potato grow bags.
- When shoots are 6–8 inches (15–20 cm) above the soil surface, unroll the cuff by one turn to expose more bag height.
- Add 3–4 inches (7–10 cm) of your soil mix around the stems, leaving the top 2–3 inches of shoot exposed above the new mix surface.
- Water the new mix in gently.
- Repeat every time shoots grow a further 6–8 inches above the mix surface.
- Continue until you have reached the top of the bag or the plant has begun to flower — whichever comes first.
- Once the bag is full and the plant is flowering, stop hilling. This is when tuber bulking begins and you want stable conditions.
UC Cooperative Extension documents this method in detail and recommends hilling in 3–4 inch increments. See Growing Potatoes in Grow Bags, UC Cooperative Extension (Contra Costa Master Gardener blog, Feb 2, 2026) for step‑by‑step hilling, irrigation, and yield guidance Growing Potatoes in Grow Bags — UC Cooperative Extension (Contra Costa Master Gardener blog, Feb 2, 2026). The key is not to bury the shoot completely, always leave a few inches of green growth above the mix to maintain photosynthesis. Done correctly, you should be able to hill 3–4 times over the growing season, building up a substantial buried stem column and a correspondingly better tuber set.
Monitoring and troubleshooting common problems
Rot (tubers or bulbs rotting before harvest)
Rot is usually a symptom of overwatering combined with a poorly draining mix, or it can indicate a diseased seed potato or bulb at planting. Symptoms include soft, dark tubers when you check early, a sulphur smell from the bag, or collapsed foliage with black stems. Fix: remove the affected plant immediately. Do not reuse the substrate for the same crop family. For prevention, always start with certified disease-free seed potatoes and firm, blemish-free bulbs, and ensure your mix includes at least 20–25% perlite.
Late blight (Phytophthora infestans)
Late blight is the most serious disease risk for potatoes regardless of container or in-ground growing, the RHS specifically flags this. Symptoms are brown patches on leaves with a whitish mould on the underside in humid conditions, and rapidly collapsing foliage. Grow bags do not prevent blight. Prevention: choose blight-resistant varieties, improve air circulation by not overcrowding bags, and remove and bin (do not compost) affected foliage immediately. There are no effective home-garden fungicide treatments for blight once established.
Pests
Slugs and vine weevils are the main pest risks. Fabric bags offer a slight advantage over in-ground beds because slugs have to climb the sides, but they will still reach pots on patios, especially at night. Use slug barriers around the base of bags (copper tape, grit) rather than pellets if possible near edible crops. Vine weevil grubs (small white C-shaped larvae) attack roots and tubers, if plants collapse suddenly despite correct watering, check the root zone for grubs. Nematode-based biological treatments are effective when soil temperature is above 5–10°C.
Poor yields
Poor yields from potato grow bags almost always trace back to one of three causes: insufficient bag depth, irregular watering during tuber bulking, or skipping the hilling steps. OSU extension data is clear that shallower containers produce fewer potatoes, so if you used a 7-gallon bag where a 15-gallon was needed, expect a proportionally modest harvest. For bulb crops, poor performance usually means bulbs were planted too shallow, the mix was too rich in nitrogen (which drives leaf at the expense of bulb), or the container was kept too wet after the foliage died back.
Nutrient deficiencies
The most common deficiency in grow bags is nitrogen (pale yellow-green leaves, starting with older leaves), which typically shows up 4–6 weeks into the season as the pre-incorporated fertilizer is exhausted. Follow up with a balanced liquid feed at this point. Magnesium deficiency (yellowing between veins on older leaves) can appear in acidic mixes, a dose of Epsom salts (magnesium sulphate) at 15 g per litre of water applied as a foliar spray addresses this. Potassium deficiency (brown leaf margins, weak stems) signals it is time to switch to a high-K tomato-type feed.
Harvesting and storage: timing and handling
Potatoes
Early varieties (First Earlies) are ready to harvest approximately 10–12 weeks after planting, usually once the plant begins to flower. You do not need to wait for the foliage to die back for earlies, simply tip the bag gently on its side, pull the sides apart, and the tubers will tumble out with minimal damage. This is one of the most satisfying advantages of grow bags: a clean, no-digging harvest in under a minute. Maincrop varieties (Second Earlies and Maincrops) need 15–20 weeks and should ideally be harvested after the foliage has died back naturally.
Cure maincrop potatoes before storage: spread them in a single layer in a dark, cool, well-ventilated space for about 10–14 days to allow the skin to toughen. After curing, store in paper or hessian sacks (never plastic) at 4–10°C (40–50°F) in the dark. Early varieties do not store well and are best eaten within a week or two of harvest.
Bulb crops
Onions and garlic are ready to harvest when the foliage flops and begins to yellow and dry back. For garlic, this is typically mid-summer; for onions, late summer. Lift the bulbs and cure them in a warm, dry, airy spot for 3–4 weeks until the outer skins are papery. Well-cured garlic stores for 6–8 months; onions for 3–6 months depending on variety. Shallots are harvested similarly but tend to store slightly less well.
For flower bulbs (tulips, daffodils, hyacinths), allow the foliage to die back completely after flowering before lifting, at least 6 weeks. The foliage feeds energy back into the bulb for next year. Once the leaves are fully brown, lift the bulbs, clean off soil gently, and store in a dry paper bag at room temperature until autumn replanting. Crocus corms can often stay in the bag year to year if it is stored dry over summer.
Re-using and maintaining your grow bags
A quality fabric bag (150+ g/m²) can easily run 3–5 seasons. After harvest, empty the bag fully, shake out residual soil, and wash it by hand or in a washing machine on a cool cycle without detergent. Allow it to dry completely before storage, folding a damp bag leads to mould on the fabric. Inspect the seams and handles after each season; bags that show tearing at the handle attachment points should be retired.
On the soil side: the main rule is not to reuse substrate from a bag where disease (blight, rot, blackleg) was present, bin that mix and start fresh. Research on container potato trials confirms that substrate reuse history affects disease incidence, with soilborne pathogens like Rhizoctonia, Pythium, and Phytophthora persisting in infected substrate. Research warns that reusing bag soil can carry soilborne pathogens (Rhizoctonia, Pythium, Phytophthora), so best practice is to avoid reusing potting mix from infected tuber/corm crops or to pasteurize/replace substrate between crops to reduce inoculum carryover (see Confounding Factors in Container-Based Drought Tolerance Assessments in Solanum tuberosum, MDPI) Confounding Factors in Container-Based Drought Tolerance Assessments in Solanum tuberosum — MDPI. For clean crops, you can refresh used mix by adding about 25–30% new compost and fresh perlite to replace what has broken down. Alternatively, rotate the mix to a less disease-sensitive crop (herbs, salad leaves) the following season rather than reusing it for potatoes or bulbs.
Crop rotation applies to containers just as it does to beds. Do not grow potatoes in the same grow bag with the same substrate for more than one season in a row. Two years' break (minimum) between potato crops in the same bag or mix helps prevent pathogen buildup. Similarly, onion and allium crops should not follow each other without a substrate change.
Quick-reference cheat sheet
| Task | Detail / Measurement | Timing |
|---|---|---|
| Bag size for potatoes | 15–20 gal (56–76 L), minimum 12 inches tall | Before planting |
| Bag size for flower bulbs | 5–10 gal (19–38 L) | Before planting |
| Soil mix | 50% compost, 25% bark/compost, 25% perlite; pH 5.5–6.5 | Before planting |
| Starter fertilizer | 5-10-5 or 10-10-5 at label rates, pre-incorporated | At planting |
| Seed potato planting depth | 4 inches (10 cm) below initial mix surface | Spring, after last frost |
| Tulip planting depth | 6–8 inches (15–20 cm), pointy-end up | Autumn (Oct–Nov) |
| Daffodil planting depth | 6 inches (15 cm) | Autumn (Sep–Oct) |
| Garlic planting depth | 2 inches (5 cm), tip up, 6-inch spacing | Autumn or early spring |
| Onion sets planting depth | 1 inch (2.5 cm), tips barely showing | Early spring |
| Hilling trigger | When shoots are 6–8 inches (15–20 cm) above mix | During growing season, repeat 3–4 times |
| Soil added per hilling | 3–4 inches (7–10 cm), leave 2–3 inches of green showing | Each hilling session |
| Watering frequency (mild weather) | Every 2–3 days | Actively growing season |
| Watering frequency (hot weather) | Daily | Hot spells above 25°C |
| In-season feed | Balanced liquid feed, then high-K once flowers appear | 3–4 weeks after emergence, then every 2 weeks |
| Early potato harvest | ~10–12 weeks after planting, at first flower | Spring–early summer |
| Maincrop potato harvest | ~15–20 weeks, after foliage dies back | Summer–early autumn |
| Potato curing | 10–14 days, dark, cool, ventilated spot | Post-harvest |
| Garlic / onion curing | 3–4 weeks, warm, dry, airy | Post-harvest |
| Bag cleaning | Rinse, machine-wash on cool cycle, dry fully | Post-season |
| Substrate rotation | Do not reuse for same crop family consecutively | Each season |
More grow bag guides on this site
If this guide has given you what you need to get started, there are several related topics covered in more depth elsewhere on Grow Bags Guide. If you grow orchids, see our guide on how to better grow orchids in a bag for tips on substrate, moisture control, and light requirements (internal link). For product-specific research, the best potato grow bag guide runs through the top-rated options side by side with a focus on fabric weight, handle quality, and size. If you are still on the fence about whether the method suits your setup, the do potato grow bags work article addresses the evidence more directly and looks at realistic expectations for different garden contexts.
Once you are up and running, the how often to water potatoes in grow bags guide goes into more detail on moisture management across different climates and bag sizes, useful once you have seen how quickly your specific bags dry out in summer. For anyone comparing fabric containers with traditional pots, the best potato grow pots guide provides a fair comparison of the two formats. And if you have a specific product in mind, the Gardener's Supply Company Gardener's Best potato grow bag page gives a full breakdown of that particular bag's specs and best use cases. For sourcing bags locally or online, the where to buy grow bags for potatoes guide covers retailers, what to check before you order, and how to avoid low-quality bags that will not last a season.
FAQ
What is the single most important evidence type to answer “Do potato grow bags work?” and whether “bulbs are easy” in grow bags?
Replicated experimental trials and extension field/container studies that report bag-level yields, tuber/flower performance, and disease incidence. Prioritize peer‑reviewed container vs field comparisons and replicated grow‑bag trials (example: ResearchGate/Journal of Applied Horticulture grow‑bag trial; MDPI and Frontiers container/hydroponic potato studies) because they quantify yield, size distribution and how substrate and container interact.
Which university/extension sources should be included for practical, step‑by‑step how‑to guidance?
Land‑grant and master gardener extension pages that give actionable protocols and measurements: UC ANR/UC Master Gardener grow‑bag potato guidance, Penn State Extension container potato pages, Oregon State Extension potato/container dimensions, RHS container potato/bulb guidance, UGA and Illinois Extension on bulbs (planting depths, botanical differences). These sources supply timing, depths, bag-size recommendations and disease/sanitation warnings.
What research topics must the article cite to avoid unsupported claims about yield and scalability?
(1) Container vs field trials showing substrate often drives outcomes more than container size (MDPI Agriculture study). (2) Container/hydroponic trials that show altered tuber‑size distribution or changed yields under fertigation (Frontiers/PMC). (3) Replicated grow‑bag yield trials for realistic bag-level benchmarks (Journal of Applied Horticulture summary). Use these to frame expectations and caution that container results don’t directly scale to field production.
What product and materials information is needed for accurate bag recommendations?
Manufacturer specs and retailer listings for common brands (Root Pouch, Gardener’s Best‑type products), including stated volume (gallons or liters), dimensions, fabric type (recycled PET felt vs non‑woven polypropylene), GSM/fabric weight, UV stabilization, handle reinforcement, drainage properties and warranty. Include commercial buyer‑guide criteria (recommended ≥120–200 g/m² for multi‑season use) and examples of SKU sizes and prices to give readers shopping context.
Which authoritative sources define botanical differences (potatoes vs bulbs) and how should that inform container guidance?
University extension bulletins (UGA, Illinois Extension) that explain bulbs vs corms vs tubers. Use these to justify different container strategies: potatoes (tubers) need hilling and deeper substrate because stolons and buried stems produce tubers, whereas true bulbs require shallower, diameter‑based planting and do not benefit from hilling.
What substrate and soil mix evidence should be referenced for mix recipes and pH/texture guidance?
Nursery and university container substrate formulations and published industry mixes (Cornell/UF/industry recipes) that specify percentages: 40–60% peat moss or coir, 20–30% compost/bark, 10–30% perlite/vermiculite/sand for drainage. Cite extension recommendations for soilless, well‑draining, high organic matter mixes and include pH and dolomitic lime amendment guidance where provided.
Gardener’s Supply Gardener’s Best potato grow bag review & how-to: sizes, soil mix, planting, yields, troubleshooting.
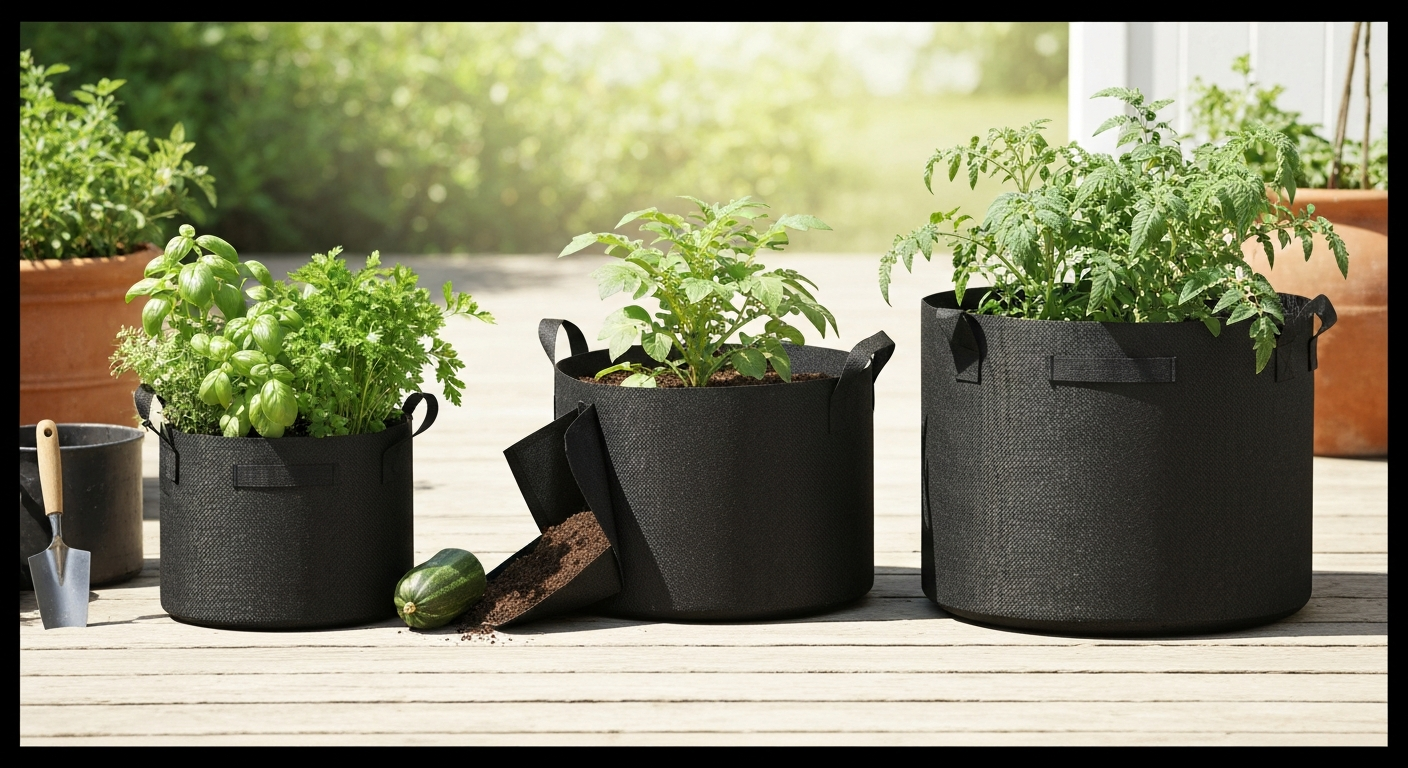
Gardener's Best grow bag buyer's guide: choose sizes, fill mix, watering, potato hilling, care & where to buy.
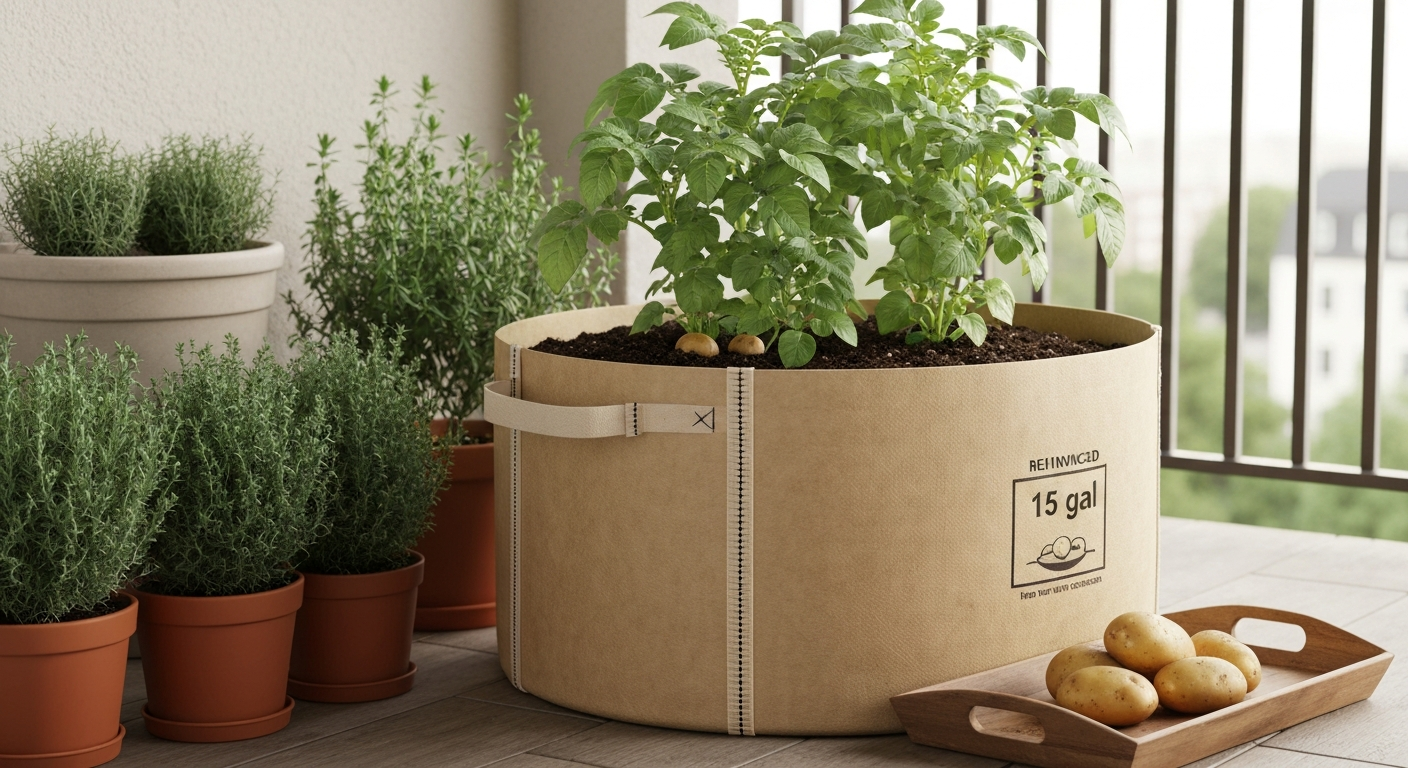
Best potato grow pots: compare fabric grow bags vs plastic, sizes, planting, watering schedule & top product picks.