Grow bags work by letting roots breathe. Instead of hitting the wall of a smooth plastic pot and circling, roots reach the fabric edge, sense the drier air, and self-prune, sending out dense clusters of fine feeder roots instead of one long, pot-bound spiral. That single difference has measurable consequences: better nutrient uptake, faster establishment after transplanting, and healthier plants across the board. If you're deciding whether grow bags are worth switching to, the honest answer is yes for most home crops, with some clear size, soil, and watering adjustments you need to get right first.
Grow Bag Planting Guide: Setup, Crops, Care & Troubleshooting
Marcus Holloway
10 Aug 2026
What grow bags are and why home growers use them
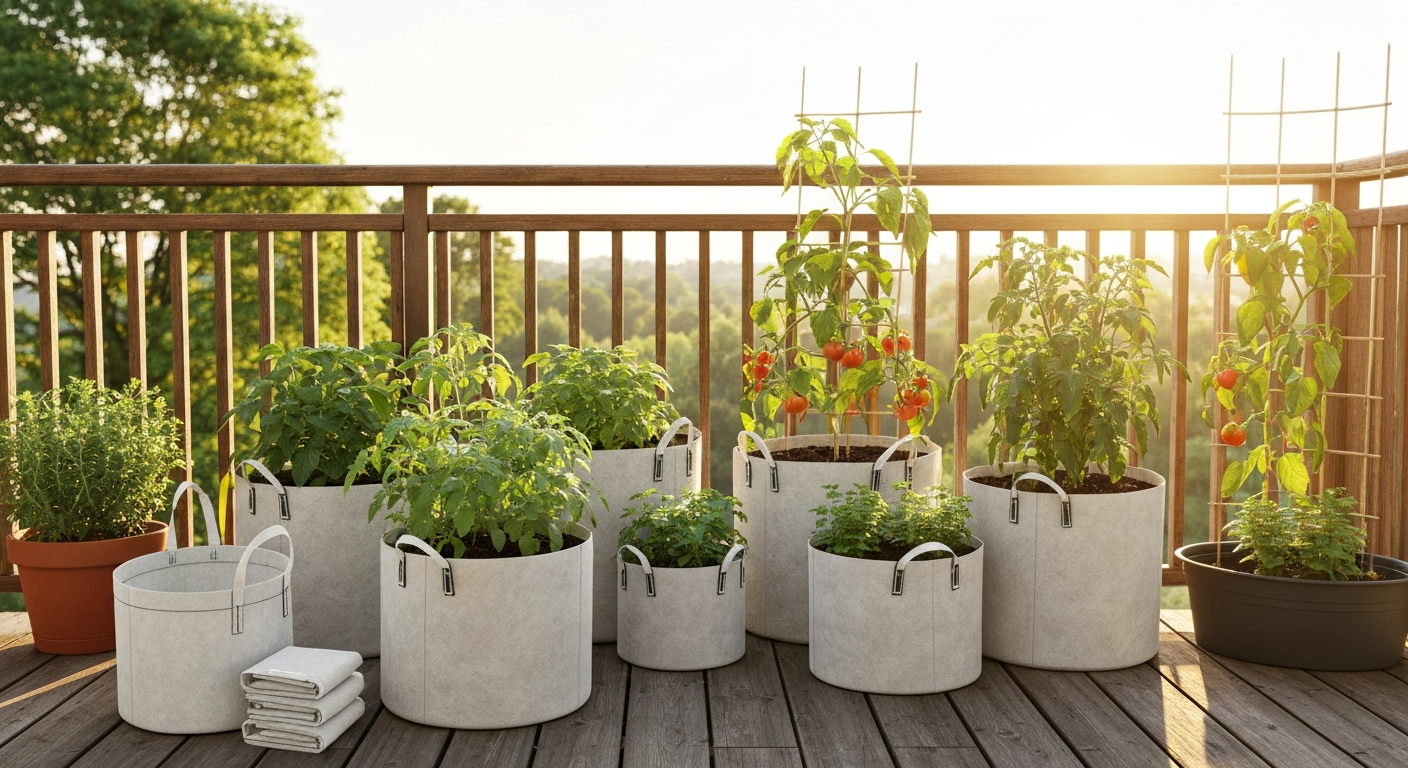
A grow bag is a flexible, open-topped container filled with growing medium and used in place of rigid pots, raised beds, or in-ground planting. The category covers a huge range of products, but the defining benefit of the most popular type, breathable fabric grow bags, is air pruning. Roots grow outward, contact the porous fabric wall, and stop elongating at that point. The plant responds by branching the root behind the tip, producing a dense fibrous network rather than a circling, girdling mass. Peer-reviewed nursery trials and arboriculture research confirm this consistently: fabric and air-pruning containers produce more feeder roots and less root circling than standard smooth-walled plastic pots, which translates to better post-planting establishment, especially in trees and perennials.
For everyday home growers, the practical benefits beyond root architecture include portability (you can move a 10-gallon fabric bag of tomatoes into shelter in August when a storm rolls in), precise control over soil quality (you fill what you use), seasonal flexibility (store flat when not in use), and the ability to garden on hard surfaces like patios, decks, and driveways where in-ground planting isn't an option. There's also a cost and space argument: you can start with two or three bags, scale up as confidence grows, and avoid the permanence of raised beds.
Grow bag types: what you're actually choosing between
The term 'grow bag' covers several distinct product types, and the differences matter for your crop, climate, and budget.
Fabric grow bags (non-woven geotextile)
These are the most widely used type for home growing. They're made from needle-punched or spun-bonded polypropylene or recycled PET fabric. Brands like Smart Pots use BPA-free, phthalate-free, lead-tested fabric and report a typical useful life of 5 or more years, with many customers getting 10-plus years from quality bags. Root Pouch makes lines from recycled PET (post-consumer water bottles) blended with natural fibers, and their heavyweight Boxer line is built for long-term use. Fabric bags drain freely from the bottom and wick moisture through the sides, so they dry faster than plastic, plan for more frequent watering. Fabric (breathable) pots typically dry faster than comparable plastic pots because of lateral evaporative loss through the fabric; growers are advised to increase irrigation frequency or use drip/soaker systems and mulches to reduce evaporation (Effect of four root‑pruning nursery containers, IPPS proceedings (2024), notes on drying behaviour) blank" rel="noopener noreferrer">Effect of four root‑pruning nursery containers — IPPS proceedings (2024) — notes on drying behaviour.
Felt grow bags
Felt bags are a subset of fabric bags, the material is thicker, softer, and usually made from compressed synthetic or natural fibers. They perform similarly to standard fabric bags for air pruning and drainage. The main practical difference is aesthetics and slightly more insulation from the denser material, though the insulation effect is modest.
Plastic and grow pouches
Traditional polyethylene grow bags, essentially thick plastic sacks, are widely used in commercial horticulture for strawberries, tomatoes, and nursery stock. They don't air-prune roots and they don't breathe, but they retain moisture much better than fabric, which matters in hot, dry climates or for crops with high water demands. They're also very cheap. The tradeoff is that root circling is a real long-term issue, drainage must come entirely from holes you cut or punch, and they degrade in UV over two to three seasons.
Biodegradable and compostable bags
These are designed to break down in the soil and are most useful for starting plants you'll transplant directly into the ground, roots can grow right through the bag wall. Root Pouch's 'thin' degradable lines are intentionally designed to break down within 12 to 18 months. For permanent container growing, biodegradable bags aren't the right choice; for single-season seedling starts or transplanting, they reduce transplant shock.
Self-watering grow bags
These incorporate a reservoir at the base that allows capillary uptake from below. They're particularly useful on balconies or when you're away for several days. The tradeoff is higher cost and added complexity, and they don't provide the same air-pruning benefit because the base is enclosed.
Specialty spawn bags (mushroom cultivation)
Mushroom spawn bags are a different category entirely, they're typically polypropylene autoclave bags with filter patches (0.2–0.5 micron) that allow gas exchange while blocking contaminants. They're sterilized with substrate and inoculated with fungal mycelium. The 'grow bag' concept here is about controlled atmosphere and contamination prevention rather than root development. If you're growing mushrooms, the spawn bag guide covers this in specific detail.
How grow bags compare with other growing options
Grow bags aren't the right answer for every situation. Here's an honest comparison with the most common alternatives home growers consider.
| Option | Root health | Drainage | Portability | Cost | Lifespan | Best for |
|---|---|---|---|---|---|---|
| Fabric grow bag | Excellent (air pruning) | Very good (sides + base) | High (foldable) | $5–$30+ | 5–10+ years | Vegetables, herbs, trees, flowers |
| Standard plastic pot | Fair (circling risk) | Good (base holes) | Medium (rigid) | $3–$20 | 3–5 years | General use, water-sensitive crops |
| Plastic grow bag | Poor (no air pruning) | Okay (cut holes) | Medium | $1–$5 | 1–3 seasons | Commercial rows, strawberries |
| Raised bed | Very good | Good | None (permanent) | $50–$500+ | 10–20+ years | Large-scale veg, perennials |
| In-ground planting | Excellent | Depends on soil | None | Near zero | Permanent | Established gardens, trees |
| Window box / planter | Fair | Good if drilled | Low–medium | $15–$80 | 5–15 years | Flowers, herbs, compact veg |
The honest case against grow bags: they dry out faster than plastic pots or raised beds, which means more irrigation attention. If you travel frequently without automated watering, a raised bed or in-ground plot will be more forgiving. And for large permanent installations, fruit trees you'll never move, established perennial beds, raised beds or in-ground planting make more long-term sense. For most other situations, especially on hard surfaces or in rental properties, fabric grow bags win on flexibility and value.
How to choose the right grow bag: materials, size, drainage and cost
Fabric weight and material
Fabric grow bags are sold in weights typically measured in grams per square meter (GSM). Lighter fabrics (150–200 GSM) are cheaper and fine for a single season or two, but they'll degrade faster under UV and repeated wetting-drying cycles. Heavyweight bags (300–400+ GSM) hold their shape, handle the weight of dense growing media, and last significantly longer. For anything you're planning to reuse across multiple seasons, especially for trees, shrubs, or annual rotations, invest in the heavier option. Root Pouch's Boxer line and Smart Pots' standard range are both good references for quality construction.
Safety: what the fabric is made from matters
If you're growing food, check that the bag manufacturer provides safety documentation. Smart Pots publishes a Safety Data Sheet stating their non-woven geotextile fabric is phthalate-free and was tested with no detectable BPA or lead. Root Pouch uses recycled PET. For food crops, stick with brands that are transparent about materials and have food-safe documentation. Avoid anonymous, unbranded bags from unknown sources when you're growing edibles.
Handles, shape, and drainage
Handles are genuinely useful, not just a marketing detail. Moving a 20-gallon bag filled with wet soil without handles is a two-person job and risks tearing the fabric or spilling the contents. Look for reinforced stitched handles if you'll move bags regularly. Shape matters too: taller, narrower bags suit deep-rooted crops like carrots and potatoes; shorter, wider bags suit shallow-rooted plants and help stability on windy balconies. Drainage in a quality fabric bag should be passive and even, the entire base and lower walls act as a drain. You shouldn't need to punch holes.
Durability and cost
A quality 5-gallon fabric grow bag costs roughly $5 to $10. A 20-gallon bag runs $10 to $20. For trees, 25-gallon and larger bags can be $20 to $40 each. Cheaper bags under $3 are usually very thin-walled and may not survive more than one or two seasons. When you're buying multiple bags, it's worth spending a bit more on one brand you can evaluate before scaling up, a bag that lasts 8 years at $10 is better value than one that lasts 2 years at $4.
Choosing the right size: a practical volume guide
Container volume is one of the most consequential decisions you'll make with grow bags. Too small and roots become restricted before the plant reaches full production; too large and you're wasting soil and water on root zone the plant can't fill. NC State Extension, University of Maryland Extension, and Cornell Cooperative Extension all provide consistent minimum volume guidance for common vegetables. Here's a practical reference table you can use when buying.
| Crop | Minimum volume (gallons) | Minimum volume (litres) | Recommended volume | Notes |
|---|---|---|---|---|
| Lettuce / salad greens | 1–2 gal | 4–8 L | 2–3 gal per plant | Shallow roots; wide bags work well |
| Herbs (basil, parsley, chives) | 1–2 gal | 4–8 L | 2–3 gal | Pot multiple herbs together in a 5 gal bag |
| Peppers | 3–5 gal | 11–19 L | 5 gal per plant | Compact varieties do well at 3 gal |
| Bush tomatoes | 5 gal | 19 L | 7–10 gal per plant | 5 gal is minimum; larger = more yield |
| Indeterminate tomatoes | 7–10 gal | 26–38 L | 10–15 gal per plant | Larger root zone rewards with better fruit set |
| Cucumbers | 5 gal | 19 L | 7–10 gal per plant | Needs trellis; tall narrow bags work |
| Zucchini / squash | 10 gal | 38 L | 15–20 gal per plant | Hungry feeders; err larger |
| Potatoes | 10 gal | 38 L | 10–15 gal per hill | Tall bags or 'potato bags' allow hilling |
| Dwarf fruit trees | 25–30 gal | 95–114 L | 25–45 gal | Univ. of Maryland recommends 25–30 gal minimum |
| Flowers (annuals) | 2–5 gal | 8–19 L | 5 gal for bushy types | Window-box bags suit trailing annuals |
| Mushroom spawn bags | N/A | 2–5 kg substrate | N/A | Volume measured by substrate weight, not plant size |
One clarification worth making: bag sizes as marketed (3 gal, 5 gal, 10 gal) are often nominal, not exact. Root Pouch, for example, publishes actual internal capacities in litres across their product range, and the numbers don't always match the marketing label exactly. See the Root Pouch Boxer product page (distributor), dimensions and L capacities for an example listing actual dimensions and a 16 L capacity Root Pouch Boxer product page (distributor) — dimensions and L capacities. If precision matters, especially for trees, check the manufacturer's listed litre capacity rather than the gallon label.
Budget ranges when buying grow bags
| Bag size | Budget option | Mid-range quality | Premium / long-life |
|---|---|---|---|
| 1–3 gal (4–11 L) | $1–$3 each | $3–$6 each | $6–$10 each |
| 5 gal (19 L) | $2–$5 each | $5–$8 each | $8–$14 each |
| 10 gal (38 L) | $4–$8 each | $8–$14 each | $14–$22 each |
| 20 gal (76 L) | $8–$12 each | $12–$20 each | $20–$35 each |
| 25–30 gal (95–114 L) | $10–$16 each | $18–$28 each | $28–$45 each |
| 45+ gal (170+ L) | $15–$25 each | $25–$45 each | $45–$80+ each |
Planning your grow bag garden
Site selection: sun, wind, and surface
Most vegetables need at least 6 to 8 hours of direct sunlight per day. Herbs and leafy greens can tolerate 4 to 6 hours. When planning your grow bag layout, prioritize south-facing positions (in the northern hemisphere) and avoid placing bags directly up against north-facing walls that create shade. Wind is a bigger consideration with grow bags than with in-ground planting, taller bags and larger plants can tip in strong gusts. Grouping bags together adds mutual stability, and positioning them against a fence or railing helps on exposed balconies and rooftops.
Weight and load limits
This is a critical check if you're gardening on a balcony, rooftop, or raised deck. A 5-gallon fabric bag filled with moist growing medium weighs approximately 15 to 20 kg (33 to 44 lbs). A 20-gallon bag can weigh 50 to 70 kg (110 to 155 lbs) when fully watered. Before setting up a large grow bag garden on any elevated structure, check the load rating with a structural engineer or building manager. Using lightweight media like perlite-heavy mixes and coir-based substrates (rather than heavy topsoil) significantly reduces weight per bag. Distributing bags across joists rather than concentrating weight in one spot also helps.
Mobility and seasonal planning
One of the genuine advantages of grow bags is the ability to move plants. In practice, this works easily for bags up to about 10 gallons if they have sturdy handles and you're moving them a short distance. Anything larger should be moved on a wheeled plant caddy or dolly. Plan for end-of-season emptying: fabric bags can be washed (many are machine washable on a gentle cycle), dried, and stored flat, a stack of 20 bags takes up almost no space. This is one area where fabric bags clearly beat rigid planters and raised beds.
Drainage, placement, and preventing waterlogging
Fabric bags drain freely through their base and walls, so true waterlogging is uncommon if your growing medium has good structure. The more common problem is the opposite: they drain and dry so efficiently that underwatering becomes a challenge, particularly in summer heat. That said, if you set a fabric bag directly on a sealed flat surface like a concrete patio, a small amount of water can pool under the bag and restrict airflow to the base. This can cause the lowest layer of growing medium to stay wetter than the rest.
Elevating bags slightly solves this problem. Purpose-made plant stands, pot feet, wooden pallets, or slatted shelves all work. Even an inch or two of clearance is enough to restore airflow and drainage. If you're using trays to catch water and reduce staining on surfaces, empty them regularly, a tray full of standing water under a fabric bag partially defeats the drainage advantage.
On slopes or uneven surfaces, stability is the key concern. Wide, short bags are inherently more stable than tall narrow ones. If you're working with an uneven surface, a shallow layer of gravel or a rubber mat under the bags can level them out and protect the fabric from abrasion.
Soil and potting mix: what to put in your grow bags
Never fill grow bags with native garden soil. It compacts, drains poorly in a container environment, and introduces weeds and pathogens. You need a purpose-mixed, soilless or near-soilless medium that balances water retention with aeration. The good news is that a simple three-ingredient recipe covers most crops well, and you can adapt it based on what you're growing.
Core ingredients to know
- Coconut coir: a sustainable alternative to peat moss, excellent water retention and good structure, near-neutral pH
- Perlite: volcanic glass that improves drainage and aeration, very lightweight, no nutritional value
- Vermiculite: expanded mineral that holds both water and nutrients (cation exchange capacity), lighter than perlite but less drainage-focused
- Compost (mature, finished): adds nutrients, microbial life, and organic matter; use worm castings or well-rotted garden compost
- Bark fines / coarse bark: adds aeration and longevity to the mix structure, especially useful for long-term tree growing
- Dolomitic lime: corrects pH in coir- and peat-heavy mixes (coir can be slightly acidic)
Mix recipes by crop type
| Crop type | Mix recipe (by volume) | Key notes |
|---|---|---|
| Vegetables (general) | 1 part coir : 1 part perlite : 1 part compost | Classic 1:1:1 ratio from UC ANR extension guidance. Adjust perlite up by 10–15% in hot, dry climates for better drainage. |
| Herbs | 1 part coir : 1 part perlite : 1 part compost | Mediterranean herbs (thyme, rosemary, oregano) prefer leaner mix; reduce compost to 0.5 parts and add more perlite. |
| Flowers (annuals) | 50% peat or coir : 25% perlite : 25% compost | A slightly richer mix suits heavy-flowering annuals like petunias and geraniums. |
| Trees and shrubs (long-term) | 40% coir : 30% bark fines : 20% perlite : 10% compost | Bark fines add structural longevity; add dolomitic lime at 3–5 g per litre to buffer pH. Professional greenhouse substrate research supports ~20–30% perlite/vermiculite in tree mixes. |
| Dwarf fruit trees | 35% coir : 30% bark fines : 20% perlite : 15% compost | Richer compost fraction supports heavy feeding; supplement with controlled-release fertilizer at planting. |
| Mushroom spawn bags (grain spawn) | 100% sterilised grain (rye, wheat, oats) OR 70% hardwood sawdust : 30% wheat bran | No soil; substrate must be pressure-sterilised at 15 psi / 121°C for 2.5+ hrs before inoculation. This is a completely different category from plant growing mixes. |
| Mushroom bulk substrate (fruiting) | 60% hardwood sawdust : 25% soy hulls : 15% coir OR classic CVG: coir/vermiculite/gypsum (12:8:1 cups) | CVG formula is standard for many gourmet species. Pasteurise rather than sterilise for high-bran bulk substrates. |
A note on professional mix ratios: commercial greenhouse substrate formulas typically use 50 to 60 percent peat or coir, 20 to 30 percent perlite or vermiculite, and 10 to 30 percent bark or compost, often supplemented with dolomitic lime and controlled-release fertilizer at specified rates per cubic meter. The home garden 1:1:1 recipe is a reliable simplification of this that works well for annual vegetables and herbs. For long-lived plants, moving toward the bark-included formula gives the medium better structural longevity.
Watering grow bags correctly
Because fabric grow bags lose moisture through their sides as well as their base, they dry out noticeably faster than comparable plastic pots. University research on root-pruning containers explicitly notes this tradeoff and recommends increasing irrigation frequency when using fabric containers. A University of Connecticut study, Water retention in soilless potting media, George C. Elliott (UConn summarised in HortScience proceedings), found that water retention and irrigation method markedly influence available water and scheduling, with retention hierarchy varying by irrigation (overhead ≥ drip > flood & drain ≥ mat in the cited experiments) Water retention in soilless potting media — George C. Elliott (UConn summarised in HortScience proceedings). In practice, during summer, a 5-gallon fabric bag in full sun may need watering once or even twice daily. A 20-gallon bag might need water every 1 to 2 days.
The simplest check: push your finger 5 cm (2 inches) into the growing medium. If it feels dry at that depth, water thoroughly, until water drains freely from the base. If it still feels moist, wait. Avoid light, frequent shallow watering that only wets the top layer; this encourages shallow roots and salt accumulation at the surface.
Drip irrigation for grow bags
Drip irrigation is the most practical long-term solution for multiple grow bags. Utah State University Extension drip irrigation guidance lists common emitter flow rates of 0.5, 0.8, 1.0, and 2.0 GPH (roughly 1.9, 3.0, 3.8, and 7.6 litres per hour). For grow bags specifically, using two to four emitters per container rather than one improves wetting uniformity across the root zone, particularly important in larger bags. For a 10-gallon bag with two 1.0 GPH emitters, you're applying about 7.6 litres per hour combined; running the system for 15 to 20 minutes delivers a thorough irrigation appropriate for most summer conditions.
A layer of mulch on top of the grow bag surface (coir chips, straw, or wood chips, roughly 2 to 3 cm deep) meaningfully reduces surface evaporation and helps even out the drying rate between irrigations. This is particularly worthwhile in full-sun positions and hot climates.
Fertilising plants in grow bags
Because grow bags drain freely and are watered frequently, nutrients leach out faster than in ground soil or raised beds. This is normal and expected, the solution is regular, consistent feeding rather than large, infrequent doses.
There are two practical approaches: controlled-release fertilizer (CRF) granules worked into the mix at planting, or liquid fertilizer applied on a schedule. For most home growers, combining both works best. Apply a slow-release granular fertilizer (such as Osmocote or a similar NPK blend) at the manufacturer's recommended rate when filling the bag. Then supplement every 1 to 2 weeks during the growing season with a diluted liquid feed. Virginia Cooperative Extension guidance recommends half-strength liquid fertilizer at higher frequency for containers rather than full-strength less often, which reduces the risk of nutrient burn and salt buildup.
For actively growing vegetables and flowering crops, aim for nitrogen in irrigation water at roughly 200 to 300 ppm N when fertigating, this is standard greenhouse practice and works just as well at the home garden scale. For casual growers without EC meters, a half-strength balanced water-soluble fertilizer (such as 20-20-20 at half label rate) applied weekly is a practical proxy. Every 4 to 6 weeks, water with plain water only to flush soluble salt accumulation from the medium, this is especially important in smaller bags and in climates with high evaporation.
Planting by crop: specific guidance
Vegetables
Tomatoes are the most common grow bag crop, and they reward generous sizing. Use 10 to 15 gallons for indeterminate varieties and at least 5 gallons for bush types. Plant one plant per bag, stake or cage early before the roots establish, and start liquid feeding at first flower set. Potatoes are excellent in grow bags, use a 10- to 15-gallon tall bag, plant seed potatoes 10 to 15 cm deep, and progressively add more growing medium ('hilling') as shoots emerge. Peppers work well in 3- to 5-gallon bags, and cucumbers, zucchini, and squash need larger bags (7 to 20 gallons) with reliable support for climbing or spreading varieties.
Herbs
Most culinary herbs are well suited to 1- to 3-gallon grow bags. You can grow multiple compatible herbs in a 5-gallon bag, basil, parsley, and chives share space well. Mediterranean herbs like rosemary, thyme, and oregano prefer leaner, drier conditions, so dial back the compost in their mix and lean toward more perlite for sharper drainage. Mint is extremely vigorous and benefits from being in its own container, a 3-gallon bag per mint plant keeps it contained and productive.
Flowers
Annual flowers including petunias, marigolds, zinnias, and geraniums all perform well in 2- to 5-gallon fabric grow bags. Deadhead regularly, fertilise with a potassium-rich bloom feed from bud stage onward, and ensure bags are positioned to receive at least 6 hours of sun. Trailing varieties work beautifully in bags elevated on stands or rails. Perennial flowers can be grown in grow bags but will need repotting every 2 to 3 years as the root system develops.
Trees and shrubs
This is where the air-pruning advantage of fabric grow bags is most clearly supported by research. Trials published in the Journal of Arboriculture and Urban Forestry (2018) show that fabric container-grown trees have significantly better root architecture at landscape installation, with measurable differences in trunk caliper still visible five years after planting in a long-term Rutgers study. For dwarf fruit trees (apple, citrus, fig, peach), use 25 to 30 gallons as a minimum, University of Maryland Extension recommends this range specifically. Repot into a larger bag every 2 to 3 years or when you notice significantly reduced growth, wilting between waterings, or roots visibly protruding from the base.
Mushroom spawn bags
Growing mushrooms in spawn bags is a distinct process from container gardening. You're not planting seeds or seedlings, you're inoculating sterilised substrate with fungal mycelium and providing controlled conditions for colonisation and fruiting. Grain spawn bags (rye, wheat, oats) or sawdust bags (hardwood sawdust with bran or soy hulls) need to be fully sterilised before inoculation, typically at 15 psi / 121°C for at least 2.5 hours using a pressure cooker or autoclave. Filter-patch polypropylene bags designed for this purpose allow CO2 to escape without contamination. Once colonised (typically 2 to 4 weeks at 20 to 24°C for most gourmet species), bags are cut open or holes are made to initiate fruiting under higher humidity and fresh air. For more detail on this specific process, the spawn bag grow guide covers the full workflow.
Temperature control and grow bag insulation (TOG guidance)
Container root zones are significantly more exposed to temperature swings than in-ground roots, and this is worth taking seriously. In summer, a dark fabric bag in full sun can see root zone temperatures 10 to 20°C higher than the air temperature if not managed. In winter, exposed roots in a container can freeze solid, even cold-hardy plants can be killed if their root zone drops below critical temperatures they'd survive in the ground.
The grow bag TOG concept, borrowed from bedding insulation ratings, is a way of thinking about how well different bag materials and coverings insulate the root zone. Thicker felt bags offer more insulation than thin polypropylene fabric. But even the heaviest fabric bag provides relatively low intrinsic insulation. Practical interventions matter more: wrapping bags in horticultural fleece, bubble wrap, or hessian for winter; using light-coloured bags to reflect summer heat; positioning bags against a south-facing wall for warmth in winter or in shade for cooling in summer; and grouping bags together to reduce exposed surface area.
For summer heat management: light-coloured bags (white, tan, or natural undyed fabric) absorb less radiant heat than black bags. Coir mulch on the surface also helps. For winter cold protection: move bags containing frost-sensitive plants into an unheated greenhouse, shed, or garage, or wrap the bag exterior in at least 5 cm of insulating material and push bags against a sheltered wall. The grow bag TOG guide covers specific material ratings and winter-wrapping methods in detail for cold-season growers.
Maintenance and troubleshooting
Common problems and fixes
| Problem | Likely cause | Fix |
|---|---|---|
| Wilting despite moist soil | Root rot or overwatering; poor drainage | Check medium structure; lift bag to inspect base drainage; reduce watering frequency; add perlite |
| Wilting in afternoon heat | Underwatering; fabric drying too fast | Water earlier in the day; add surface mulch; check drip emitter output; consider self-watering bag |
| Yellowing leaves (older leaves first) | Nitrogen deficiency from leaching | Apply liquid balanced fertilizer; check feeding schedule; ensure pH is in range (6.0–7.0 for most veg) |
| Yellowing leaves (new growth first) | Iron or micronutrient deficiency | Test pH (likely above 7.0); apply sequestered iron foliar feed; flush medium to reduce salt |
| Roots growing out of bag base | Root-bound; bag too small | Repot into larger bag; for annual crops this is late-season normal — harvest soon |
| Slow growth despite feeding | Compacted medium, low aeration | Top-dress with perlite; check if medium has broken down and needs replacement |
| Fungus gnats / surface mould | Overly moist surface; over-watering | Allow surface to dry between waterings; add grit top-dressing; use sticky yellow traps for adults |
| Bag losing shape, leaning | Bag too small for root mass; weak fabric | Move to larger bag; use external support ring or cage; check fabric weight for future purchases |
| Salt crust on soil surface | Fertilizer buildup from evaporation | Flush thoroughly with plain water; scrape and discard surface crust; reduce fertilizer concentration |
Root circling and repotting
One of the key claims for fabric grow bags is that air pruning prevents root circling. This is well-supported for the wall-bound circling you see in smooth plastic pots, fabric bags consistently perform better in trials. However, if a plant is left in a bag that's genuinely too small for too long, root density at the base can still become problematic. When you repot, inspect the root ball: if it's a dense, tightly wound mass with little visible growing medium, it's overdue. If roots look fibrous and fill the volume evenly with some medium visible, the timing is good.
Lifespan, cleaning, and reuse
Quality fabric grow bags are rated for 5 or more years, and many last considerably longer with proper care. At the end of each season, empty the bag completely, shake out loose medium, and wash. Many fabric bags can be hand-washed or put through a machine wash on a cold, gentle cycle. Allow them to dry fully before folding for storage, storing damp bags encourages mould and fabric degradation. Before replanting in a used bag, inspect the fabric for tears, thinning, or persistent mould that washing didn't remove. Replace bags showing structural degradation.
Pest and disease management in grow bags
The fresh, sterile potting mix in a grow bag gives you a clean start, which is a real advantage over in-ground growing. But containers concentrate root zones in a small space, which means problems can develop quickly. Aphids, spider mites, and fungus gnats are the most common pest issues in container gardens. Check undersides of leaves weekly and intervene early, neem oil, insecticidal soap, or beneficial insects (such as predatory mites for spider mite control) are all effective. For soil-borne diseases, the main prevention is not reusing contaminated medium without sterilisation, maintaining good drainage, and avoiding overwatering.
Winterising your grow bags
For annual crops, end-of-season care is straightforward: harvest, empty, clean, and store the bags. For perennial plants (trees, shrubs, strawberries) overwintering in containers, the main risk is freeze-thaw damage to the root zone and dessication from cold, drying winds. Move bags to a sheltered position, against a wall, under an overhang, or inside an unheated structure. Wrap the bag exterior in bubble wrap or horticultural fleece and, critically, water the root zone before a hard freeze: dry roots are more vulnerable to freezing than moist ones. Stop feeding 6 to 8 weeks before the expected first frost so the plant hardens off properly.
A practical setup checklist before you start
- Choose a bag size matched to your crop using the volume guide above — err on the side of larger
- Confirm the surface you're placing bags on can handle the wet weight (allow approximately 3–4 kg per litre of container volume)
- Prepare or purchase a suitable soilless growing mix — do not use garden soil
- Plan your irrigation method before filling bags (hand watering, drip, or self-watering inserts)
- Position bags to receive the correct light level for your crop before filling — they're much harder to move once full
- Elevate bags slightly from sealed surfaces using pot feet, a pallet, or a stand
- Label bags clearly with crop, variety, planting date, and fertiliser schedule
- Have a liquid fertiliser on hand to begin weekly feeding once plants are established
- For food crops, confirm your bag material is food-safe with manufacturer documentation
Going further with your grow bag setup
This guide gives you everything you need to get started confidently, from choosing the right bag material and size to filling, planting, watering, feeding, and managing common problems across vegetable, herb, flower, tree, and mushroom crops. For quick, practical grow bag tips, see this short checklist. For step-by-step grow bag instructions, see the grow bag instructions guide for filling, planting, and watering details. The depth of what's possible with grow bags rewards continued learning. If you're planning a larger setup with multiple bags, pathways, and support structures, the grow bag garden setup resource covers layout planning in more detail. For growers who want to compare fabric bags against specific alternatives like raised beds and traditional planters for their particular situation, the grow bag alternatives guide walks through that decision honestly. And if you're new to the concept and still forming your view on whether fabric containers are worth the switch, the grow bag meaning guide covers the fundamentals in a more focused way. For a focused explanation of what grow bags are and why they work, see the grow bag meaning guide (ID: 3dd619bf-fc34-4fa7-83a3-64b29398de06).
FAQ
What is a grow bag and what are the main benefits of using fabric and specialty bags?
A grow bag is a portable container made from breathable fabric, geotextile or specialty plastic designed to hold growing media for plants. Benefits: improved root health from air‑pruning (reduces circling and increases feeder roots), lighter weight and portability, good drainage and oxygenation, lower transplant shock for many trees/vegetables, and wide size range for small herbs to dwarf trees. Tradeoffs: fabric bags generally dry faster than smooth plastic pots and usually need more frequent irrigation. (See selection guide and troubleshooting pages for details.)
How do grow bags compare to plastic pots, raised beds and in‑ground planting?
Compared with smooth‑walled plastic pots: fabric/air‑pruning bags reduce root circling and encourage fine roots but dry faster and may require more irrigation. Compared with raised beds: grow bags are more portable, need less permanent space and fewer materials, but hold less volume and need more active feeding/watering. Compared with in‑ground planting: grow bags let you control media and placement and avoid poor native soil, but plants are volume‑limited and more temperature‑sensitive. Evidence from nursery and university trials shows air‑pruning containers often improve root architecture and establishment versus standard plastic pots; extension guidance stresses matching volume to crop for good results.
How do I choose the right grow bag material and trusted features to look for?
Material choices: heavyweight non‑woven polypropylene/geotextile (longer lasting), recycled PET fabric (common in commercial brands), thin biodegradable lines (short‑term use), and specialty spawn bags for mushrooms. Look for: verified capacity/dimensions, reinforced handles, UV stabilization or manufacturer life estimates, phthalate/BPA testing if chemical safety matters, and drainage/finish details. For long‑term use choose heavyweight, UV‑stabilized fabric; for single‑season or compostable uses choose degradable labeled products. (See product selection guide.)
What bag sizes/volumes suit common crops (quick volume chart)?
Approximate recommended internal volumes: herbs/leafy greens 1–3 gal (4–11 L); peppers/compact veggies 3–5 gal (11–19 L); most tomatoes and bush cucumbers 5–10 gal (19–38 L) per plant; patio tomatoes/determinate varieties can sometimes use 3–5 gal if compact; larger indeterminate tomatoes and small shrubs 15–25 gal (57–95 L); dwarf fruit trees/large shrubs 25–30+ gal (95–114 L). For mushrooms use small spawn bags (0.5–2 L) or bulk substrate in larger tubs/bags per species. These align with land‑grant extension recommendations—choose the next size up if you expect heavy root growth.
How much does a grow bag cost and how should price affect my choice?
Retail prices vary by material and size: small fabric bags (3–5 L) often a few dollars; common 10–20 L/5 gal bags $5–20; large 50–100 L / 13–26 gal bags $15–50; heavy commercial or branded pots higher. Consider expected lifespan (cheaper thin bags may last 1 season; heavyweight 5+ years per manufacturer/customer reports), reuse plans and shipping/handling. Balance cost per season by dividing price by expected usable years and factor in savings from less soil replacement and easier transport.
What soil/media recipes work best in grow bags (simple, testable mixes)?
Three practical, evidence‑based recipes by volume: 1) All‑purpose veggie (Mel’s Mix style): 1/3 compost : 1/3 coconut coir or peat : 1/3 perlite or vermiculite — good water holding/drainage balance. 2) Fast‑draining mix for larger bags/trees: 50% coir/peat : 25% screened compost : 25% pine bark fines/perlite. 3) High‑drainage mix for mushrooms (substrate varies by species): sterilized pasteurized grain or sawdust recipes per species. Amendments: add dolomitic lime if using peat, starter controlled‑release fertilizer per manufacturer (see fertilizer schedule). For accuracy, measure by volume and test one bag first.
Next Articles
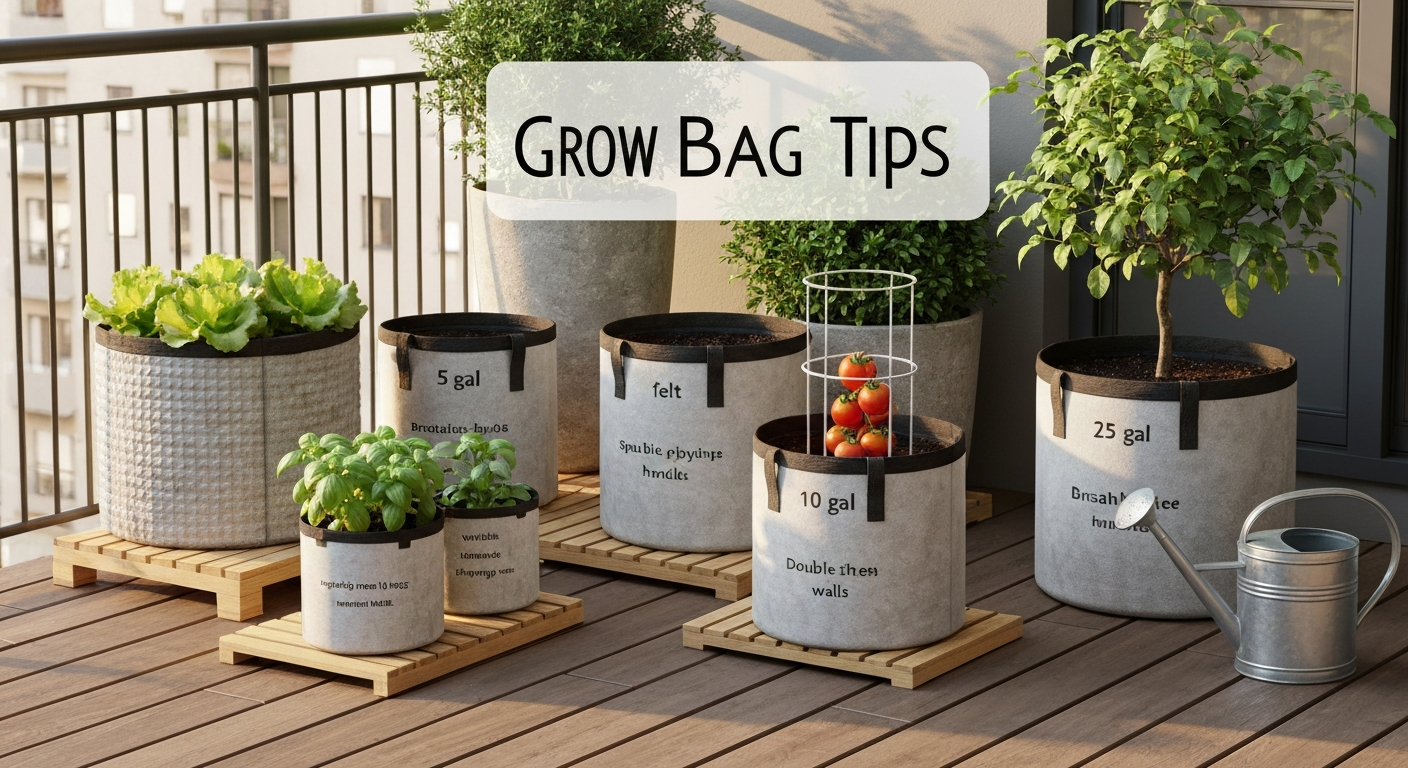
Grow Bag Tips: Complete Guide to Choosing, Planting & Care
Grow bag tips: choose the right fabric bag, set up, soil mixes, watering, troubleshooting & plant-specific guides.
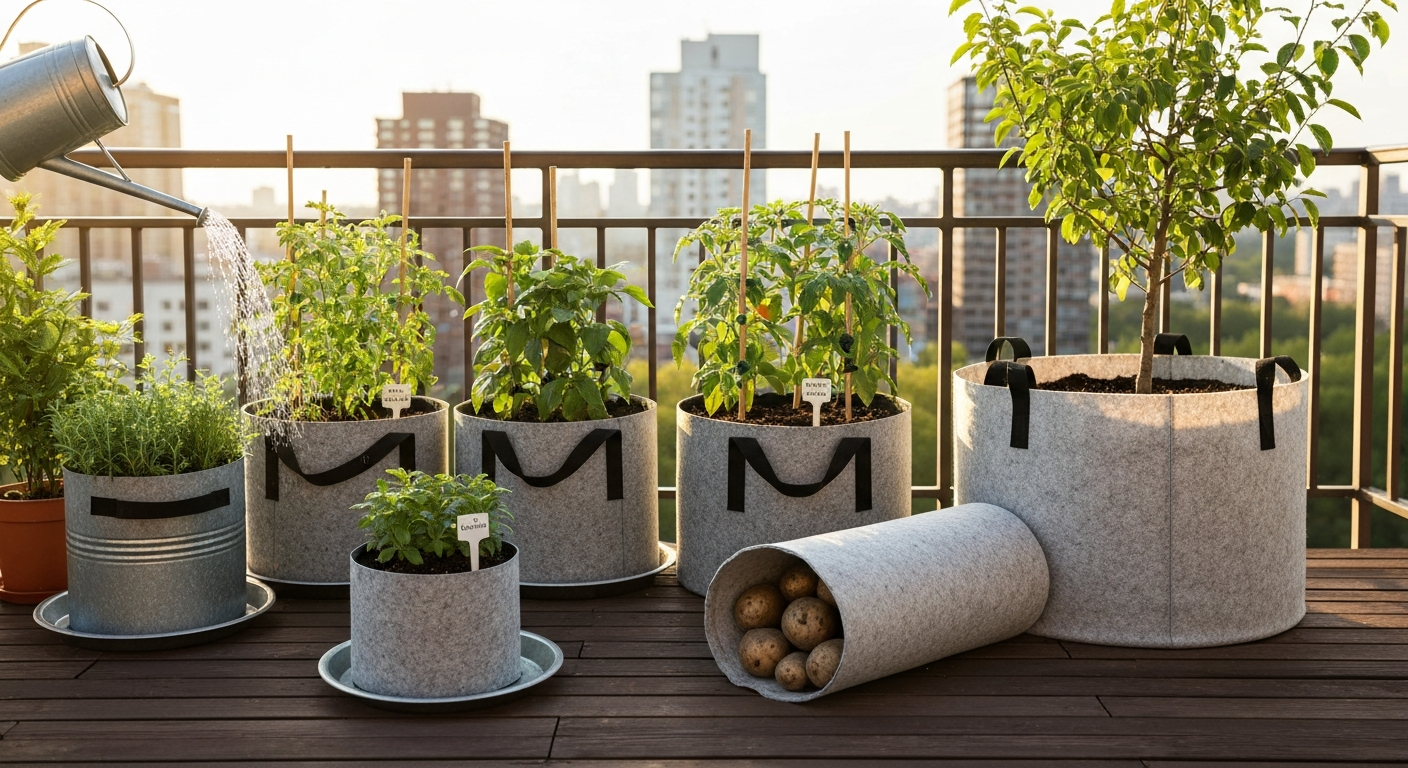
Grow Bag Garden Setup: Step-by-Step Guide for Home Growers
Step-by-step grow bag garden setup: choose bags, soil mix, planting and care for veggies, herbs, flowers, trees.
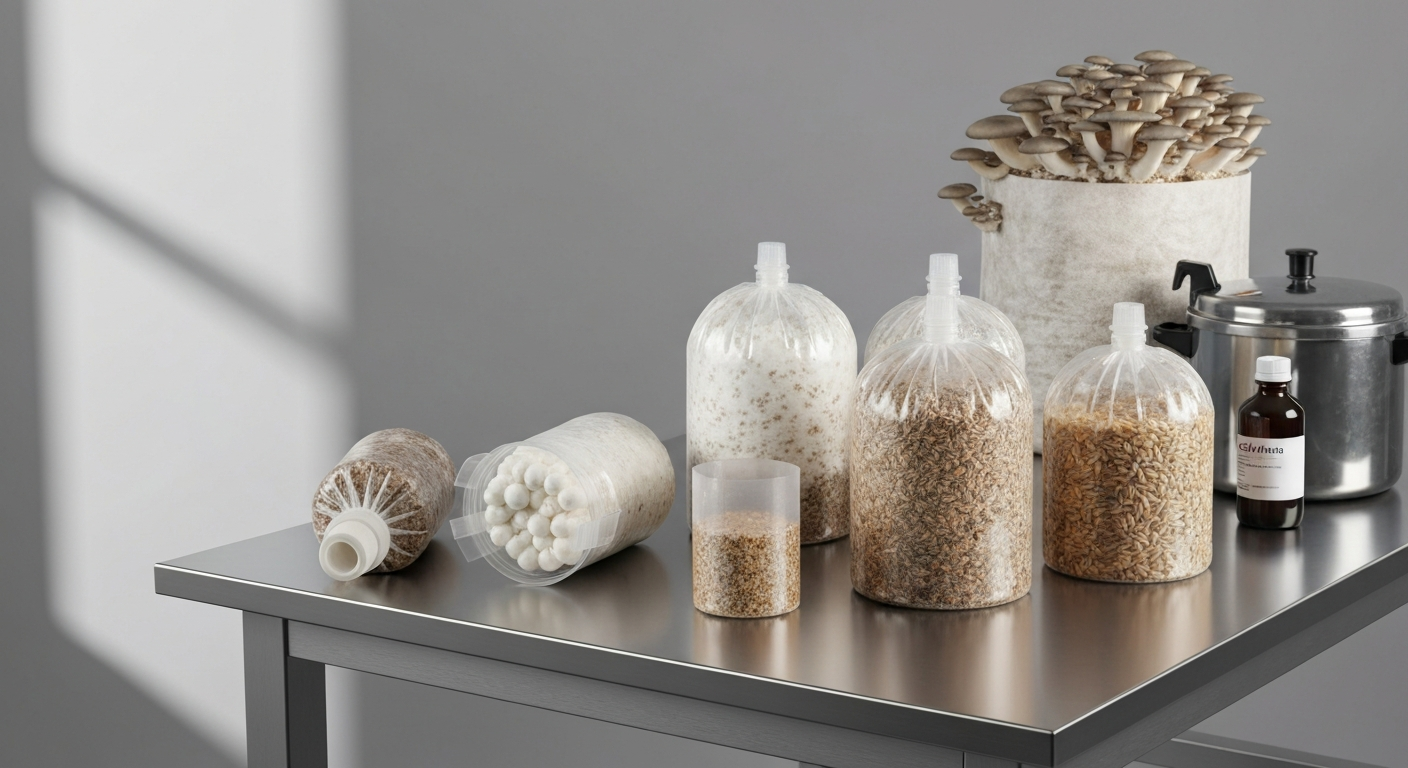
Spawn Bag Grow Guide: From Prep to Fruiting in Fabric Bags
Practical spawn bag grow guide: choose, prepare, inoculate, transfer, troubleshoot, and integrate with fabric grow bags.