Yes, you can absolutely use grow bags for flowers, and they work remarkably well for a wide range of ornamentals. Fabric grow bags suit annuals, perennials, bulbs, and even flowering shrubs. The breathable walls air-prune roots so they branch outward instead of circling, which gives you a healthier root system and, in most cases, better flowering. The main trade-off is that fabric dries out faster than a plastic pot, so your watering schedule has to keep up. Get the size right, use a well-draining potting mix, and stay on top of feeding, and grow bags are a genuinely strong option for flowers in containers.
Can You Use Grow Bags for Flowers? Practical Guide & Tips
Marcus Holloway
28 Jul 2026
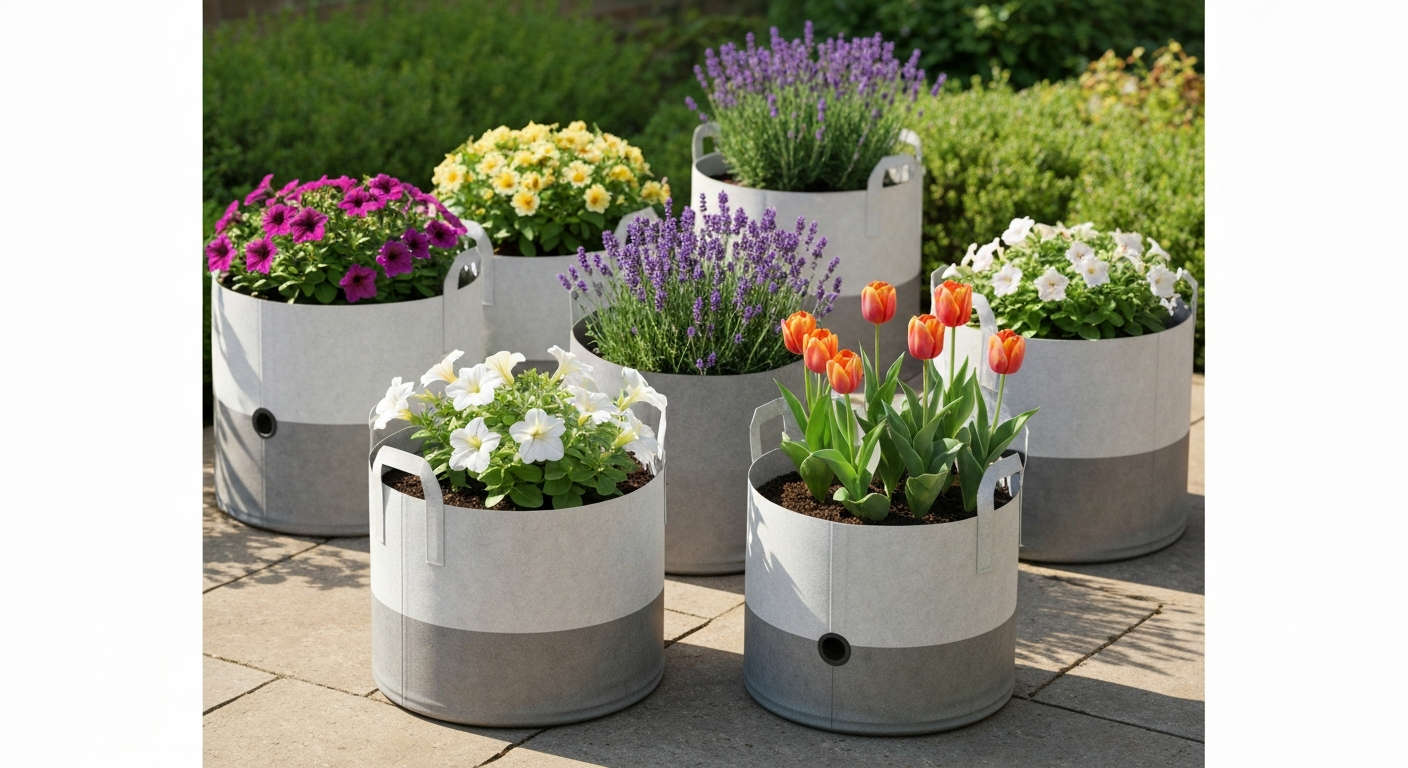
Which flowers and situations work best in grow bags
Grow bags shine in a few specific situations: patios and balconies where permanent beds aren't possible, gardens where you want to move color around seasonally, or anywhere you're dealing with poor native soil. Because the bags sit above ground, you control the growing medium entirely, which is a real advantage when your garden soil is compacted clay or full of weeds.
Annuals
Bedding annuals like petunias, marigolds, zinnias, cosmos, calibrachoa, and trailing lobelia are probably the most natural fit. Their root systems are relatively compact, they respond well to the air-pruning effect, and they're fast-growing enough that the season ends before the fabric has any chance to degrade. A 5- to 10-gallon bag gives you room for a mixed planting of three to five annuals, and the result looks nearly identical to a traditional mixed patio pot.
Perennials
Perennials like lavender, salvia, echinacea, rudbeckia, and ornamental grasses grow well in fabric bags as long as you choose a bag large enough (10 gallons minimum for most medium perennials). The air-pruning effect is especially valuable here because perennials left in rigid containers for more than one season often develop severely circling roots. In a fabric bag, that problem is greatly reduced. The question of whether to leave perennial-filled bags outside over winter is worth thinking through carefully, as freezing and thawing can degrade both the roots and the fabric faster than average.
Bulbs
Spring bulbs (tulips, daffodils, hyacinths, alliums) and summer bulbs (dahlias, cannas, gladiolus) both do well in grow bags. For spring bulbs, the fabric allows excellent drainage, which is critical because bulbs rot fast in waterlogged media. The RHS recommends planting bulbs at a depth of roughly two to three times the bulb's own height, with spacing about one bulb-width apart. A 5- to 7-gallon bag works well for a dozen small bulbs like crocuses or grape hyacinths; tulips and daffodils want at least a 7- to 10-gallon bag. For a dramatic display, try the "bulb lasagna" method: layer large bulbs (tulips) at the bottom, medium bulbs (hyacinths) in the middle, and small bulbs (crocuses) near the top so everything blooms in succession.
Flowering shrubs and climbing plants
Smaller flowering shrubs like roses (patio varieties), hydrangeas, and potentilla are feasible in grow bags, though they need larger volumes (15 to 20 gallons or more) and more attentive watering. Climbers like sweet peas work well in 5- to 10-gallon bags placed at the base of a trellis or fence. University nursery research consistently shows that fabric containers improve root architecture in woody plants, which translates to better establishment when you eventually transplant or overwinter.
Outdoor vs indoor placement
Grow bags work outdoors on patios, decks, balconies, driveways, and in garden beds. If you're asking can you use grow bags outside, the answer is yes, grow bags are well suited to outdoor use on patios, decks, balconies, driveways, and in garden beds. Indoors, they're less common for flowers but entirely workable if you use a drip saucer (fabric drains freely from every side, so runoff is real). When placing bags on impervious surfaces outside, elevate them slightly on pot feet or a slatted stand so water doesn't pool underneath. If you place a bag directly on soil, roots can grow right through the fabric and into the ground, which is useful if you want extra stability for a large planting but a problem if you're planning to move the bag later.
Fabric types and bag construction
Most grow bags sold for home use are made from non-woven polypropylene felt, sometimes described as "geotextile fabric." A smaller number are made from woven polypropylene, which tends to be stiffer and more durable but slightly less breathable. The non-woven felt is the standard for good reason: it's porous enough for air-pruning to happen, it's lightweight, and it folds flat for storage. What varies enormously between brands is the fabric weight, measured in grams per square meter (GSM), and how the seams and handles are constructed.
| Fabric type | Typical GSM | Best for | Expected lifespan |
|---|---|---|---|
| Non-woven polypropylene felt (standard) | 80–150 gsm | Seasonal annuals, bulbs, single-year use | 1–3 growing seasons |
| Non-woven polypropylene felt (heavy-duty, UV-stabilized) | 200–300+ gsm | Perennials, multi-season reuse, outdoor year-round | 3–5+ growing seasons |
| Woven polypropylene | 150–250+ gsm | Large shrubs, heavy soil loads, commercial use | 4–7+ growing seasons |
| Recycled content non-woven | 100–200 gsm | Eco-conscious seasonal use | 2–4 growing seasons |
Handle construction matters more than most buyers realize. Thin handles stitched to a single layer of fabric are the most common failure point in cheaper bags, especially once the bag is fully loaded with moist soil. Practical consumer testing and reviews consistently report common failure modes, thin, low‑GSM bags and poorly reinforced handles fail first, so buyers’ reviews and independent test guides therefore emphasize GSM, UV‑stabilization and double‑stitched handles when selecting bags for multi‑season plantings. Look for reinforced or double-stitched handles that attach to a strip of fabric running the full circumference of the bag, not just a small patch. UV stabilization is the other factor to check: bags left in full sun for multiple summers will degrade, discolor, and eventually become brittle without UV inhibitors in the material. Smart Pots, one of the original commercial brands, claims their proprietary fabric is independently tested and routinely lasts 3 to 5 years, with many customers reporting a decade or more under favorable conditions.
Choosing the right bag size
Sizing is probably the single decision that most affects your results. Too small and the soil dries out before you can water again; the plant gets stressed and stops flowering. Too large and you're dragging around unnecessary weight and spending more on mix. For flowers, the following guidelines cover most situations.
| Flower type | Recommended bag size | Plants per bag | Notes |
|---|---|---|---|
| Small annuals (lobelia, alyssum, dwarf marigold) | 1–3 gal (4–11 L) | 1–3 plants | Good for tight groupings or edging |
| Medium bedding annuals (petunias, zinnias, impatiens) | 5–7 gal (19–26 L) | 3–5 plants | Most versatile size for mixed containers |
| Large annuals / mixed combos (cosmos, tall marigolds, calibrachoa) | 7–10 gal (26–38 L) | 3–5 plants | More soil volume = less frequent watering |
| Small spring bulbs (crocuses, grape hyacinths) | 5–7 gal (19–26 L) | 10–15 bulbs | Bulb lasagna layers work well here |
| Medium bulbs (tulips, daffodils, hyacinths) | 7–10 gal (26–38 L) | 6–12 bulbs | Depth and drainage are critical |
| Large summer bulbs (dahlias, cannas) | 10–15 gal (38–57 L) | 1–3 tubers | Dahlias especially need room to branch |
| Medium perennials (salvia, echinacea, rudbeckia) | 10–15 gal (38–57 L) | 1–3 plants | Go larger if overwintering in the bag |
| Large perennials / patio roses / small shrubs | 15–25 gal (57–95 L) | 1 plant | Larger volume buffers moisture and cold |
As a general rule, if you're choosing between two sizes, go up. A bigger bag reduces how often you need to water, gives roots more room to develop, and keeps soil temperature more stable on hot days. For mixed annual plantings on a sunny patio, I almost always reach for a 10-gallon bag over a 5-gallon simply because the moisture buffer is worth it.
The best potting mixes for flowers in grow bags
Never use straight garden soil in a grow bag. It compacts, drains poorly through fabric, and cuts off the air-pruning process the bag is designed to create. You need a soilless or near-soilless mix that holds enough moisture between waterings while still draining freely. The good news is that the established extension-service recipes for container production map directly onto grow bag use.
Annuals: lightweight and fast-draining
For most bedding annuals, a peat-lite style mix works very well. A classic Cornell-style recipe is 1 part sphagnum peat (or coir as a more sustainable substitute) to 1 part perlite by volume, with a small amount of slow-release starter fertilizer mixed in at planting. This mix drains fast, which suits the fabric walls, while peat or coir retains enough moisture between waterings. If you're buying a commercial mix, look for one labeled "container" or "potting" mix rather than "garden soil" or "raised bed mix," and check that perlite is a significant ingredient.
Perennials: more structure and nutrition
Perennials benefit from a slightly richer mix because they'll be in the bag longer. A good all-purpose perennial recipe by volume is 1 part mature compost, 1 part peat or coir, and 1 part perlite or coarse vermiculite. Organic growers following NCAT/ATTRA guidance typically use 20 to 40% compost by volume in their container mixes, and that range works well here. The compost adds nutrients and water retention, while perlite keeps the mix from becoming dense and anaerobic over time.
Container bulbs: drainage first
Bulbs are the one situation where you want to lean even harder on drainage. Use a 50/50 mix of a quality potting mix and perlite, or add a generous layer of grit or fine gravel at the base of the bag before filling with your mix. The goal is to make sure water moves through quickly: bulbs sitting in wet media will rot before they ever sprout. I've had good results adding 25 to 30% coarse horticultural grit to a standard peat-perlite mix for tulips and daffodils specifically.
How to plant flowers in a grow bag: step by step
- Set the empty bag upright in its final location before filling. A 10-gallon bag with moist mix weighs 20 to 30 pounds and is awkward to move.
- If placing on an impervious surface, position pot feet or a wooden slat underneath for drainage clearance.
- Fill the bag about one-third full with your chosen potting mix. Give it a light shake to settle, then continue filling to about 2 inches below the top rim. This gap prevents mix from washing out when you water.
- For plug or cell-grown annuals, use your hand to make a planting hole slightly larger than the root ball. Set the plant so the top of the root ball sits about 1/2 inch below the soil surface. Fill in around it and firm gently.
- For bulbs, plant at a depth of 2 to 3 times the bulb's height. For a tulip bulb 2 inches tall, plant 4 to 6 inches deep. Space bulbs approximately one bulb-width apart (roughly 2 to 4 inches for most tulips and daffodils).
- For the bulb lasagna method, place large bulbs (tulips) first at the deepest level, cover with 3 to 4 inches of mix, add medium bulbs (hyacinths) at 45 degrees to avoid sitting directly above the lower layer, cover again, then add small bulbs (crocuses or grape hyacinths) closest to the surface.
- For bareroot perennials, spread the roots naturally over a small mound of mix in the center of the bag. The crown (where root meets stem) should sit at or just above the soil surface.
- Water thoroughly after planting until water runs freely from the fabric sides and bottom. This initial soak settles the mix around roots and removes air pockets.
- Optionally, apply a 1-inch layer of fine mulch (composted bark or coir) over the surface to slow moisture loss from the top of the bag.
Watering, drainage and keeping moisture right
This is the area where most people struggle with grow bags, and it's the one real downside compared to a solid plastic pot: fabric bags lose moisture from all sides, not just the top. In warm weather, a 5-gallon bag in full sun on a hot patio may need watering once a day or even twice during heat waves. Larger bags are more forgiving, which is another reason to size up when you're unsure.
General watering schedule
As a starting point, check bags daily during spring and summer. Push your finger 2 inches into the soil: if it feels dry at that depth, water. In cooler or overcast conditions, bags may only need watering every two to three days. In high summer heat, daily watering is the norm. Self-watering inserts and drip irrigation systems work particularly well with grow bags and can take a lot of stress out of the routine.
Mulching to reduce moisture loss
A 1- to 2-inch layer of fine bark mulch or coir fiber on the surface of the bag meaningfully reduces evaporation from the top. It won't stop lateral evaporation through the fabric walls, but it does extend the time between waterings and keeps the surface from crusting. I use composted bark routinely on any grow bag that's going to be in full sun.
Signs of over and under-watering
- Under-watering: wilting in the morning (not just afternoon heat wilt), dry and pulling-away soil surface, pale or yellowing lower leaves, stunted or absent flowering
- Over-watering: yellowing leaves starting from the bottom, soft or mushy stems at the base, algae or moss on the fabric surface, persistently soggy soil that never seems to dry out between waterings
- Salt buildup (from fertilizer): white crusty deposits on the fabric surface or soil top, leaf tip burn, reduced flowering despite regular feeding — flush the bag thoroughly with plain water every 4 to 6 weeks to clear accumulated salts
One practical note on placement: if your bag is sitting on soil rather than a hard surface, roots will eventually grow out through the fabric into the ground below. This naturally extends the plant's access to moisture and nutrients, which can reduce how often you need to water. It's not a problem unless you were planning to move the bag later in the season.
Fertilizing flowers in grow bags
Grow bag mixes drain freely, which means nutrients flush out faster than in a traditional garden bed. Regular feeding is non-negotiable if you want consistent flowering. The standard approach used by extension services and commercial container growers is a two-part strategy: a slow-release (controlled-release coated) fertilizer incorporated at planting, plus supplemental liquid feeding during active growth.
Slow-release fertilizer at planting
Work a slow-release granular fertilizer into the top few inches of mix when you plant. A balanced formula close to a 3:1:2 NPK ratio (for example 15-5-10 or similar) suits most flowering ornamentals. Follow the label rate for container use, which is typically lower than the rate for open beds. Most coated slow-release products feed for 8 to 12 weeks depending on temperature, which covers annuals planted in late spring through midsummer adequately as a baseline.
Liquid feeding schedule
Supplement with a liquid fertilizer every 1 to 2 weeks during active growth and flowering. For heavy-flowering annuals like petunias, calibrachoa, or dahlias, weekly liquid feeding at half the recommended label rate is more consistent than bi-weekly feeding at full strength, because it prevents the boom-and-bust nutrient cycle that can cause flower drop. Use a bloom-promoting formula higher in phosphorus (middle number) once buds begin forming: something in the range of 10-30-20 or a dedicated bloom booster diluted to the label rate.
| Flower type / bag size | Slow-release at planting | Liquid feed frequency | Liquid feed product type |
|---|---|---|---|
| Small annuals, 1–3 gal | 1/4 tsp granules per gallon of mix | Every 7–10 days at half strength | Balanced 20-20-20 or bloom booster |
| Mixed annuals, 5–10 gal | Per label for container size (approx. 1 tbsp per 5 gal of mix) | Every 7–14 days | Balanced, then bloom formula at bud stage |
| Perennials, 10–20 gal | Per label for container size | Every 14 days during growth; reduce in late summer | Balanced NPK; low-nitrogen in late season |
| Bulbs in containers, 5–15 gal | Light application at planting (half label rate) | Every 14 days with dilute liquid feed after shoots emerge | High potassium (tomato feed works well) after flowering starts |
| Flowering shrubs, 15–25 gal | Per label for container size | Every 14 days spring through midsummer | Balanced, then reduce nitrogen after peak flowering |
University of Maryland Extension guidance for container fertilizing specifically cautions about salt buildup in potting media from repeated fertilizer applications. To manage this, water deeply (until water flows freely from the bag) rather than giving shallow sips, and flush the bag with plain water every four to six weeks to move accumulated salts through and out. This is especially important for bags on non-draining surfaces where drainage water collects.
Grow bags vs. rigid containers and in-ground planting
It's worth being honest about where grow bags have a genuine advantage versus where a traditional pot or in-ground planting beats them. For more on this topic, read our short guide titled "what is the difference between grow bags and compost" which compares how grow bags affect root health, drainage, and the reuse of potting mix. Grow bags win on root health (air-pruning prevents circling), portability for their weight, storage (they fold flat), and the ability to grow on hard surfaces. Rigid containers hold moisture longer, which matters if you're not around to water daily. In-ground planting is almost always better for large, long-lived perennials and shrubs that you never intend to move, because soil volume, moisture retention, and winter insulation are all superior. Grow bags are a strong choice for seasonal flowering displays, container gardening on hard surfaces, and situations where flexibility matters.
Winter, reuse, and lifespan
Whether your grow bags and plants survive winter depends heavily on what's in them and where you live. Hardy perennial bulbs can stay in bags over winter in mild climates, but the above-ground walls of a fabric container offer far less insulation than in-ground soil. Repeated freeze-thaw cycles can damage both roots and the fabric. If you're in a zone where temperatures drop below -10°C (14°F) regularly, either move bags to an unheated shed or garage, or lift tender bulbs and store them bare. For more details on protecting fabric containers in cold climates, read our guide on whether you can leave grow bags out all winter can you leave grow bags out all winter. Wrapping bags with burlap or horticultural fleece adds some insulation but isn't a substitute for moving them indoors in severe winters.
As for reuse, fabric bags made from 200+ gsm UV-stabilized material are designed for multiple seasons. Are grow bags reusable? Learn how long different fabrics last and how to clean and store bags for safe multi-season reuse. After each season, empty the bag, shake out loose mix, and wash it in warm water. Let it dry fully before storing folded in a dry location. Inspect handles and seams before replanting. Lower-GSM bags (under 150 gsm) may only last one or two seasons in full sun. For more detail on expected lifespan and the factors that affect it, see how long do grow bags last. When a bag is too degraded to use for planting, the spent potting mix inside is a different matter: exhausted potting mix can often be repurposed as a soil amendment for garden beds or composted, though it's worth noting that grow bag fabric itself and the growing mix are not the same thing, a distinction that matters when deciding what to do with each at end of season. If you're wondering can you use grow bags as compost, note that while the spent potting mix can be composted or used as a soil amendment, the fabric grow bags themselves are not compostable and should be recycled or repurposed where possible. For step-by-step guidance on cleaning, storing, and reusing fabric containers, see can you reuse grow bags.
Are grow bags worth it for flowers?
For most home growers who want seasonal flower displays on a patio, balcony, or driveway, grow bags are genuinely worth it. The cost per bag is typically lower than an equivalent-volume decorative pot, the air-pruning benefit is real and measurable, and the ability to fold and store them flat in winter is a practical convenience that traditional containers can't match. The main cost is attention to watering: if you travel frequently or can't water consistently in summer, grow bags will punish you more than a thick-walled terracotta pot would. Pair them with a simple drip timer and they become much more manageable. For long-lived woody plants you never plan to move, the investment in a high-quality rigid container or permanent in-ground planting is probably better value over a decade. But for flowers, especially seasonal annuals, bulb displays, and container perennials you can bring in for winter, grow bags are a practical, affordable, and effective choice. If you're asking "are grow bags worth it", see the dedicated section for a concise evaluation.
Common problems and quick fixes
| Problem | Likely cause | Fix |
|---|---|---|
| Wilting despite regular watering | Bag too small; high evaporation in heat | Size up to next bag size; add mulch surface layer; water morning and evening in heat waves |
| Poor or no flowering | Insufficient nutrients; too little light; wrong pot size | Start weekly liquid bloom fertilizer; check light levels (most annuals need 6+ hours); repot to larger bag if rootbound |
| Yellowing leaves, soggy soil | Overwatering or poor drainage | Elevate bag; reduce watering frequency; check mix for compaction; repot with more perlite if needed |
| White crust on fabric or soil surface | Salt buildup from fertilizer | Flush bag thoroughly with plain water; switch to half-strength liquid feed more frequently |
| Roots growing out through fabric base | Bag placed directly on soil | Intentional: leave if extra stability is wanted; unintentional: elevate on stand or hard surface |
| Handles ripping or seams splitting | Low-GSM bag with poor construction | Transition to higher-GSM UV-stabilized bag with reinforced handles for next season |
| Fabric discoloring and becoming brittle | UV degradation over multiple seasons | Replace bag; choose UV-stabilized fabric (200+ gsm) for outdoor multi-season use going forward |
| Bulbs rotting before sprouting | Waterlogged mix; insufficient drainage | Increase perlite ratio to 50%; elevate bag; ensure planting depth is correct (not too shallow) |
FAQ
Can you use grow bags for flowers?
Short answer: Yes. Fabric grow bags (non‑woven/polypropylene felt or woven polypropylene) are suitable for annuals, perennials and container bulbs. They promote air‑pruned roots, good drainage and are a practical alternative to rigid pots when sized and managed correctly.
Which types of flowers work best in grow bags?
Best: bedding annuals (petunias, geraniums, calibrachoa), mixed container combos, spring bulbs (tulips, daffodils, crocus), small to medium perennials and trailing plants. Use larger volumes for clumping perennials or multi‑plant bowls. Avoid long‑lived woody shrubs unless you choose very large, heavy‑duty bags (10–20+ gal) and expect to manage irrigation and wintering carefully.
What fabric types and construction should I choose?
Choose non‑woven polypropylene felt or woven/thermal‑bonded polypropylene. Look for UV‑stabilized fabric and heavier weight for reuse: ~80–150 gsm for seasonal use, 200–300+ gsm or woven PP for multi‑season/reusable bags. Reinforced seams and double‑stitched handles reduce failure risk.
How do I choose the right bag size?
Match root volume to plant needs: small annuals/individual bedding plants 1–3 gallon (4–12 L); mixed containers or multiple annuals 5–10 gallon (20–40 L); large perennials or small shrubs 10–20+ gallon (40–80+ L). Larger volumes reduce watering frequency and support bigger displays.
Recommended potting mix recipes for flowers in grow bags?
General all‑purpose mix (by volume): 1 part compost : 1 part peat moss or coir : 1 part perlite or vermiculite. Faster‑draining mix for bulbs/early spring: 1 part compost : 2 parts coir/peat : 1–2 parts perlite. Seed/plug mix: 1 part peat/coir : 1 part perlite (low nutrient; start with starter feed). For organic mixes use 20–40% compost and replace peat with coir if preferred.
How much fertilizer should I use and how often?
At planting: add a controlled‑release fertilizer to media according to product label (many recommend rates supplying ~8–12 weeks of nutrition). During the season: supplement with a balanced liquid fertilizer (e.g., 10‑10‑10 or similar) every 1–2 weeks for heavy bloomers, or every 3–4 weeks for light feeders. Flush media occasionally to reduce salt buildup.
Next Articles
Can You Use Grow Bags Outside? Yes With These Conditions
Yes, you can use fabric grow bags outside with proper drainage, sun and watering, plus pest and nutrient tips for each c
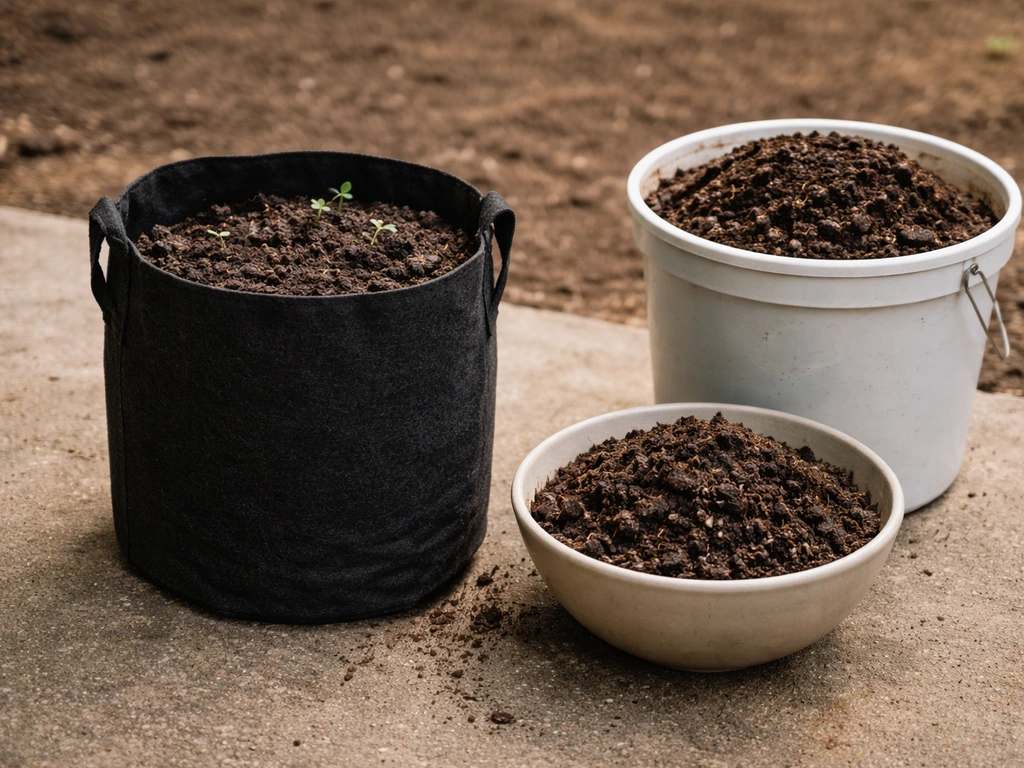
What Is the Difference Between Grow Bags and Compost?
Grow bags are fabric plant containers; compost is decomposed matter. Learn how to choose mixes, water, and feed.
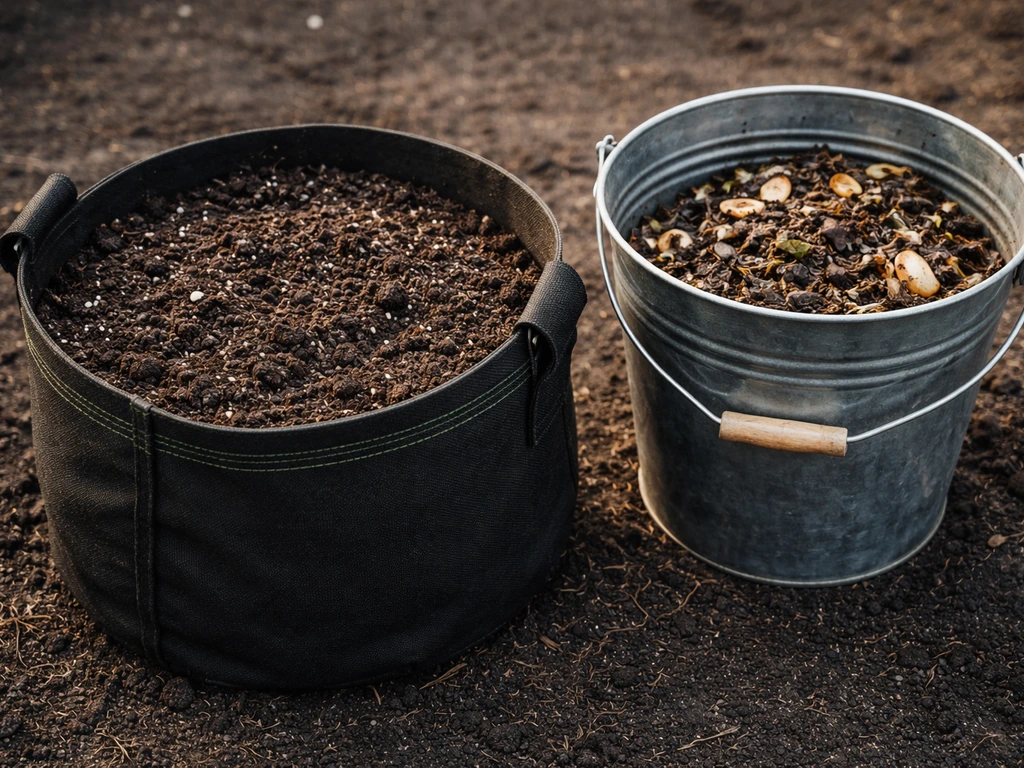
Can You Use Grow Bags as Compost Instead of Compost?
Yes for growing media, not for composting: use grow bags with the right soil mix and moisture, avoid composting inside.