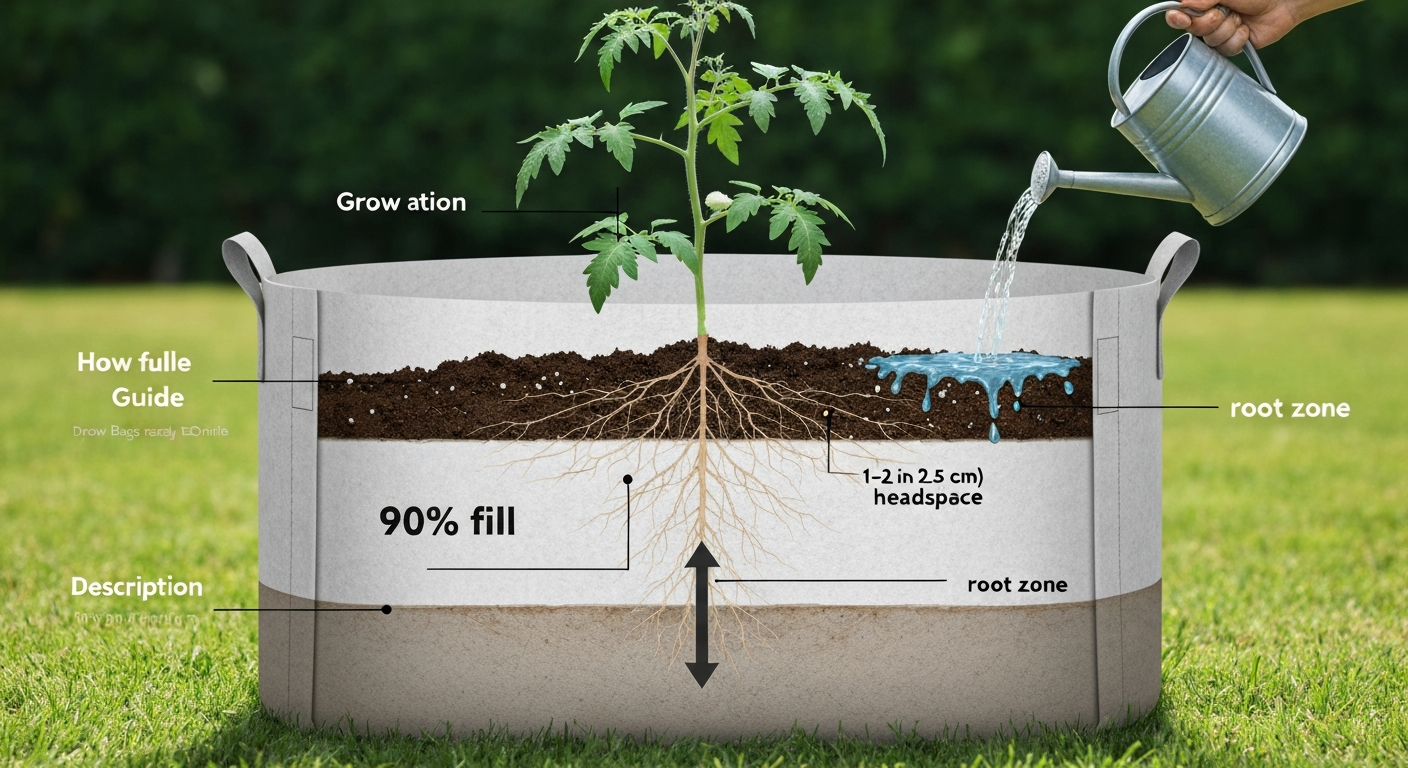
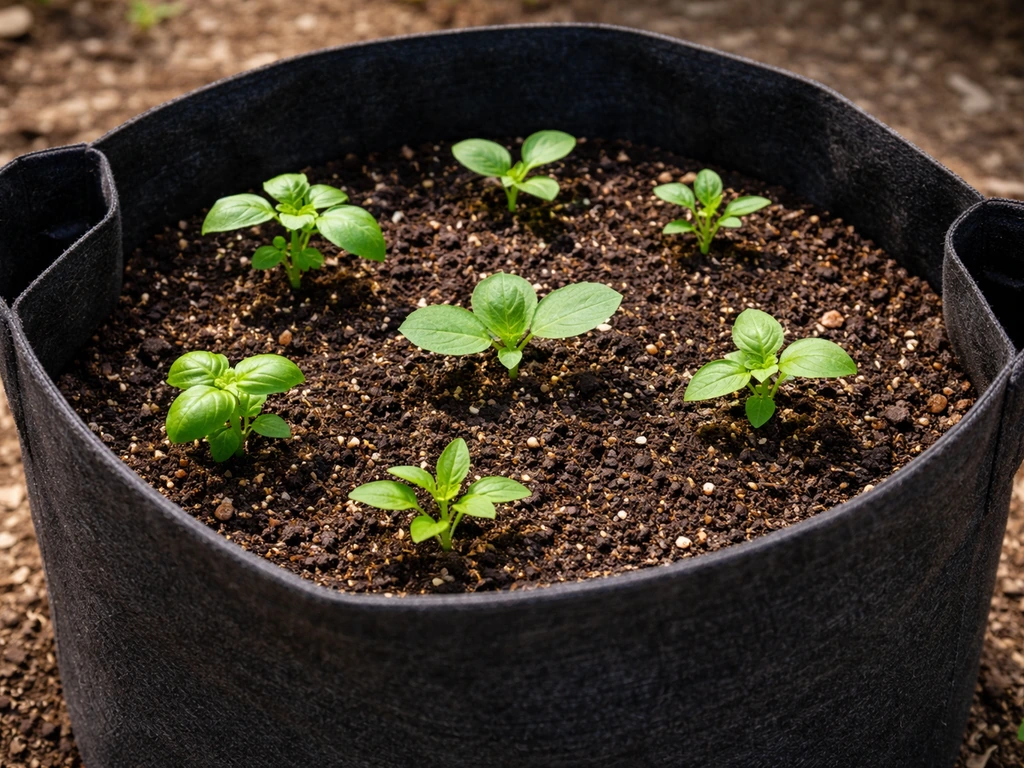
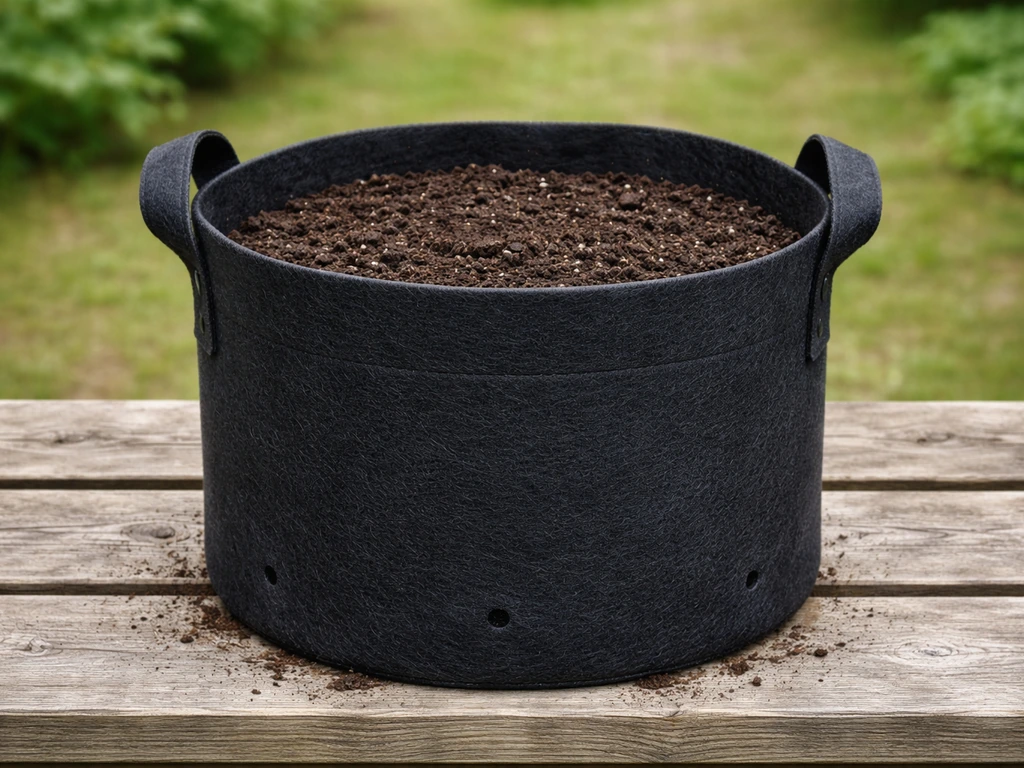
Fill your grow bag to about 90% of its volume, leaving a 1 to 2 inch (2.5 to 5 cm) gap below the rim. If you're asking "do you fill grow bags to the top", the short answer is no, leave about 1–2 inches (2.5–5 cm) of headspace to allow for settling and prevent overflow. That headspace is not wasted space. It prevents water from spilling over when you irrigate, gives the mix room to settle after the first few waterings, and keeps the top layer of soil from becoming a compacted crust. For most crops, that landing zone is the sweet spot. The exceptions are potatoes, which you intentionally start at one-third to one-half full so you can hill up as the plant grows, and mushroom bags, which follow a completely different logic altogether.
How Full to Fill Grow Bags: Exact Fill Percentages & Tips
Marcus Holloway
26 Jul 2026
Who This Guide Is For (and What You'll Walk Away With)
Whether you're filling your first 5-gallon bag with tomato seedlings or dialing in a 30-gallon potato setup, the filling decisions you make on day one affect drainage, root health, and how often you'll be watering all season. This guide covers the right fill percentages for common crops and bag sizes, explains why headspace and mix choice matter more than most growers realize, and gives you a step-by-step technique you can follow right now. Experienced growers will find the crop-specific breakdown and mix recipes useful; beginners will get a clear, practical framework without needing to wade through container science to get a straight answer.
Quick-Reference: Fill Levels by Crop and Bag Size
The table below covers the most common combinations I see home growers working with. Bag sizes are listed in gallons with approximate liter equivalents. Fill percentage refers to how full the bag should be after initial settling, not before. The compaction allowance column tells you how much extra mix to load in before watering so that you end up in the right place after the soil compresses.
| Crop | Recommended Bag Size | Target Fill After Settling | Headspace at Rim | Notes |
|---|---|---|---|---|
| Tomatoes (determinate) | 5–10 gal (19–38 L) | 90% | 1–2 in (2.5–5 cm) | Minimum 12 in depth; 10 gal preferred |
| Tomatoes (indeterminate) | 10–20 gal (38–75 L) | 90% | 1.5–2 in (4–5 cm) | Deeper is better for root volume and yield |
| Peppers / Eggplant | 5–10 gal (19–38 L) | 90% | 1–2 in (2.5–5 cm) | Similar depth needs to tomatoes |
| Potatoes | 20–30 gal (75–115 L) | Start 33–50%, hill to 80% | 2 in (5 cm) final | Add mix in stages as stems grow |
| Strawberries | 1–3 gal (4–11 L) | 90% | 1 in (2.5 cm) | Shallow roots; small bags work well |
| Herbs (basil, parsley, cilantro) | 1–3 gal (4–11 L) | 90% | 1 in (2.5 cm) | Can use 2–4 plants per 3 gal bag |
| Lettuce / Greens | 2–5 gal (8–19 L) | 90% | 1–1.5 in (2.5–4 cm) | Shallow rooters; wider bags over deeper |
| Squash / Cucumber | 10–15 gal (38–57 L) | 90% | 2 in (5 cm) | Vigorous roots need volume |
| Small fruit trees / shrubs | 15–30 gal (57–115 L) | 85–90% | 2 in (5 cm) | Allow room for top-dressing |
| Flowers (annuals) | 2–5 gal (8–19 L) | 90% | 1–1.5 in (2.5–4 cm) | Mix varies; most standard potting mix |
| Mushrooms (substrate bags) | Various | 80–85% | 3–4 in (7.5–10 cm) | Headspace for colonization / fruiting |
Why Headspace Actually Matters
I've watched growers pack bags right to the brim and then wonder why the soil is waterlogged two weeks in, or why their mix is splashing out every time they water. The 1 to 2 inch headspace does a lot of quiet work. Here's what's happening at each layer.
Drainage and the Perched Water Table
One thing that surprises a lot of new container growers is that the bottom few inches of any container mix stay saturated after watering, regardless of how well-draining your soil is. This is called the perched water table (PWT), and it exists because water clings to small particles by capillary force, not just gravity. In a shorter, wider bag the PWT takes up a proportionally larger fraction of the root zone. In a taller, deeper bag the same saturated bottom zone is a much smaller percentage of total rooting volume. This is one of the main reasons I always recommend going deeper (not just wider) for thirsty, heavy-feeding crops like tomatoes, squash, and potatoes. A common fix growers try is adding a gravel layer at the bottom, but this actually makes things worse by raising the PWT closer to the roots. Use a freely draining potting mix instead and make sure the bag isn't sitting in standing water.
Aeration and Air-Pruning
Fabric grow bags work on a principle of air-pruning: when root tips reach the breathable wall of the bag, the air at the fabric surface desiccates and stops those tips from circling. The plant responds by branching out more fibrous lateral roots throughout the bag's full volume. This is well-documented in nursery research and is one of the genuine advantages fabric bags have over rigid plastic pots. But air-pruning only works if there's sufficient, well-aerated mix filling the bag. Overly compacted media or heavy soil chokes pore space and negates much of this benefit. This is why mix composition (covered below) and correct fill level are closely related.
Compaction and Settling
Dry potting mix is fluffy. Once you water it, fine particles migrate down and the whole mix compresses. A standard compaction allowance is 8 to 15% of the mix volume. In practice, if you fill a 10-gallon bag to the very brim with dry mix, after the first two or three waterings you'll have 1 to 2 inches of airspace at the top anyway. The difference is that the mix settles unevenly and the surface crust can become hydrophobic (water-repellent). Pre-moistening your mix slightly before filling, and tamping it gently in layers, gives you a more uniform result and predictable final fill level.
Weight and Portability
A fully packed 20-gallon grow bag with wet potting mix can weigh 80 to 100 lbs (36 to 45 kg). Leaving 10% headspace reduces that somewhat, but the real weight management tool is choosing a lighter mix (coir-based rather than loam-heavy) and using perlite as a filler. If you plan to move bags seasonally or onto shelves, fill percentage and mix weight both factor into whether that's realistically possible.
How Fill Level Affects Watering, Root Development, and Plant Stability
Fabric bags lose water faster than plastic pots because of sidewall evaporation, not just drainage from the bottom. A 2022 HortScience study confirmed this directly: fabric containers required significantly more irrigation than equivalent plastic containers, though they also produced lower nutrient leachate. That's a good trade-off (you're losing less nitrogen and phosphorus to runoff), but it means you need to water more attentively. Small bags under 3 gallons can need daily watering in hot or windy conditions. Medium bags in the 10 to 15 gallon range typically need water every 1 to 3 days. The single most useful check is to push your finger 1 inch (2.5 cm) into the top of the mix. If it's dry at that depth, water thoroughly.
Fill level influences root development directly through volume. A meta-analysis covering dozens of plant species found that doubling rooting volume increases plant biomass by an average of 43%. Filling your bag to the correct level means the plant is using all the volume it paid for. Under-filling a large bag wastes that potential. Over-filling and compacting the top eliminates the air-filled pore space where roots thrive most.
Plant stability is also affected. A bag filled firmly and evenly sits upright without tipping, which matters for tall crops like indeterminate tomatoes and peppers that carry a lot of canopy weight. Under-filled bags can slump, lean, or cause the stem to sit at an angle that encourages pooling water at the crown.
Best Soil and Potting Mixes for Grow Bags (by Crop Type)
Grow bags have specific mix requirements that differ from raised beds and in-ground gardening. The mix needs to drain freely (no compaction), hold enough moisture to buffer the faster drying that comes with fabric sidewalls, and stay loose enough for air-pruning roots to move through. A target bulk density of roughly 0.2 to 0.5 g/cm³ and total porosity above 50% is what you're aiming for. Dense garden soil will compact and kill drainage within a season. Never use straight topsoil or heavy compost as your only medium.
Standard Vegetable Mix (Tomatoes, Peppers, Eggplant, Cucumbers)
- 50–60% high-quality coir or peat-based potting mix
- 20–30% well-matured compost (for nutrients and moisture retention)
- 10–20% perlite or pumice (for drainage and aeration)
Pre-mix all components evenly before filling. Grow Bag Soil Calculator / recipe examples, FarmerGrows notes common grow‑bag recipes: about 50–60% base potting mix (coir or peat), 20–30% compost, and 10–20% perlite/pumice for drainage and aeration Grow Bag Soil Calculator / recipe examples — FarmerGrows. Avoid layering heavy compost at the bottom because it creates uneven density and effectively raises your perched water table zone. Adding slow-release granular fertilizer into the mix at filling time reduces the need to liquid-feed as frequently early in the season.
Potato Mix
Potatoes need a looser, slightly more free-draining mix to let tubers expand without resistance. Use a similar base recipe but push perlite toward the higher end (20%) and add a small amount of coarse horticultural grit if your climate is wet. Start with the base third of your bag filled, then add the same mix progressively as you hill.
Strawberries and Herbs
Shallow-rooted plants like strawberries and herbs don't need complex mixes. A good commercial potting mix with 10 to 15% perlite added is sufficient. Strawberries are sensitive to waterlogging at the crown, so keep the top layer of mix slightly elevated and avoid packing it tightly around the crown when planting.
Small Trees and Fruit Shrubs
Woody plants in large grow bags (15 to 30 gal) benefit from a slightly denser, more mineral-rich mix. A blend of 40% quality potting mix, 30% compost, 20% perlite or coarse bark, and 10% horticultural grit gives good structure with enough drainage. Leave a generous 2 inches at the top for annual top-dressing with compost, which slowly works into the mix.
Mushroom Bags
Mushroom grow bags follow completely different rules and don't use potting mix at all. They're filled with a sterilized substrate (commonly hardwood sawdust, straw, or a supplemented grain-based mix depending on species). Fill to 80 to 85% to leave room for gas exchange during colonization and for the fruiting pins to develop. These bags are sealed or filter-patched, not open-topped for drainage.
Exact Fill Percentages and How to Measure Them
A 90% fill target is simple enough in principle but can be tricky to judge in practice, especially before the mix settles. Here's how I approach it for different bag sizes.
Small Bags (1–5 gal / 4–19 L)
Fill to within 1 inch (2.5 cm) of the rim. For a standard 5-gallon bag that's typically 12 to 14 inches tall when full, that means filling to about 11 to 13 inches. Add mix in two or three layers, tamping each one gently (not compacting, just settling). After your first deep watering, the mix will drop. Top it up to re-establish the 1-inch headspace and you're set for the season.
Medium Bags (5–15 gal / 19–57 L)
Leave 1.5 to 2 inches (4 to 5 cm) of headspace. At the 10-gallon mark, bags are typically 12 to 14 inches tall, so you're filling to about 10 to 12.5 inches of actual mix depth. Compaction allowance here is more significant, so start by filling roughly 10 to 12% above your target depth with dry mix before watering. After settling, top up once to the final level.
Large Bags (20–30+ gal / 75–115 L)
Leave 2 inches (5 cm) at the rim as a minimum. Large bags are typically 18 to 24 inches tall when full. Filling them in thirds is easiest: add one-third of your mix, settle it gently, add the second third, settle, then fill to within 2 to 2.5 inches of the rim. You'll need to top up after the first few waterings as the mix compresses. For potatoes, stop at the one-third mark intentionally and hill from there.
A Simple Way to Measure Without a Ruler
Hold your hand flat inside the unfilled bag and note where your wrist sits at the rim. Two finger-widths below that is roughly 1.5 inches, which is a workable target for most medium and large bags. It's not scientific, but it's consistent enough to replicate bag to bag without stopping to measure each one.
Step-by-Step Filling Technique
The technique matters as much as the fill level. How you load the mix determines how evenly it settles and whether you end up with air pockets or compacted zones that stress roots later.
- Position the empty bag in its final growing location before filling. Grow bags are awkward to move once full and heavy, especially anything over 10 gallons.
- Pre-moisten your potting mix. Bone-dry coir or peat can be hydrophobic and repel water after filling. Mix should feel like a wrung-out sponge: damp but not dripping. Add water to your mix pile and turn it before loading into the bag.
- Add the base layer (roughly one-third of your total mix volume). This is not a gravel layer or drainage layer. It should be the same mix you're using throughout. Gently pat it level with your hands or a trowel.
- Check for evenness. The base should sit flat, not piled in the middle. An uneven base causes the bag to lean and creates unequal root depth across the growing zone.
- Add the second layer (the middle third). Again, pat it level and gently firm. You're aiming to eliminate large air pockets without over-compacting. A light hand-press across the surface is enough.
- Fill the top layer to your target headspace (1 to 2 inches below the rim for most crops). Do not compact this layer. Leave it loose so roots and water can penetrate easily from the top.
- Water slowly and deeply until water flows from the sidewalls or base of the fabric. This first watering is critical: it settles the mix, reveals any large air pockets, and shows you where the actual final fill level will land.
- Top up with additional mix to restore the 1 to 2 inch headspace that compaction has reduced. This is your final fill. The bag is now ready for planting or transplanting.
- For potatoes: stop after the base layer at one-third full, plant seed potatoes, and cover with a few inches of mix. As stems grow to 6 to 8 inches above the surface, add mix to hill up and cover the lower stem. Repeat until the bag is at 80% capacity with the 2-inch headspace remaining.
Fill Checklist to Use While You're Filling
Run through this list as you fill each bag. It takes less than a minute and catches the most common mistakes before they become problems.
- Bag is in its final position before filling begins
- Potting mix is pre-moistened (damp, not soggy)
- No gravel, rocks, or coarse drainage layer at the bottom
- Mix is the same throughout: no heavy compost layer at the base
- Fill loaded in two or three layers, each one gently leveled
- No large air pockets visible when pressing gently on the surface
- Target headspace of 1 to 2 inches (2.5 to 5 cm) left below the rim
- First deep watering completed and mix has settled
- Topped up after settling to restore correct headspace
- For potatoes: base layer only (one-third full), hilling plan in place
- Bag sits flat and upright without leaning
- Drainage confirmed: water seeps through sidewalls or base during watering
When to Top Up or Repot
Over the course of a growing season, the mix in a fabric bag continues to compact and break down organically. By mid-season in a warm climate you might see 3 to 4 inches of headspace in a bag that started with 1 to 2 inches. For annual crops (tomatoes, peppers, squash), top up with fresh potting mix or compost mid-season to restore root access to fresh organic matter near the surface. For perennial plants and small trees in large bags, annual top-dressing with 1 to 2 inches of compost is more practical than repotting and keeps the root system healthy.
Repotting into a larger bag is worth considering when a plant's yield or growth visibly stalls despite adequate watering and feeding, or when roots are emerging heavily from the sidewalls and base of a bag that is clearly undersized. Moving a tomato plant from a 5-gallon to a 15-gallon bag mid-season is disruptive but can rescue a plant that was clearly root-bound. Prevention is easier: start with an appropriate bag size for your crop (see the table above) and you'll rarely need to repot annuals. University extension recommendations note that a single tomato plant can survive in a 4–5 gallon container but generally performs better in larger 10–20+ gallon containers, and benefits from deeper/taller pots of at least 12–18 inches (30–45 cm) for improved root volume and yield container size guidance: 4–5 gal minimum, 10–20+ gal preferred; depth ≥12–18 in..
Drainage, Leakage, and Whether You Need Holes
Fabric grow bags are inherently porous and don't need drainage holes added. For a concise FAQ-style take on this specific question, see do grow bags need drainage holes for practical guidance on saucers, standing water, and preventing waterlogging. Water moves out through the fabric walls and base passively. If you wonder "do grow bags leak water", they typically allow steady passive seepage through the fabric rather than sudden uncontrolled leaks. This is one of their core advantages over plastic containers. If you’re wondering whether you should poke holes in the bottom, i.e., do grow bags need holes in the bottom, the short answer is no: the fabric walls and base provide adequate drainage without added holes. For more on the differences between sealed and open systems, see our guide to open top grow bags. The question of whether grow bags drain well (and whether they leak water or need saucers) comes up constantly, and the honest answer is: they drain very well, sometimes too well for hot climates, which is why fabric bags typically need more frequent watering than plastic equivalents. If you're seeing water pooling under a bag without flowing through, the most likely cause is a mix that's too dense or hydrophobic after drying out. Re-wetting a dried coir mix before re-use solves this in most cases.
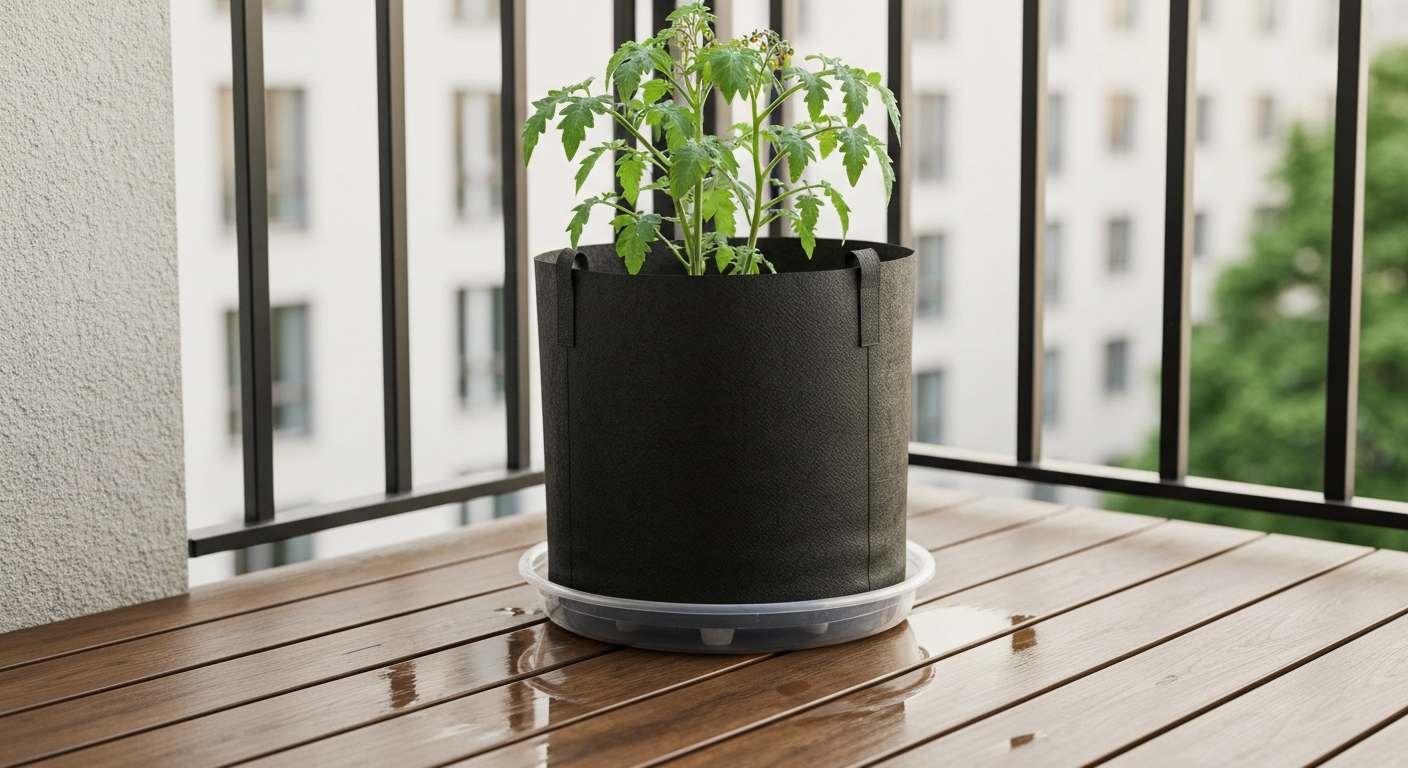
Whether to use saucers under grow bags is a practical trade-off. If you're wondering whether grow bags need saucers, weigh the trade-off between catching runoff and preventing the bag base from sitting in standing water do grow bags need saucers. Saucers catch runoff, which is useful on decks and patios, but they can also allow the base of the bag to sit in standing water, which defeats the drainage advantage. If you use saucers, empty them after watering or use elevated risers to keep the base of the bag slightly above any pooled water. Mold on the exterior of grow bags is usually cosmetic (surface algae or fungal growth on the outer fabric) and doesn't typically harm plants, though it indicates persistently damp conditions that might be worth addressing.
FAQ
How full should I fill a fabric grow bag (general rule)?
Leave 5–10% headspace by volume (about 1–2 inches / 2.5–5 cm below the rim) for most crops. Practically this means filling to ~90–95% of the bag’s nominal capacity to allow for watering without overflow, settling/compaction after the first wetting, and room for mulch or top‑dressing.
Why not fill grow bags completely to the rim?
Headspace prevents overflow when watering, allows substrate to settle (avoiding subsequent compaction), reduces surface erosion, and preserves an air gap for better drainage and aeration. Without headspace you risk messy runoff, clogged drainage, and reduced root zone aeration.
How does fill level affect drainage, aeration and compaction?
Higher fill (near rim) increases the volume of usable substrate but also increases weight and compaction risk after wetting. Leaving the recommended headspace and using a loose, porous mix maintains air‑filled porosity and prevents a dense, waterlogged layer. Fabric bags drain well through their walls, but saturated lower layers still form (perched water table) so good mix and headspace matter more than adding gravel.
How does fill level change watering frequency and water needs?
Shallower fills (smaller volume of substrate) dry faster and need more frequent watering. Larger/deeper fills buffer moisture and reduce watering frequency. Fabric bags lose extra moisture through breathable walls, so they generally need more frequent irrigation than rigid pots of the same volume—plan for daily checks in small bags and every 1–3 days for larger bags in warm weather.
What fill percentages and headspace should I use for specific crops (quick reference)?
- Leafy greens, herbs, small flowers: fill to ~85–95% (leave 1–2 in / 2.5–5 cm). - Tomatoes (determinate): fill to ~90–95%; use larger bags (10–20+ gal) when possible. - Tomatoes (indeterminate): fill to 95% in large bags (15–30+ gal) for better roots and drainage. - Potatoes in grow bags: start at ~30–50% and ‘hill’ by adding substrate as stems grow (final fill ~90% by the end of season). - Strawberries: fill to ~85–95% in shallow/long bags (6–12 in depth preferred). - Large vegetables (peppers, eggplant, bush beans): fill to ~90–95% in 5–10 gal bags. - Small trees/shrubs: use deep/large bags (20+ gal) and fill to ~90% leaving 1–2 in for watering. - Mushrooms (specialized substrates): follow species substrate depth — typically shallower and specific; leave some headspace for casing layer or fruiting mushrooms. Adjust for compaction and root/hill growth needs.
How deep/large should the bag be for tomatoes, potatoes and other big crops?
Match rooting volume to crop: tomatoes perform best in deeper, larger bags (10–20+ gal for single plants; indeterminate varieties prefer ≥15–20 gal). Potatoes need tall/wide bags (20–30 gal) to allow hilling and tuber development. Large vegetables generally need 8–10+ gal and 12–16 in depth; medium crops 4–6 gal and 8–12 in depth; small crops 1–3 gal and 4–6 in depth.
Next Articles
Do Grow Bags Need Saucers? Drainage, Setup & Best Picks
Do grow bags need saucers? Practical, evidence-based answers on drainage, leaks, saucer setup, and prevention.
Open Top Grow Bags Guide: Setup, Soil, Watering, and Troubleshooting
Learn how to choose, set up, soil, water, and troubleshoot open top grow bags for vegetables, flowers, shrubs, and mushr
Do You Fill Grow Bags to the Top? Correct Fill Level
Learn the right fill height for fabric grow bags, avoid overfilling or underfilling, and plant at the right depth.