Most fabric grow bags don't need you to add drainage holes because the permeable fabric itself handles drainage. Water passes through the sidewalls and base of the material, so excess moisture escapes without you cutting or punching anything. That said, the real answer depends on what bag you're using, where it's sitting, and how you water. Get those three factors wrong and you can still end up with waterlogged roots even in a fabric bag.
Do Grow Bags Need Drainage Holes? Quick Guide for Fabric Bags

Marcus Holloway
28 Apr 2026
How drainage actually works in a fabric grow bag
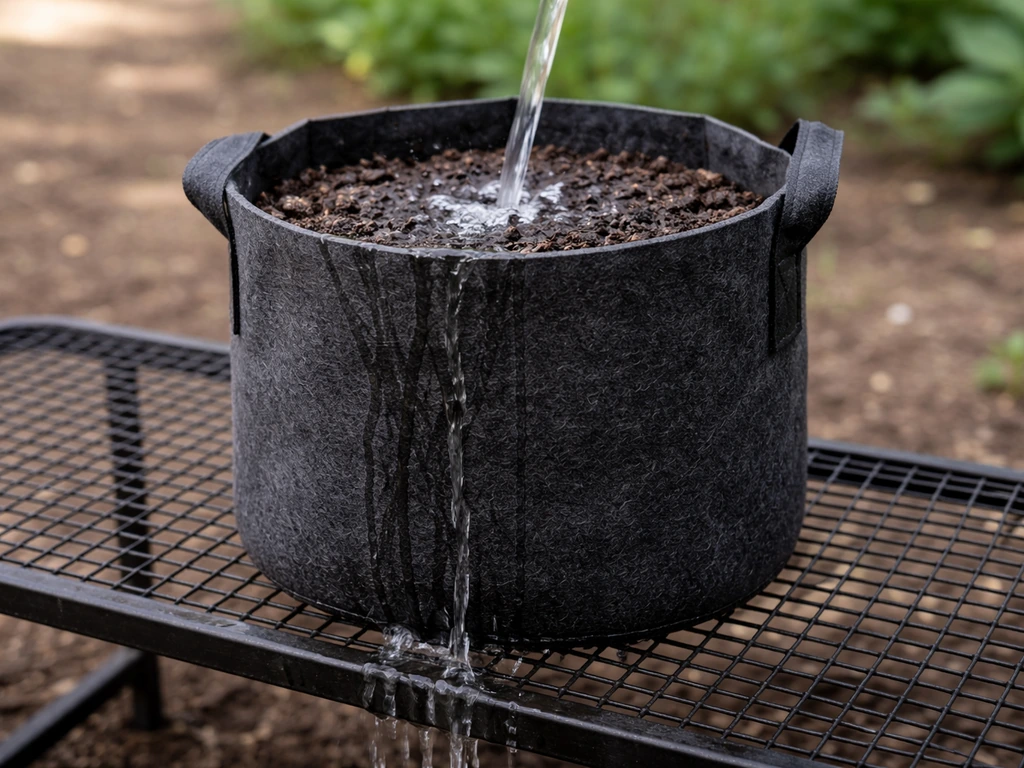
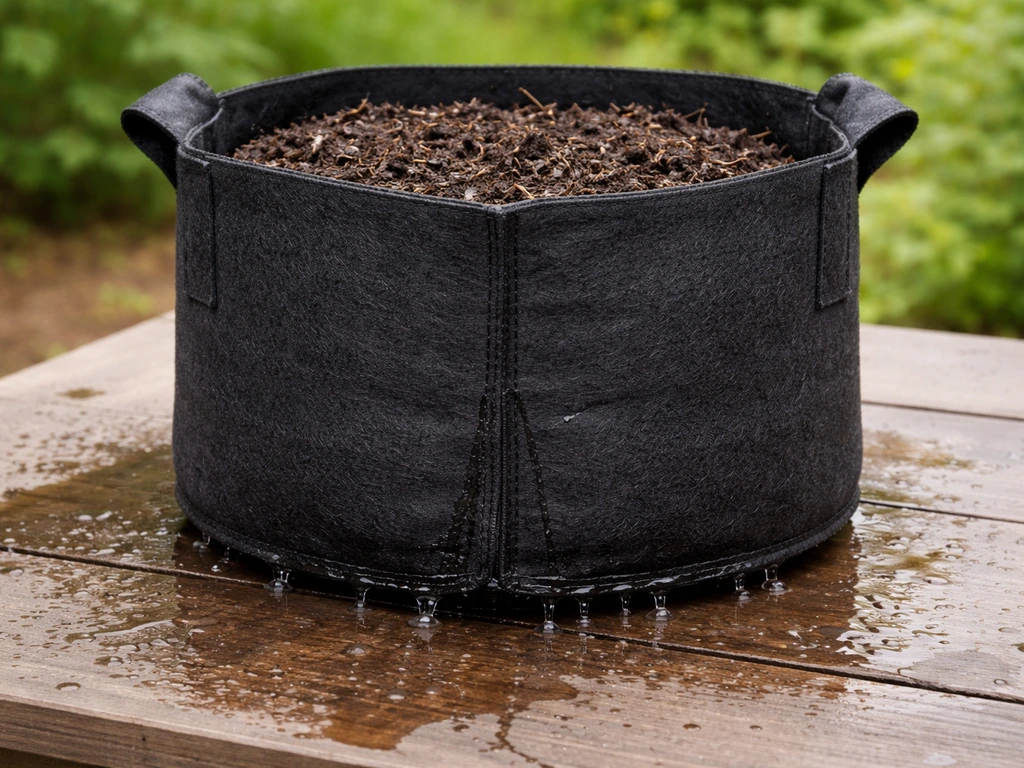
Fabric grow bags drain differently than plastic or ceramic pots. In a standard plastic pot, water collects at the bottom until enough pressure builds to push it out through dedicated holes in the base. Fabric bags work the opposite way: water seeps through the entire structure continuously, including the sidewalls and the bottom. Brands like Smart Pot describe this as "excellent drainage by design" and explicitly say no extra holes are needed. RootPouch uses the word "permeable" and connects that fabric property directly to reduced root-rot risk. RootTrapper goes further and leaves the bottom two inches of their sidewall unlaminated specifically to enhance drainage near the base.
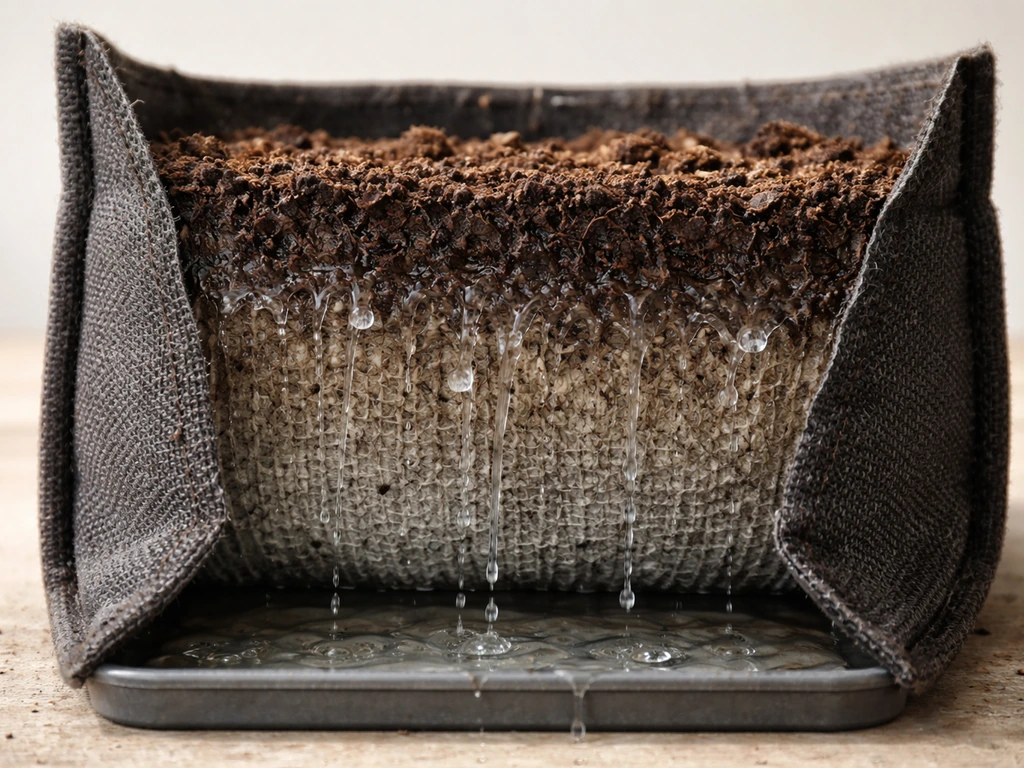
The drainage benefit is inseparable from the aeration benefit. Because water can escape through the fabric walls, air can also move in. That air exchange keeps the root zone oxygenated, which is exactly what you're trying to protect when you worry about waterlogging. When soil stays saturated, it displaces the air between soil particles and around roots. The RHS is clear that prolonged waterlogging causes anaerobic conditions, leading to yellow leaves, root rot, and eventually plant death. Fabric grow bags sidestep this cycle as long as the fabric stays functional and setup conditions support drainage.
Some fabric bags with stitch seams drain partly through those seams too. RootMaker's pot-in-pot documentation notes that water can exit "through the myriad of stitch holes in the vertical seam and bottom" of the container. This reinforces why well-made fabric bags rarely need modification: the drainage pathways are already built in at the manufacturing level.
When you can skip holes vs when you should add them
For most standard fabric grow bags from reputable brands (Smart Pot, RootPouch, VIVOSUN, RootTrapper), you don't need to add holes. The fabric does the job. Where things get more complicated is when you start putting bags in situations that interfere with the passive drainage the fabric relies on.
Safe to skip holes in these situations
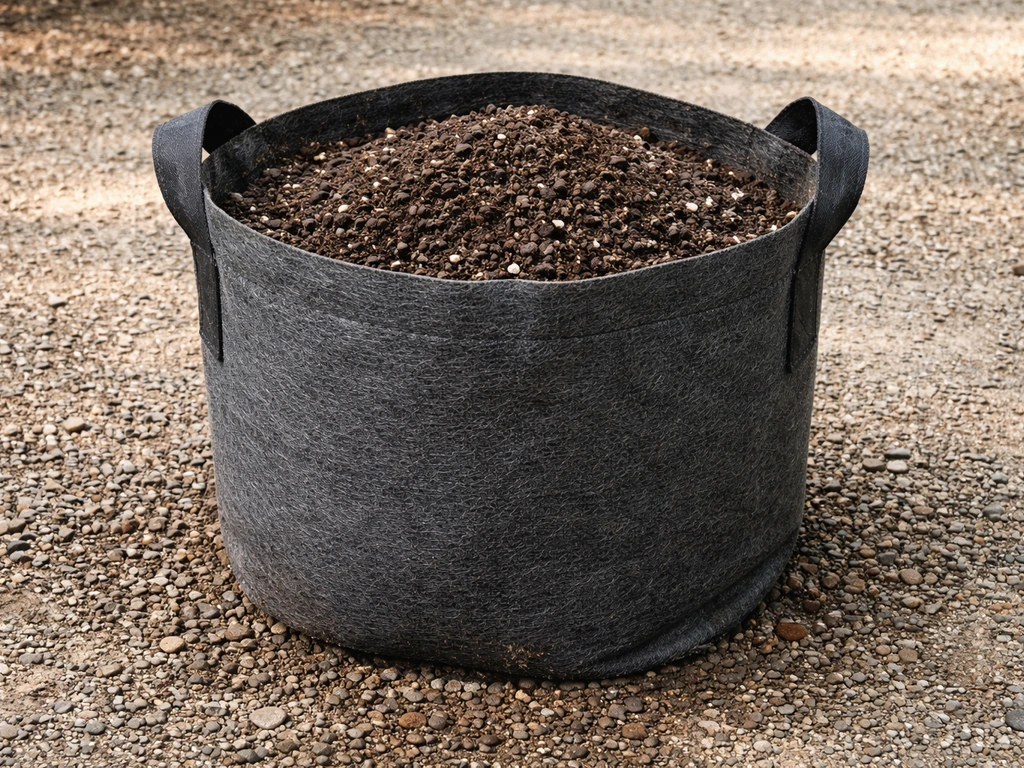
- You're using a name-brand fabric grow bag with permeable non-woven or woven geotextile fabric (not a laminated or coated bag)
- The bag sits on a surface that lets water drain away freely, like a raised bench, wire mesh support, or gravel bed
- You're watering in a way that lets the growing medium partially dry between sessions
- You're using a self-watering fabric pot system (like VIVOSUN's) that has an integrated elevated drain plate and drainage holes built into the design
- The bag is buried or sunk in a bed where surrounding soil naturally wicks and drains away excess moisture
Situations where you should add holes or rethink your setup
- Your bag has a coated, laminated, or waterproofed bottom layer that blocks water from passing through
- The bag sits inside another container or on a solid surface with no airflow beneath it and water visibly pools under the bag after watering
- You're growing indoors on a surface where water can't drain and you're watering heavily
- The bag has been sitting in a saucer or tray where the water level stays at or above the bottom of the bag for more than a day or two
- You're seeing classic waterlogging symptoms: yellowing leaves, slow growth, or soil that smells sour despite regular air temperature
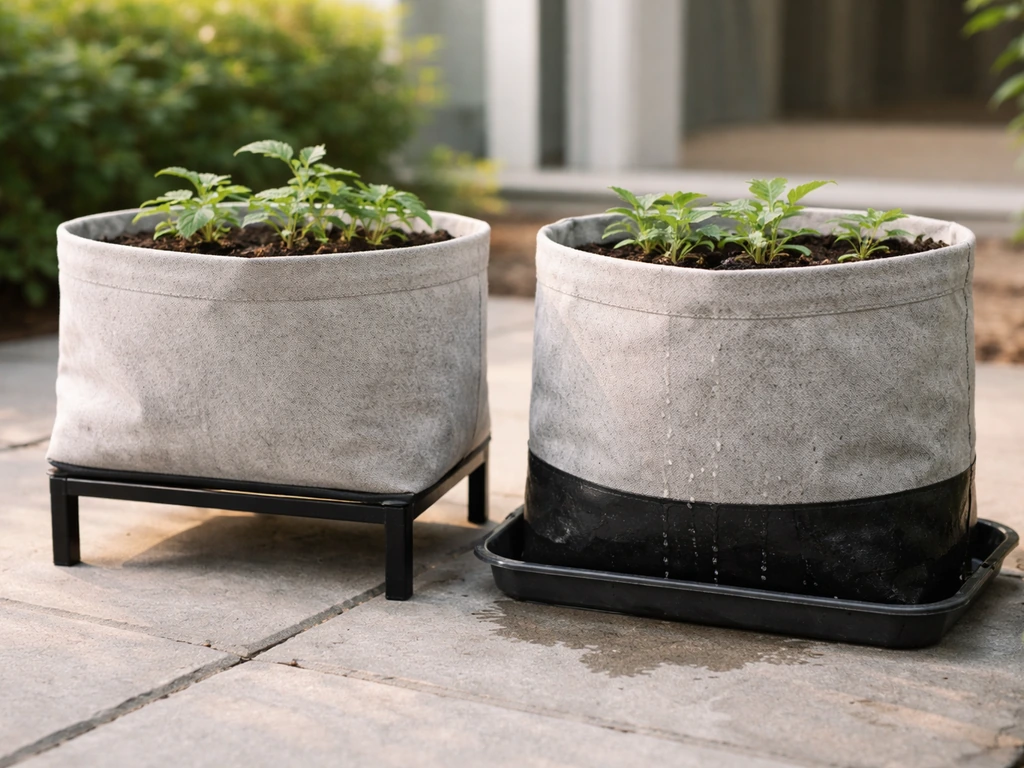
The honest check: pick up a corner of your bag after watering. If water is beading or pooling underneath rather than dispersing, drainage is compromised and you need to fix the setup, whether that means raising the bag, adding holes, or both.
Best-practice setup: saucers, location, and watering habits
Getting drainage right isn't just about the bag itself. Where you place it and how you water matter just as much. RootMaker recommends elevating containers on wire benches roughly 18 to 24 inches off the ground for maximum air circulation and drainage effectiveness. For most home growers that's not realistic, but the underlying point stands: anything you can do to get airflow under and around the bag helps.
If you're growing on a patio, deck, or balcony, placing the bag on a few bricks, a wire trivet, or a pot feet set keeps the base slightly elevated so air can move beneath it and water isn't trapped between the bag and the surface. Smart Pot actually recommends using a saucer on treated wood decks to protect the surface, and that's a sensible compromise.
The key is that you're using the saucer to catch splash and runoff, not to let the bag sit in standing water. If you're using do grow bags, a saucer can help manage splash and runoff, but you should empty it promptly to avoid keeping the base wet saucers. Leaving water pooled in a saucer under any container for more than a day or two increases root rot risk, even in a fabric bag.
Watering habits are the biggest variable most people underestimate. Fabric bags dry out faster than plastic pots because moisture evaporates through the sidewalls. That's usually a feature, not a bug, because it reduces overwatering risk. But if you're watering on a fixed schedule instead of checking the soil, you can still waterlog the medium, especially in cooler weather when evaporation slows down.
The rule: water when the top inch or two of the growing medium feels dry, and water thoroughly so excess runs out through the fabric before stopping. Do grow bags get moldy? They can, but keeping runoff managed and avoiding constant soggy conditions usually prevents it. A helpful next step is learning how full to fill grow bags so water has room to drain without pooling around the roots.
When deciding how full to fill your grow bag, the goal is to avoid filling it too high so runoff can escape instead of pooling around the roots how full to fill grow bags. Open top grow bags can also support good airflow around the root zone when you pair them with proper elevation and saucers.
How to add drainage holes safely if you need to
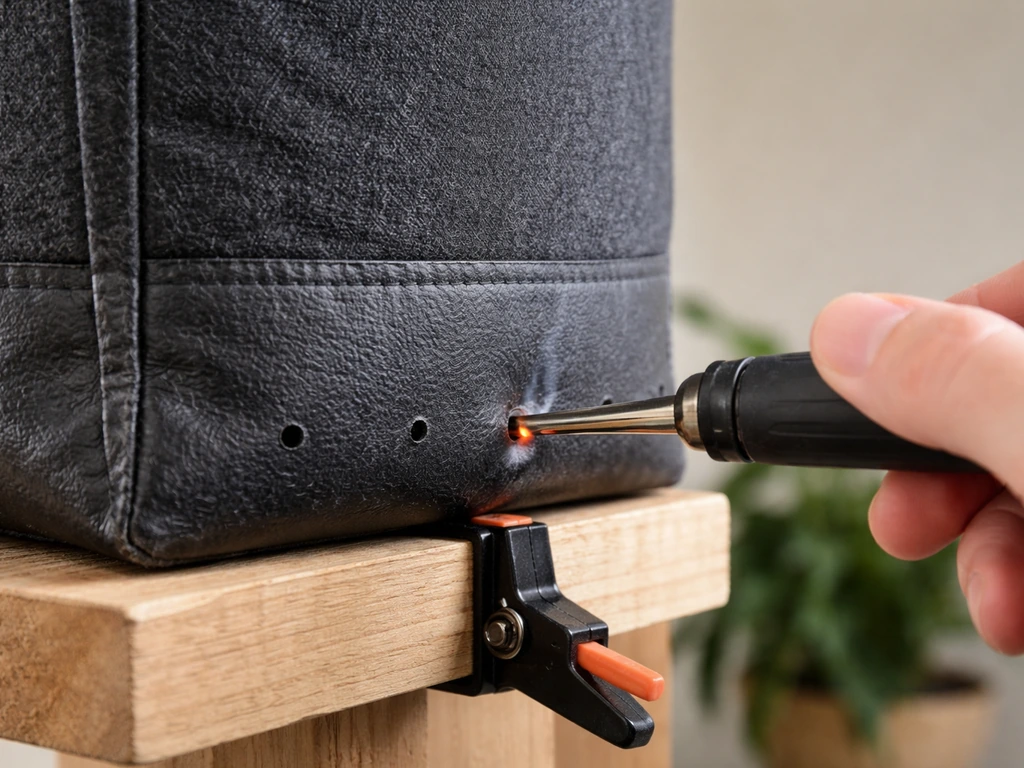
If you've confirmed your bag needs additional drainage (usually because it has a coated or semi-impermeable base), adding holes is straightforward but worth doing carefully so you don't compromise the bag's structural integrity.
- Use a sharp pointed tool, like a hot nail, awl, or small soldering iron, rather than scissors. A hot tool melts the fabric edge cleanly and prevents fraying, which can cause the hole to widen over time.
- Space holes evenly. For a circular bag base, aim for at least 5 to 6 holes placed in a ring a few inches from the outer edge, plus 2 to 3 in the center. Evenly spaced holes create more consistent drainage than one large opening.
- Also consider a ring of holes around the lower sidewall (about 1 to 2 inches from the base). This mirrors how RootTrapper designs their unlaminated base zone and keeps drainage active even when the bag is sitting flat.
- Keep holes relatively small, around 6 to 10mm. Large holes can allow growing medium to spill out over time, especially with loose soilless mixes.
- If you're adding holes to a bag that originally had drainage by design, understand you're modifying a tested system. You shouldn't need to do this with quality fabric bags, so if you feel like you do, it may be worth diagnosing whether the real issue is placement or watering rather than the bag itself.
One thing to keep in mind: if your bag is a thicker felt-style fabric, a hot awl or thin soldering tip works much better than scissors because the dense fiber can bunch and fray with cutting tools. For thinner woven geotextile fabric, a sharp awl or even a large heated nail works cleanly.
Matching drainage setup to your crops and growing conditions
Not every plant and situation has the same drainage demands. Here's how to think about it by crop type and environment:
| Crop / Use Case | Drainage Priority | Recommended Setup |
|---|---|---|
| Tomatoes | High | Elevate bag on bricks or wire support, water deeply but allow surface to dry between sessions, avoid saucers unless on a deck surface |
| Potatoes | High | Needs freely draining medium and good airflow at base; raised placement or gravel bed under bag works well |
| Herbs (basil, mint, oregano) | Medium-High | Standard fabric bag on elevated surface; mint tolerates more moisture than most, but still needs drainage |
| Flowers (annuals and perennials) | Medium | Most do fine on a standard elevated surface; heavy clay-based mixes increase waterlogging risk |
| Trees and shrubs | High | Larger bags need firm support and significant airflow; RootMaker-style berming (6 to 8 inches high) works well for long-term container trees |
| Indoor growing | Very High | Use a self-watering system with integrated drain plate (like VIVOSUN's), or place bag in a tray and empty it every 24 hours |
| Mushrooms | Low to Medium | Mushroom substrate bags are often sealed or semi-sealed intentionally; drainage rules differ and depend on the cultivation method |
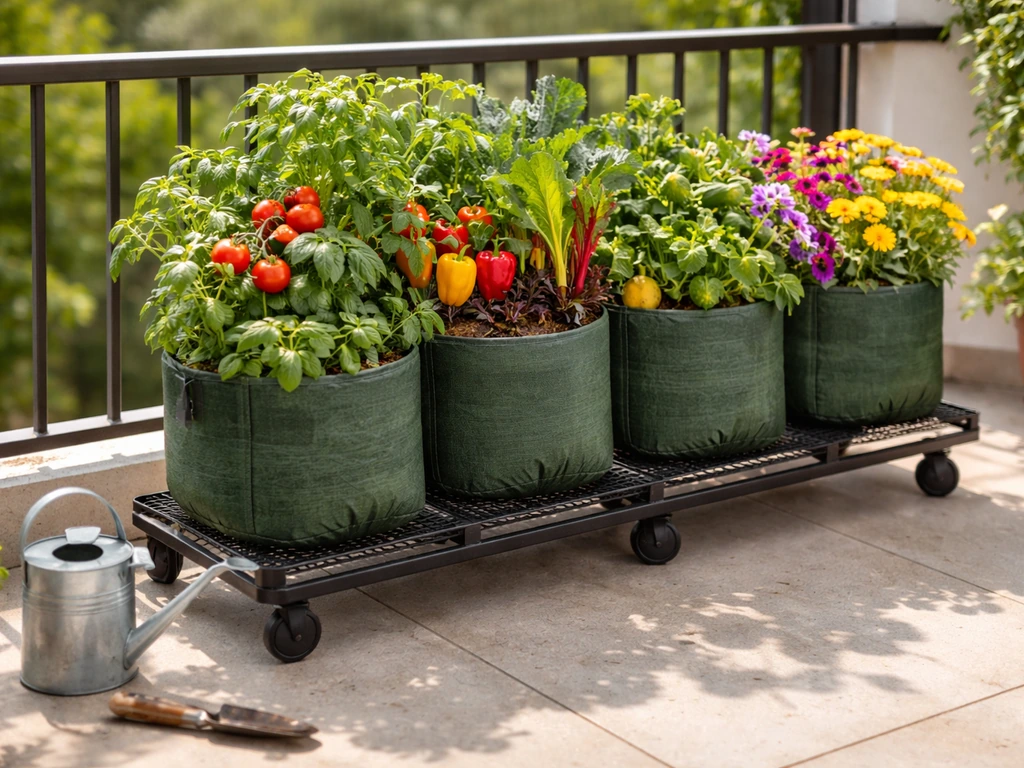
Plants with high water needs, like tomatoes and potatoes, benefit most from a setup that maximizes drainage and airflow because they're heavy feeders that get watered frequently. Trees in fabric containers, especially if you're planning to keep them in bags for more than one season, need the most attention to base drainage because the root mass grows dense and can restrict moisture movement over time.
Indoors is where drainage setup matters most and is most often ignored. When you're growing outside, excess water evaporates and drains away naturally. Indoors, there's nowhere for it to go. If you're using fabric grow bags inside, a self-watering system with a built-in elevated drain plate and multiple drainage holes is the easiest way to prevent problems. If you're using a regular fabric bag indoors, place it in a tray, water carefully, and empty that tray within a day of watering.
Quick comparison: drainage scenarios at a glance
| Scenario | Do You Need to Add Holes? | Why |
|---|---|---|
| Standard permeable fabric grow bag, elevated surface outdoors | No | Fabric handles drainage passively; elevation keeps base clear |
| Standard fabric bag sitting directly on solid concrete or wood | Maybe | Elevation or ventilation underneath solves this better than holes |
| Fabric bag with coated or laminated base | Yes | Coating blocks passive drainage; holes restore it |
| Self-watering fabric pot system with drain plate | No | Drainage is built into the system design |
| Fabric bag indoors in a tray | No, but manage the tray | Empty tray frequently; standing water is the risk, not the bag |
| Budget bag of uncertain material | Check first, then decide | Feel and test the base for water permeability before growing |
The bottom line is this: if you bought a quality fabric grow bag from a known brand, trust the design and focus your energy on placement and watering habits. Those two factors cause far more drainage problems than the bags themselves. If you're unsure about a bag's permeability, do a quick test: fill it partway with water and watch whether it seeps through the base and walls within a minute or two.
To do grow bags drain well, that quick permeability check tells you whether water can actually escape through the fabric base and walls. If you’re wondering whether to use drainage holes, do grow bags leak water depends on the bag’s permeability and how you handle saucers and runoff. If it does, you're good. If water just pools inside, you've got a coated bag and you'll need to add holes or change bags entirely.
FAQ
How can I tell quickly if my grow bag’s fabric is permeable enough without drilling?
If the bag is from a reputable, permeable brand and the fabric feels “breathable,” you usually do not need to punch holes. However, if the base feels coated or slick (or the water test shows delayed seepage), add holes only to the bottom area and avoid cutting into seams that help the bag flex and drain.
Can I put a do grow bag on a saucer if it has no drainage holes?
Yes. You can still use a saucer, but it should catch runoff and splash, not become a reservoir. Empty it right after watering (or within 12 to 24 hours), since even fabric bags can stay too wet if the tray keeps the base constantly damp.
What’s the most common reason fabric grow bags still end up waterlogged?
Overwatering and poor airflow can outweigh the bag’s natural drainage. Indoors, especially, you can water on autopilot and keep the medium saturated. Check moisture by feel (top inch or two), then water thoroughly and stop only when the top is evenly moist and runoff has moved through without sitting.
Is the “does it leak?” test the same as the permeability test mentioned for do grow bags?
Doing a one-time “leak” check is different from a proper permeability check. For permeability, fill partway with water and watch whether it seeps through the base and sides within about a minute or two. For leak risk, test with the bag fully filled to normal planting height, then check whether water pools around the base on your specific surface.
If water pools under the bag, should I add holes immediately or change the setup first?
If water pools underneath after watering, first fix elevation and under-airflow (pot feet, bricks with a trivet, or a wire bench). Only after that should you add holes, because adding holes to a bag that is sitting in standing water can still leave roots constantly saturated.
What’s the best tool and technique for adding holes to different types of fabric grow bags?
If the bag is thicker felt or dense fabric, a hot awl or thin soldering tip is less likely to create ragged tears that can unravel and weaken drainage pathways. For thinner woven geotextile, a sharp awl works cleanly. Avoid large snips with scissors because fraying can spread.
Do stitch seams count as drainage holes, and when would I still need to modify the bag?
Some bags partially drain through stitch seams, but you should not assume every seam drains equally. If you see water beading and slow seepage, rely on placement fixes and elevation first, then consider targeted bottom holes if the base is coated or semi-impermeable.
How does fill level affect whether I really need drainage holes in a grow bag?
A raised, well-ventilated location helps, but so does how full you fill. If the medium is too high, water has less headroom to move and escape. Aim to keep the fill level where runoff can flow out through the fabric before it backs up around the root zone.
Does drainage hole advice change for perennials or multi-season container grows?
For plants kept in containers through multiple seasons (like trees), drainage performance matters more over time because the root mass can restrict moisture movement. Re-check drainage after repotting and after a few weeks of growth, since fabric can also degrade or clog with fine compost over long use.
What self-watering setup works best with fabric grow bags?
Yes, but they must be chosen for drainage, not just “wicking.” A true self-watering setup with an elevated drain plate and multiple drain openings prevents constant soggy contact with the roots. If you use a DIY reservoir, ensure there is a way for excess to flow out and the drain area stays elevated and not submerged.
Next Articles
Do Grow Bags Drain Well? How to Test and Fix It
Learn if fabric grow bags drain well and how to test, spot issues, and fix soggy soil fast with steps.
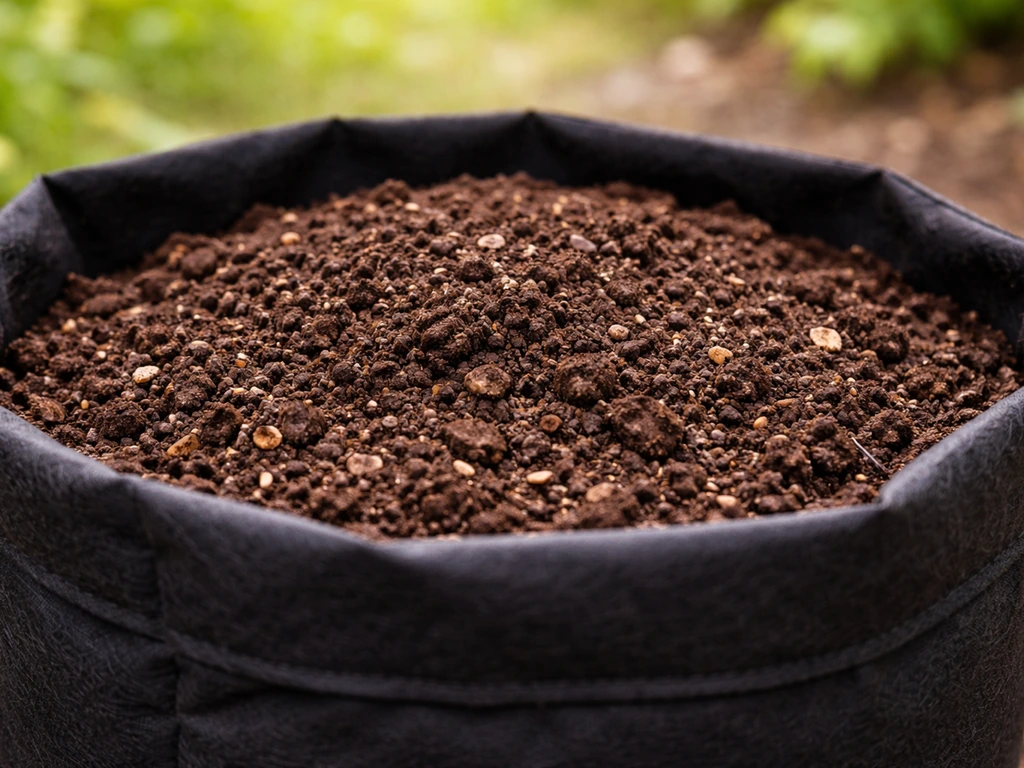
Best Soil for Grow Bags: Mix Recipes and How Much to Add
Best soil for grow bags: mix recipes, how much to add by bag size, and vegetable tweaks for strong drainage and yield.
Pros and Cons of Grow Bags for Vegetables and Flowers
Grow bag pros and cons for veg, flowers, trees, and mushrooms: aeration, mobility, and watering plus fixes for common is