Most fabric grow bags do not need holes cut into the bottom because the fabric itself is porous enough to let water escape. Smart Pot’s spring garden guidance also notes that there’s no need to place rocks or broken pottery in the bottom for drainage, since their system relies on the container design instead.
Do Grow Bags Need Holes in the Bottom? How to Decide

Marcus Holloway
17 May 2026
The woven or non-woven polypropylene material that makes up a typical fabric grow bag allows water to seep through the sidewalls and base naturally, which is the whole point of choosing fabric over plastic in the first place. That said, there are specific situations where the bottom of your grow bag is too dense, where you are overwatering, or where your bag is sitting on a surface that blocks drainage entirely.
In those cases, adding a few holes can absolutely save your plants.
How to tell if your grow bag already has drainage
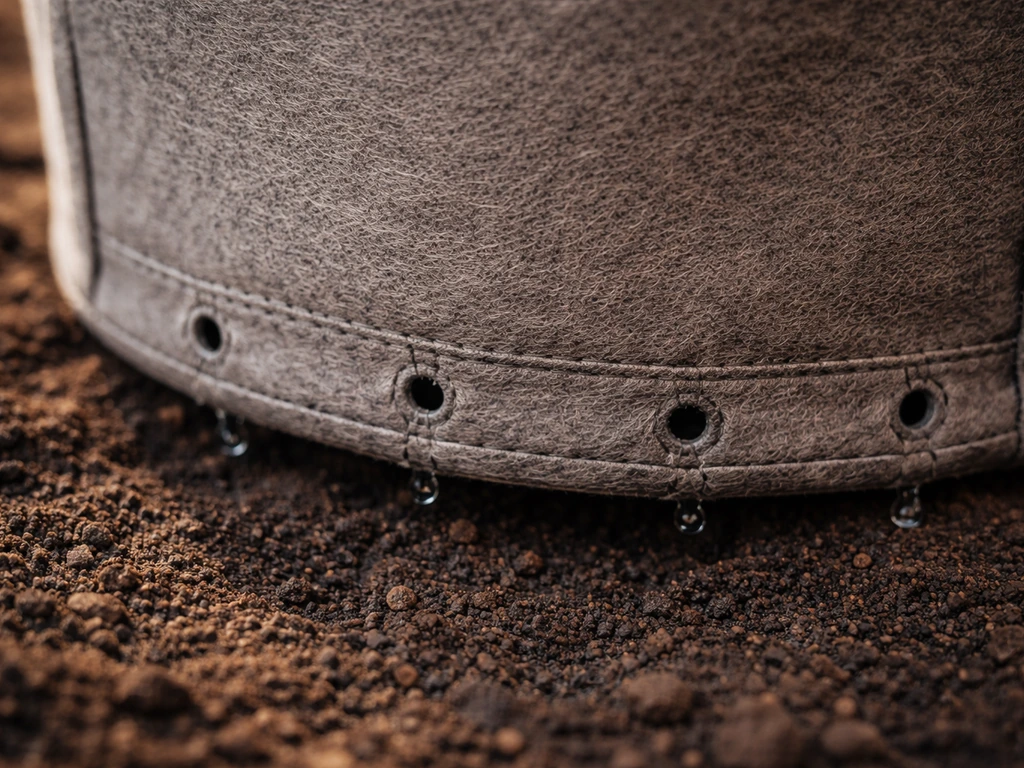
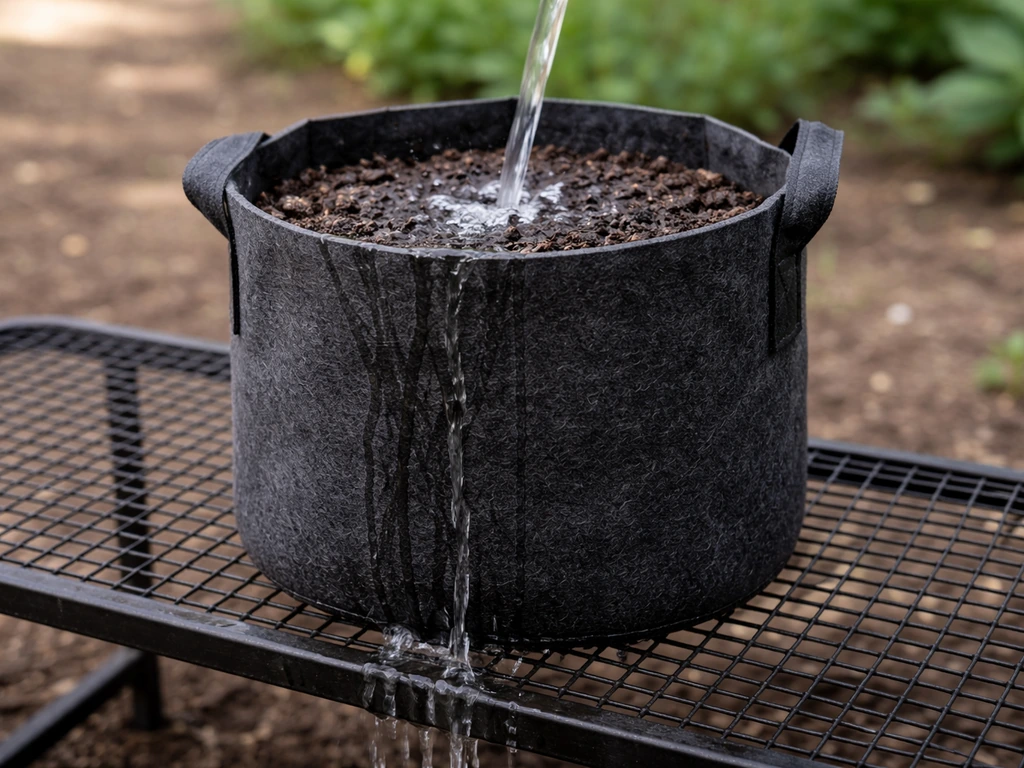
Before you grab scissors or a soldering iron, check whether your bag is actually draining. The easiest test is to water it thoroughly and then watch what happens over the next 10 to 15 minutes. Lift a corner of the bag slightly. If water is weeping through the bottom fabric and collecting underneath, you have drainage. If the bag feels extremely heavy and water is just pooling on top of the soil without going anywhere, something is blocking the flow.
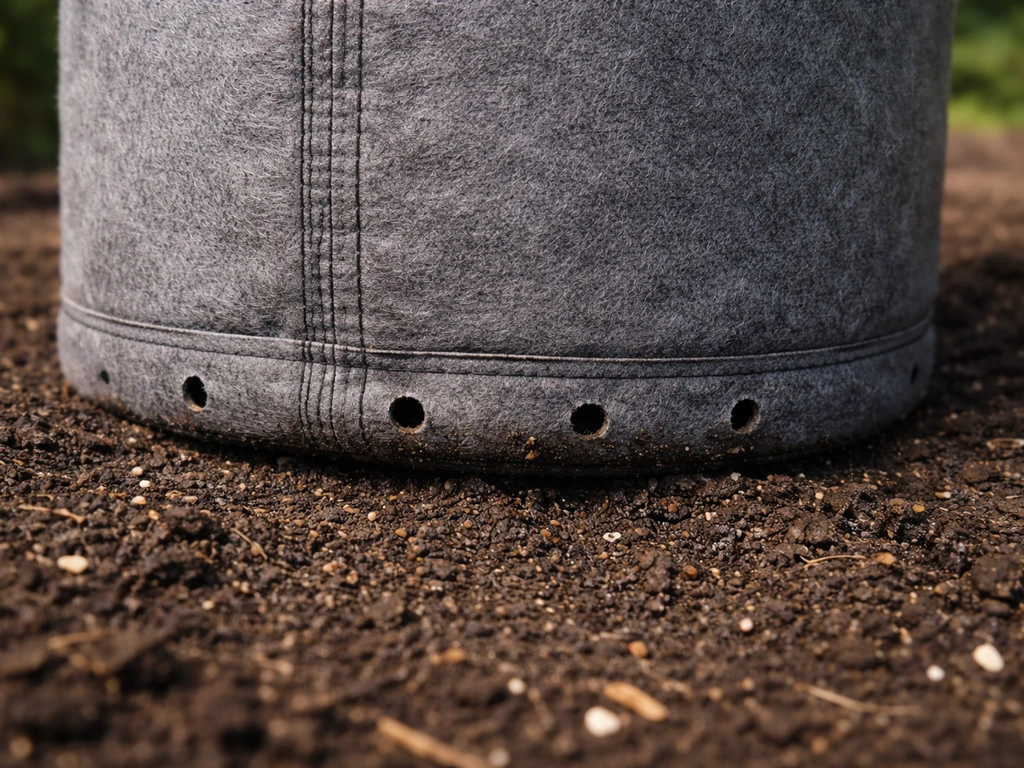
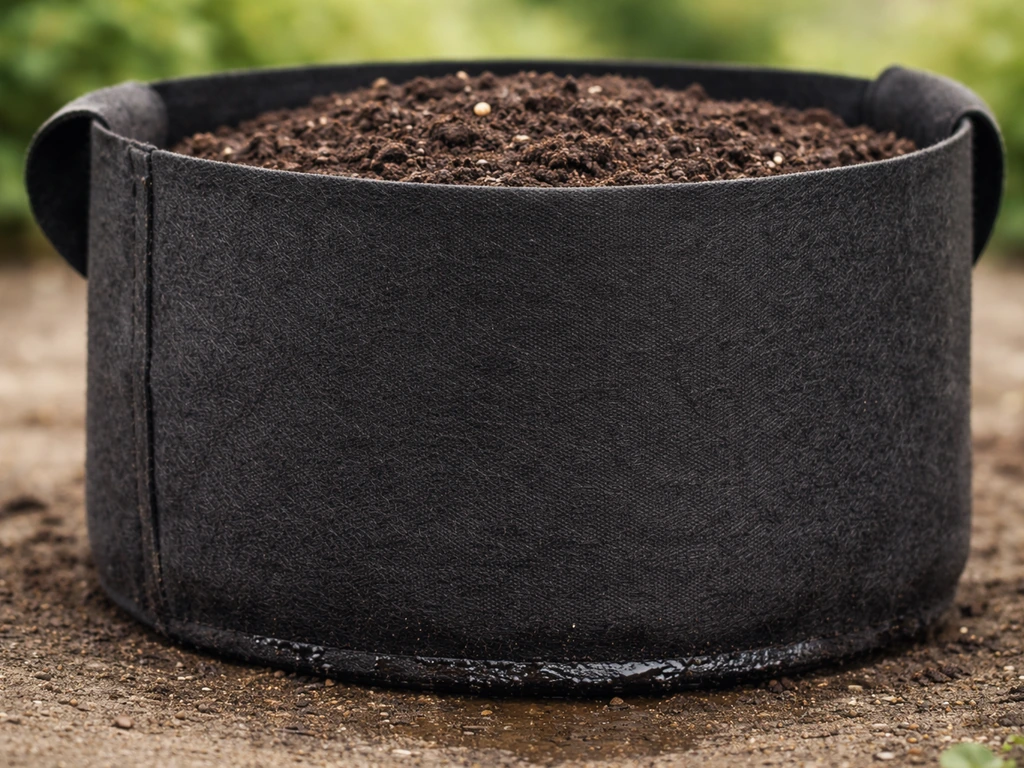
You can also look at the base fabric closely. High-quality bags from brands like Smart Pot use a thick, tightly woven felt-like material that still allows water to pass through when the soil is properly saturated. Cheaper bags sometimes use a denser, almost plastic-like fabric at the bottom that barely breathes. Rub the base between your fingers: if it feels stiff and almost waterproof, it probably needs help. If it feels more like a thick felt or fleece, the drainage is most likely already there.
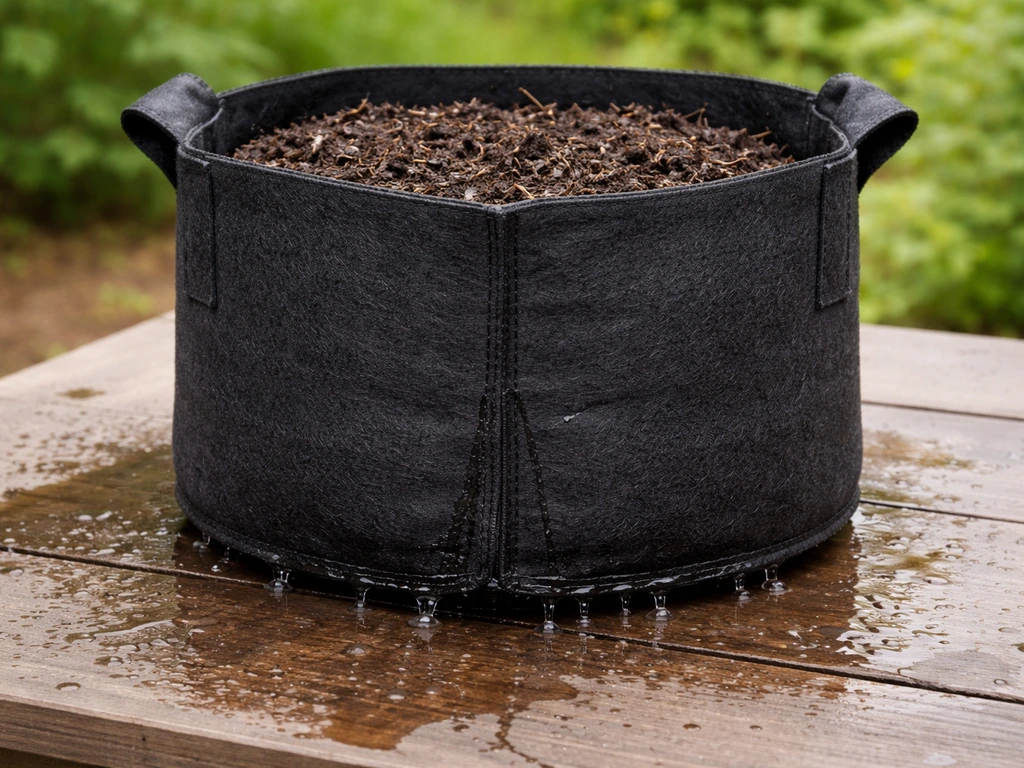
One more check: pull the bag off the ground slightly after watering and look for a damp ring or moisture stain on your patio or surface below it. That stain is drainage working as intended. No stain, no drainage.
When you should add holes (and when you can skip them)
The honest answer is that most growers using quality fabric grow bags never need to add holes. Brands like Smart Pot specifically engineer their containers so that you do not get the classic problem of soggy bottoms, and they explicitly say you do not even need to add rocks or broken pottery at the base for drainage. The fabric handles it. If your bag is draining freely after watering and your plants look healthy, leave it alone.
Where holes actually help is in a handful of specific situations. Add holes if your fabric is noticeably non-porous at the base, if your bag is sitting directly on a surface that traps water beneath it (like a flat balcony without any gap), if you are growing a plant that is extremely sensitive to wet feet (like lavender, rosemary, or succulents), or if you have a habit of heavy, frequent watering. In those cases, a few small holes in the base give water a guaranteed exit route regardless of what the fabric itself is doing. Open top grow bags can be especially handy when you want easier access while still maintaining good drainage.
Skip the holes if your bag is already draining freely, if you are growing in a dry climate where moisture retention is actually beneficial, or if you are using a bag on a surface where runoff would cause a mess or damage (like a wood deck or indoor floor). In that last case, managing where water goes matters more than whether you have extra holes.
| Situation | Add holes? | Reason |
|---|---|---|
| Dense, barely porous base fabric | Yes | Water has no exit route without them |
| Bag sitting on flat, non-draining surface | Yes | Even porous fabric won't drain if blocked underneath |
| Growing lavender, rosemary, succulents | Yes | These plants are very sensitive to wet roots |
| Quality felt-style fabric bag draining freely | No | Fabric already handles drainage |
| Dry climate, moisture retention is a goal | No | Retaining water is an advantage here |
| Bag on a wood deck or indoor space | No (use a tray instead) | Runoff management matters more than extra holes |
How to make holes in grow bags: tools, spacing, and steps
If you decide holes are the right move, the method matters. The goal is to create clean openings that let water through without fraying the fabric, weakening the bag structure, or creating tears that spread over time.
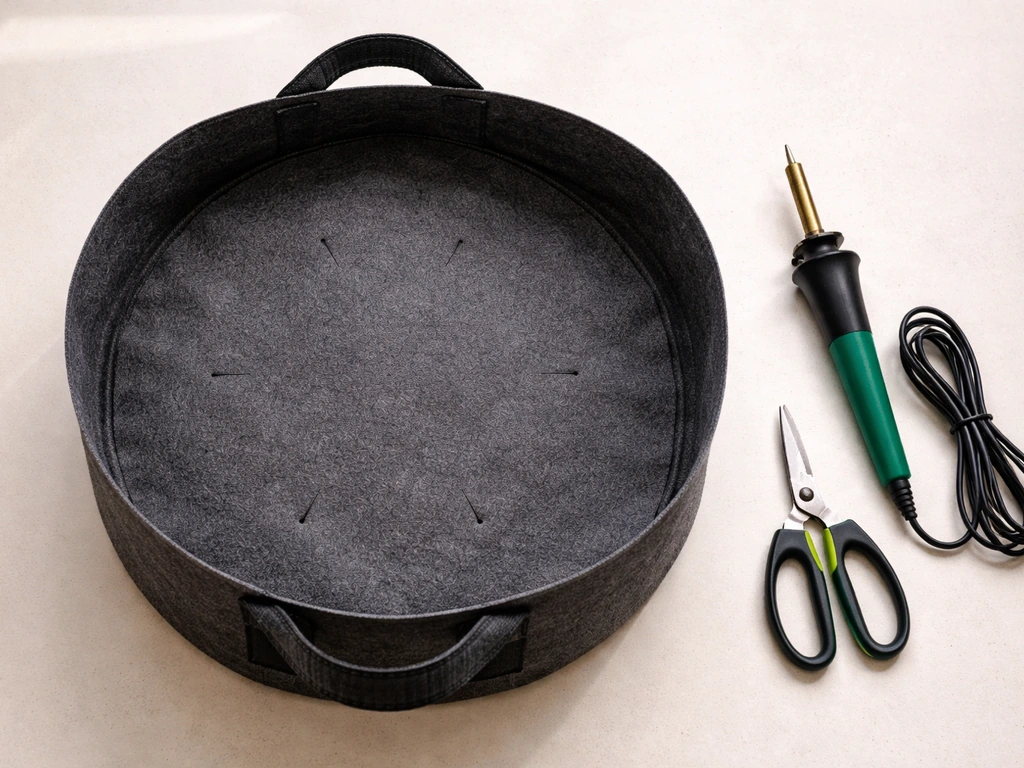
Best tools for the job
- Soldering iron or wood-burning tool: the best option for non-woven polypropylene fabric. The heat melts and seals the edge of the hole cleanly so it won't fray. Use a 3 to 5mm tip and work in a ventilated area.
- Sharp leather punch or hole punch: works well on thicker felt-style bags. Creates a clean circular hole without heat. A 6 to 8mm punch diameter is ideal.
- Scissors (small, sharp): acceptable for a quick fix on thin fabric bags, but snip in a small X rather than a circle to reduce fraying risk.
- Drill with a small bit (4 to 6mm): only useful if the base fabric is very stiff and thick. Use a scrap piece of wood underneath to protect the bit and your work surface.
Step-by-step process
- Empty the grow bag completely and turn it upside down so the base faces up.
- Mark your hole positions with a chalk pen or a small piece of tape. Aim for a grid pattern across the base, not just one hole in the center.
- For a standard 5-gallon bag, make 5 to 8 holes evenly spaced. For a 10-gallon or larger bag, aim for 8 to 12 holes. Concentrate them in the center area where water pools most.
- Use your chosen tool to create each hole. If using a soldering iron, press and hold for 2 to 3 seconds per hole so the edges fuse cleanly. Do not drag the tip or the hole will distort.
- Check each hole from inside the bag to confirm it is fully open and not partially blocked by melted fabric.
- Let any melted edges cool fully before refilling the bag with soil.
A note on size: holes that are too small (under 3mm) clog with soil and roots quickly. Holes that are too large (over 12mm) will let fine potting mix wash out with every watering, creating a mess and reducing your soil volume over time. The 5 to 8mm range is the practical sweet spot for most grow bag fabrics.
Best setup for runoff: trays, placement, and watering habits
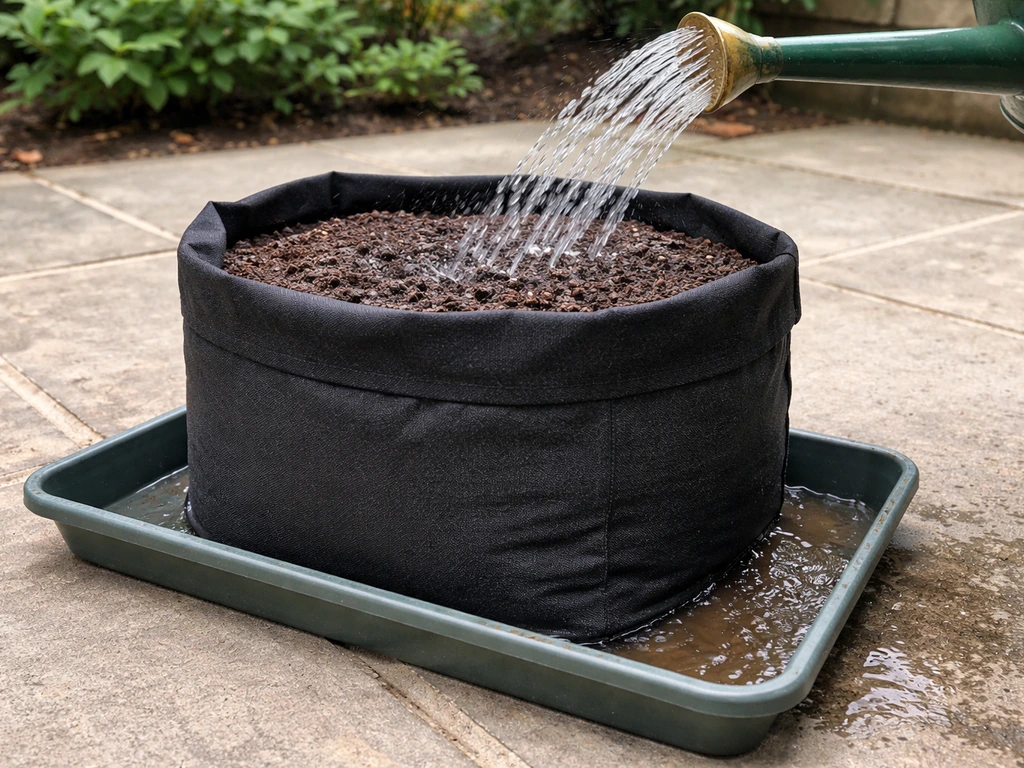
Even a perfectly draining grow bag creates runoff, and where that water goes is something you need to plan for. Whether you have holes or not, setting up your bags on the right surface protects your deck, floor, or patio and makes it much easier to manage watering consistently.
Saucers and trays are the most common solution, and they work well as long as you are not leaving standing water in them for more than an hour or two after watering. Sitting a grow bag in a tray full of water is almost as bad as having no drainage at all because the base stays saturated. The trick is to use a tray to catch the initial runoff, then either tip it out or let it evaporate. For larger bags, using a tray with feet or placing the bag on a pot riser (a simple plastic grid lifts the bag about an inch) gives the base of the bag airflow and prevents the wicking-back problem.
If your grow bags are outdoors on a patio or ground, elevation helps. Even placing bags on a few bricks raises them enough that water drains freely underneath instead of pooling. For balcony growers, a wide, shallow tray under multiple bags is a practical way to manage runoff without individual saucers for every container.
Your watering habits matter as much as your setup. Water deeply but less frequently, letting the top inch or two of soil dry out between sessions. If you are wondering whether to fill grow bags to the top, focus on watering depth and leaving enough headspace for proper drainage and airflow the top inch or two of soil. This approach works with the fabric's natural drainage and air-pruning properties rather than against them. Light, frequent watering that never fully saturates the bag tends to encourage shallow roots and can create a consistently damp-but-not-draining situation that is harder to manage than proper deep watering with a dry-down period.
Troubleshooting wet grow bags and root problems
If your plants are struggling and you suspect poor drainage, here are the signs to look for and what to do about each one.
- Yellowing lower leaves: often the first sign of overwatering or waterlogged roots. Check the base of the bag. If it feels heavy and stays cold for days after watering, drainage is the problem. Add holes if the fabric is dense, and let the bag dry out more between waterings.
- Wilting despite wet soil: counterintuitively, plants can wilt when roots are drowning. Oxygen-starved roots cannot move water into the plant even if the soil is saturated. Let the bag dry down significantly, improve drainage, and check for root rot (mushy, brown roots) when repotting.
- Mold or fungal growth on the outside of the bag: indicates the fabric is staying wet too long. Improve airflow around the bag, elevate it off the ground, and reduce watering frequency. This is more common when bags are crammed together without airflow between them.
- Water not draining through the bag at all: either the fabric base is nearly impermeable, or roots have blocked the drainage points. Add holes using the method above. If the bag is root-bound, it may be time to size up.
- Soil stays soggy for more than 3 to 4 days: your mix is probably too dense. Standard garden soil or heavy mixes without perlite hold too much moisture for grow bags. Mix in 20 to 30 percent perlite to improve drainage from the inside out.
One thing worth checking if you are having persistent wet-bag problems is whether the bag itself might be retaining mold or compacted soil from a previous grow season. If your grow bags stay too damp, mold can form on the fabric and in the soil, so focus on improving drainage and drying between waterings. Over time, fabric bags can develop buildup that affects how well the fabric breathes. A good rinse and a soak in a dilute hydrogen peroxide solution (1 part 3% hydrogen peroxide to 5 parts water) can restore breathability before replanting.
The good news is that most drainage problems with grow bags are fixable with simple adjustments: a few holes, better placement, the right tray setup, or a tweak to your watering schedule. Fabric grow bags are genuinely forgiving containers when used correctly, and understanding how they manage water is the fastest way to get consistent results from them. For a related baseline, see how full to fill grow bags so you avoid oversaturation from soil that compacts too tightly. If you are still unsure, also review do grow bags drain well so you can confirm you are getting true drainage rather than just surface dampness.
FAQ
How can I tell if my grow bag has drainage but my plant still looks waterlogged?
Drainage can be working while the root zone is still staying too wet from frequent watering or dense potting mix. Check the top 2 to 3 inches of soil, if it never dries between waterings, the bag will still behave like it is staying damp even with outlet seepage. Adjust to deep watering with a dry-down, or swap to a lighter, airier mix that includes more perlite or pumice.
Should I put holes in only the bottom, or also along the sides?
For most fabric grow bags, side drainage is already built in through the porous fabric. If you add extra holes, focus on the base because that is where pooling happens when airflow or runoff is blocked. Cutting side holes can weaken the bag and create unexpected soil loss, especially if your potting mix washes through the openings.
What is the safest way to add holes to a grow bag fabric without ruining it?
Use a small hole punch or heated tool that makes a clean opening rather than tearing. Aim for a few evenly spaced holes, avoid cutting long slits, and let the bag cool fully after any heated method. Inspect after the first few waterings to make sure the fabric edge is not fraying or spreading.
Do I still need holes if I use a tray or saucer under the grow bag?
You may not, as long as the tray is used correctly and you avoid leaving standing water. A tray should catch initial runoff, then be emptied or allowed to drain or evaporate quickly. If runoff stays in the tray for more than an hour or two, it can wick back into the bag and recreate soggy conditions even without blocked fabric.
If my patio or balcony is waterproof, can I place the grow bag directly on it?
Even on waterproof surfaces, direct placement can still trap a thin layer of water under the bag, which slows drying. Elevate with feet, risers, or a slight gap using bricks so air can reach the base. This is especially important after heavy watering or rain when the underside takes longer to dry out.
Are holes ever a bad idea for grow bags?
Yes. Holes can cause soil washout, especially with fine potting mixes or if the openings are too large. They also reduce the time soil stays evenly moist, which can stress drought-prone plants in hot weather. If you frequently water lightly rather than deeply, holes may make moisture swings worse.
What size potting mix and plant types work best if I add holes?
Use a mix with good structure, like one that includes perlite or coarse amendments, so it does not readily run out through base openings. For small, fine-textured mixes, added holes can drain out fines and gradually lower soil volume. If you grow very small seedlings, consider smaller openings and more careful watering to reduce mix loss.
Do holes help with indoor grow bags on floors, or should I avoid modifying them?
Inside, the bigger risk is water damage and uncontrolled runoff rather than drainage alone. If you add holes, you still need a sealed or properly sized catch system and a plan for emptying it. Often it is safer to skip holes and instead use a riser plus a tray that you monitor and empty rather than letting water escape freely onto the floor.
Can mold on the bag mean the holes are not the problem?
It can. Mold often indicates the bag and root area are staying wet too long, which can be caused by overwatering, a heavy dense mix, or a tray that retains water. Also, old compacted soil can clog fabric pores. Rinse and dry the bag thoroughly, then reset watering frequency and consider refreshing the mix.
Next Articles
Do Grow Bags Leak Water? Causes and Quick Fixes
Learn if fabric grow bags leak, why seepage happens, and quick tests and fixes to stop runoff and protect roots.
Do Grow Bags Need Drainage Holes? Quick Guide for Fabric Bags
Do fabric grow bags need drainage holes? Learn when to add them, how to prevent waterlogging, and safest setup tips.
Do Grow Bags Drain Well? How to Test and Fix It
Learn if fabric grow bags drain well and how to test, spot issues, and fix soggy soil fast with steps.