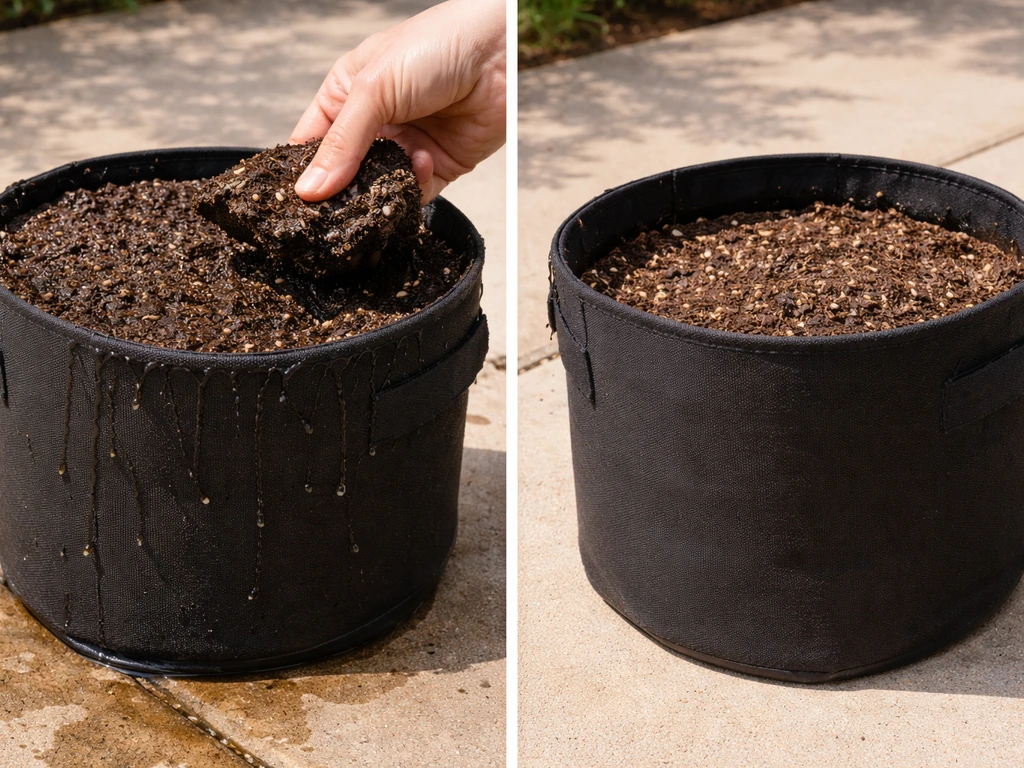
No, you should not fill grow bags to the very top. Leave about 2 to 4 inches of headspace between the soil surface and the rim of the bag. If you're using open top grow bags, keep that headspace in mind so watering soaks in instead of running off the sides. That gap is not wasted space.
Do You Fill Grow Bags to the Top? Correct Fill Level

Marcus Holloway
18 Jun 2026
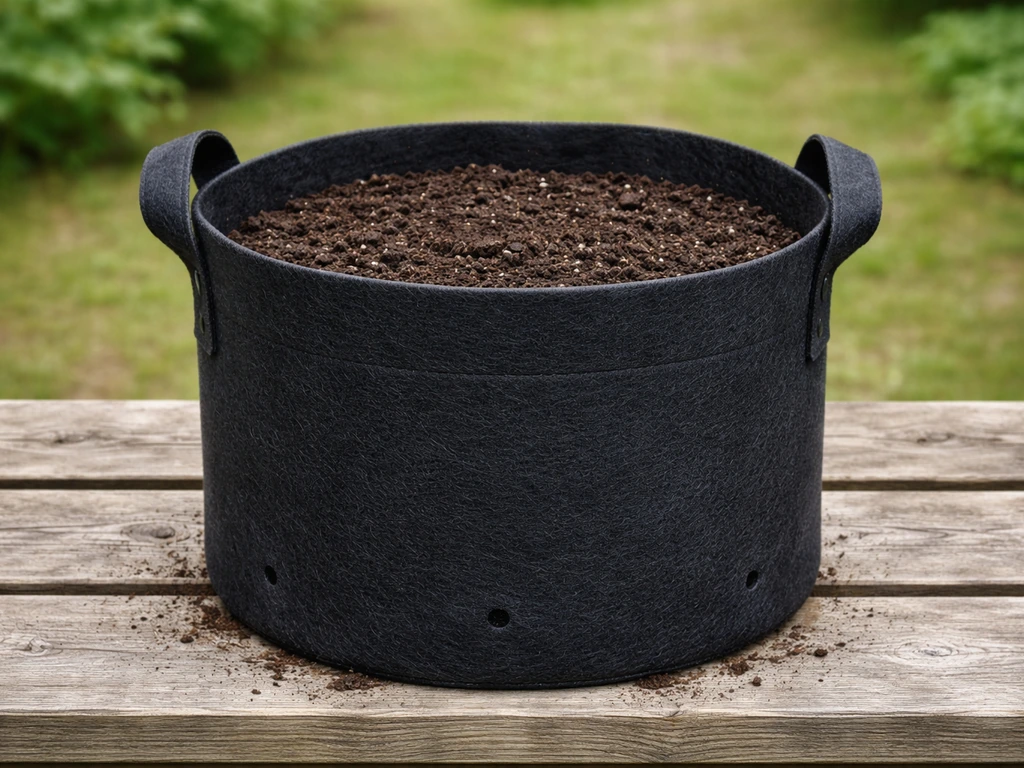
It keeps water from sheeting off the sides when you irrigate, directs moisture straight down into the root zone, and gives the growing medium room to settle without spilling over. As a practical rule: aim for 2 inches of headspace as a minimum, and go up to 4 inches if you're working with a tall bag or a crop that you'll be top-dressing over time, like potatoes.
Why filling to the brim causes real problems
It's tempting to pack every inch of a grow bag full of soil because it feels like you're maximizing your investment. But overfilling creates a cascade of small problems that add up quickly, especially in fabric containers where the dynamics are different from plastic pots.
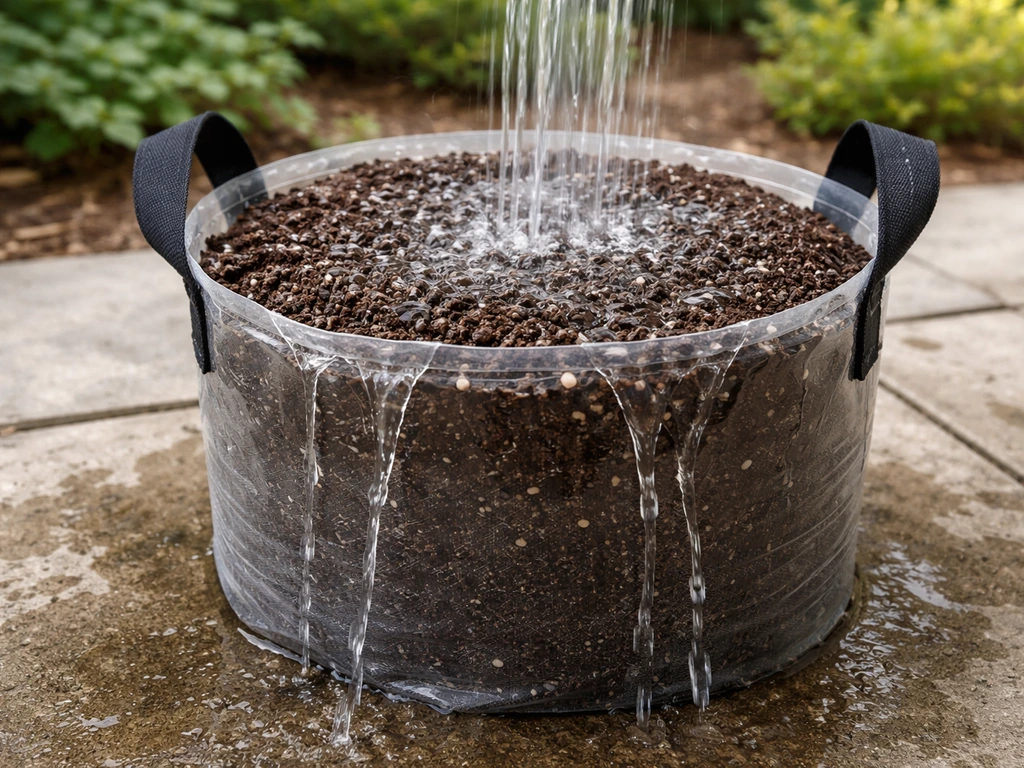
The first issue is watering efficiency. When the soil sits right at or above the rim, water runs off immediately over the sides instead of soaking in. You end up using more water, getting uneven moisture distribution, and constantly eroding the top layer of your growing mix. If you're wondering whether your grow bag needs holes, treat drainage as a must alongside correct fill depth do grow bags need holes in the bottom. That headspace acts like a small reservoir, holding water for a few seconds so it can percolate downward evenly. Even a 1 to 2 inch collar makes a noticeable difference.
The second issue is airflow and root oxygen. Fabric grow bags work because their porous walls allow air to reach the roots from the sides, which triggers air pruning and prevents the circling root growth you see in hard plastic containers. But that system only works if the growing medium inside isn't packed so tightly that it collapses the air-filled pore spaces.
Overfilling tends to go hand in hand with overpacking. Research on growing media consistently points to air-filled porosity of around 25 to 30% as optimal for oxygen diffusion in the root zone. Heavy, compacted soil jammed to the rim kills that porosity fast. The fix is gentle consolidation when filling, not compression, and leaving that headspace so you're not tempted to keep tamping down more soil to make it fit.
Third, fabric bags already drain and dry out faster than sealed containers because moisture evaporates through all four sides and the bottom simultaneously. If you overfill and the top inch stays constantly wet from splashback during watering, you can end up with a waterlogged surface layer even while the bag as a whole drains well. That wet surface is where mold and fungus gnats love to get started. Leaving headspace keeps the top of the soil drier and better aerated.
How full to fill at planting vs. how to top-dress later
For most crops (tomatoes, peppers, herbs, leafy greens, flowers), you fill the bag to within 2 to 4 inches of the rim before planting, set your transplant or seed in, and you're essentially done with the fill level for the season. The soil will settle a little over the first few weeks, which is normal. If it drops more than an inch or so, you can top up with a thin layer of compost or potting mix, but don't obsess over it.
Potatoes are the exception to this. With potatoes, you start with only 4 to 6 inches of potting mix in the bottom of the bag, place your seed potatoes on top with a little spacing between them, and cover them loosely. As the shoots grow and reach around 6 to 8 inches tall, you add a few more inches of mix to bury most of the new growth, leaving about 4 inches of leafy stem exposed.
You keep repeating this process, gradually filling the bag over several weeks, until the bag is nearly full. By harvest time the bag is filled close to the top. This staged approach is not just tradition. Potato tubers form along the buried stem, so each layer of soil you add gives the plant more room to produce.
Top-dressing with compost is also useful mid-season for heavy feeders like tomatoes and squash. Once the plant is established and the initial soil has settled, adding a half-inch to one-inch layer of finished compost on top slowly releases nutrients each time you water. Just make sure you still maintain at least 1 to 2 inches of headspace below the rim even after top-dressing. Top-dressing is also where timing matters, so it helps to know how full to fill grow bags at planting versus later in the season.
Fill depth by crop type
Different plants have different root architectures, and that changes both how deep your bag needs to be and how you approach the initial fill. Here's how to think about it by crop category.
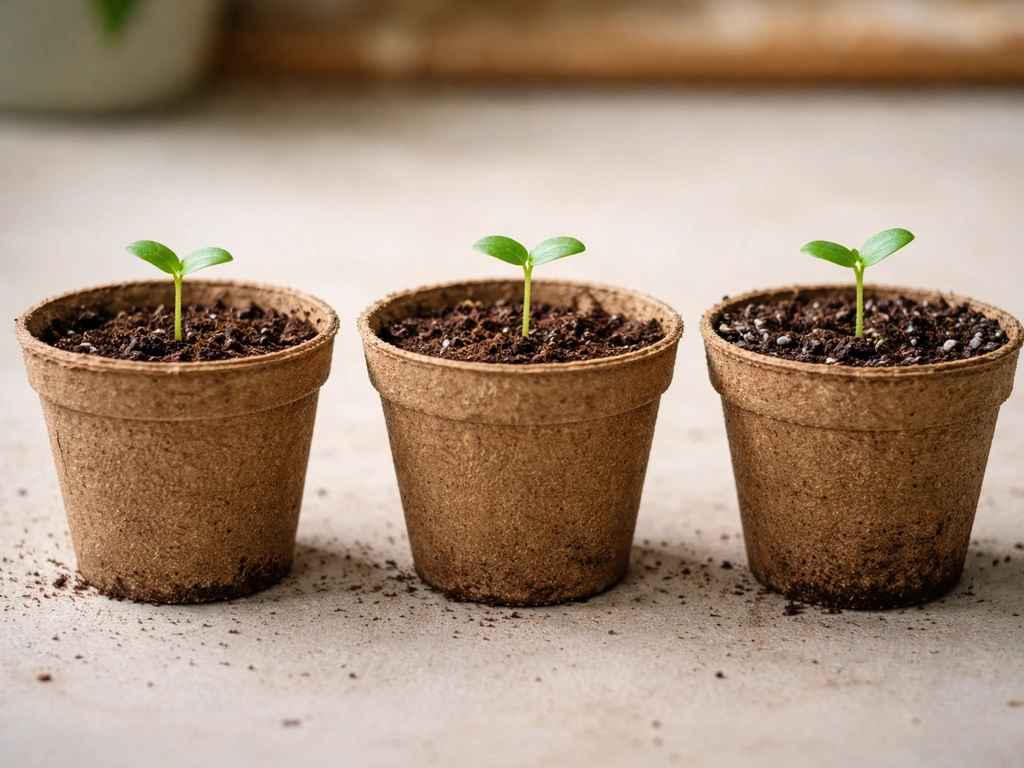
Seedlings and transplants
Fill the bag to within 2 to 3 inches of the rim, then dig a planting hole just deep enough to set the root ball slightly below the surrounding soil surface. For tomatoes and peppers, you can bury the stem deeper than it was in its nursery pot since they root along buried stems. The surrounding soil should be at roughly the same level as the bag's filled surface once you firm everything in.
Tall plants and heavy feeders (tomatoes, peppers, squash)
These plants want deep root runs. Use at least a 5-gallon bag for peppers, and a 10 to 15-gallon bag for indeterminate tomatoes. Fill to within 2 to 4 inches of the top. The full depth of the bag is what matters here more than the headspace. Don't shortchange the root zone to make the bag look tidy on top.
Potatoes
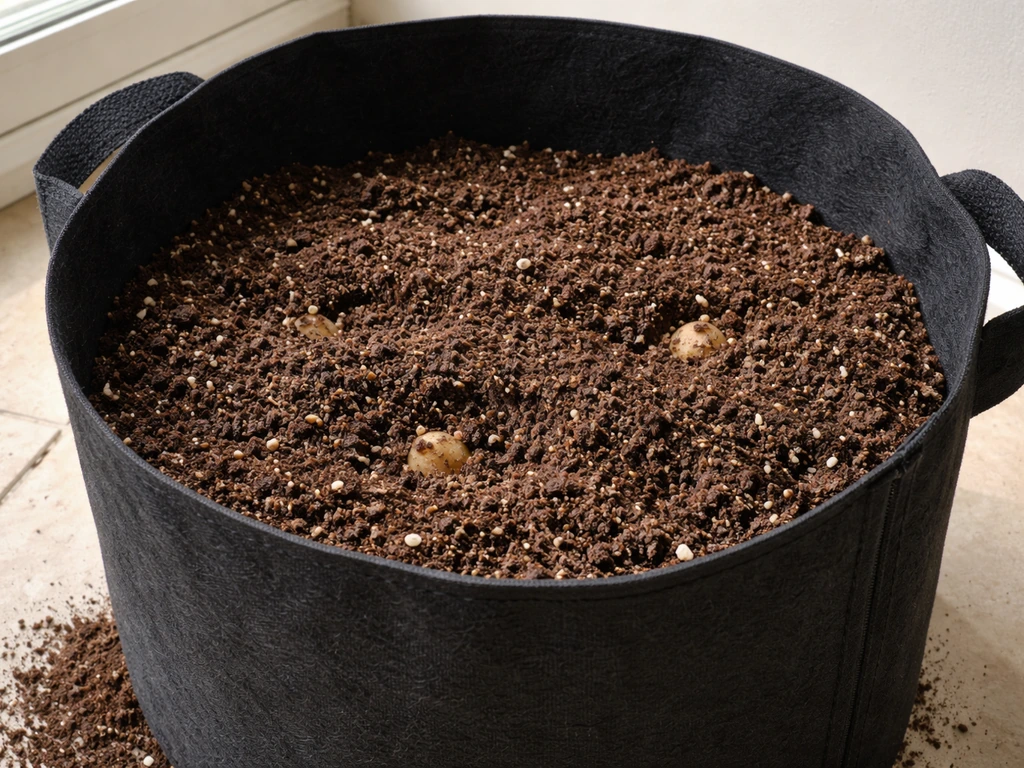
Start with 4 to 6 inches of moistened potting mix in a 10-gallon bag. Place 2 to 4 seed potato pieces with eyes facing up, leaving a few inches of space between them. Cover with another inch or two of mix and water gently. Then follow the staged hilling process described above until the bag is filled near the top by mid-season.
Shallow-rooted crops (lettuce, spinach, herbs, strawberries)
These plants don't need more than 8 to 10 inches of root depth, so a shorter bag or a bag only partially filled works fine. Fill to within 2 inches of the rim. You don't need to use a massive 10-gallon bag for herbs or lettuce. A 1 to 3 gallon bag filled correctly will outperform a 10-gallon bag that's half-empty and drying out unevenly.
Woody plants and trees
Trees and shrubs grown in fabric bags (which is increasingly common for nursery stock and air-pruning production) need the full depth of the bag filled. Leave 2 to 3 inches of headspace. Because these plants stay in their bags for longer periods and are watered less frequently per inch of soil depth, maintaining that headspace is especially important for directing water where it needs to go without runoff.
Choosing and preparing the right soil mix
Regular garden soil is a hard no for fabric grow bags. It compacts under irrigation, collapses air pore spaces, and makes the bag extremely heavy. What you want is a quality potting mix that includes aerating components. A reliable starting blend for vegetable grow bags is roughly two parts quality potting mix combined with one part perlite and one part finished compost. The perlite keeps the mix loose and aerated even after repeated watering cycles. The compost adds nutrients and microbial life. The potting mix provides the base structure.
For potato bags specifically, a mix of potting soil and finished compost (roughly 50/50) works well because you're adding it in increments and you want it easy to work with as you hill. Avoid peat-heavy mixes for potatoes since they can become hydrophobic if they dry out between additions.
When you fill the bag, pour the mix in gradually and tap the sides of the bag gently every few inches to settle it. Do not stomp or press the mix down hard with your hands. You want it to settle under its own weight with mild encouragement, not to be compacted. Filling too aggressively destroys the pore structure you built into the mix, which is the main reason to use perlite in the first place. Stop filling when you reach your target headspace (2 to 4 inches from the rim), then place your plant and firm the soil gently around the root ball only.
What to do right after filling: your first water check
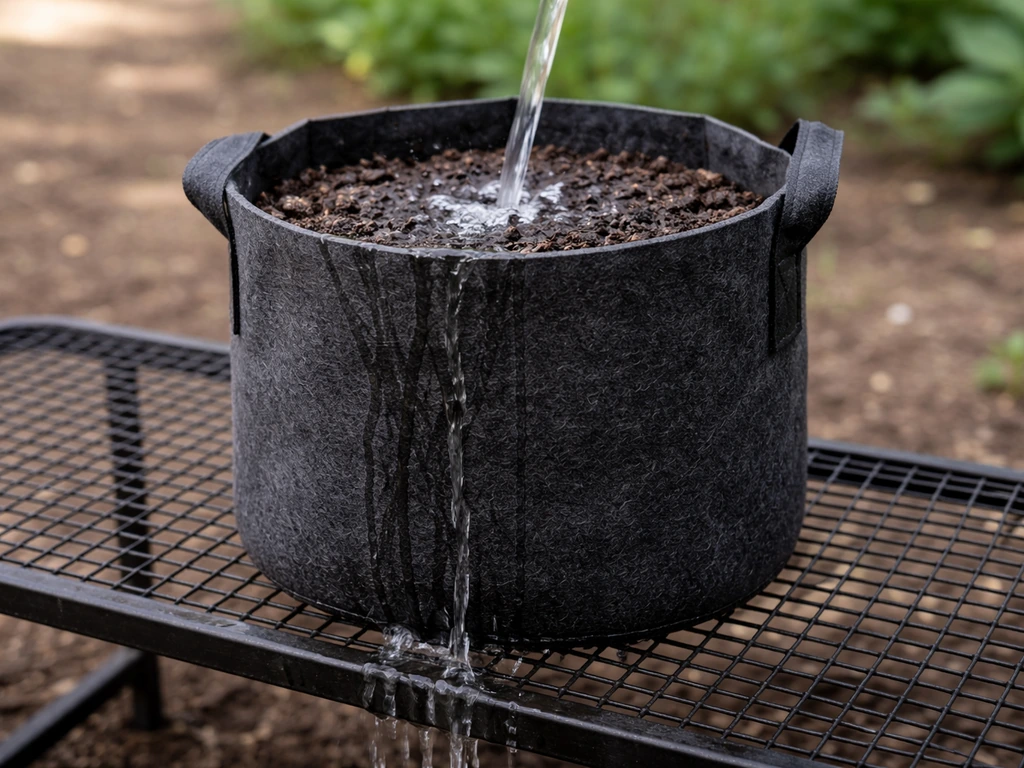
Water the bag thoroughly right after planting. You're looking for a few things. First, water should begin to seep out of the fabric sides and bottom within a minute or two of watering. If it doesn't, either the mix is hydrophobic (which sometimes happens with dry peat-based mixes) or you've compacted it too much.
If water pools on top and just sits there, the same diagnosis applies. If you notice standing water, your grow bag may be holding more than it should, so check whether the bag is leaking water or draining properly water pools on top and just sits there. Second, make sure the bag isn't sitting in a pool of its own runoff for more than a few minutes.
Placing the bag on a slightly elevated surface or using a saucer that you empty regularly solves most runoff issues. A saucer is especially useful for smaller bags indoors or on patios, but you don't want the bag perpetually sitting in collected water.
After that first deep watering, let the bag tell you when it's thirsty. The standard check for fabric grow bags is to push your finger about one inch below the soil surface. Do grow bags need saucers, and how do you handle runoff after watering checks like this push your finger about one inch below the soil surface. If it's dry at that depth, water again. Because fabric bags breathe from all sides, they dry out faster than plastic pots, especially in warm, windy conditions. You'll probably water more often than you expect in the peak of summer, sometimes daily for smaller bags.
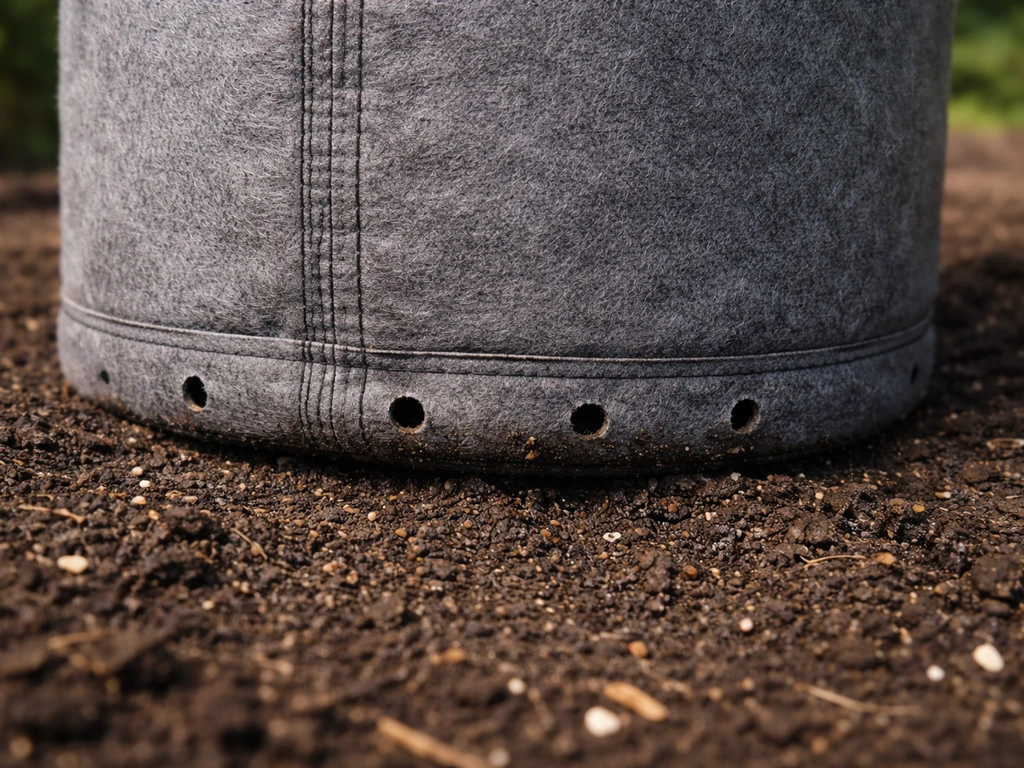
One practical note on drainage: fabric grow bags don't usually need drainage holes in the bottom the way plastic pots do, because the entire wall is permeable. If you find the soil stays soggy too long, adjust your fill level and avoid overpacking so the grow bag drains well. That's part of what makes overfilling less immediately catastrophic than it would be in a sealed container. But it doesn't mean you can ignore the fill level. Water still needs to move through the medium efficiently, and a compacted, overfilled bag slows that process significantly.
Troubleshooting: overfilled and underfilled bags
Here's how to read what your bag is telling you, and what to do about it.
| Symptom | Likely cause | Fix |
|---|---|---|
| Water runs off sides immediately during watering | Overfilled: soil at or above rim, or compacted surface | Carefully remove top 1 to 2 inches of soil to create headspace; loosen surface with a fork |
| Soil surface stays wet for hours after watering | Overfilled and/or overcompacted; poor pore structure | Remove excess soil, loosen mix, ensure perlite is in the blend |
| Mold or fungus gnats on soil surface | Surface too wet due to overfilling and poor drainage | Reduce fill level, add a thin layer of perlite to the surface to dry it out faster |
| Plant looks stressed, yellowing lower leaves despite watering | Root zone staying waterlogged due to compacted/overfilled mix | Carefully repot or reduce fill, amend mix with more perlite |
| Plant is wobbly and unstable | Underfilled: not enough soil around the root zone | Add more potting mix around the base until the root ball is firmly supported |
| Bag dries out extremely fast, plant wilts daily | Underfilled: insufficient soil volume to hold moisture | Top up with quality potting mix to the 2 to 4 inch headspace target |
| Roots visibly emerging from the top of the bag | Underfilled: root ball placed too high, insufficient soil cover | Add a layer of mix over roots; ensure the plant is set at the right depth at next repot |
| Soil level dropped significantly after a few waterings | Normal settling, but may be too severe if over 2 inches lost | Top dress with compost or potting mix to restore the correct level |
One situation that trips up new growers is confusing normal soil settling with underfilling. Some settling, maybe half an inch to an inch over the first week, is normal. The mix is finding its natural density. But if the soil drops by 2 or more inches and the plant starts to look unstable or the root ball is sitting proud of the surrounding soil, add more mix and firm it gently around the plant. This is just part of managing a living container system, not a sign something went seriously wrong.
If you're regularly battling drainage issues or wondering whether your bag type is partly responsible, it's worth reviewing how fabric grow bags handle drainage and whether yours are performing as they should. A key detail is that grow bags generally need drainage holes to prevent water from pooling and causing root problems. Fill level is one part of the puzzle, but bag quality, fabric porosity, and growing medium all work together.
FAQ
What if my grow bag is already filled too high, can I fix it after planting?
For most crops, don’t. If you’re already near the rim, add a thin top-up only (about 0.5 to 1 inch) after the mix settles in the first couple of weeks, then stop and water gently. If you go above the target headspace, you increase runoff and can keep the top layer wet, which can invite mold or gnats.
How do I tell whether overfilling is causing drainage problems?
If water runs off the sides immediately and you can see it pooling on top for more than a few minutes, your fill level and mix structure are likely off. Another quick check is to monitor how far moisture penetrates, push a finger about 1 inch down, and confirm it’s wet there. If it stays dry near the surface, you may have hydrophobic or overpacked mix, not just a headspace issue.
If I leave headspace, does that mean the top layer will never get waterlogged?
No, it usually isn’t because the fabric can wick and evaporate from multiple sides. However, if the soil surface stays constantly wet from splashback, you can still get a waterlogged top layer. Keep at least 1 to 2 inches of headspace even after top-dressing, and water more slowly so the mix has time to absorb.
Does the right headspace change for small grow bags?
Aim for the same 2 to 4 inches of headspace, but adjust how you water. With smaller bags (like 1 to 3 gallons), they heat and dry faster, so short, frequent watering is often better than one big soak, but still water thoroughly each time until it starts to seep from the sides and bottom.
Can I top-dress with regular garden soil if the bag settles low?
If you need to top up, use a blend similar to your original growing medium (potting mix with perlite, and compost if that was part of your mix). Don’t switch to heavy garden soil for a quick fix, it can compact, destroy pore space, and make the bag drain unevenly.
Does packing the mix down hard matter if I still leave 2 to 4 inches of headspace?
Yes, even with headspace, the mix can be too compacted. Use gentle consolidation, tapping the sides as you fill, then firm only around the root ball. If you see uneven wetting or a slow “soak-in,” loosen the top layer slightly and avoid pushing more soil down to refill.
Do you follow the same “2 to 4 inches from the rim” rule for potato grow bags?
For potatoes, the staged filling matters more than reaching a specific headspace on day one. You start with about 4 to 6 inches of mix, cover loosely, then hill gradually as shoots grow, leaving around 4 inches of leafy stem exposed at each step. By harvest, you’ll be close to full because tubers form along the buried stem.
Why does my grow bag sometimes drain from the bottom but still have problems on top?
Don’t assume “it’s fine” just because the bottom is draining. In fabric bags, the side walls breathe, so the container may drain well while the top inch stays wet. If that top crust stays damp, reduce how much you add at once and consider watering in cycles (soak, wait a few minutes, soak again) instead of one heavy pour.
What should I troubleshoot first if my bag keeps pooling water?
If your bag is performing poorly, check headspace along with the other variables: mix quality (avoid garden soil), moisture penetrates about 1 inch down, and the bag sits where runoff can escape. If standing water persists, the issue may be mix hydrophobicity, overpacking, or a saucer or surface that keeps the bag in pooled water.
Next Articles
Do Grow Bags Need Holes in the Bottom? How to Decide
When to add drainage holes to fabric grow bags, how many to cut, and what to do if they stay too wet.
Do Grow Bags Leak Water? Causes and Quick Fixes
Learn if fabric grow bags leak, why seepage happens, and quick tests and fixes to stop runoff and protect roots.
Do Grow Bags Need Drainage Holes? Quick Guide for Fabric Bags
Do fabric grow bags need drainage holes? Learn when to add them, how to prevent waterlogging, and safest setup tips.