In warm weather, tomatoes in fabric grow bags typically need watering every 1 to 2 days. During a heatwave, a large plant in a small bag may need water twice a day. In cooler or cloudy conditions with a big bag, every 2 to 3 days is realistic. The honest answer is that there is no single fixed schedule, but once you understand what drives drying speed in grow bags specifically, you can dial in a routine that works for your setup within a few days.
How Often to Water Tomatoes in Grow Bags: A Guide

Marcus Holloway
22 May 2026
Why grow bags change tomato watering frequency
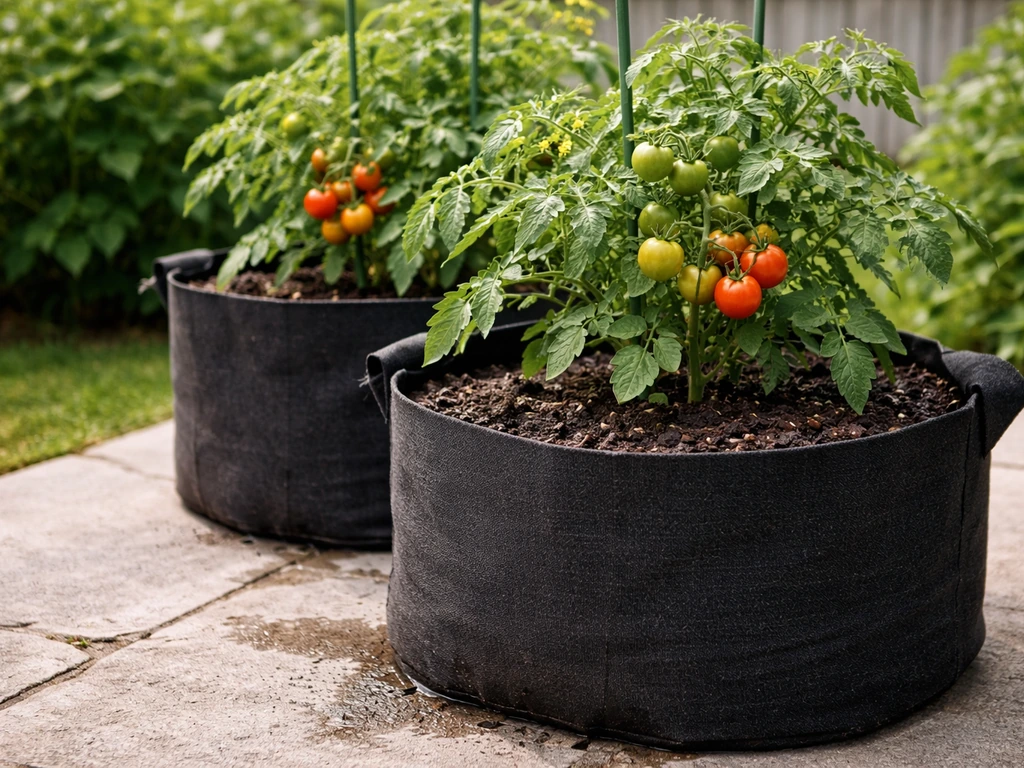
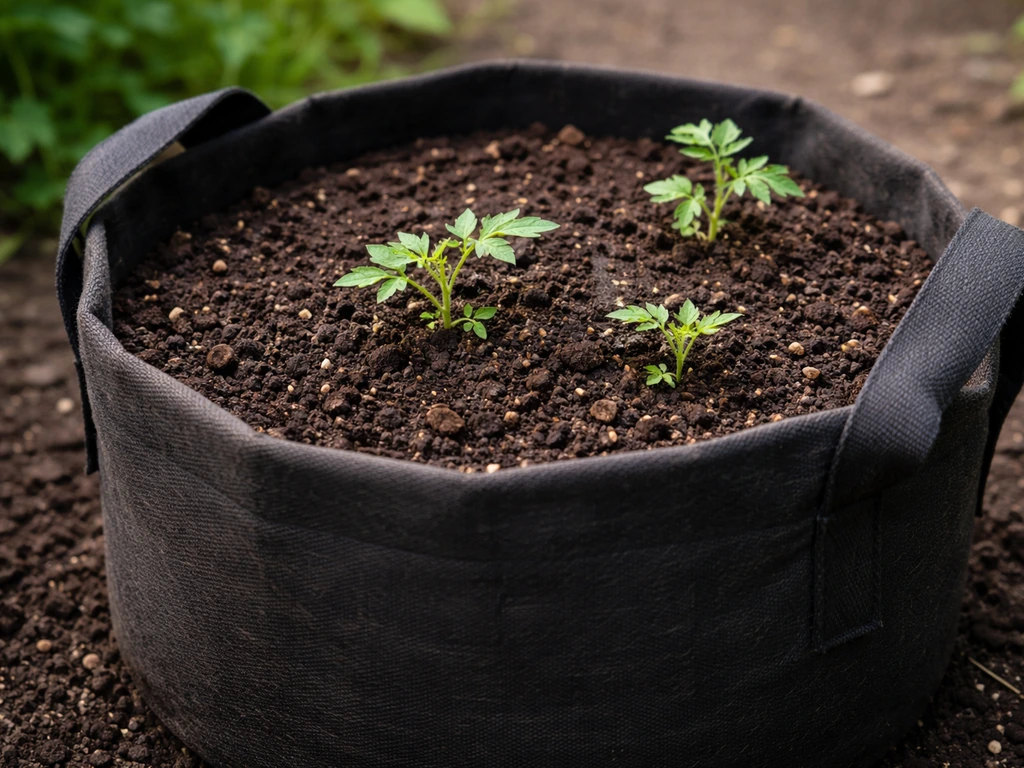
Fabric grow bags dry out faster than plastic pots, ceramic pots, or raised beds, and that is not a flaw. It is just how they work. The fabric is breathable, which means water can escape from every surface of the bag, not just the drainage holes at the bottom. This is great for root health and air pruning, but it means your soil loses moisture much faster than you might expect if you are coming from growing in plastic containers.
The sides of the bag dry out first. If you have grown in living soil or any dense potting mix, you will notice the edges of the grow bag look and feel drier than the center. This edge-drying effect is unique to fabric containers and it matters because if you only check the surface or the center, you can misjudge how dry the root zone actually is.
Several variables stack together to determine how fast your specific bag dries out:
- Bag size: A 1 to 3 gallon bag can dry out in a few hours on a hot day. A 15 to 25 gallon bag holds a much larger water reservoir and stays moist for significantly longer.
- Fabric thickness and type: Thinner, lighter fabric loses moisture faster than thick, double-walled fabric.
- Plant size and stage: A full-grown indeterminate tomato in peak summer is pulling water aggressively. A seedling in the same bag barely touches the moisture.
- Weather and sun exposure: High temperatures, low humidity, direct sun, and wind all accelerate drying. A bag sitting in full sun on a dark patio surface can dry out twice as fast as one in part shade.
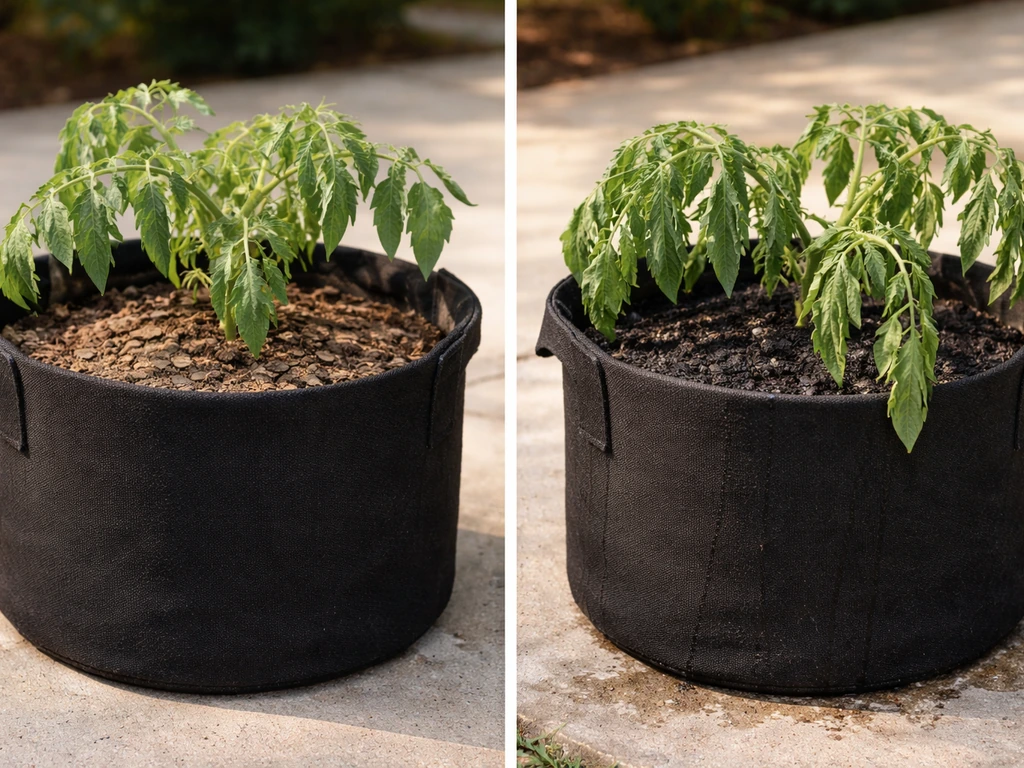
- Soil mix: Sandy or perlite-heavy mixes drain and dry fast. Mixes with coir or compost retain more moisture. The soil you choose makes a real difference.
- Mulch on top: A layer of straw or wood chip mulch on the surface of the bag slows surface evaporation noticeably.
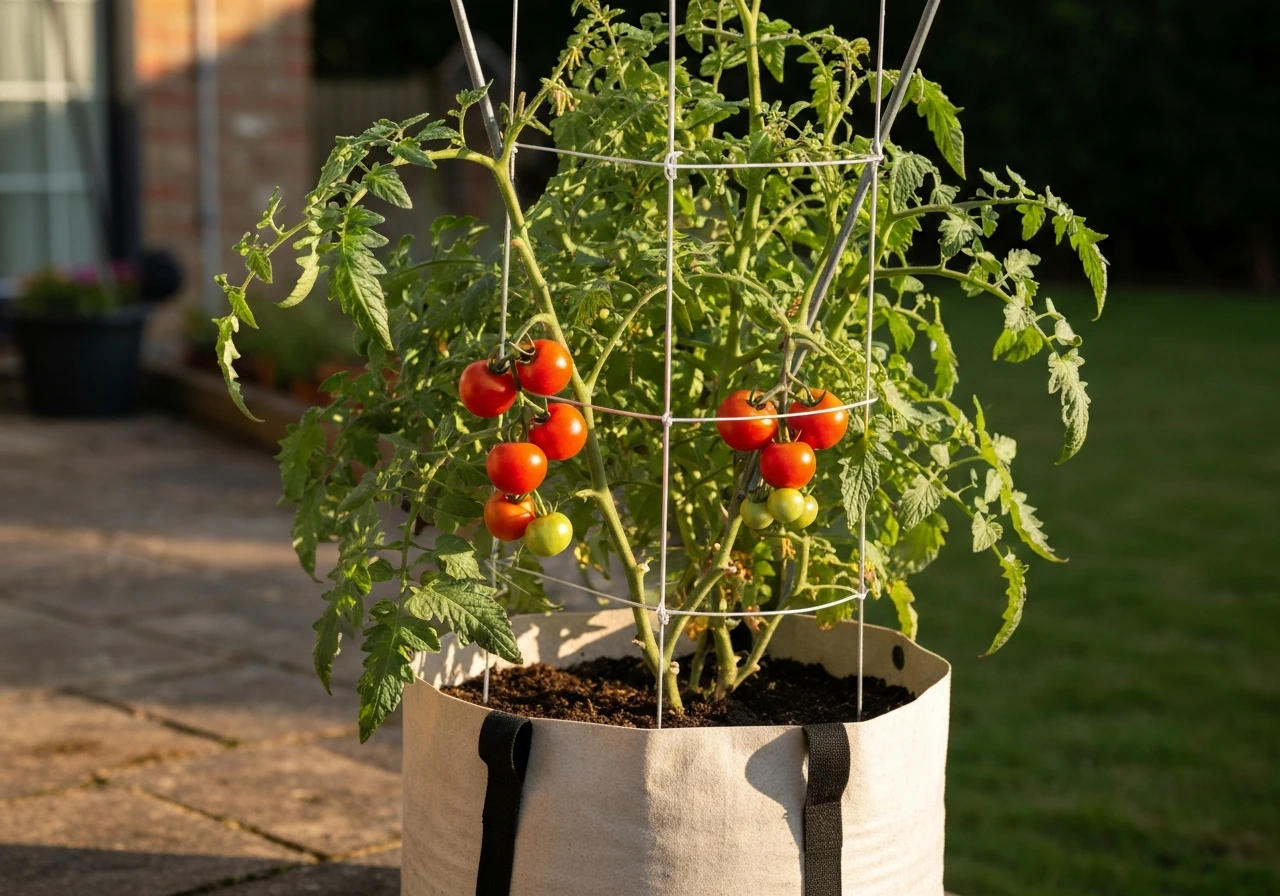
The practical takeaway: grow bags are not set-and-forget containers. You can also reuse grow bags for tomatoes with basic cleaning and drying steps, but you still need to monitor watering closely because reused bags can dry out differently. They reward growers who check in regularly rather than watering on a rigid calendar.
How to know when to water

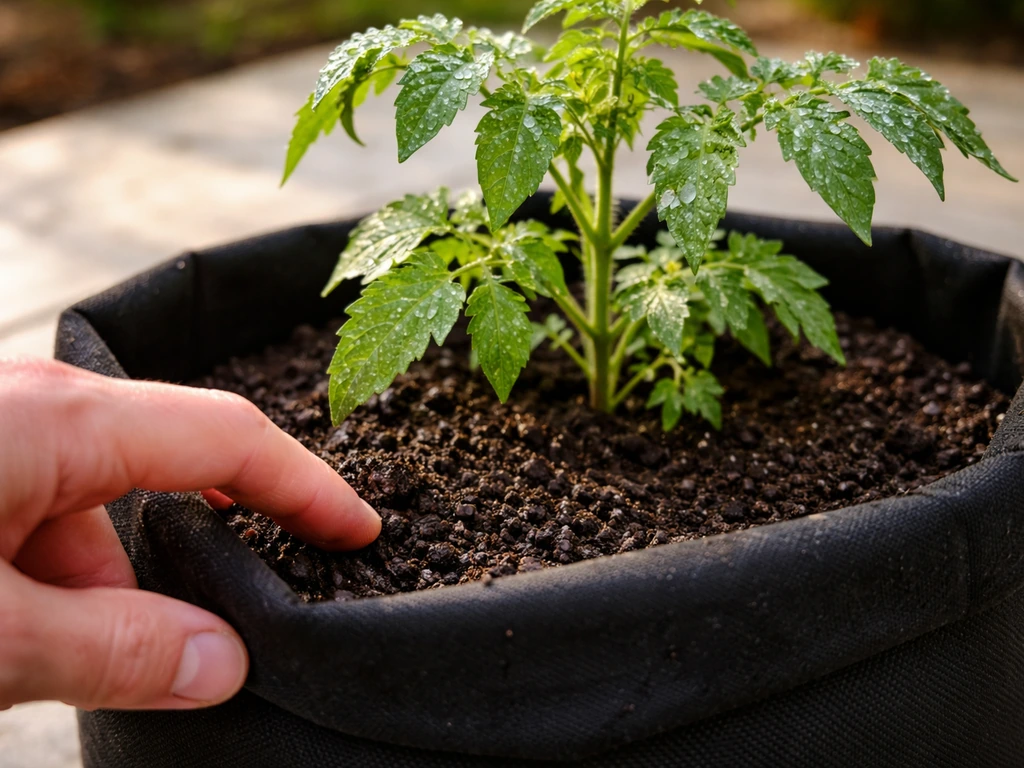
The most reliable low-tech method is the finger test, done properly. In community discussions, gardeners commonly suggest the blank" rel="noopener noreferrer">finger test for checking soil dryness before watering, but it is a less reliable approach than weighing or using instruments. If you want the simplest path to good results, a gardener's best tomato grow bag kit can help you start with the right setup and materials finger test. Push your finger into the soil about 2 inches deep (roughly two knuckles). If it feels dry or barely damp at that depth, it is time to water. If it still feels clearly moist, wait and check again in a few hours. The key is going to depth, not just feeling the surface, which can fool you completely on a sunny day.
You can also lift the bag if it is small enough. A dry grow bag feels noticeably lighter than a freshly watered one. After a few days of doing this, your hands will know the difference immediately. For larger bags, this is not practical, but a wooden chopstick or bamboo skewer inserted a few inches into the soil and left for 30 seconds works well: if it comes out with soil stuck to it, there is still moisture down there.
For growers who want more precision, a soil moisture meter or tensiometer takes the guesswork out entirely. A tensiometer measures the actual suction force your plant roots have to overcome to extract water, which tells you more than a finger ever can. It is overkill for casual home growing but genuinely useful if you have had repeated issues with inconsistent watering.
Signs your tomato needs water now
- Leaves start to look slightly dull or matte rather than glossy
- The plant wilts in the morning (afternoon wilting on a very hot day can be normal, but morning wilt means the plant is genuinely stressed)
- The soil surface is pale and pulling away from the bag edges
- The bag feels very light when you try to tilt it
Signs you can wait a bit longer
- The finger test at 2 inches still feels cool and clearly damp
- The bag feels heavy
- The plant looks turgid and upright in the morning hours
How much water tomatoes actually need in grow bags
The goal every time you water is to wet the entire root zone, not just the top inch or two. For grow bags, that means watering until you see a small amount of water draining from the bottom of the bag. This confirms water has moved all the way through the growing medium and reached the deepest roots. Extensions from Oregon State, Iowa State, and Maryland all say the same thing: water until you see runoff, not before.
A useful target from commercial greenhouse research is to aim for around 10 to 20 percent of what you put in to come out as runoff once plants are actively fruiting. That sounds precise, but in practice it just means: do not stop at the first trickle. Water steadily, let it slow down, then check the bottom of the bag. If you see free drainage happening, you are done.
One technique that works especially well with fabric grow bags is watering in two passes. Microsteading also recommends using deep, thorough watering habits, including allowing time for the first pass to soak in, so you avoid shallow wetting and encourage full wetting through the grow bag watering in two passes. Water thoroughly, wait five minutes for the soil to absorb the first round, then water again. This is particularly helpful if your soil mix has dried out fully, because dry growing media can be hydrophobic and the first pass mostly runs off the surface before soaking in. Illinois Extension specifically recommends this double-watering approach to ensure the media fully absorbs water rather than channeling around it.
As a rough starting benchmark for fully grown tomato plants, aim for at least the equivalent of 1 inch of water per week total across your waterings, adjusted upward for heat, wind, and direct sun. In practice, that often translates to significantly more water per week in the peak of summer.
How often to water tomatoes: a practical schedule
Use this as a starting framework, not a rigid rule. Adjust based on what your moisture checks are telling you.
| Conditions | Plant Stage | Starting Frequency |
|---|---|---|
| Cool weather (below 65°F), overcast | Seedling / transplant | Every 2 to 3 days |
| Cool weather (below 65°F), overcast | Established / fruiting | Every 2 days |
| Warm weather (65 to 80°F), sunny | Seedling / transplant | Every 1 to 2 days |
| Warm weather (65 to 80°F), sunny | Established / fruiting | Daily or every other day |
| Hot weather (above 85°F), full sun | Seedling / transplant | Daily |
| Hot weather (above 85°F), full sun | Established / fruiting | Once or twice daily |
| Heatwave (above 95°F), windy, full sun | Any stage | Check twice daily; water as needed |
Bag size shifts these numbers. If you are growing in a 5 gallon bag, lean toward the more frequent end of any range. If you are in a 20 to 25 gallon bag with a good moisture-retentive soil mix, you can often stretch toward the less frequent end. Minnesota Extension is direct about this: in hot, dry conditions, watering more than once a day in containers is not unusual and should not surprise you.
One thing worth noting for fruiting plants specifically: University of Arizona research suggests that watering every 3 to 4 days deeply is generally better than daily shallow watering. The key is that each watering session is thorough. If you are watering daily but only wetting the top few inches, you will actually get worse results than someone watering every other day but saturating the full root zone each time.
How to water tomatoes in grow bags correctly
Technique matters as much as frequency. Here is how to do it well:
- Water at the base of the plant, not over the leaves. Wet foliage invites fungal disease and can increase pathogen spread risk on tomatoes. This is especially important if you are watering later in the day when leaves will not dry quickly.
- Water slowly and steadily. A gentle flow gives the soil time to absorb rather than channeling water straight through. A watering wand or a slow-flow hose setting works better than a blast of water from a standard nozzle.
- Do two passes. Water until runoff starts, wait 5 minutes, then water again. This ensures your growing medium is fully saturated rather than just surface-wet.
- Check the bottom of the bag for drainage. Free-flowing water from the base tells you the root zone is wet all the way through.
- Water in the morning when possible. Morning watering gives foliage time to dry, reduces disease pressure, and means the plant has moisture available during the hottest part of the day. Avoid watering in the evening if you can help it.
- Do not water just the center of the bag. Because fabric bags dry from the edges in, make sure you water around the entire perimeter of the bag surface, not just the middle near the stem.
If you are growing outdoors in full sun on a hot surface like concrete or a dark patio, consider placing something under or around the bags to reduce radiant heat from below. This will not eliminate the faster drying of fabric bags, but it does help moderate soil temperature and moisture loss.
Common watering problems in fabric grow bags
Underwatering
This is the more common mistake, especially for people new to fabric grow bags who do not realize how quickly these containers dry out. Classic signs are morning wilting, dull or slightly curling leaves, and very light bags. The bigger problem with inconsistent moisture is that it directly causes blossom end rot (BER). BER looks like a dark, sunken, leathery patch on the bottom of the fruit. It is technically a calcium deficiency, but the calcium deficiency is almost always triggered by inconsistent watering rather than calcium being absent in the soil. When moisture fluctuates wildly, calcium cannot move through the plant effectively. Utah State, Oklahoma State, UConn, and Michigan State extensions all point to fluctuating water supply as the primary trigger for BER. Avoiding fluctuating soil moisture helps prevent blossom end rot by supporting consistent water and calcium movement, and USU Extension recommends infrequent, deep irrigation to keep soil uniformly moist blank" rel="noopener noreferrer">fluctuating water supply as the primary trigger for BER. The fix is not a calcium spray as a first step. The fix is consistent, deep watering.
Overwatering
True overwatering in fabric grow bags is less common than in plastic pots because the breathable fabric allows excess moisture to escape and prevents the waterlogged conditions that lead to root rot. That said, it is still possible, especially in cool weather or with a very dense, poorly-draining soil mix. Signs of overwatering include yellowing lower leaves, a constantly soggy bag that never seems to lighten, and a sour or anaerobic smell from the soil. If this is happening, hold off on watering and check your soil composition. Good drainage starts with choosing the right growing medium, which is worth thinking about carefully when you set up your bags. If you are unsure what to use, start by picking the best soil for.tomatoes in grow bags and then revisit drainage once your mix is in the bag choosing the right growing medium.
Skin splitting
Tomato skin splitting or cracking is another sign of inconsistent watering. It usually happens when a dry spell is followed by a heavy watering or rainfall. The fruit takes up water rapidly after stress and the skin cannot expand fast enough. The solution is the same as for BER: keep soil moisture as consistent as possible through regular, deep watering rather than irregular soakings.
Feeding vs watering: getting the schedule right for both
Watering and feeding are related but separate routines, and conflating them is a common source of confusion. Watering frequency is driven by how fast your soil dries out. Feeding frequency is driven by how fast nutrients deplete, which in grow bags happens faster than in garden beds because frequent watering leaches nutrients out of the growing medium over time.
For most home growers using a pre-amended potting mix, hold off on feeding for the first 2 to 4 weeks after transplanting. After that, a liquid tomato fertilizer every 1 to 2 weeks is a solid starting point. Minnesota Extension says starting fertilizer applications between 2 and 6 weeks after planting is appropriate depending on the potting media and growth rate. Maryland Extension suggests lightly fertilizing long-season crops like tomatoes roughly every 2 weeks to support continuous production. Iowa State Extension gives a practical example: a soluble fertilizer like 15-30-15 applied every one to two weeks.
Once your plants are flowering and setting fruit, switch to a fertilizer with higher phosphorus and potassium relative to nitrogen. High nitrogen at this stage encourages lush foliage at the expense of fruit. Look for formulas labeled for tomatoes or blooming plants, which are typically lower in nitrogen and higher in the other two.
An alternative approach some growers prefer is feeding at half-strength with every single watering. This keeps nutrient levels steady rather than spiking every two weeks. If you go this route, use a soluble fertilizer and make sure your label supports it. The advantage is that it mirrors the consistent, even approach that also helps prevent BER.
The simple rule: water when the soil needs it (check daily in warm weather), and feed on a separate schedule every 1 to 2 weeks regardless of how many times you have watered that week. Do not skip feedings just because you watered recently, and do not water extra just because you are feeding.
Putting it all together
The biggest shift in mindset for grow bag tomato growers is moving from a calendar-based routine to a check-based one. If you want the clearest step-by-step approach, follow tomorite grow bag instructions for planting, watering, and care. Check your bags daily in warm weather. Use the finger test at 2 inches deep, or lift the bag to feel its weight. When it is time to water, do it thoroughly in two passes until you see runoff from the bottom. Water at the base, not the leaves, and morning is ideal. Feed separately on a weekly or biweekly schedule once your plants are established. Keep moisture consistent and you will sidestep most of the common problems, including blossom end rot, cracking, and the wilting that stresses your plants during the most productive stage of the season. If you want the best tomato grow bags for your garden, pick fabrics and sizes that match your climate and watering habits.
FAQ
I watered until I saw runoff, but my top still feels dry. Is that normal, and should I water again?
If you see runoff but the soil still feels dry at 2 inches, it usually means the water is moving around rather than through (hydrophobic or channeling media). Fix by using the two-pass method (water thoroughly, wait 5 minutes, then water again) and ensure you stop only after the bottom is consistently wet, not just when you first get a trickle.
My tomatoes wilt in the morning. How can I tell if it is from watering too little versus something else?
Morning wilting can be from root zone moisture stress even if the bag looks slightly moist on top. Check at 2 inches (finger test) rather than the surface, and lift the bag if possible. If it is dry at depth, water that day, then keep the next few days on a check-based routine to prevent BER.
How do I avoid mistaking dry soil on the surface for a fully dry root zone in a grow bag?
Yes, hot sun can fool surface checks because the top dries quickly while moisture remains deeper. Do the finger test at about 2 inches, or use a skewer and leave it in for about 30 seconds, then read the moisture where it exits. If you only check the top inch, you will often end up watering too often but not deeply enough.
What are clear signs that I am overwatering a fabric grow bag, not just watering frequently?
If your bag stays heavy and smells sour or constantly anaerobic, that points to excess moisture and poor drainage, not the need for more frequent watering. Hold watering, let the bag dry partially, and revisit your soil mix (it should drain and aerate well). True overwatering is less common in fabric bags, but it can happen with dense, water-retentive media in cool weather.
What should I do if my tomatoes are cracking after a dry spell, and I have been watering on a loose schedule?
Tomato skin cracking and blossom end rot both tend to follow moisture swings. After a dry period, do a deep, steady watering (again, two passes helps) rather than a quick heavy soak. After that, return to check-based watering so the root zone moisture stays steadier day to day.
How should I adjust watering when it rains, especially if my grow bag is outside?
If rainfall is soaking the bag, you may need to skip your planned watering, but still check at 2 inches because fabric bags can dry quickly after the rain. After a heavy rain, verify runoff occurred and then reassess in a few hours, not immediately before watering.
Are moisture meters reliable in fabric grow bags, and how do I use them correctly?
A soil moisture meter can work, but placement matters. Insert the probe near the middle of the bag at a consistent depth each time, and do not rely on a single reading after you just watered, because it can lag. For best results, pair the meter with the 2-inch finger test so you can calibrate how it behaves in your specific mix.
Can I water less often (like every few days) without hurting my tomatoes in a grow bag?
Yes. In warm conditions, some growers avoid daily watering by using deeper sessions every 3 to 4 days once plants are fruiting, as long as the root zone is fully wetted each time (not just the top). The practical rule is still depth and runoff, so you can compress frequency without sacrificing thorough soaking.
Would putting something under the grow bag help, and what should I avoid?
Placing a board or insulation mat under the bag can reduce radiant heat from concrete and help the bottom dry slower. Do not use a material that blocks drainage, and make sure the bag still releases water freely from underneath. The goal is moderating soil temperature, not trapping water under the bag.
Should I water less or more when I apply fertilizer in grow bags?
Feeding does not replace watering. If you fertilize while the bag is dry, you can increase the risk of nutrient stress or an overly concentrated root zone. Keep watering and feeding on separate routines, and after fertilizer, check moisture so the soil is evenly damp rather than dry pockets.
Next Articles
Best Soil for Tomatoes in Grow Bags: Mix Recipes
Best grow-bag tomato soil mixes with exact ratios, amendments, and filling tips plus feeding and troubleshooting for hea
Best Tomato Grow Bags: How to Choose and Use Them
Choose the best tomato grow bags, compare to pots, sizing and setup, plus what to plant and costs for UK buyers.

Best Landscape Fabric for Grow Bags: Buy and Install Guide
Choose the best landscape fabric for grow bags with weed-blocking, drainage and aeration tips plus DIY install steps.