Yes, you can reuse fabric grow bags for tomatoes, and in many cases you can reuse the soil too, but both come with conditions. The bag itself usually lasts several seasons if the fabric is still intact and you clean it properly. The soil is trickier: if your last tomato crop was healthy, a refresh with new amendments is often enough. If anything looked diseased, skip reuse entirely and start fresh. Here's exactly how to make that call and what to do either way.
Can You Reuse Grow Bags for Tomatoes? Safe Steps

Marcus Holloway
9 Jun 2026
Should you actually reuse? The quick verdict
Reusing a fabric grow bag and its soil is a reasonable choice when your previous tomato crop was healthy, the bag fabric is structurally sound, and you're willing to do a proper refresh. It saves money and reduces waste. But it's not always the right call. Diseased soil, salt-crusted media, or a bag that's falling apart at the seams are all signs to move on. Think of it less as a yes-or-no question and more as a quick inspection checklist before you commit.
How to assess your grow bag before reusing it
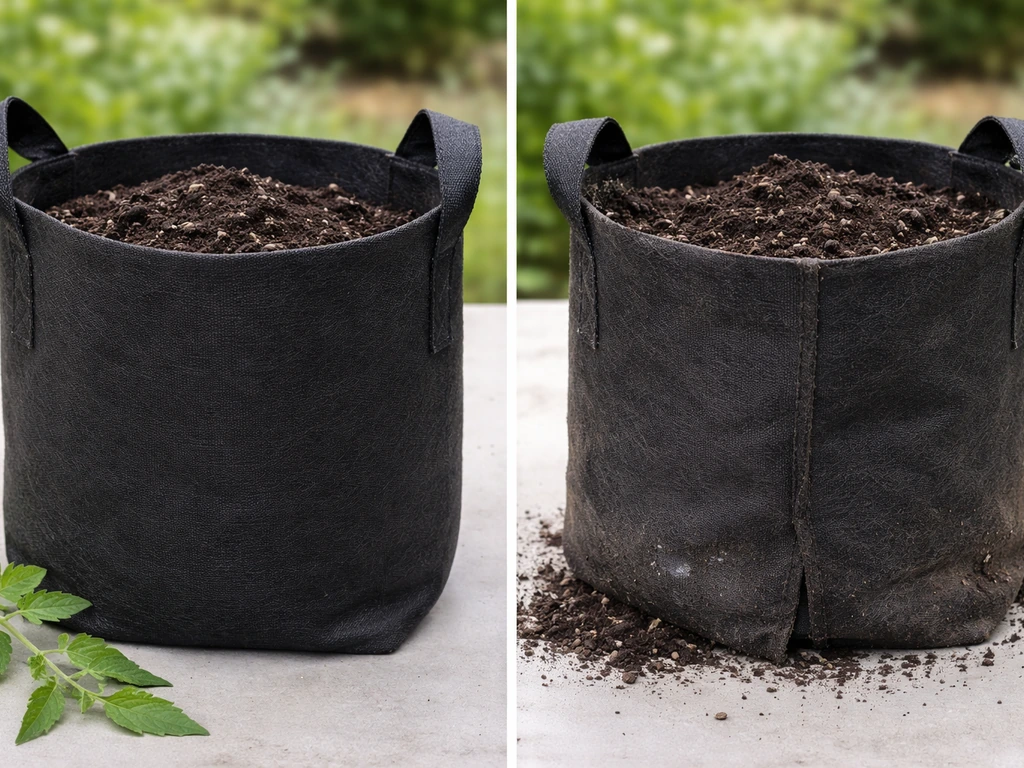
Before you do anything with the soil, look at the bag itself. A good fabric grow bag can handle multiple seasons, but the material does degrade over time, especially with repeated wet-dry cycles and sun exposure. Here's what to check:
- Fabric condition: Hold the empty bag up to light. If you can see obvious thinning, holes, or fraying around the seams, the bag may not hold soil and moisture evenly anymore. Small surface wear is fine; structural damage is not.
- Drainage: Turn the bag inside out and look at the base. Root buildup and compacted debris can partially block the porous fabric, which defeats one of the main benefits of growing in fabric. If the base looks matted and dense, it needs a thorough clean.
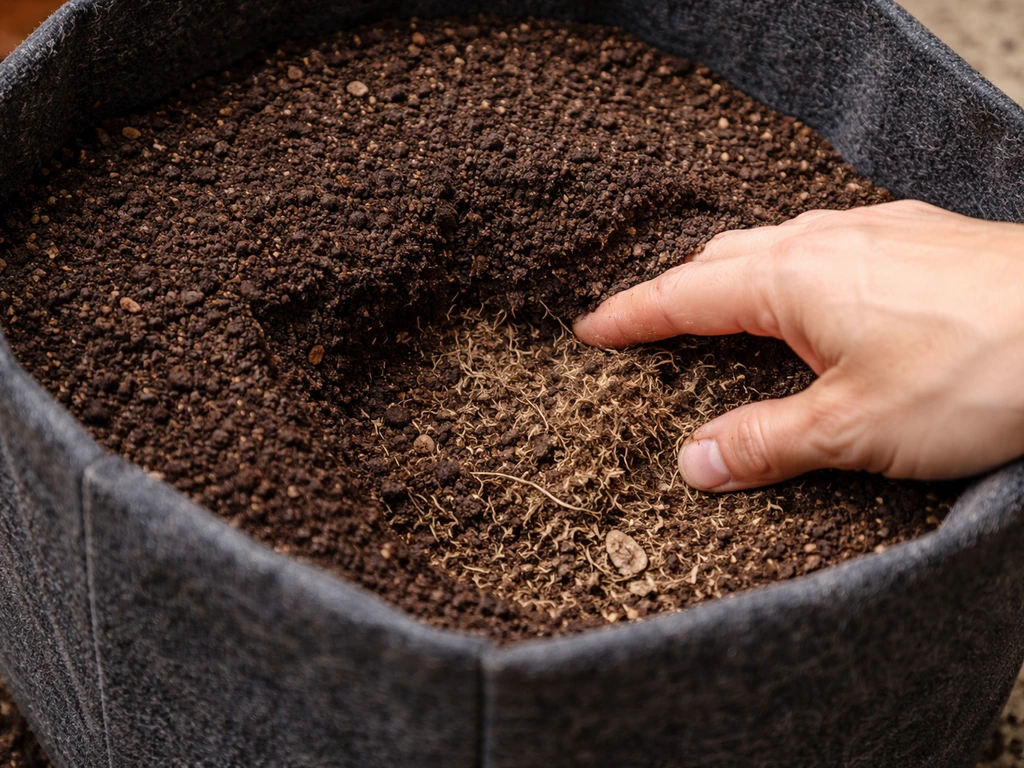
- Root material: Tomatoes leave behind a significant root ball. Most of it comes out with the soil, but fibrous roots woven into the fabric are common. These need to be removed before cleaning because they harbour moisture and can host pathogens.
- Odour: A sharp, sour, or ammonia-like smell from the used bag or soil often signals anaerobic breakdown or disease. A mild earthy smell is normal.
Once you've dumped the soil out, shake the bag well and turn it inside out to dislodge loose debris and root fragments. Then let it dry completely before any cleaning step. Smart Pot recommends dumping and drying as the baseline, and it's good advice, moisture trapped in the fabric just makes cleaning harder and can encourage mould.
Cleaning and sanitizing the bag

For a standard clean after a healthy crop, a wash with OxyClean or a diluted hydrogen peroxide solution works well and is gentler on fabric than bleach. If you had any disease in the previous crop and still want to reuse the bag, a bleach solution of 2 tablespoons per gallon of water is the more reliable sanitizing option. Soak, rinse thoroughly, and dry completely in the sun before storing or refilling. One important note: avoid boiling water as a sterilizing method, it can damage the fabric and break down the nonwoven structure of some bags.
What to do with the old tomato soil
This is where most of the decision-making happens. Tomatoes are heavy feeders and they leave spent potting mix behind, depleted of key nutrients, often with compacted structure, and potentially harbouring disease organisms depending on how the season went. You have three realistic options: refresh it in place, compost it, or sterilize it.
Refreshing the soil (best for healthy crops)
If the prior crop was healthy and the soil structure still looks reasonable (not hard-packed or salt-crusted), refreshing is the most practical route. Remove and discard about one-third of the old mix, then work in a blend of fresh potting mix, compost, and a balanced slow-release fertiliser. Tomatoes specifically need calcium and magnesium, so adding a handful of garden lime or dolomite and a light application of Epsom salts when planting addresses those gaps. The key is that you're not just topping up, you're actively improving the structure and nutrient profile.
Composting the old mix
If the soil is exhausted but not diseased, it makes excellent compost input. Tip it into your compost pile or bin, mix it with green material, and let it break down over a few months. Refreshed this way, it can go back into containers or garden beds the following season as part of a blended mix, just not as the primary component for containers where structure and drainage matter.
Sterilizing the soil (for borderline cases)
If you saw early signs of a fungal or bacterial issue but nothing severe, soil pasteurization is an option. The method recommended by University of Florida research involves heating barely moist soil to 60–70°C (140–158°F) for 30 minutes using aerated steam. This eliminates most soil-borne pathogens including Phytophthora without completely nuking the beneficial microbiome. For home growers without steam equipment, placing damp soil in a covered oven-safe container and holding it at 82°C (180°F) for 30 minutes approximates the effect. Before you do this, break up any large clumps and remove debris, clods and excess moisture block heat penetration and make the process unreliable.
When you should NOT reuse the soil or the bag
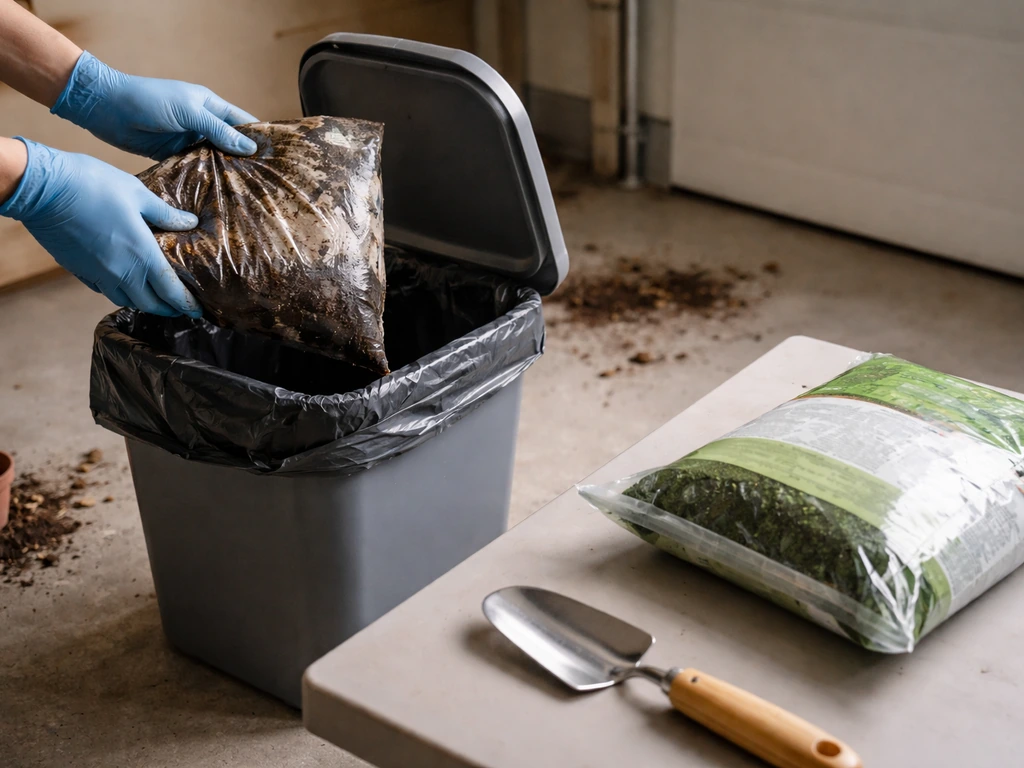
Some situations make reuse genuinely risky and not worth the effort. Oklahoma State University Extension is direct about this: if your previous plants showed signs of disease, the soil is a contamination risk because viruses, fungi, and bacteria can survive in potting media long after the plant is gone. Penn State Extension takes it a step further, when disease like damping-off or root rot appears in a container, the recommended response is to discard the soil and sterilize or replace the container entirely.
Here are the clear skip-it scenarios:
- The previous crop showed visible disease symptoms: wilting, leaf spots, stem lesions, root rot, or blight. Any of these point to soil-borne pathogens that will carry over.
- You had a pest infestation, particularly fungus gnats, root aphids, or nematodes. Larvae and eggs can persist in used media.
- There's a white crusty residue on the inside of the bag or across the top of the soil. That's salt buildup from fertiliser and mineral accumulation. Salt-laden soil stresses tomato roots and suppresses uptake even with fresh nutrients added.
- The soil smells bad, feels slimy, or has visible mould growth beyond superficial surface mould.
- The bag fabric is structurally compromised — holes, torn seams, or fabric so degraded it no longer holds shape.
Salt buildup deserves extra attention because it's easy to miss visually until it's severe. If you notice white crust or your tomatoes performed poorly last season despite regular feeding, test the electrical conductivity (EC) of the old mix before deciding to reuse it. High EC readings indicate salt accumulation that basic refreshing won't fully resolve.
Step-by-step workflow for reusing bags next season
Here's the practical sequence, whether you're doing this right after harvest or prepping ahead of the next planting window: Follow these tomorite grow bag instructions to time your setup and choose the right mix for the best results practical sequence.
- Empty the bag completely. Remove all soil and shake out root debris. Turn the bag inside out.
- Inspect the fabric as described above. If it passes, move on. If not, retire it.
- Wash the bag. OxyClean or diluted peroxide for a healthy-crop bag; 2 tablespoons bleach per gallon of water if there's any concern about sanitation. Rinse thoroughly.
- Dry completely. Lay flat or hang in the sun. Do not store a damp bag.
- Assess the old soil. Healthy with good structure? Refresh it. Exhausted but clean? Compost it. Borderline disease signs? Sterilize or discard.
- If refreshing: remove roughly one-third of the old mix. Add fresh potting mix (aim for a 50/50 blend of old refreshed mix and new mix at minimum), a generous scoop of compost, a balanced slow-release tomato fertiliser, and calcium/magnesium amendments.
- Check pH and EC if you have the tools. Penn State Extension lists pH, soluble salts, and nutrient content as the key parameters for potting media testing — even a basic test kit gives you useful information before you plant.
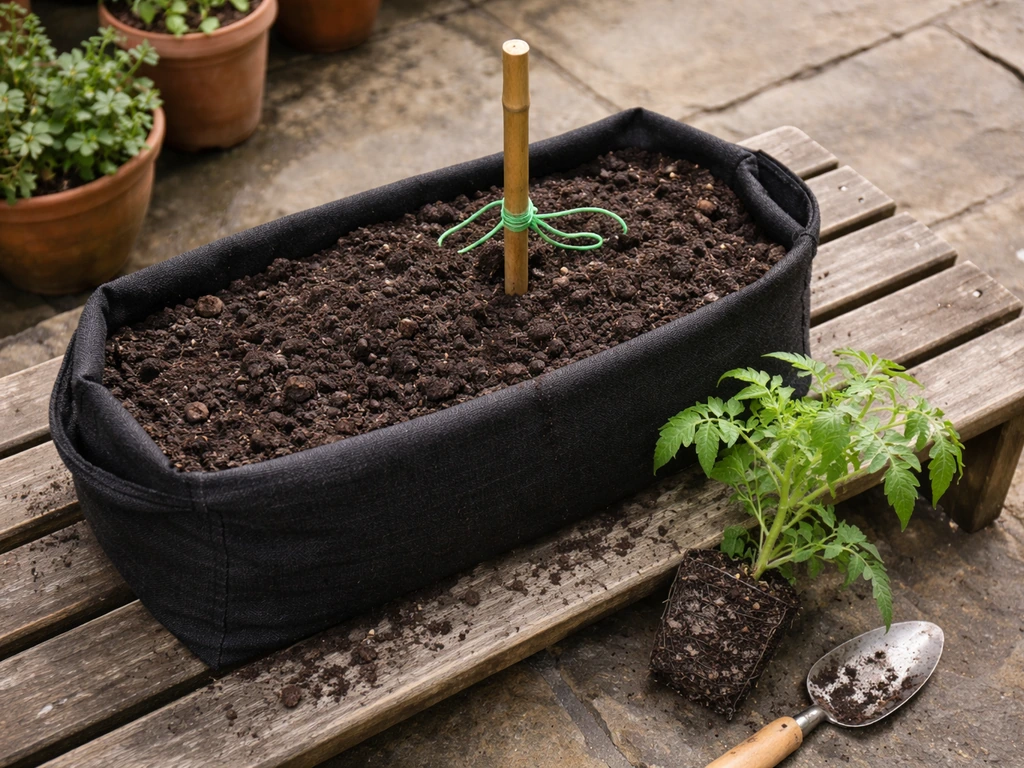
- Refill the bag and plant. Water in well to help the mix settle and integrate.
- Label the bag with the season. After two to three reuses even a well-maintained bag and refreshed soil benefit from a full replacement.
Timing matters too. If you're doing this in autumn after harvest, clean and dry the bags and store them empty rather than leaving old soil sitting in them over winter. Soil left in a bag through cold wet months compresses, becomes hydrophobic, and is far harder to refresh come spring.
Getting the safest results: contamination control and testing
Even when you're reusing a bag that looks perfectly fine, a few extra steps meaningfully reduce the risk of carryover problems with tomatoes specifically, which are vulnerable to several common soil-borne diseases including Fusarium wilt and early blight.
- Don't grow tomatoes in the same bag for more than two consecutive seasons without at least one season break growing a different crop. This mimics crop rotation and reduces pathogen buildup.
- If you have multiple bags, keep a simple log of what was grown where and whether any disease appeared. It sounds fussy but takes about 30 seconds and saves headaches.
- Test EC before reusing soil. University of Maryland Extension notes that measuring electrical conductivity alongside watching for plant stress signs is the most reliable way to assess salinity. Inexpensive EC meters are widely available and worth having if you run multiple containers.
- When in doubt, sterilize the bag itself with a bleach solution (2 tbsp per gallon), rinse it twice, and dry it fully. This step costs almost nothing and eliminates surface contamination.
- Use a fresh top layer of potting mix (5–7 cm) in the reused bag. Even if the bulk mix is refreshed, a fresh top layer reduces the splash-back of soil pathogens onto lower leaves, which is a common early blight entry point for tomatoes.
Reuse vs. starting fresh: honest pros and cons
There's a real cost and effort trade-off here worth being honest about. Reusing isn't always the better choice, even when it's technically possible.
| Factor | Reuse and Refresh | Start Fresh |
|---|---|---|
| Cost | Lower — mainly amendments and partial new mix | Higher — full potting mix and possibly new bags |
| Disease risk | Moderate — reduced with proper sanitation, higher if disease history | Very low — eliminates carry-over pathogens |
| Soil quality | Variable — depends on how well you refresh | Consistent — known nutrient and structure baseline |
| Effort | Moderate — inspection, cleaning, amending required | Low — fill and plant |
| Environmental impact | Lower waste, less resource use | More waste from discarded mix and bags |
| Best for | Experienced growers with healthy crop history | Beginners, disease-affected crops, or year-one setup |
If you're just getting started with grow bags, starting fresh each season removes variables while you're still learning what works in your setup. Once you have a season or two under your belt and know your watering habits, feeding schedule, and how your bags perform, reusing becomes a smarter and more efficient choice. The best tomato grow bag results generally come from understanding your whole system, which includes knowing what soil mix and watering frequency your specific setup needs, not just whether the bag is reusable. In hot, dry conditions, University of Missouri Extension notes that container plants may need watering daily or even twice a day, which is often more frequent than ground-bed watering blank" rel="noopener noreferrer">watering daily or even twice a day during hot, dry conditions. A good gardener's best tomato grow bag kit can make this reuse process simpler with the right bag size and setup. In grow bags, watering tomatoes often needs more frequent checks than in-ground beds because the mix dries out faster watering frequency. If you are choosing new containers, look for the best tomato grow bags based on fabric quality, drainage, and how long they hold up.
For experienced growers who had a clean, productive season, the refresh-and-reuse approach is genuinely worth it. A 20-litre fabric bag used for one tomato season still has a lot of life left in both the bag and the soil. With proper cleaning, targeted amendments, and a basic sanitation step, you're setting up the next crop almost as well as if you'd started from scratch, and at a fraction of the cost.
FAQ
Can you reuse grow bags for tomatoes if you didn’t rotate the location or you planted the same tomato variety in them before?
Yes, as long as the prior crop was healthy and you complete the bag inspection and proper soil refresh or sanitizing. Reusing is mainly about disease and soil condition, not the tomato variety, but identical planting patterns can mask early issues, so inspect foliage for spots, wilting, and root health before deciding to reuse.
What EC or salt buildup level means I should stop reusing the old potting mix?
If you find high electrical conductivity readings (often a sign salts accumulated beyond what amendments can correct), treat it as a skip-it scenario and discard or pasteurize/replace. Since target EC ranges depend on your fertilizer program, the practical approach is to compare your measured EC to what you normally feed with, and if your tomatoes previously struggled despite regular feeding, assume salts are the problem and start fresh.
Is it safe to reuse the bag right after harvest without washing or sanitizing it?
Only for a very clean, disease-free season. Even then, at minimum you should dump, shake out debris, turn and let it fully dry, then wash with a gentle oxygen-based cleaner. Skipping cleaning increases the chance of carrying fungal spores, and moisture left in fabric can encourage mold during storage.
Can you reuse tomato grow-bag soil if the plant had yellowing leaves from nutrient deficiency?
Usually yes, nutrient-related yellowing alone is not the same as contagious disease. Refreshing with fresh mix, compost, and targeted amendments (including calcium and magnesium) is typically the right move. However, if yellowing came with lesions, damping-off, or root rot symptoms, switch to sanitize or discard.
Should I reuse the soil if the bag stayed outside through winter rain and cold?
Generally no, it becomes a higher-risk material to refresh because it compresses, turns hydrophobic, and is harder to heat-sanitize evenly. The better approach is cleaning and drying the bags and storing them empty, then rebuilding the mix fresh for the next planting window.
How much of the old soil should I keep when reusing, and what if the mix is still fluffy?
A common safe approach is to remove and discard about one-third, then blend in fresh potting mix, compost, and slow-release fertilizer. If the mix is still fluffy and shows no salt crusting, you can keep more, but only if you also correct fertility and still verify there were no disease signs.
If I pasteurize soil, can I reuse it immediately or do I need to wait?
After pasteurization, let the soil cool completely and ensure it doesn’t stay overly wet before refilling the bag. In general, you should avoid planting into steaming or saturated media, since it can stress roots and make re-growth uneven. Cooling and proper moisture management are the practical “wait steps.”
Can I reuse the bag for tomatoes again if the last season ended with root rot or damping-off?
No, that’s a discard or replace situation. When damping-off or root rot shows up, organisms can persist in the media, and even if you refresh, the risk remains. The safest path is to discard the soil and sterilize or replace the container/bag.
Is it okay to sterilize grow bags with bleach and then reuse them for tomatoes right away?
Use bleach only as a sanitizing step for bags when you had disease risk, then always rinse thoroughly and dry completely in the sun before refilling. Residual bleach can harm roots and beneficial soil life, so the rinse and full dry are the non-negotiable parts.
Next Articles
Tomorite Grow Bag Instructions: Step by Step Tomato Guide
Step-by-step tomorite grow bag instructions for fabric bags: planting, watering, feeding, troubleshooting, harvest and a
Gardener's Best Tomato Grow Bag Kit: Setup and Care Guide
Set up and care for a gardener's best tomato grow bag kit with sizing, watering, feeding, training, and fixes.
How Often to Water Tomatoes in Grow Bags: A Guide
Learn how often and how much to water tomatoes in fabric grow bags, plus feeding timing and quick troubleshooting.