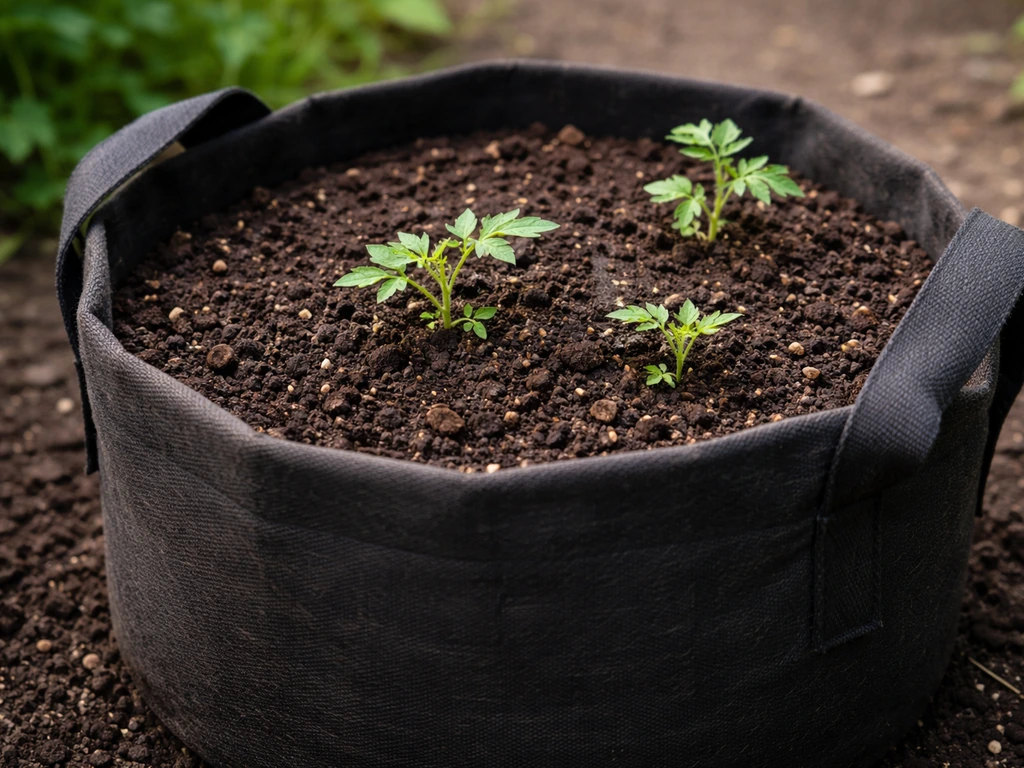
The best soil for tomatoes in grow bags is a loose, well-draining potting mix with added perlite, compost, and ideally some worm castings or coco coir. It should never be straight garden soil or raised-bed soil. That is the short answer. Everything below explains exactly why, what to buy, how to mix it yourself, and how to keep it performing all season in a fabric grow bag.
Best Soil for Tomatoes in Grow Bags: Mix Recipes

Marcus Holloway
21 Apr 2026
What "best soil" actually means for grow-bag tomatoes
Fabric grow bags change the rules compared to ground planting. The fabric walls breathe, which means water escapes faster, roots air-prune at the edges instead of circling, and nutrients leach out with every watering. Those three facts drive every decision about your growing medium.
What you need is a mix that does several things at once: drains fast enough that roots never sit in waterlogged media, stays loose enough to allow oxygen deep into the root zone, holds just enough moisture between waterings so the bag doesn't dry out in hours, and carries enough organic matter and slow-release nutrition to fuel a heavy-feeding crop like tomatoes. On top of that, pH needs to sit between 6.0 and 6.8 (the University of Missouri Extension cites 6.4 as the sweet spot), because outside that range key nutrients like potassium become unavailable regardless of how much fertilizer you add.
The specific properties to look for in a grow-bag tomato mix are listed below, and I'll come back to each one when we talk about amendments and troubleshooting.
- Drainage and aeration: the mix should drain freely within seconds of watering, never clump or stay soggy
- Water retention: enough organic matter (compost, coco coir) to slow moisture loss without causing compaction
- Neutral-to-slightly-acidic pH: target 6.0–6.8, ideally around 6.4
- Nutrient density: a base of quality compost plus slow-release fertilizer to offset leaching
- Light, low-compaction structure: heavy or dense mixes collapse in fabric bags over the season and suffocate roots
The best pre-mixed options you can buy (and what to skip)
If you want to grab something off the shelf and get growing today, a quality all-purpose potting mix is the right starting point. If you want an easier route, a gardener's best tomato grow bag kit can help you get the right mix and start strong with less guesswork a quality all-purpose potting mix. Not raised-bed mix, not garden soil, not topsoil. Here is why those distinctions matter.
| Medium Type | Good for Grow Bags? | Why |
|---|---|---|
| Premium potting mix (e.g., FoxFarm Ocean Forest, Espoma Organic Potting Mix, Pro-Mix BX) | Yes, with minor amendments | Designed for container drainage and aeration; balanced pH; contains perlite |
| Raised-bed soil (e.g., Miracle-Gro Raised Bed Mix) | Marginal | Too dense for fabric bags; compacts quickly; poor aeration for confined roots |
| Garden soil / topsoil | No | Compacts severely in containers, kills drainage, harbors pests and disease |
| Seed-starting mix | No on its own | Too fine and nutrient-poor for full-season tomato production |
| Peat-based potting mix (standard Miracle-Gro potting mix) | Yes, with perlite added | Holds moisture well but needs 20–25% extra perlite to prevent waterlogging |
My go-to recommendation for beginners is FoxFarm Ocean Forest or Espoma Organic Potting Mix, both of which come with a reasonable nutrient charge and good initial pH. Even with those, I add about 20% perlite by volume because grow bags dry and drain faster than standard pots, and you want that extra air-pocket structure. Miracle-Gro Performance Organics is another solid option that is widely available and works well once you bump up the perlite.
One thing to watch out for: cheap potting mixes that list mostly peat or bark with little else. They tend to go hydrophobic (water-repellent) once they dry out, which is a real problem in a fabric bag on a hot day. I cover that in the troubleshooting section, but avoiding those mixes upfront saves headaches later.
DIY tomato grow-bag soil mix recipes with exact ratios
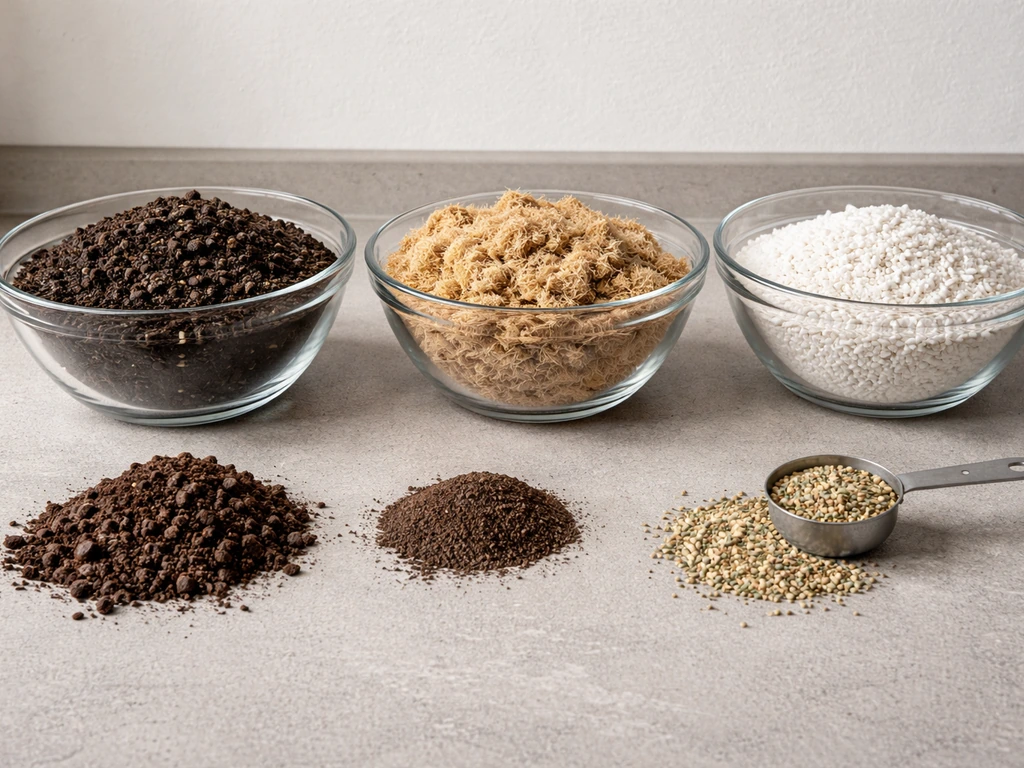
Making your own mix gives you more control and usually costs less per bag at scale. Below are two versions: a simple beginner mix and an upgraded mix for growers who want to push production.
Simple beginner mix (works for most home growers)
- 50% high-quality potting mix (e.g., FoxFarm Ocean Forest or Espoma Organic)
- 25% perlite (for drainage and aeration)
- 25% finished compost or aged garden compost
For a standard 15-gallon grow bag, you'll need roughly 2 cubic feet of mix total. That breaks down to about 1 cubic foot of potting mix, half a cubic foot of perlite, and half a cubic foot of compost. Mix everything dry in a wheelbarrow or tub before adding water. At this ratio, drainage is excellent, moisture retention is reasonable, and the compost adds a natural slow-release nutrient base.
Upgraded performance mix (for experienced growers or bigger harvests)
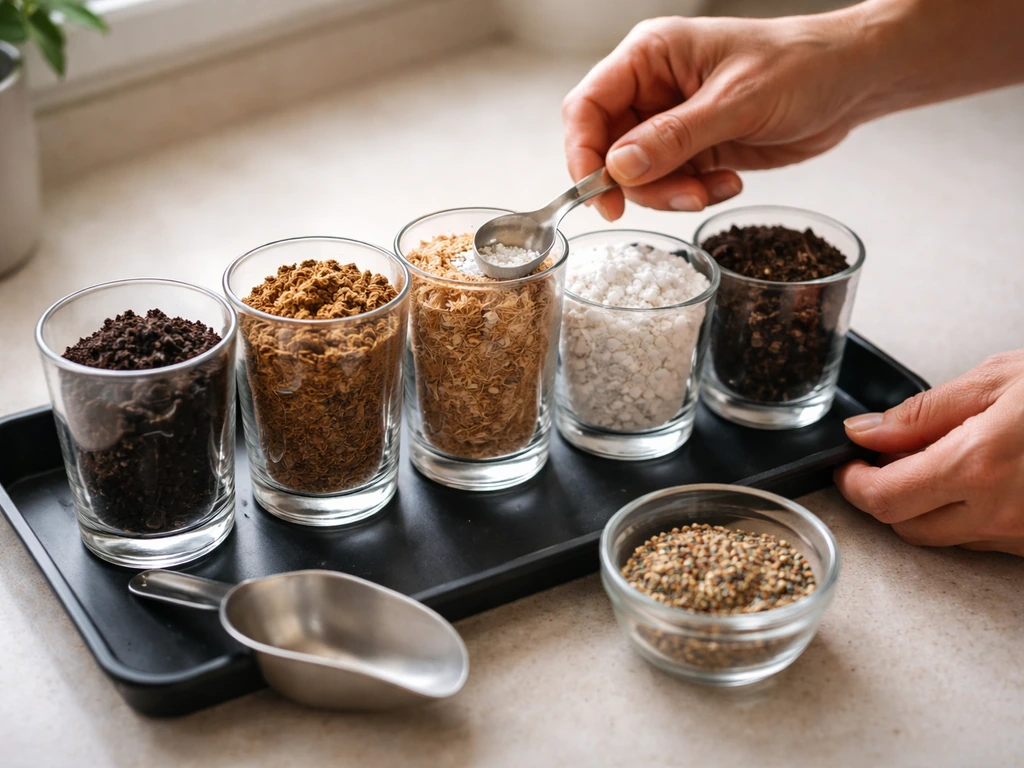
- 40% potting mix
- 20% perlite
- 20% coco coir (pre-rinsed and buffered)
- 10% worm castings
- 10% finished compost
- Plus: 1 cup of a granular slow-release balanced fertilizer (e.g., Osmocote 14-14-14 or Tomato-Tone 3-4-6) per 15-gallon bag, blended into the dry mix
Coco coir is the upgrade that makes the biggest difference. It holds roughly 8 to 10 times its weight in water while staying structurally open, which is exactly what you need in a breathable fabric bag that loses moisture quickly. Worm castings add microbial life and a gentle slow-release nutrient supply that does not burn roots. This mix will stay productive and well-structured for the full tomato season, even with heavy watering schedules.
A quick note on pH: compost and coco coir tend to land in the 5.8–6. Mississippi State University Extension recommends holding tomato nutrient solution pH around 5.6, 5.8 when growing in aggregate media like pine bark or peat-lite type mixes 5.8–6.5 range. 5 range, and quality potting mixes are typically adjusted to 6.0–6.5 at the factory. Combined, this blend usually hits the 6.0–6.8 target without any extra adjustment. If you want to be precise, a basic pH meter or test strips run about $10–$15 and take 60 seconds to use.
How to fill, pre-wet, and set up your grow bag properly
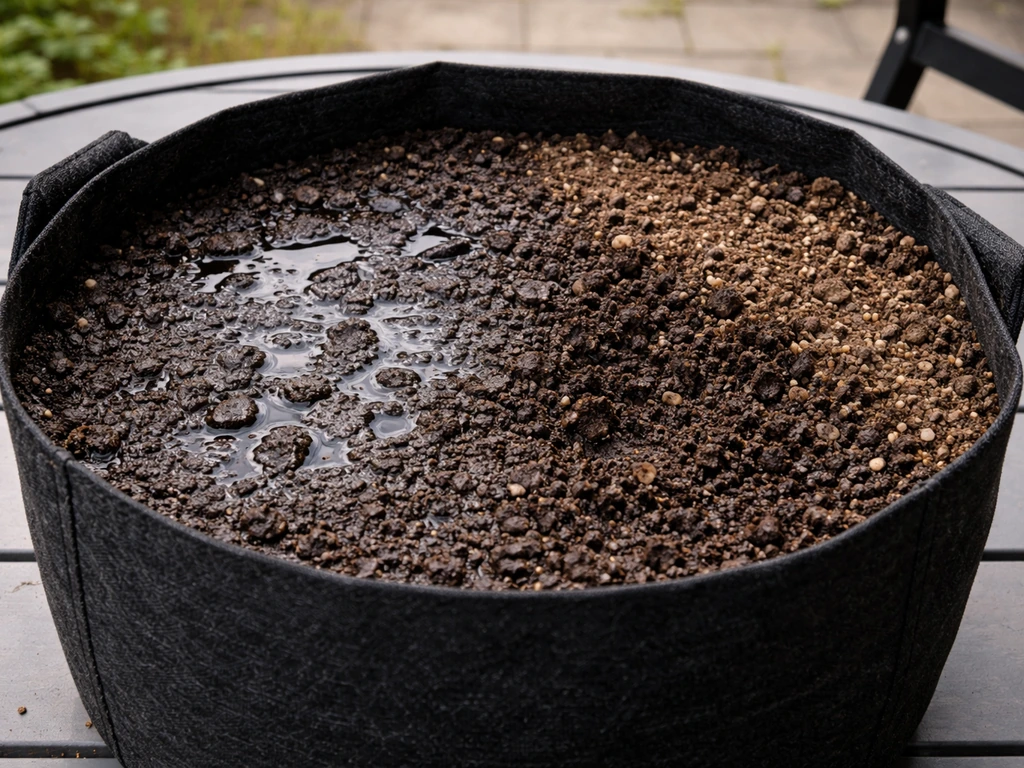
How you fill and prepare the bag matters almost as much as what you put in it. A dry mix dumped straight into the bag and watered from the top often results in uneven wetting, dry pockets, and compaction issues within the first two weeks. Here is the approach that consistently works better.
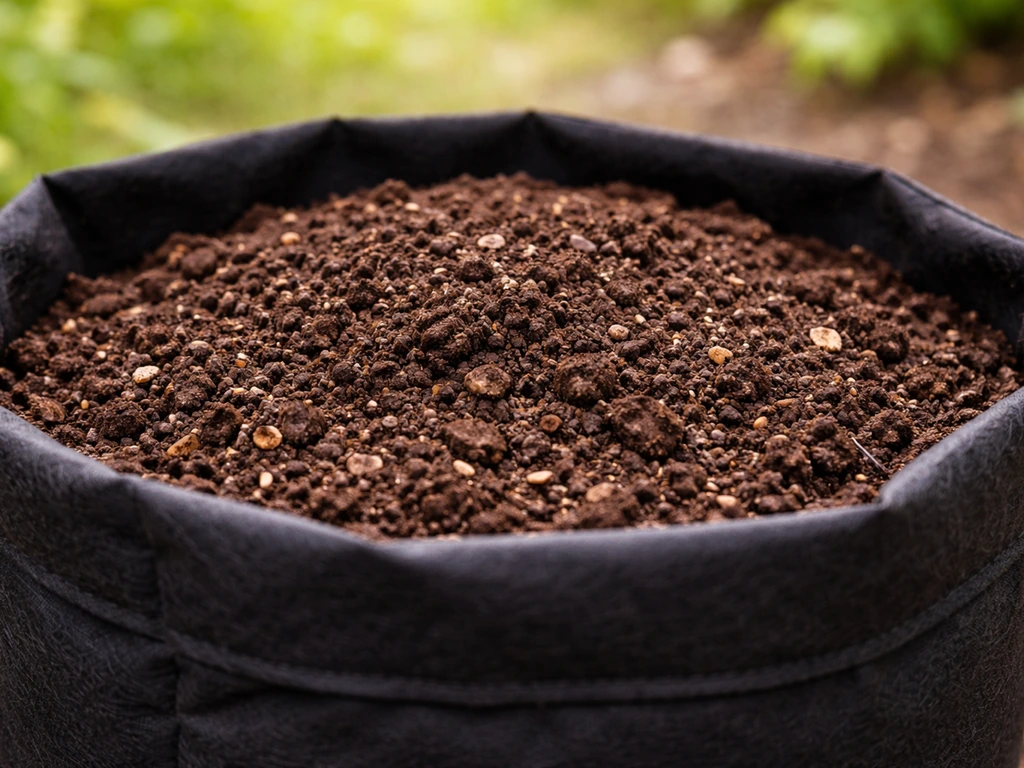
- Pre-wet the dry mix before filling: moisten your mix in a tub until it holds its shape when squeezed but does not drip. This prevents dry pockets and helps the bag settle evenly.
- Set the empty grow bag in its final position before filling. Fabric bags are heavy once filled (a 15-gallon bag can weigh 30+ pounds wet) and awkward to move.
- Fill in thirds, pressing the mix down gently with your hands between each layer. Do not pack it hard; just settle it enough to close air gaps.
- Leave 2–3 inches of headspace at the top so water does not run straight off the edges when you irrigate.
- Water thoroughly after planting until you see water draining evenly from the base of the fabric. This confirms there are no dry zones and sets the initial moisture baseline.
- Place a saucer or tray under the bag only if you need to conserve water on hot days; otherwise, free drainage is better for root health.
One thing I always do with new fabric bags: give the filled, pre-wet bag a day to settle before transplanting. The mix compacts slightly as it absorbs water, and adding a seedling into still-settling media can leave roots in air pockets. A 24-hour wait also lets you check drainage behavior and top off any spots that sank.
Watering frequency is a real adjustment for growers coming from in-ground or raised-bed growing. Fabric bags dry out 30–50% faster depending on temperature, bag size, and wind exposure. How often to water tomatoes in grow bags depends on conditions, but checking the top 2 inches of media daily once plants are established is a good habit.
Fertilizing through the season and adjusting for what tomatoes need
Even the best soil mix will run low on nutrients by midsummer. In a fabric grow bag, every watering pushes some soluble nutrients out through the base. Tomatoes are also heavy feeders, so you need an active feeding strategy from the moment you transplant to the last harvest.
The basic feeding timeline
| Growth Stage | Feeding Approach | Key Nutrients to Prioritize |
|---|---|---|
| Transplant to first flowers (weeks 1–4) | Slow-release granular blended into mix; light liquid feed weekly if no granular used | Balanced NPK (nitrogen, phosphorus, potassium); calcium |
| First flowers to fruit set (weeks 5–8) | Switch to bloom-focused liquid fertilizer (lower N, higher P and K) weekly | Phosphorus, potassium, calcium, magnesium |
| Active fruiting and ripening (weeks 9 onward) | Continue liquid feed every 7–10 days; supplement calcium if needed | Potassium, calcium; reduce nitrogen to avoid excessive foliage |
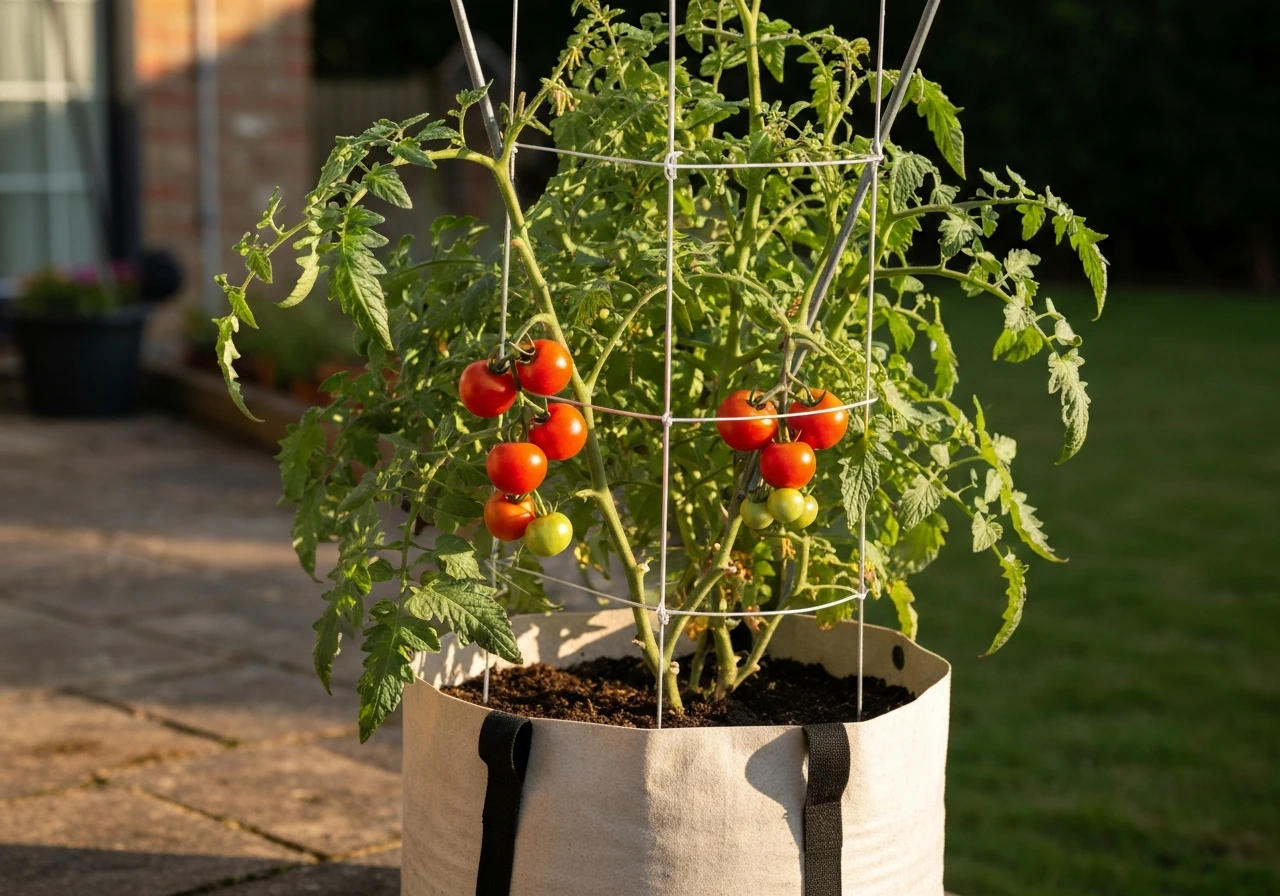
For liquid feeding, tomato-specific fertilizers like Tomorite or FoxFarm Grow Big transitioning to Tiger Bloom work well because they are formulated around tomato demand curves. Tomorite, a popular UK option, is designed specifically for fruiting crops in containers and is a reliable choice if you want a single product to carry you through the fruiting phase.
Top-dressing with worm castings every 4–5 weeks is a low-risk way to refresh organic matter and microbial life without the risk of fertilizer burn. Just spread a thin layer (half an inch or so) over the surface and water it in. It is not a replacement for a structured feed schedule, but it is a useful supplement, especially for growers who are cautious about over-fertilizing.
Reading your plants and adjusting
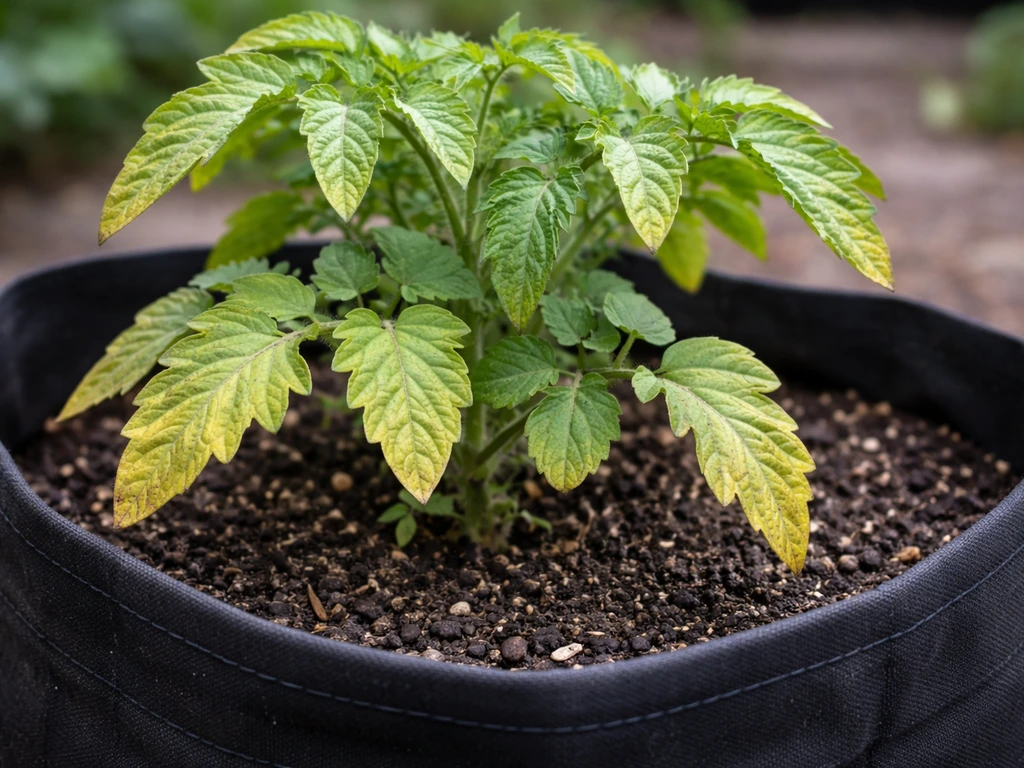
Yellowing leaves are the most common sign that something is off, but the pattern tells you what the problem is. Uniform yellowing starting with older lower leaves usually signals nitrogen deficiency from leaching, which is common by midsummer. Yellow leaves with green veins (interveinal chlorosis) often point to magnesium or iron deficiency, usually caused by pH drifting above 6.8 where those nutrients lock out. Blossom-end rot is not a soil problem per se, it is a calcium uptake issue often triggered by irregular watering and exacerbated by excessive nitrogen early in the season.
If growth stalls mid-season and leaves look pale, do not automatically dump in more fertilizer. Check the pH of your media first. Penn State Extension notes that as substrate pH rises above the optimal uptake range for tomatoes, potassium and other nutrients become unavailable even when they are physically present in the mix. A soil pH test kit (or a slurry test with a digital pH meter) will tell you if that is the problem. A dilute sulfur drench or a pH-down product applied carefully can correct it without disrupting the root zone too much.
Troubleshooting soil-related problems in grow bags
Most problems that show up in grow-bag tomatoes trace back to the growing medium: either what is in it, how it was prepared, or how it is behaving after weeks of watering. Here are the most common ones and how to deal with them.
Mix too dense or compacted
Symptoms: water sits on the surface before slowly soaking in, drainage from the base is slow or inconsistent, and plants look stunted despite regular watering and feeding. This happens when you use raised-bed soil, add too much compost without enough perlite, or when the mix naturally settles and compacts over several months. The fix mid-season is limited: you can top-dress with an inch of coarse perlite or coarse horticultural sand and let it gradually work down, or gently aerate the top few inches with a chopstick or thin rod without disturbing deep roots. For next season, adjust the recipe to include at least 20–25% perlite from the start.
Hydrophobic (water-repellent) media
Symptoms: water runs down the sides of the bag and out the base without visibly wetting the middle of the mix. The center of the bag stays dry even after heavy watering. This happens most often with cheap peat-heavy mixes that dry out completely. To fix it, submerge the entire bag in a large container of water for 30–60 minutes if possible, or water slowly and repeatedly in small amounts every 10–15 minutes until the mix rewets evenly. Adding a tiny amount of liquid dish soap (a drop per gallon of water) as a wetting agent can help break surface tension temporarily. A few drops of commercial yucca extract is a cleaner long-term option. Pre-wetting the mix before filling, as described earlier, is the best prevention.
Nutrient burn
Symptoms: brown, crispy leaf edges especially on younger growth, sometimes accompanied by curling. Usually caused by over-fertilizing with concentrated liquid feeds or using too much granular fertilizer in the initial mix. Flush the bag with clean water (two to three times the bag's volume passed through it) to leach out excess salts, then hold off on feeding for 7–10 days. After flushing, restart feeding at half the normal dose and build back up gradually.
Deficiencies from leaching
Symptoms: progressively lighter green or yellow plants despite a good start, often appearing 6–8 weeks into the season. This is normal in fabric grow bags and is not a sign that your original mix was wrong. It just means the nutrient charge has depleted faster than in a closed container. Resume or increase your regular liquid feeding schedule, and consider a mid-season top-dress of worm castings or a balanced granular slow-release fertilizer worked lightly into the top inch of media.
Drainage too fast (bag dries out within hours)
Symptoms: even with daily watering, the top few inches of media are bone dry within a few hours on warm days, and leaves wilt by afternoon. This often happens in smaller bags (5-gallon or below) or in mixes with too much perlite and not enough organic matter. Adding coco coir to your next fill is the best adjustment. In the meantime, mulching the top surface of the bag with a thin layer of straw or shredded leaves slows evaporation noticeably. You might also consider watering twice daily during the hottest weeks, once in the morning and once in the early evening.
Your next steps today
If you are starting from scratch today, the practical path is straightforward. Yes, but you can only reuse grow bags for tomatoes if you clean them thoroughly and check that the fabric and drainage still work properly can you reuse grow bags for tomatoes. Pick up a quality potting mix and a bag of perlite. If you can find coco coir and worm castings, grab those too. Mix your medium dry using the simple beginner recipe (50% potting mix, 25% perlite, 25% compost), pre-wet it before filling, and give the bag a day to settle before transplanting your tomato seedling. Plan your fertilizer strategy before the plants set flowers, because the window between transplant and first bloom is when the feeding foundation matters most.
Once your mix is sorted, the next big variable is watering consistency, which has a direct effect on nutrient availability, fruit quality, and problems like blossom-end rot. Pairing a good soil mix with a reliable watering routine is what separates grow bags that produce well from ones that underperform. Choosing the right size bag for the variety you are growing also plays into this, and if you are still deciding which grow bag to use, the differences in fabric type, size, and construction all affect how your soil behaves inside them throughout the season.
Get the mix right, fill the bag properly, and feed on a consistent schedule. That combination handles the majority of what tomatoes need to produce well in a fabric grow bag from planting through the end of harvest.
FAQ
Can I use garden soil or compost-heavy soil in my grow bag if I add fertilizer?
No, even with added fertilizer it usually fails for tomatoes in fabric bags because garden soil compacts, drains unpredictably, and drains nutrients in a way that quickly creates pH and salt swings. Stick to a potting-mix base plus structural amendments (perlite) and only moderate compost, so roots keep access to oxygen and nutrients stay available.
How do I know if my mix is too dense or will compact in my grow bag?
Do a simple squeeze-and-release test before planting. Grab a handful of moistened mix, form a loose ball, then gently break it apart. If it holds together like clay, feels sticky, or won’t aerate back into crumbs, you likely have too little perlite. Compaction shows up early as slow drainage and stunted growth even when you water.
Should I adjust pH if my mix measures outside 6.0 to 6.8?
Measure and then correct carefully. Compost and coco coir can drift acidic, while some mixes trend alkaline, but pH correction mid-season can stress roots if you overhaul it aggressively. The safer move is to test media runoff or a small sample slurry, then make small adjustments (and re-test in a few days) rather than changing products repeatedly.
Is worm castings enough for feeding, or do I still need a tomato liquid fertilizer?
Worm castings help as a gentle supplement, but they usually do not provide consistent, fast-available nutrition for fruiting tomatoes in a breathable grow bag. A common approach is liquid feeding to maintain steady growth, plus castings top-dressed every few weeks as insurance against micronutrient decline and to support soil biology.
Do I need to sterilize or “refresh” the potting mix every season?
You should not reuse old mix as-is for best results. If you reuse, at minimum remove old roots and debris, then mix with fresh potting mix and add perlite to restore structure, because the organic fraction breaks down and compacts over time. Many growers simply start with new mix for the most predictable season.
What’s the correct way to pre-wet and mix the ingredients before filling the bag?
Pre-wet the dry mix in a wheelbarrow or tub so water distributes evenly through potting mix, perlite, compost, and coco coir. If you fill the bag first and only water from the top, you can leave dry pockets in the center that later cause uneven growth. Let the filled bag settle for about a day, then top off any spots that sink.
How much fertilizer should I apply to avoid brown crispy leaf edges?
Use less than the label suggests at first, especially early in the season. If you see leaf edge burn, flush salts out with plenty of water, then pause feeding for about a week and restart at half dose. Concentrated tomato liquids and heavy granular use in the initial mix are common triggers.
My bag dries out too fast even with daily watering, what should I change first?
First check bag size, wind exposure, and whether the top is acting like a crust. For the soil, reduce excess perlite and add coco coir to increase moisture holding while keeping airflow. Also mulch the surface lightly to slow evaporation, because fabric bags can lose water quickly on warm, windy days.
Can I move my grow bag around once the tomatoes are established?
It’s possible, but avoid drastic changes that break the watering rhythm. Rotating or relocating can change how quickly the bag dries and how much sun it receives, which shifts nutrient uptake and increases stress. If you must move it, keep watering consistent for a few days and watch for early signs like sudden wilting or uneven leaf color.
How do I tell the difference between nutrient lockout and a simple watering problem?
Nutrient lockout often shows up as patterned yellowing (like interveinal chlorosis) or stalling while soil moisture seems adequate. Watering problems usually come with wilting swings and symptoms that correlate with dry or overly wet periods. When unsure, test the media pH and confirm by checking moisture at the 2-inch depth before adding more fertilizer.
Is fabric bag size important for the “best soil” mix, or is the recipe enough?
Size matters because smaller bags dry faster, so the same mix can behave differently. If you’re using a 5-gallon bag or smaller, lean a bit more toward coco coir and keep perlite from becoming excessive, because too much perlite plus limited volume leads to fast drying and nutrient depletion before fruit set.
Next Articles
Best Tomato Grow Bags: How to Choose and Use Them
Choose the best tomato grow bags, compare to pots, sizing and setup, plus what to plant and costs for UK buyers.
Best Soil for Grow Bags: Mix Recipes and How Much to Add
Best soil for grow bags: mix recipes, how much to add by bag size, and vegetable tweaks for strong drainage and yield.
Pros and Cons of Grow Bags for Vegetables and Flowers
Grow bag pros and cons for veg, flowers, trees, and mushrooms: aeration, mobility, and watering plus fixes for common is