Fabric grow bags can look pretty rough after a season or two: green algae creeping up the sides, white crusty salt deposits, muddy splashback stains, and fabric that looks tired and faded. The good news is most of that is fixable with a soft brush, a mild cleaning solution, and a few tweaks to how you water and position your bags. You do not need to replace them or buy expensive decorative pots. A clean, well-arranged grow-bag setup can genuinely look sharp on a patio or in a garden.
How to Make Grow Bags Look Better: Easy Fixes

Marcus Holloway
19 May 2026
Why your grow bags look bad (and what's actually causing it)
Before you can fix the problem, it helps to know what you are actually looking at. Most grow-bag cosmetic issues fall into a few clear categories, and each one has a different cause and fix.
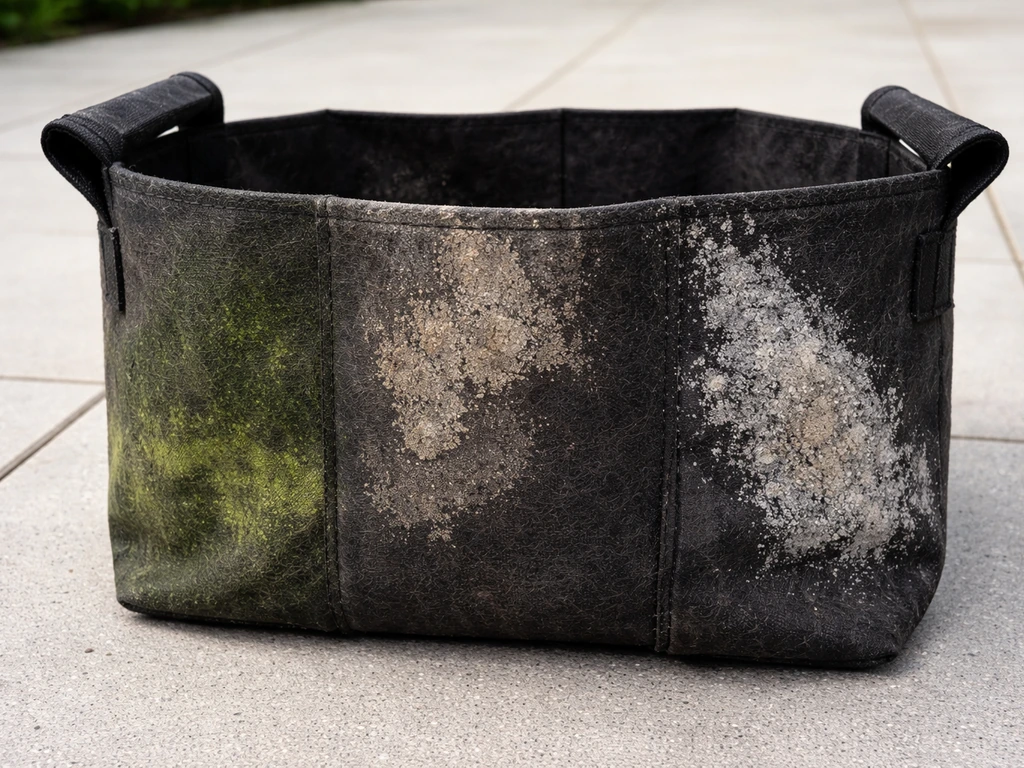
- Green or black staining: This is almost always algae or mildew. It thrives when fabric stays consistently wet, especially when bags sit directly on the ground or on a surface with poor drainage. Constant moisture plus sunlight on the bag's exterior is the perfect recipe for green creep.
- White or yellowish crust: This is mineral and fertilizer salt buildup. When water evaporates through the breathable fabric, it leaves dissolved minerals and fertilizer salts behind as a white crystallized coating. It looks chalky and can actually reduce the fabric's aeration over time.
- Brown mud and soil splashback: This happens when water hits bare soil at the top of the bag and kicks up fine particles that cling to the outer fabric. It is especially visible on lighter-colored bags after watering or rain.
- Fabric wear, pilling, and discoloration: This is usually a combination of UV exposure, abrasion from rough surfaces, and repeated wetting and drying. Cheap bags show this faster than quality woven fabric bags.
- Root residue and matted fiber: Roots grow through fabric walls, and when you empty the bag, fragments get left behind. They trap moisture and contribute to mildew if the bag is not properly dried before storage.
Identifying which of these you are dealing with matters because the cleaning approach and prevention strategy differ. A bag that is just salt-crusted needs descaling. A bag with active mildew needs sanitizing. A bag with splashback mostly needs a topdress and better watering habits. Most bags have a mix of all three, honestly.
How to clean and refresh your grow bags safely
The safest and most effective cleaning approach for fabric grow bags is a gentle one. Harsh chemicals and aggressive scrubbing can weaken the fabric, leave residues that harm roots, and shorten the life of the bag. Here is the process I use and recommend.
Step 1: Dry brush first
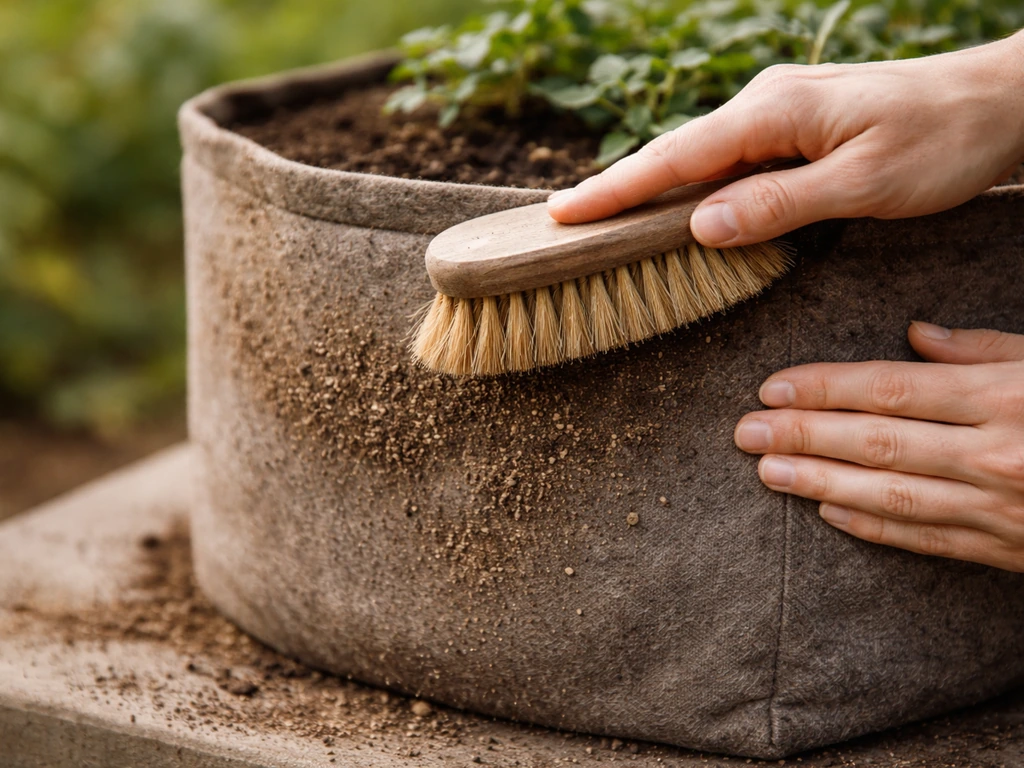
Before you add any water or solution, let the bag dry out and then use a stiff dry brush to knock off loose soil, crusty deposits, and matted root material. This takes a few minutes but dramatically reduces how much scrubbing you need to do later. Dry brushing gets into the weave and dislodges embedded particles without pushing them deeper into the fabric.
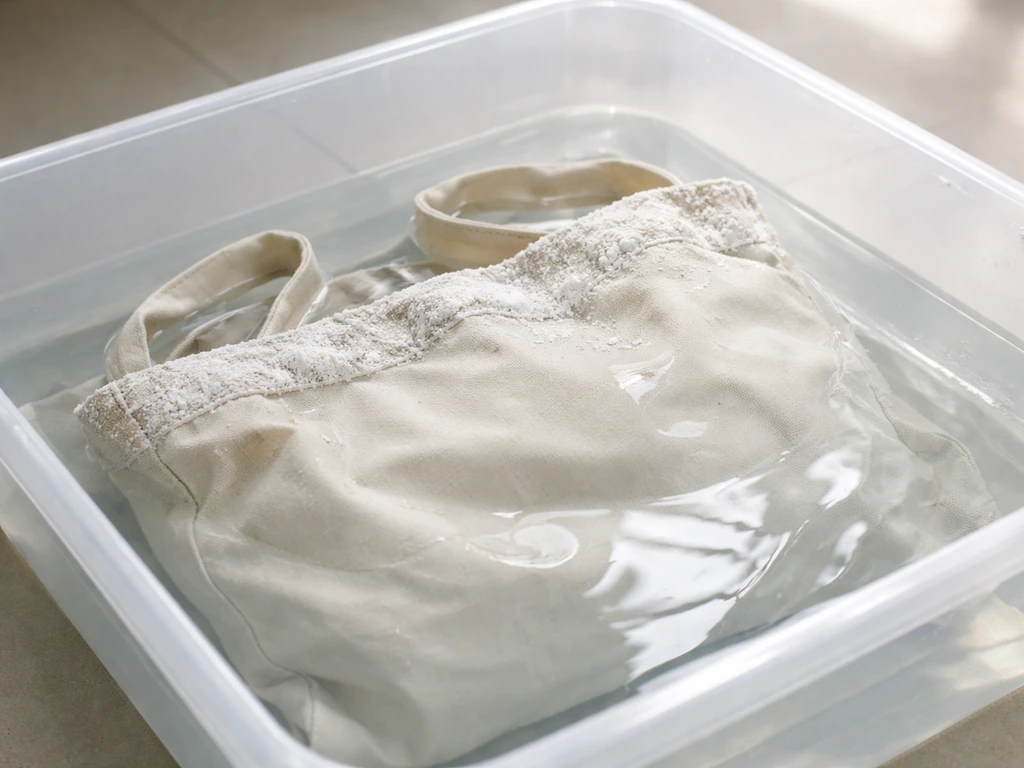
Step 2: Soak and scrub with a mild cleaning solution
For most stains, algae, and general grime, a solution of OxiClean or another non-chlorine oxygen-based cleaner is your best option. It is effective on organic staining, safe for fabric, and does not leave harmful residues. Mix according to the product directions, submerge or thoroughly wet the bag, and let it soak for 10 to 15 minutes. Then gently scrub the exterior with a soft-bristle brush. Do not dig hard into the fibers or use wire brushes as these can break down the weave.
If you are dealing with persistent mildew or want to sanitize at end of season before storage, a diluted bleach solution works but needs to be used carefully. A ratio of about 2 tablespoons of bleach per gallon of water is a commonly recommended approach. Spray or soak the bag, wait 10 to 15 minutes, then rinse extremely thoroughly until there is zero bleach smell remaining. Residual bleach can harm your next crop, so do not rush the rinse. Avoid regular or strong detergents entirely as they can weaken the fabric and leave soap residue that affects drainage.
One important warning: do not use boiling water on fabric grow bags. Boiling water can disintegrate some grow-bag fibers, particularly bags made from recycled or loosely woven materials rather than durable nylon or polypropylene. Warm water is fine, boiling is not.
Step 3: Tackle salt and mineral crust specifically
White crust on the outside of the fabric is mineral and fertilizer salt buildup, not a cleaning failure. To remove it, soak the bag thoroughly with clean water and let it sit. The water rehydrates the crystallized deposits and they become easier to brush away. For stubborn buildup, a dilute white vinegar solution (around 1 part vinegar to 3 parts water) helps dissolve the mineral crust without damaging the fabric. Rinse thoroughly afterward. Going forward, flushing your grow bags with plain water every few waterings helps prevent salts from accumulating in the first place.
Step 4: Rinse well and air dry completely
Thorough rinsing is not optional. Any cleaning solution left in the fabric can leach into your soil and affect plant health. After rinsing, open the bags fully and air dry them in the sun. Sunlight helps kill off any remaining mold spores, and full drying before storage prevents the mildew that makes bags look terrible before you have even planted anything. When the season is over, clean and thoroughly air-dry your grow bags before storing them to prevent lingering mildew and salts full drying before storage. Do not fold and store damp bags.
Stop the buildup before it starts
Cleaning reactive is fine once or twice, but the real fix is changing a few habits so your bags stay looking decent through the whole season. Most cosmetic problems with grow bags trace back to two things: too much moisture sitting on the fabric surface, and direct contact with wet ground.
Lift your bags off the ground
Constant ground contact keeps the bottom and sides of the bag damp, which encourages mildew and accelerates fabric decomposition. Getting your bags even a few centimeters off the ground makes a real difference. A simple wooden pallet, a metal plant stand, a layer of gravel, or even a few bricks under each bag improves airflow around the bottom and sides. This also keeps the drainage functioning properly, which matters for your plants as well as the appearance of the fabric.
Adjust your watering approach
Overwatering is the main driver of algae growth on grow-bag fabric. When you water more than the plant and soil can absorb, excess moisture sits in and on the fabric for longer, giving algae exactly what it needs to establish. Water slowly and let the soil absorb before adding more.
Because fabric grow bags aerate the soil through the container walls, they genuinely drain well when used correctly, which means you typically need to water more frequently but in appropriate amounts rather than drenching. Smart Pot similarly claims that its fabric containers aerate the soil by producing airflow through the container walls, which supports plant health while preserving good drainage and aeration fabric grow bags aerate the soil through the container walls.
Soaker hoses or drip irrigation directed at the base of the plant are ideal because they reduce splashback and keep the bag's exterior drier.
Manage fertilizer to reduce salt crust
If white crust is a recurring problem, look at how much fertilizer you are using and how often. Heavy liquid feeding, especially with hard water, deposits minerals on the exterior fabric as water evaporates through the breathable walls. This is somewhat unavoidable with fabric bags, but you can reduce it by flushing your bags with plain water every 4 to 6 weeks to leach out excess salts before they crust up. If the white deposits are coming back within a week or two, that is a sign you are either overfeeding or dealing with particularly hard water.
Make your grow bags look genuinely good (without hurting your plants)
Once the bags are clean, there are several practical ways to improve the look of your setup. The key constraint is that anything you put around or on top of a fabric grow bag must not block aeration through the sides or drainage from the bottom. Grow bags work because air moves through the fabric walls. Block that and you lose one of the main advantages of using them in the first place.
Topdress with mulch to hide bare soil and reduce splashback
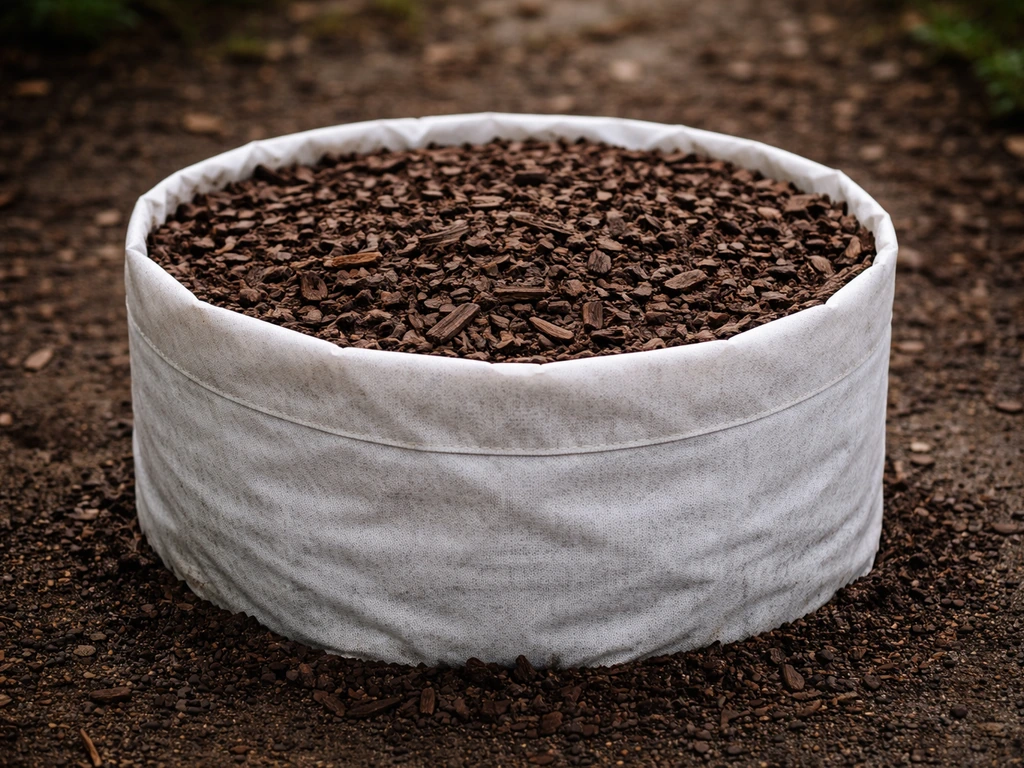
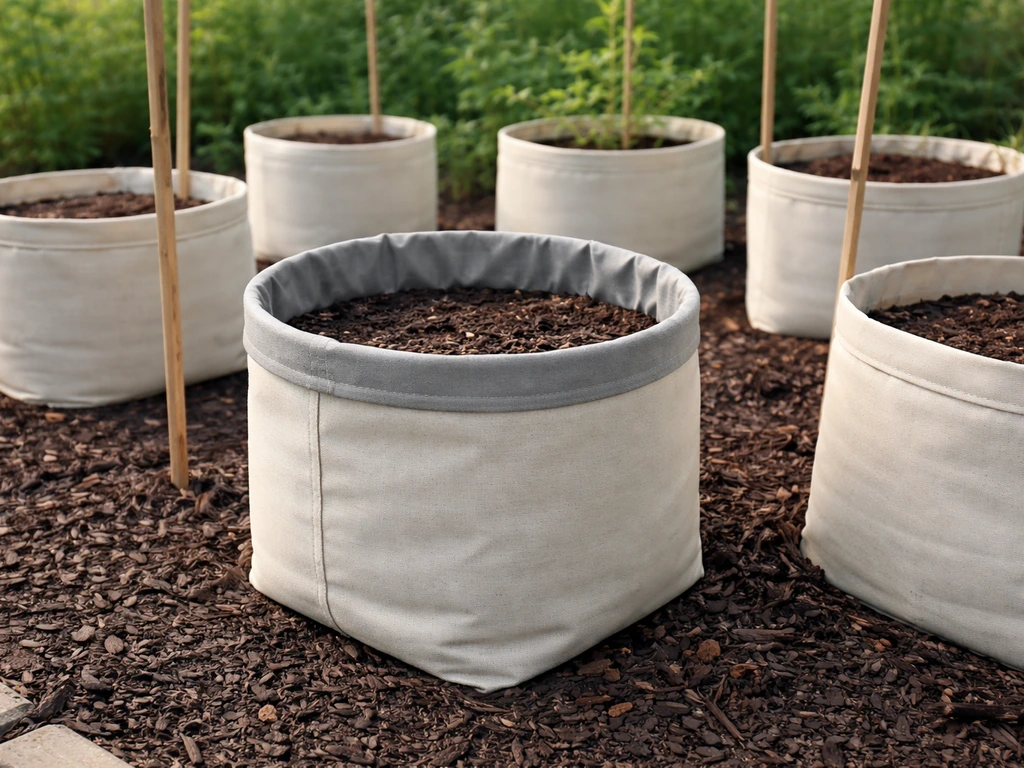
A 2 to 3 cm layer of bark chip mulch, decorative gravel, or coir fiber on top of the soil in your grow bags does two things at once. It looks much neater than exposed potting mix, and it prevents water from splashing soil particles onto the outside of the bag when you water. This is one of the cheapest and most effective visual upgrades you can make. Coir fiber mulch is especially good for edibles because it is organic and pH-neutral. Decorative pebbles or gravel work well for ornamental plants and add a polished, intentional look.
Use outer decorative containers or covers to hide the bag
Placing a fabric grow bag inside a decorative outer pot or basket is one of the cleanest visual solutions. If you want to DIY a cleaner look, you can also make grow bags from old clothes and use the same setup tips to keep them healthy. The outer container provides the aesthetic you want, and the grow bag inside still handles all the root health and drainage.
Choose an outer container that is slightly larger than the grow bag and has no drainage holes, or has holes large enough that air can still circulate. Wicker baskets, terracotta-style plastic containers, wooden crates, and ceramic pots all work well as outer covers. Just make sure there is a little clearance between the bag and the outer container so drainage is not completely blocked.
Fabric bag covers or sleeves, which are specifically designed to wrap around grow bags, are also available. These are typically made from hessian, jute, or canvas, and they give a more cohesive look to a row of bags without affecting drainage or aeration. They are particularly useful on patios where you want a consistent visual style.
Choose darker-colored bags to show less dirt
If you are buying new bags or replacing worn ones, dark gray, charcoal, or black grow bags show far less surface staining than tan, beige, or white ones. Salt deposits are still there but much less visible, and algae staining blends in rather than creating a stark contrast. Most quality grow bags come in black or dark gray for exactly this reason. Lighter-colored bags are sometimes marketed as more UV-reflective to keep roots cooler, which is a legitimate point, but if appearance matters to you, darker is almost always the more practical choice.
Upgrade the overall setup for a polished look
Individual bag improvements make a difference, but the biggest visual upgrade usually comes from how your bags are arranged as a group. A collection of grow bags that looks intentional and organized will always look better than the same bags placed randomly.
Group bags by size and plant type
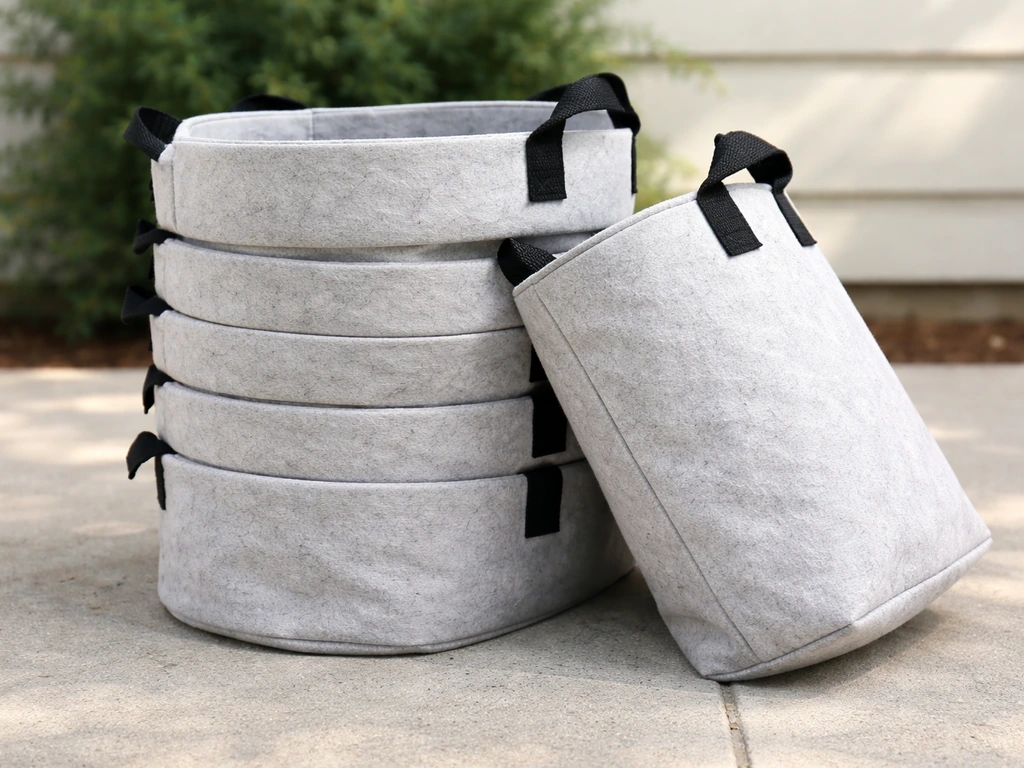
Arranging grow bags in clusters by size creates a more deliberate look. Put larger bags (the 20 to 30 gallon ones for tomatoes or fruit trees) at the back or center, and smaller bags in front. Mixing sizes randomly looks chaotic. If you are growing several of the same plant, using matching bags in a row creates a clean, purposeful effect that reads more like a designed garden than a collection of containers.
Elevate bags to add height and improve drainage
Plant stands, tiered shelving, and wooden risers all add visual height variation to your setup, which makes it more interesting to look at and prevents the flat, cluttered look of bags all sitting at the same ground level. Elevation also improves air circulation around each bag, reduces contact with wet ground, and makes it easier to check on drainage. Even raising a few bags by 15 to 20 cm on a simple stand changes the whole feel of the space.
Control drip and runoff
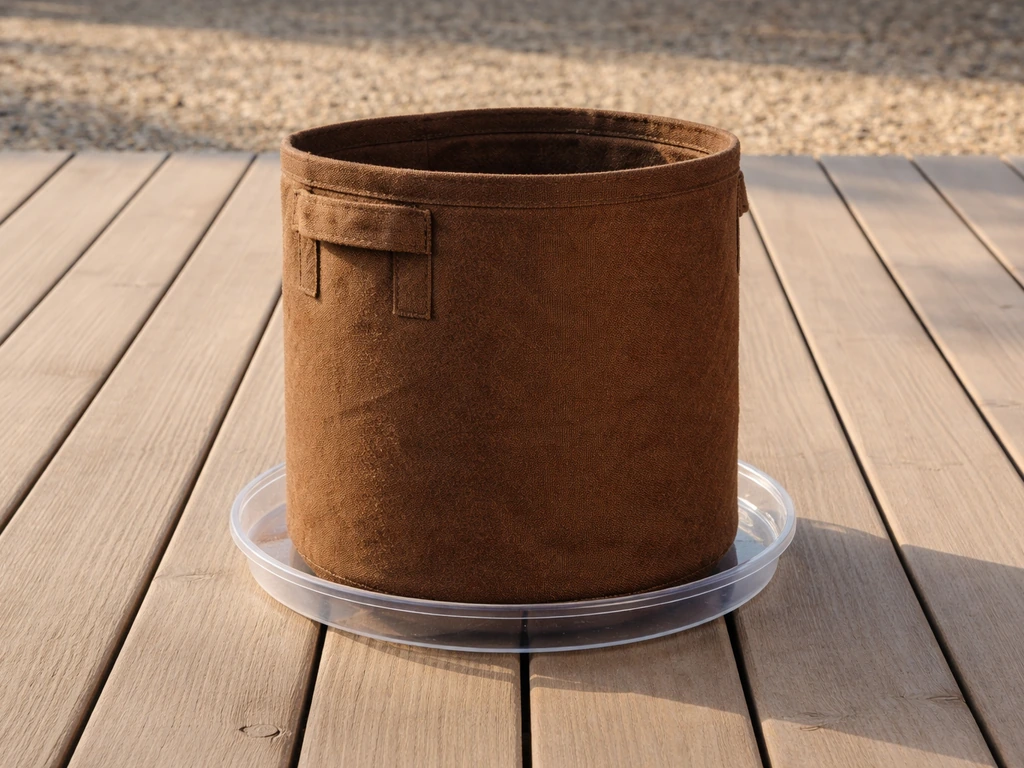
Grow bags drain freely, which is great for roots but can leave wet marks, mud trails, and staining on patios and decking beneath them. Placing a shallow tray or saucer under each bag catches runoff without blocking drainage. For larger bags, a gravel tray (a shallow container filled with pebbles) lets excess water drain away from the fabric rather than pooling directly under it. Drip irrigation systems reduce splashback and keep the outside of the bags cleaner.
If you are managing multiple bags, a drip line with individual emitters per bag is cleaner-looking than a watering can and reduces the chance of overwatering. Treegator notes that overwatering or poor drainage can reduce root oxygen availability and may harm roots, which aligns with why controlling runoff and preventing bags from staying waterlogged matters.
Tidy up the surrounding space
This sounds obvious but it genuinely matters. Clean the surface your bags sit on, remove dead leaves and dropped soil regularly, and keep any supports, cages, or stakes looking neat. Grow bags sit low to the ground and draw the eye down, so a clean surrounding surface makes them look much more intentional. Gravel, pavers, decking, or even a simple rubber mat under your bag arrangement creates a defined growing zone that looks considered rather than improvised.
Quick troubleshooting checklist and maintenance routine
Use this as a reference when something looks off, or as a seasonal maintenance reminder before and after the growing season. If you are starting from scratch, you can also learn how to make a grow bag from simple materials and basic gardening tools reference.
| Problem | Likely Cause | Fix |
|---|---|---|
| Green or black staining on fabric | Algae or mildew from constant moisture | Lift bags off ground, reduce overwatering, scrub with OxiClean solution, air dry in sun |
| White or yellow crust on exterior | Mineral or fertilizer salt buildup | Flush bags with plain water, descale with dilute vinegar, review fertilizer frequency |
| Brown mud splashback on sides | Bare soil + overhead watering | Add 2-3 cm topdress of mulch or gravel, switch to drip/base watering |
| Persistent mildew smell or dark spots | Mildew embedded in fabric | Sanitize with dilute bleach solution (2 tbsp per gallon), rinse thoroughly, dry fully in sun |
| Fabric looks worn, pilling, faded | UV exposure, abrasion, age | Consider bag covers or outer decorative containers; replace heavily worn bags |
| Wet marks and staining on patio below | Uncontrolled drainage runoff | Add gravel tray or shallow saucer, use drip irrigation |
| Setup looks cluttered or random | No arrangement strategy | Group by size, elevate with stands, use matching bags or covers |
Ongoing maintenance routine
- Every watering: Check the exterior of the bag for new salt crust or algae patches. If the outside stays consistently wet between waterings, reduce your watering volume or frequency.
- Every 4 to 6 weeks during the season: Flush bags with plain water to leach out mineral and fertilizer salt buildup before it visibly crusts.
- After heavy rain: Check bags sitting on the ground and lift or reposition any that are sitting in puddles.
- End of season: Empty bags, dry brush off loose soil and root material, soak and scrub with OxiClean or dilute bleach, rinse thoroughly, air dry completely in the sun, then store flat.
- Before replanting: Inspect fabric for tears, worn patches, or persistent mold that does not come out after cleaning. If mold persists after thorough cleaning, it is worth replacing the bag rather than risking pathogen carryover to your next crop.
- Ongoing: Keep the surface beneath your bags clean, clear dropped leaves and debris regularly, and maintain any mulch topdress at 2 to 3 cm depth.
If you are already thinking about the whole lifecycle of your grow bags, it is worth reading up on what to do with grow bags at the end of the season and how to clean grow bags in more detail, both of which connect directly to keeping your setup looking and performing well year after year. And if you are starting from scratch and want to build a better-looking setup from the beginning, understanding how to use grow bags correctly from the start will prevent most of the cosmetic problems covered here before they ever happen.
FAQ
Can I use pressure washing to make grow bags look new again?
Avoid pressure washing. The force can tear the fabric weave, drive dirt deeper into the fibers, and leave microscopic damage that accelerates mildew. Stick to dry brushing plus a soft-bristle scrub, and only use soaking when needed.
What should I do if the bags smell “bleachy” after sanitizing?
Rinse longer than you think. Continue rinsing until there is zero bleach odor, then let the bags air-dry fully with open access to airflow. If the smell persists after a couple of rinses, repeat a careful soak in clean water before storage.
How do I clean algae without taking all the fabric color with it?
Use oxygen-based cleaner and keep scrubbing gentle. Let the soak do the work for 10 to 15 minutes, then scrub lightly, focusing on the surface film rather than grinding. For stubborn patches, repeat the soak once rather than using stronger chemicals.
Is it safe to clean inside the grow bag, or only the outside?
Clean both sides if you see residue or mildew, but be careful not to disturb the soil unnecessarily. If you are already removing plants, rinse and dry the interior too. If you are mid-season, spot-treat the exterior only and improve watering to stop further growth.
Why is the bottom of my grow bag getting darker or slimier first?
That usually means the fabric is staying in prolonged moisture contact with wet ground or runoff pooling underneath. Raise the bag 2 to 3 cm (more is fine), use a gravel tray or saucer, and make sure drainage is not blocked by a cover.
What if I want to wrap grow bags with a decorative sleeve, is that always okay?
Only if the sleeve does not clamp the fabric tight against the bag or fully seal the sides. You want airflow through the bag walls, so leave clearance, avoid waterproof wraps that trap moisture, and ensure bottom drainage still functions freely.
Can I solve the white crust problem with more scrubbing?
Usually no. White crust is mineral salt buildup, and heavy scrubbing can damage the fabric and spread deposits into the weave. Soak with clean water to rehydrate the crystals, brush gently, and if needed use a light vinegar solution, then rinse extremely thoroughly.
How often should I flush grow bags with plain water to prevent salt buildup?
A practical schedule is every 4 to 6 weeks when you notice deposits forming. If crust returns within a week or two, reduce feeding frequency or concentration, and consider whether your water is hard since that makes deposits form faster.
Will using mulch on top of the soil help the outside stay cleaner?
Yes, but keep it light and controlled. A thin 2 to 3 cm top layer reduces splashing, which cuts down muddy splashback stains. Avoid piling mulch high enough that it presses against or blocks airflow at the fabric sides.
Do black or dark gray bags always look better than tan bags, even after years?
They typically hide staining and mineral contrast better, but they still get algae and salts. Dark bags mainly reduce visual “contrast” from crust and spotting, so the same prevention habits still matter.
What’s the best way to keep runoff from staining my patio without harming drainage?
Use a shallow tray or gravel tray to catch runoff, but do not create a sealed reservoir that keeps the fabric bottom wet. Ensure water can move away and never allow the bag to sit in standing water between waterings.
Should I rotate grow bags during the season to even out staining?
It can help. Rotating or repositioning every couple of weeks reduces uneven algae growth from consistent splash exposure or a specific wind direction, and it evens out how the exterior dries.
Next Articles

How to Make Grow Bags From Old Clothes: Step-by-Step Guide
DIY grow bags from old clothes: safe fabrics, sturdy sewing, drainage airflow, and size tips for thriving plants.
How to Make a Grow Bag at Home: Fabric DIY Guide
Learn how to make a fabric grow bag at home with materials, sizing, drainage, and step-by-step sewing instructions.
How to Clean Grow Bags: Wash, Dry, and Reuse Safely
Can you wash grow bags? Clean fabric bags step-by-step, remove soil, avoid odors, dry fully, and reuse safely.