Yes, you can absolutely make your own grow bags at home, and they work just as well as commercial ones if you use the right fabric and construction method. The core idea is simple: cut breathable, non-woven polypropylene fabric into panels, sew them into a cylinder with a bottom, and you have a functional fabric pot. The tricky part is choosing fabric that won't fall apart in the sun, sizing the bag correctly for the plant you have in mind, and making sure your seams won't blow out under the weight of wet soil. This guide walks you through every step.
How to Make a Grow Bag at Home: Fabric DIY Guide

Marcus Holloway
14 Apr 2026
Why DIY grow bags (and when it's worth it)
The honest answer to whether DIY is worth it depends on what you need. If you want one or two bags for a quick experiment, buying commercial bags is faster and cheaper per unit. But if you want a specific size, a specific depth, or just a lot of bags for a large grow-bag garden setup, making your own starts to make real sense. You can also customize handle placement, add reinforced bottoms, and choose fabric weights that match your growing conditions.
Commercial fabric grow bags are popular because they genuinely work: the breathable, non-woven fabric improves drainage and aeration, supports air pruning at the root tips, and helps stabilize root-zone temperature compared to hard plastic pots. Academic research has confirmed that air-pruning containers increase the number of root tips plants develop, which translates to stronger, more efficient uptake of water and nutrients. A DIY bag made from the right geotextile delivers all of those same benefits.
Where DIY makes the most sense: you want odd sizes (say, a very shallow bag for herbs or a deep bag for carrots), you want to repurpose materials (more on that below), you're building out a large garden on a budget, or you just enjoy making things. Where it doesn't make sense: you need bags immediately, you're growing something that demands highly consistent dimensions, or you only need two or three pots.
Materials and tools for making fabric grow bags
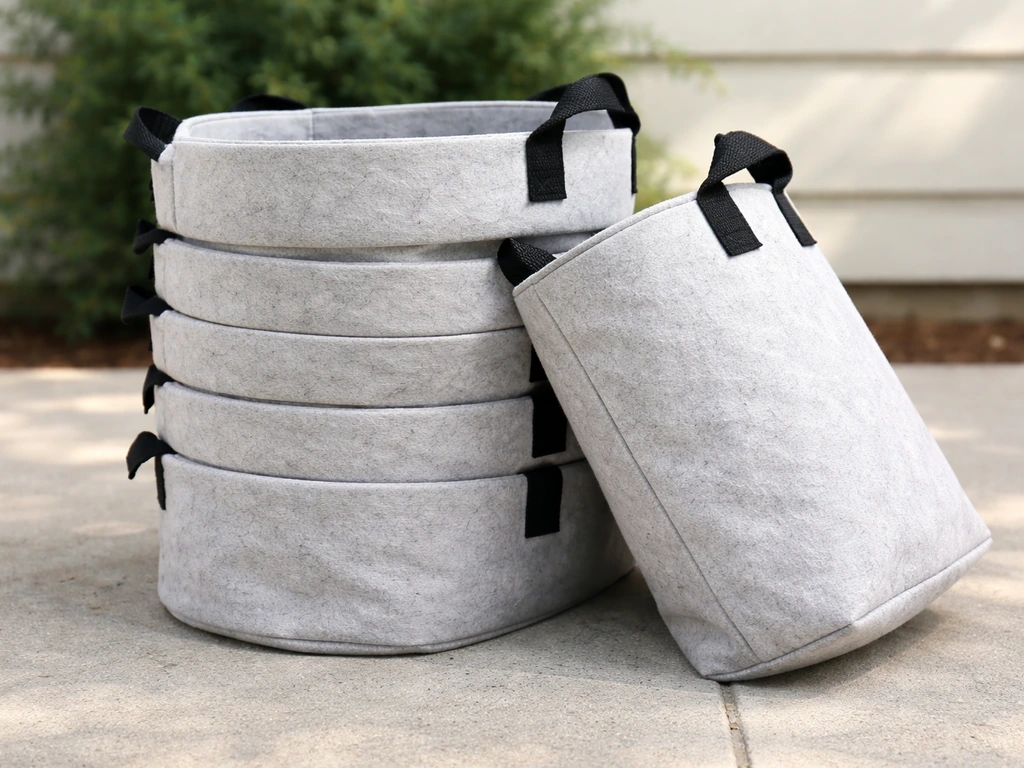
The most important decision you'll make is fabric choice. Non-woven polypropylene geotextile is the gold standard for DIY fabric grow bags. It's breathable, wicks moisture sideways to prevent waterlogging, and is structurally stable enough to hold soil without stretching out of shape. Products like US 120P (a needlepunched polypropylene nonwoven) and TenCate's Mirafi S-Series are examples of the type of material you're looking for. Both are tested for UV resistance at 500 hours per ASTM D4355 standards, which matters because untreated polypropylene can lose 20 to 50 percent of its tensile strength after just one to five years of sun exposure. Always confirm your fabric has UV stabilizers built in before buying.
Landscape fabric is a practical and widely available alternative. A proven DIY approach uses a double layer of 7-year landscape fabric for each bag, which compensates for the thinner weight of typical landscape fabric rolls and adds meaningful structural stability. Two layers also reduce the risk of soil escaping through the fabric weave during watering.
You can also make grow bags from old clothes or other repurposed fabric, which is a genuinely viable approach for low-cost gardening. The trade-off is that repurposed fabric may not be as breathable or UV-stable, so treat those bags as single-season solutions rather than multi-year investments.
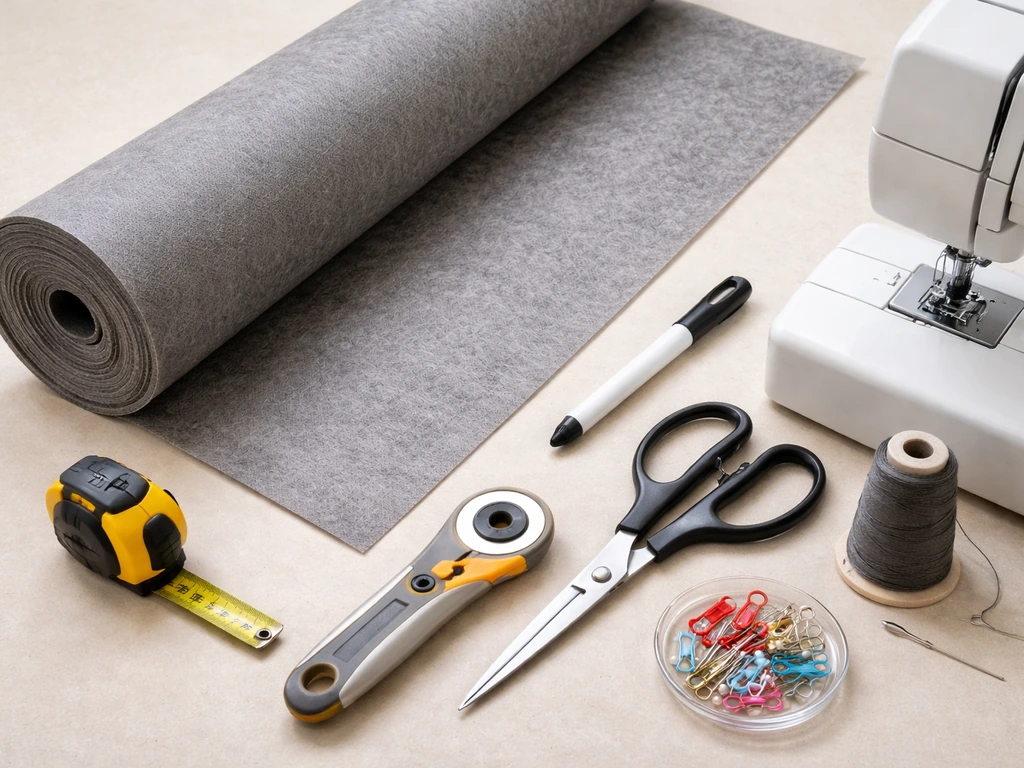
Here's what you'll need to get started:
- Non-woven polypropylene geotextile or heavy landscape fabric (UV-stabilized)
- Sharp fabric scissors or a rotary cutter with a cutting mat
- Fabric marker or chalk for marking cut lines
- Sewing machine capable of handling heavy fabric (a basic home machine works if you go slowly)
- Heavy-duty thread: bonded nylon or polyester in a weight appropriate for outdoor/upholstery work
- Sewing machine needles in size 90/14 to 100/16 for heavy fabric
- Measuring tape and ruler
- Pins or binder clips to hold panels while sewing
- Optional: grommets or webbing for handles
On needle and thread: for thicker geotextile or double-layered landscape fabric, use a 100/16 needle and drop your sewing machine to a slower feed rate. Heavy fabric jams machines when fed too fast, and a broken needle mid-seam is frustrating. Use a stitch length of around 3 to 4mm for structural seams. Bonded nylon thread holds up better outdoors than standard polyester because it resists UV degradation and moisture over time.
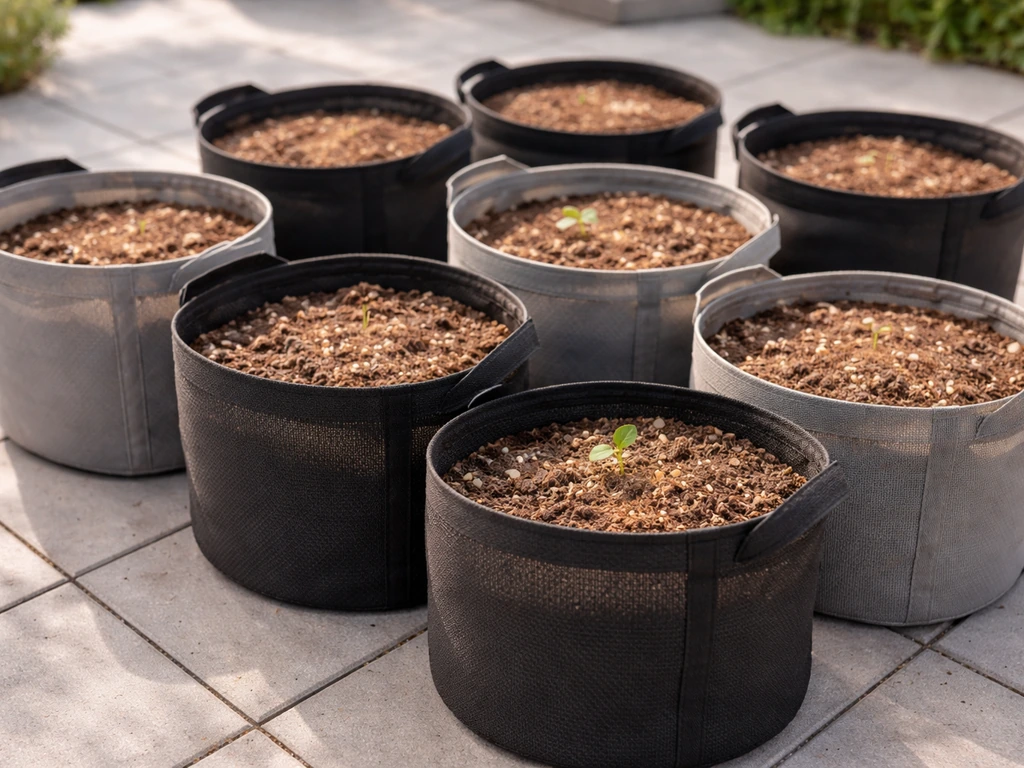
Sizing and planning: choosing the right grow bag dimensions
Getting the size right matters more than most beginners expect. A bag that's too small stresses the plant's roots and dries out too fast. A bag that's too big wastes soil mix and can hold excess moisture in cool weather. Here's a practical reference for common plants:
| Plant Type | Recommended Volume | Approximate Diameter x Height | Notes |
|---|---|---|---|
| Herbs, lettuce | 1 to 3 gallons | 8 to 10 inches x 7 to 8 inches | Shallow bags work well |
| Peppers, eggplant | 3 to 5 gallons | 10 to 12 inches x 10 to 11 inches | Good for patios |
| Tomatoes (determinate) | 5 to 7 gallons | 12 to 14 inches x 11 to 12 inches | Minimum for healthy fruit set |
| Tomatoes (indeterminate), cucumbers | 10 to 15 gallons | 16 to 18 inches x 12 to 14 inches | More root room = better yield |
| Potatoes, squash | 15 gallons | 18 inches x 13.5 inches | Smart Pot reference dimension |
| Small trees, shrubs | 25 to 45 gallons | 22 to 28 inches x 16 to 20 inches | Plan for weight when wet |
The 15-gallon size is a useful benchmark because it's well-documented: a standard 15-gallon Smart Pot measures 18 inches in diameter and 13.5 inches tall. That's a good target if you're making bags for potatoes or large squash. Note that actual sewn dimensions can vary by up to half an inch depending on seam folding and fabric thickness, so don't cut your fabric to the exact final dimension you want.
To calculate fabric dimensions from a target volume, use this approach: decide on the diameter (D) and height (H) of the finished bag. The circumference of the side panel is D multiplied by pi (approximately 3.14), and you add seam allowance on each side (typically 1 inch per seam). The height panel gets seam allowance at top and bottom. The circular bottom panel diameter equals D plus 2 inches for seam allowance. For example, a 10-gallon bag targeting 14 inches diameter and 12 inches tall needs a side panel roughly 46 inches wide (44-inch circumference plus 2 inches allowance) by 14 inches tall (12 inches plus 2 inches allowance), and a bottom circle 16 inches in diameter.
Step-by-step: how to sew a grow bag at home
This method produces a cylinder-style bag with a flat bottom, reinforced seams, and optional handles. It works for any size and uses double-layer landscape fabric or single-layer geotextile.
- Calculate your fabric dimensions using the formula above and mark them clearly with chalk or a fabric marker.
- Cut your side panel and bottom circle. If using landscape fabric, cut two identical sets and layer them together, treating the double layer as a single piece from here on.
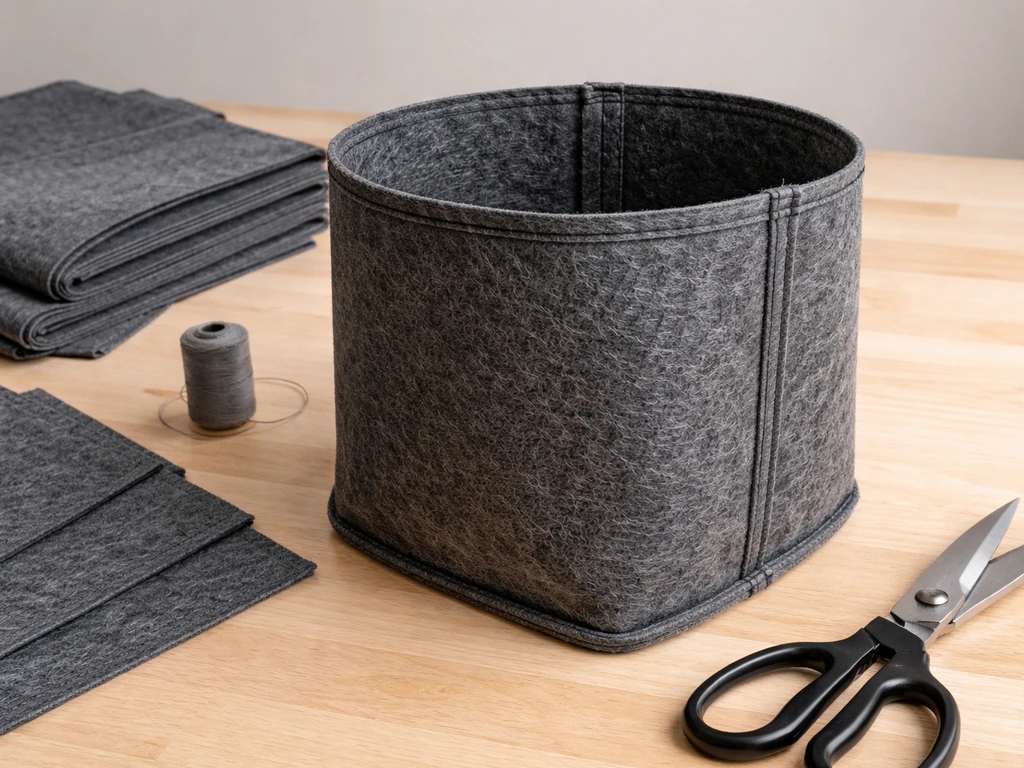
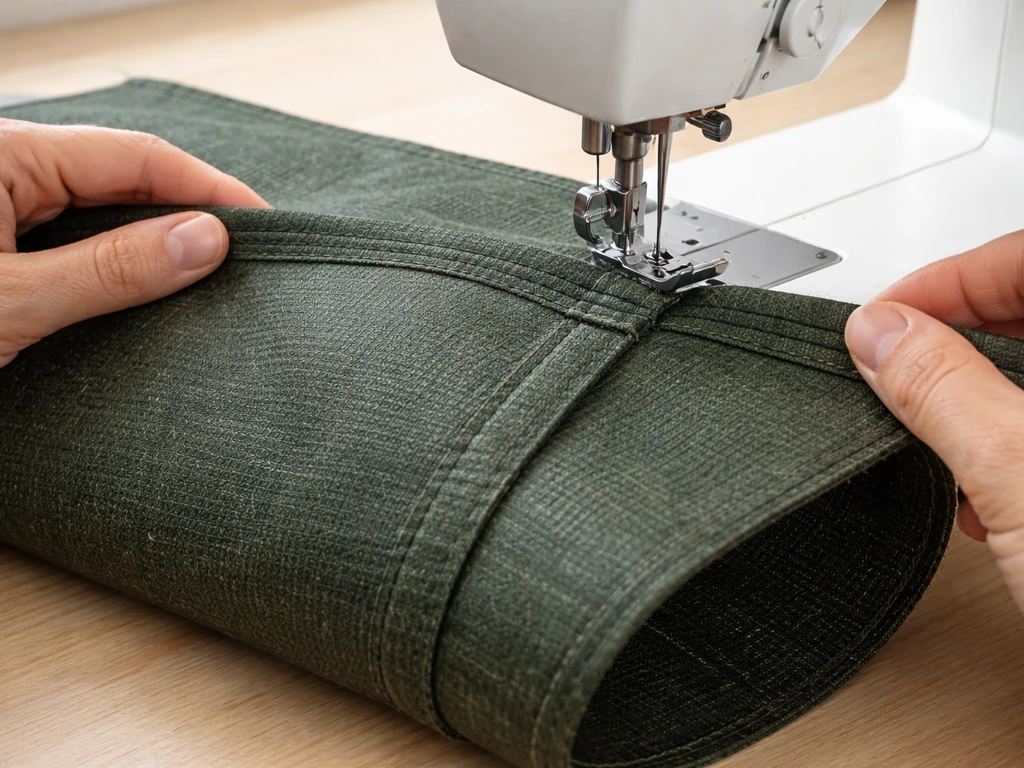
- Fold the side panel in half lengthwise (right sides or smoother sides together) and sew the vertical seam with a 1-inch seam allowance. Use a straight stitch at 3 to 4mm length, then go back and sew a second parallel line of stitching 1/4 inch from the first for reinforcement. Heavy-duty fabric pulls on seams when full of wet soil, so double-stitching is not optional.
- Press the vertical seam open or flat with your fingers (an iron is not needed and can melt synthetic fabric) and topstitch each seam allowance flat to reduce bulk.
- Fold down the top edge about 1 inch and sew a hem all the way around. This stiffens the rim and prevents fraying.
- If adding handles, cut two strips of webbing or folded fabric about 18 inches long. Pin them to the outside of the bag at the top hem, spaced evenly opposite each other. Stitch a reinforced box-X pattern on each handle attachment point.
- Pin the bottom circle to the open bottom of the side panel, right sides together or inside facing, matching the circumference. Clip curves with scissors every inch around the edge to help the circle lie flat while you sew.
- Sew the bottom seam with a 1-inch allowance, then sew a second reinforcing line 1/4 inch inside the first. This bottom seam takes the most stress, especially on larger bags.
- Turn the bag right-side out. The seams should be on the inside, giving you a clean exterior.
- If you want drainage holes (see the drainage section below), use a hot soldering iron or sharp hole punch to create 1/2-inch holes in the bottom panel, spacing them a few inches apart. Fabric bags rarely need this because the material is permeable, but it does not hurt for extra assurance.
Once sewn, test your bag by filling it with water before adding soil. Any seam failures will show up immediately and are much easier to fix now than after planting.
Alternative DIY approach: making your own grow bag without complex sewing
If you don't have a sewing machine or just want something faster, there are no-sew and minimal-sew options that still produce functional bags. The simplest is a folded and stapled burlap or landscape fabric sack: cut a rectangular panel, fold it into a tube, overlap the edges by at least 2 inches, and secure with heavy-duty staples (T50 style) every 2 to 3 inches. Fold the bottom up, staple it flat, and you're done. These won't last more than one season, but they're free if you already have the materials.
Another approach is to use zip ties and mesh fabric or shade cloth stretched over a wire frame. Cut a cylinder of wire mesh (hardware cloth or similar), line the inside with a layer of landscape fabric, and zip-tie the fabric in place. The wire gives structural support, which is useful for very large bags over 25 gallons where fabric alone can bulge outward. This is essentially a DIY version of a raised bed in bag form.
You can also use heat-bonding tape designed for outdoor fabric repair as a no-sew seaming method. Apply it to overlapping edges with a household iron set to low, press firmly, and let it cool. This works reasonably well for medium-weight landscape fabric but tends to fail on heavier geotextile under sustained wet-soil pressure. Treat heat-bonded seams as single-season only.
Drainage, potting mix, and setup for planting in a grow bag garden
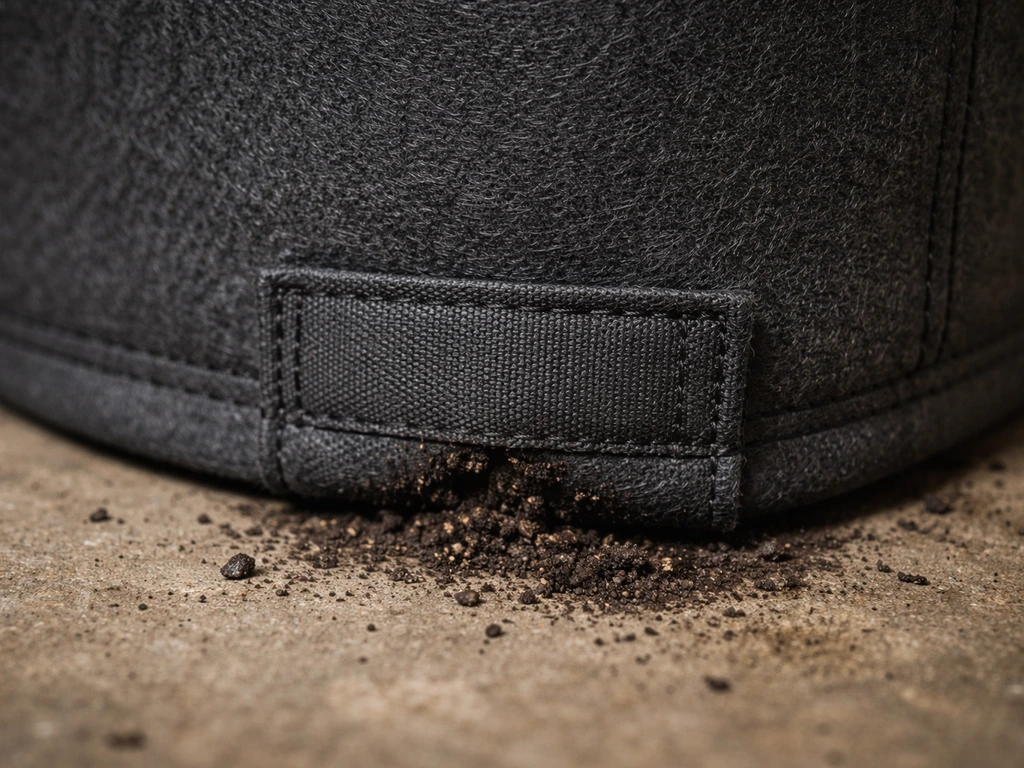
Drainage: do fabric bags need holes?
Standard non-woven geotextile is permeable enough that water drains freely through the fabric itself, so technically you don't need drainage holes in the bottom. That said, if you're placing bags on a solid surface like concrete or a deck, the bottom can sit in pooled water and restrict drainage. In that case, adding a few 1/2-inch holes in the bottom panel helps, and a piece of mesh or screen over each hole keeps the soil in while water moves out freely. Oregon State University Extension also notes that container gardening basics include using containers with holes at the bottom so excess water can drain away adding a few 1/2-inch holes in the bottom panel helps. Container gardening best practices recommend at least one drainage hole covered with mesh, and for grow bags, several small holes distributed across the bottom bottom are even better.
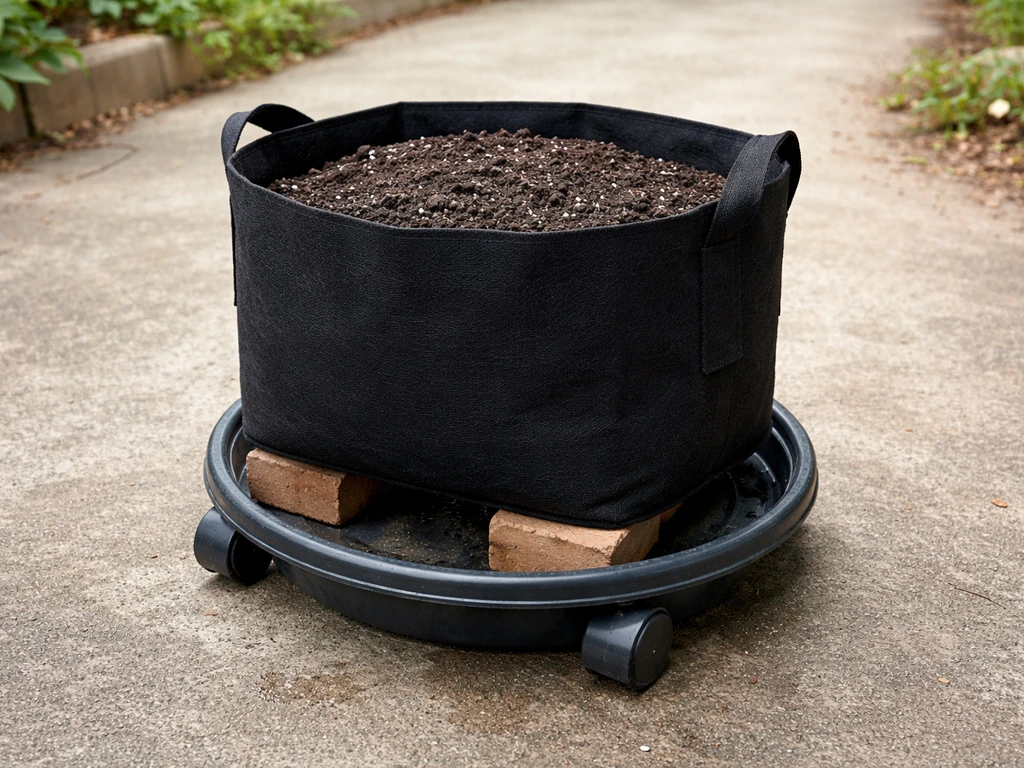
Raising the bag slightly off the ground on a plant caddy, a few bricks, or a slatted wood surface dramatically improves drainage and extends bag life by preventing the bottom from sitting in moisture constantly.
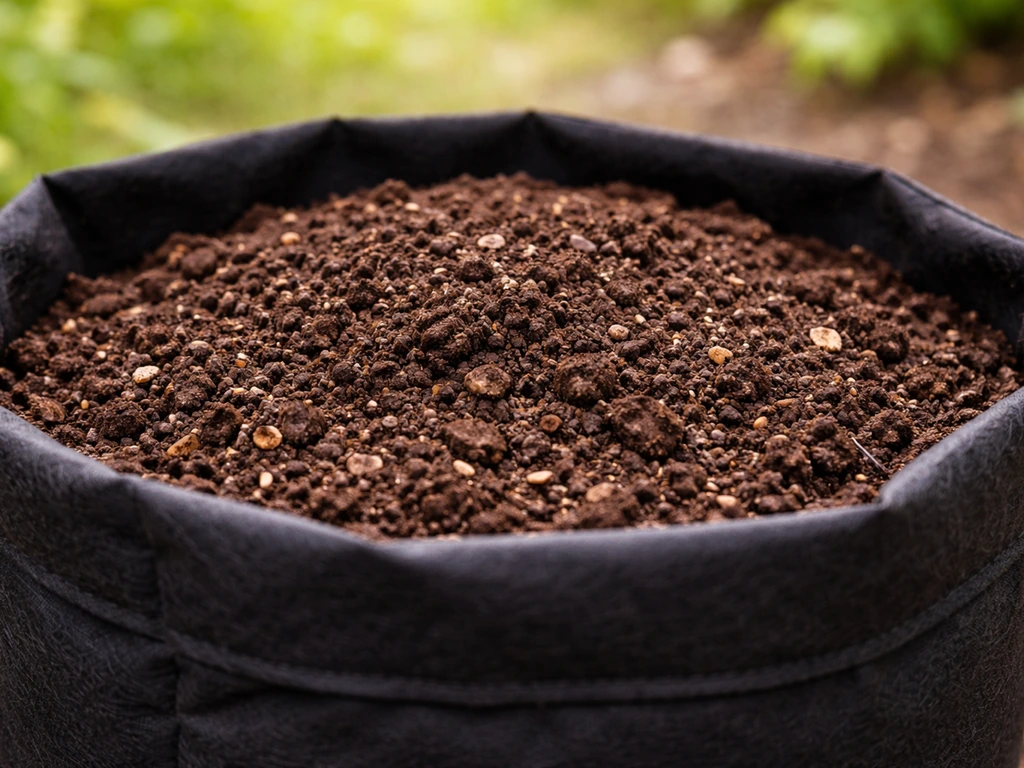
Potting mix: what to fill your homemade bag with
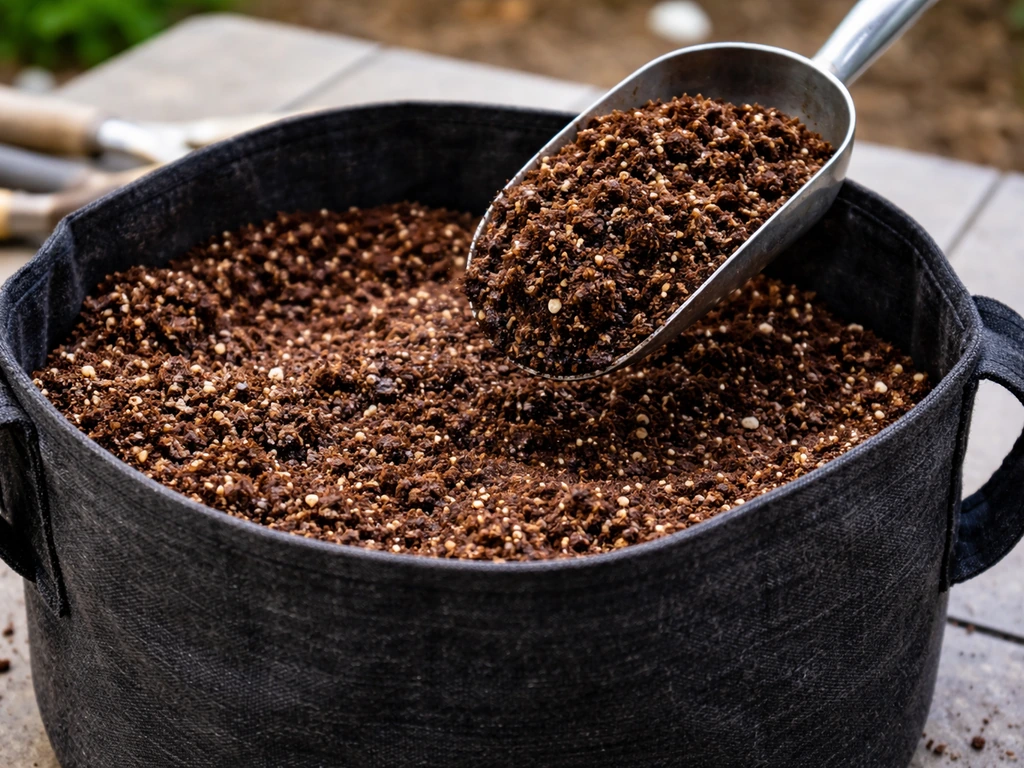
Never fill fabric grow bags with garden soil or straight topsoil. Mineral soil compacts inside containers, loses pore space, and can become saturated quickly, which suffocates roots. You need a lightweight, porous potting medium that retains some moisture while draining freely. A reliable basic mix is two parts peat moss or coconut coir, one part perlite, and one part quality compost. The coir or peat retains moisture, perlite maintains air space, and compost supplies nutrients.
University extension programs consistently recommend combining moisture-retaining components like peat moss with fast-draining components like perlite or vermiculite for any container growing situation. For fabric bags specifically, the breathable walls already wick away excess moisture, so you don't need an extremely porous mix. A standard peat-perlite mix at a roughly 2:1 ratio works well for most vegetables and flowers.
Setting up your grow bag garden
Once you have your bags filled and planted, the setup details matter. Place bags in their final location before filling if possible, because a 15-gallon bag full of moist soil can weigh 50 to 60 pounds. Group bags with similar watering needs together. In hot climates, light-colored or natural tan fabric reflects more heat than black fabric, which helps keep the root zone cooler. For anyone new to working with fabric containers, a solid overview of how to use grow bags covers the day-to-day management side, from watering frequency to fertilizing schedules, in useful detail.
Troubleshooting and maintenance for homemade grow bags
Seam failure and soil leaking through the fabric
The most common DIY grow bag problem is seam failure, especially at the bottom where wet soil creates constant outward pressure. If a seam is starting to open, reinforce it from the outside with iron-on repair tape or hand-stitch a running seam across the failure point. Soil escaping through the fabric weave (not seams) usually means your fabric is too open-weave or you're using a single layer when you need two. The fix is to slip a second layer of landscape fabric inside the existing bag as a liner.
Fabric degrading faster than expected
If your bags are getting brittle and tearing after just one season, UV degradation is almost certainly the cause. Non-UV-stabilized polypropylene can lose substantial strength in as little as a year of direct sun exposure. The solution going forward is to use UV-stabilized geotextile from the start. In the meantime, move affected bags to a partly shaded spot or wrap them in a second layer of fabric for the rest of the season.
Bags drying out too fast
Fabric bags naturally dry out faster than plastic pots because of evaporation through the walls. In hot weather, a 5-gallon bag may need watering every day. Fixes include: using a wetter potting mix with more coir, placing a saucer under the bag to allow bottom-up wicking, grouping bags together to reduce airflow around individual bags, and mulching the soil surface with straw or wood chips to reduce surface evaporation.
Cleaning and storing bags between seasons
Homemade bags are worth cleaning and storing if you've put real effort into making them. Empty the spent soil, shake out root debris, and rinse with a hose. For a deeper clean before storing or reusing, the process for how to clean grow bags properly walks through sanitizing methods that remove pathogens without damaging the fabric. Once dry, fold flat and store out of direct sunlight to preserve UV stabilizers.
End of season decisions
When your growing season wraps up, you have several options beyond simply tossing the bags. Thinking through what to do with grow bags at end of season can save you time and money, since well-made DIY bags can often go two or three seasons with proper care. If a bag is structurally sound but looking worn, a simple aesthetic refresh is also possible: read up on how to make grow bags look better for ideas that range from fabric paint to decorative covers that won't compromise breathability.
The bottom line is that making your own grow bags is genuinely practical. Use UV-stabilized geotextile or double-layer landscape fabric, double-stitch your seams, match the size to your plant, and fill with a peat-perlite potting mix. Do those four things and your homemade bag will perform as well as anything you'd buy off a shelf.
FAQ
Can I leave my DIY grow bag outdoors in heavy rain and still avoid seam failures?
Yes, but only if you keep the seam strategy and potting mix aligned with container conditions. If you soak the bag by flooding or leaving it in a standing saucer, seams at the bottom experience the highest outward pressure. For wet climates or frequent heavy watering, reinforce the bottom seams with an extra outside stitch and consider adding a second layer liner (for landscape fabric) to reduce soil escape through the weave.
Do grow bags need drainage holes if the fabric is breathable?
Avoid “guaranteed drain” expectations. Non-woven geotextile lets water move through the fabric, but if the bag sits on a non-permeable surface (concrete, deck boards with gaps blocked by debris, or a solid tray), water can pool underneath and slow overall drying. Use drainage holes in the bottom plus mesh over them (or raise the bag) when you cannot ensure free run-off.
What size grow bag is “too big” for fabric-only construction?
You can, but it is a common mistake to use the wrong material type. Standard hardware cloth and shade cloth solutions help for very large bags because the wire keeps the shape, but you still need a breathable inner liner to control soil loss. For small 5 to 15 gallon bags, wire frames usually add work without improving performance if you use UV-stabilized geotextile or double-layer landscape fabric.
Can I make a grow bag from burlap and expect it to last multiple seasons?
If your goal is air pruning benefits and consistent root behavior, switching to burlap is risky for long seasons because burlap breaks down faster in wet conditions, even when it drains well. If you try a no-sew burlap sack approach, treat it as single-season, and expect larger swings in moisture and root-zone temperature compared with geotextile.
How can I verify my bag size before planting?
Garbage in, garbage out applies to sizing too. If you miscalculate the finished diameter and height, the bag can end up undersized, leading to rapid drying and root stress. Measure after construction, then confirm fill volume with a water trial (fill to your target, then dump and measure) rather than trusting cutting dimensions alone.
Is it safe to reuse DIY grow bags for the next season?
Yes, but there is an important caveat: do not reuse a bag that had diseased plants unless you sanitize thoroughly and dry it completely. Even with cleaning, heavily degraded fabric can create more leaks over time. For best results, reserve reused bags for healthy crops or use sanitizing steps designed for containers, then store out of sun to preserve remaining UV stabilizers.
How does the potting mix in a fabric grow bag change fertilizing and watering?
It depends on the plant and your watering schedule. If you use a peat-perlite mix, you will typically fertilize more often because the mix is light and drains well. As a rule of thumb, start with a balanced fertilizer and adjust based on leaf color and growth, since the bag’s faster drying can make nutrient uptake inconsistent if you let it fully dry out.
What sewing-machine settings help prevent skipped stitches and weak seams?
Stitching speed and needle size matter more than most DIYers expect. For thicker geotextile or double-layer landscape fabric, slower machine feed helps prevent skipped stitches, puckering, and weak seam points. A slower pace also reduces heat buildup if you are close to any heat-bonded areas.
My soil is leaking out, how do I tell if it is a seam problem or a fabric-weave problem?
When soil leaks through the fabric weave, it usually means the fabric is too open or you used only one layer. The practical fix is to add a liner inside the existing bag (a second layer of landscape fabric works well) rather than trying to patch every leak point. If the leak is near the seams, reinforce with outside stitching or repair tape along the seam line.
How reliable are no-sew heat-bonded seams for heavy wet potting mix?
Yes, but treat it like a durability trade-off. Heat-bonded seams can work for medium-weight landscape fabric, but they tend to loosen under sustained wet-soil pressure, especially on the bottom. If you use heat bonding, test the filled bag with water for a long soak (several hours) before planting.
What is the best way to manage heat and fast drying in DIY grow bags?
Yes, and the method affects outcomes. For dark fabric, root zones can overheat in direct sun, while lighter fabric slows that effect. If you cannot change fabric color, shade the top of the bag or provide partial afternoon shade, and mulch the surface to reduce evaporation, since fabric bags lose moisture faster than plastic.
If my bags dry out too quickly, what changes should I make first?
Most DIY bags will dry out faster, but you can reduce watering frequency by improving moisture retention and limiting airflow. Increase coir or peat in the mix, mulch the top, and consider grouping bags so surrounding foliage reduces wind across the fabric walls. Using a plant caddy can also enable bottom-up wicking if you manage it so water does not remain stagnant.
Next Articles
How to Clean Grow Bags: Wash, Dry, and Reuse Safely
Can you wash grow bags? Clean fabric bags step-by-step, remove soil, avoid odors, dry fully, and reuse safely.
How to Use Grow Bags: Step-by-Step Guide for Fabric Bags
Step-by-step how to use fabric grow bags, from filling and pre-wetting to planting, watering, feeding, and fixes.
Best Soil for Grow Bags: Mix Recipes and How Much to Add
Best soil for grow bags: mix recipes, how much to add by bag size, and vegetable tweaks for strong drainage and yield.