Using a fabric grow bag is straightforward once you understand one key thing: they behave differently from plastic pots, and those differences are mostly in your favor. Fill the bag with the right mix, plant at the correct depth, water a bit more often than you would with a hard container, and the fabric does most of the heavy lifting for you. This guide walks through every step of that process, from choosing the right size to troubleshooting problems mid-season and knowing what to do with your bags when the season is over.
How to Use Grow Bags: Step-by-Step Guide for Fabric Bags

Marcus Holloway
4 Apr 2026
How grow bags actually work

A fabric grow bag is essentially a breathable container. The walls are porous, which does two things that rigid plastic pots simply cannot do: they allow oxygen to reach the root zone, and they air-prune roots instead of letting them circle. Air pruning happens when a root tip reaches the container wall and is exposed to air, which naturally stops its growth. The plant responds by branching more roots inward, creating a dense, fibrous root mass rather than a tangled coil pressed against the inside of a pot. Smart Pot, one of the better-known manufacturers, specifically highlights this contrast with rigid plastic containers where roots can continue spiraling because there's no air at the edge to stop them.
The breathable sidewall also changes how water behaves. Unlike a hard plastic pot where water tends to channel down the sides and pool at the bottom, a fabric bag distributes moisture more evenly through the root zone. Water also escapes through the sidewalls by evaporation, not just through drainage holes at the bottom. A 2022 HortScience study confirmed this directly: fabric containers increased irrigation demand compared to plastic, primarily because of sidewall evaporation. That's not a flaw, it's a trade-off. You water more often, but your roots get better aeration and you're much less likely to drown your plants. Fabric bags also don't need added drainage holes because the fabric structure handles drainage naturally.
Choosing the right size and material
Getting the size right is probably the single most important decision you'll make. Too small and your plant gets root-bound and stressed; too large and the extra soil stays wet for too long between waterings. Here's a practical size reference for the most common crops:
| Plant Type | Recommended Size | Notes |
|---|---|---|
| Herbs (basil, cilantro, parsley) | 1–3 gallon | Compact roots, frequent harvesting |
| Lettuce, spinach, greens | 3–5 gallon | Shallow-rooted, great for smaller bags |
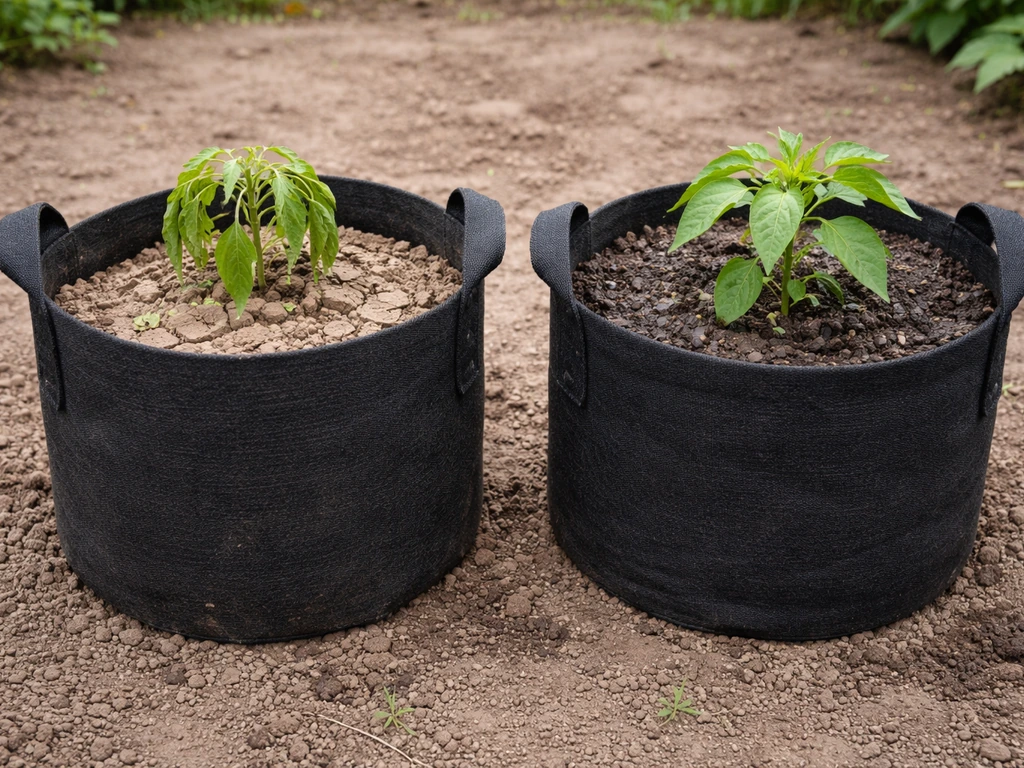
| Peppers, eggplant | 5–7 gallon | Need room to develop but not huge |
| Determinate tomatoes | 7–10 gallon | Bush-type varieties stay manageable |
| Indeterminate tomatoes | 15+ gallon | Go smaller and you risk stunting the plant |
| Potatoes | 10–15 gallon | Depth matters as much as volume |
| Perennials, deeper-rooted crops | 20 gallon | Ideal for crops needing sustained root depth |
| Small trees and shrubs | 25–45 gallon | Depends on the species and growth stage |
For indeterminate tomatoes especially, don't undersize. Gorilla Grow Tent recommends at least 15 gallons for most indeterminate varieties to avoid stunting or reduced harvest, while determinate types can get by with 7 to 10 gallons. MIgardener points to 20-gallon bags as the go-to for perennials or anything with deeper roots. If you're somewhere in between, go one size up rather than one size down.
On material: most fabric grow bags you'll encounter are made from nonwoven polypropylene felt. These are durable, washable, and effective. Thicker fabric (300g to 400g per square meter) holds up better over multiple seasons and tends to resist tearing when the bag is heavy and wet. Thinner bags are fine for a single season or for lighter crops like herbs. If you're making your own instead of buying, making a grow bag from scratch is more approachable than it sounds, and you can control the fabric weight. For a more creative approach, repurposing old clothes into grow bags is a real option that works well for lighter crops.
Preparing the grow bag and mixing your fill

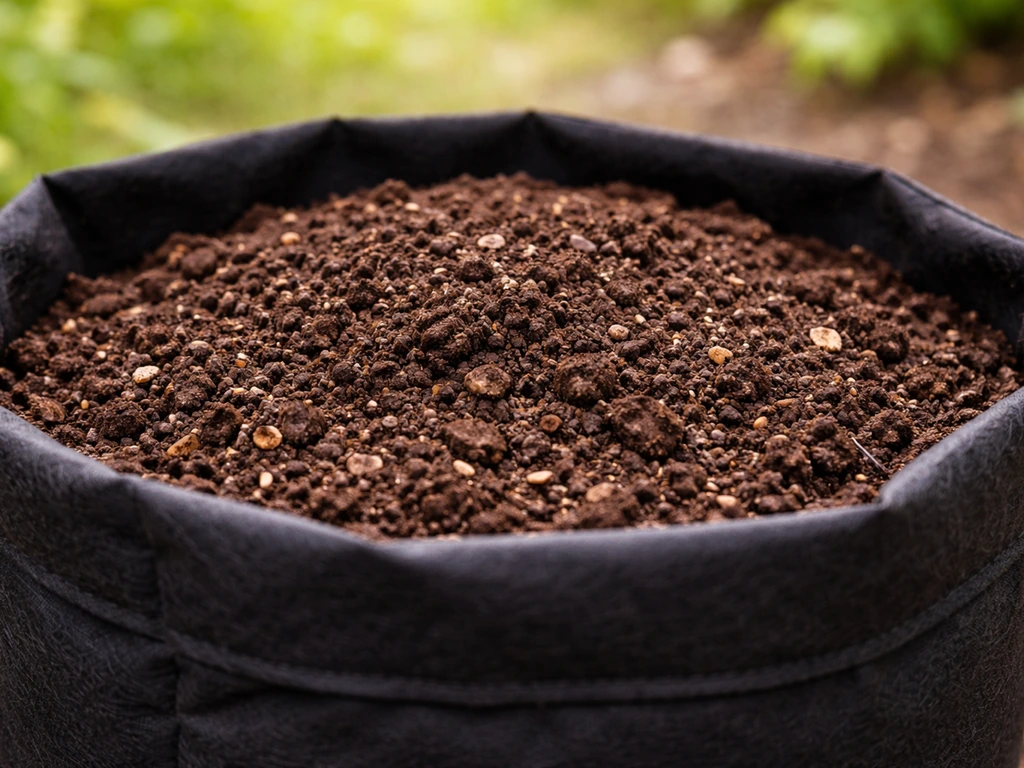
What to put in a grow bag
Don't use garden soil or regular topsoil in a grow bag. It compacts quickly, drains poorly, and is too heavy for fabric containers. You want a mix that stays loose and well-aerated throughout the season. A reliable starting formula is two-thirds compost to one-third perlite. This gives you good moisture retention from the compost and drainage plus aeration from the perlite. If you want to go lighter (useful for large bags you'll be moving), a coco coir and perlite blend works well. Mother Earth's coco plus perlite mix, for example, is ready to use straight from the bag, though it's an inert medium with no nutrients, so you'll need to run a consistent fertilizer program from day one.
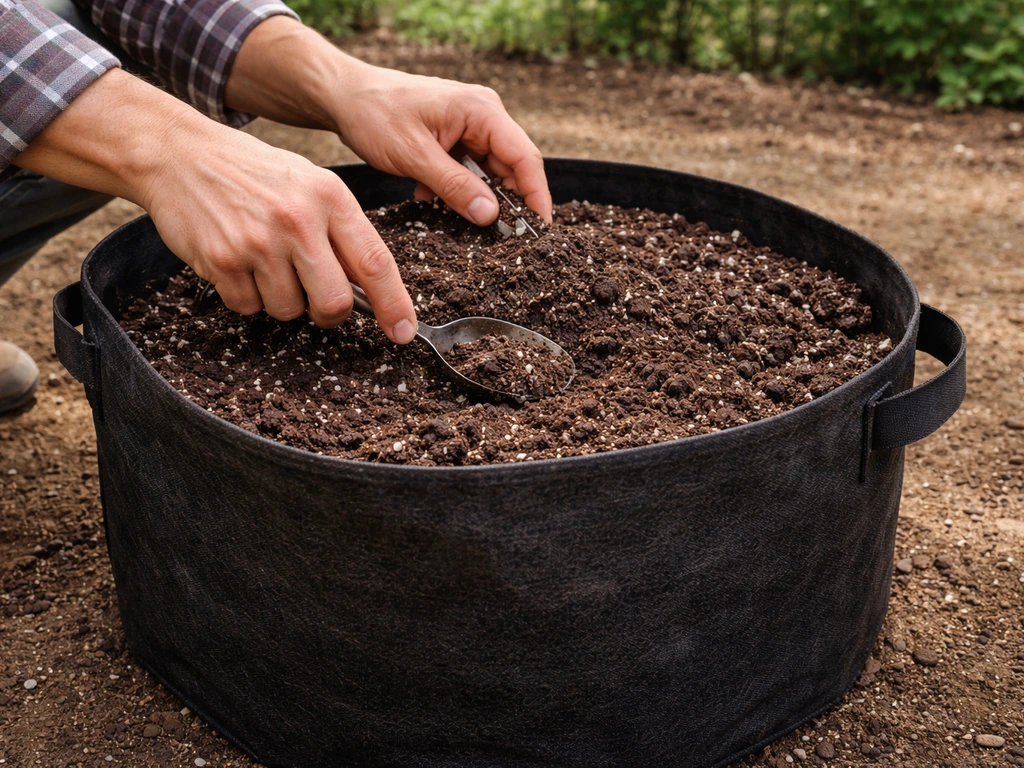
Slow-release fertilizer prills are a smart addition if you're mixing your own medium. Mix them into the dry or barely damp growing medium before filling, and fill the bag promptly after mixing. This matters because once slow-release fertilizer encounters moisture, it begins releasing nutrients immediately. If your mix gets wet before you're ready to plant, those prills start working ahead of schedule and can concentrate unevenly in the bag.
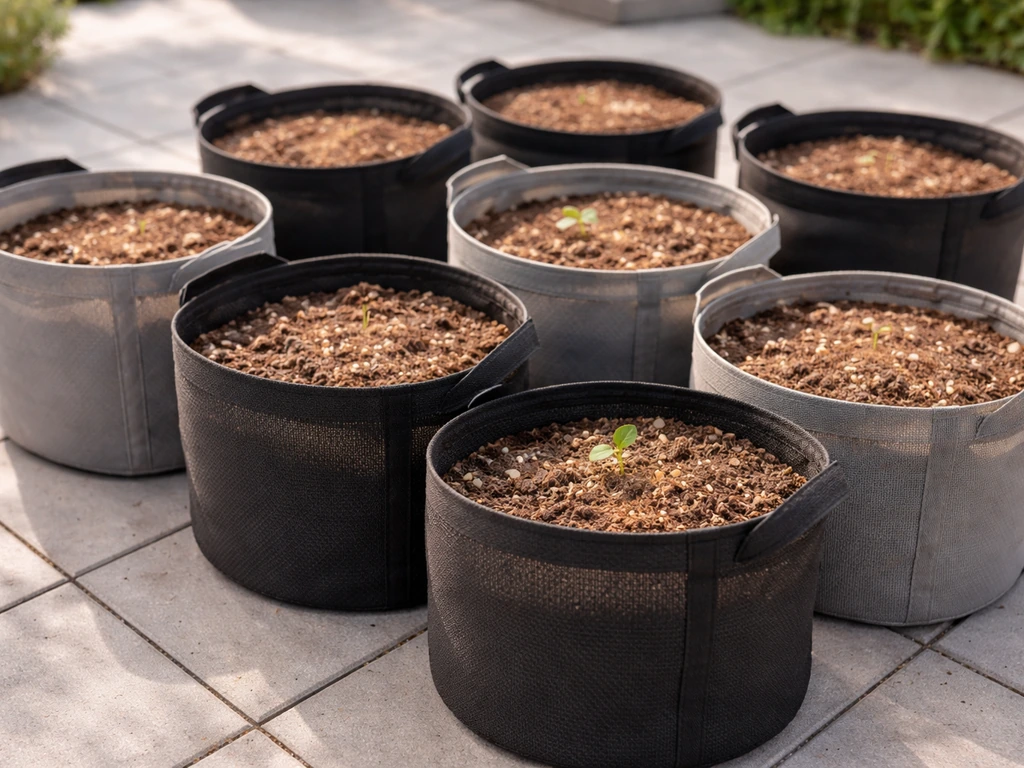
Filling and pre-wetting the bag
Set the bag in its final position before filling it. This sounds obvious, but a 15-gallon bag full of moist soil mix weighs well over 50 pounds and is awkward to carry without a built-in handle. Once it's in place, fill it to about one inch below the rim. That inch of headspace is important: it creates a small reservoir for water to pool before soaking in rather than running straight off the top.
Pre-wetting your mix before filling makes the whole process easier. Dry perlite-heavy mixes can be hydrophobic at first, meaning water beads off the surface instead of soaking in. Moistening the mix in a wheelbarrow or large tub, squeezing it to roughly the dampness of a wrung-out sponge, then filling the bag saves you a lot of frustration at the watering stage. If you're using a coco-based mix, pre-wetting is essentially mandatory since dry coco takes time to absorb water fully.
Step-by-step: setting up and planting
- Choose your location first. Fabric bags dry out faster than plastic pots, especially in full sun and wind. Position matters more than it does with hard containers.
- Set the empty bag in its final spot and open it fully so the sides are standing upright.
- Mix your growing medium (compost plus perlite or coco plus perlite) and pre-moisten it until it holds together when squeezed but doesn't drip.
- If adding slow-release fertilizer, mix it into the medium now, before wetting, or immediately before filling.
- Fill the bag to about one inch below the rim. Gently firm the mix but don't pack it tightly.
- For transplants: dig a hole slightly larger than the root ball, set the plant at the same depth it was growing in its nursery container (never deeper), and backfill gently.
- For seeds: sow at the depth recommended for that crop and cover lightly.
- Water thoroughly right after planting until you see moisture weeping through the fabric sidewalls. This tells you the medium is evenly saturated.
- Check moisture by inserting a finger two inches into the mix. Water again when it feels dry at that depth.
Placement deserves a little extra thought. On hot days, fabric sidewalls lose water rapidly through evaporation, and a bag sitting on a dark patio surface can heat the root zone significantly. Elevating bags on a wooden pallet or slatted surface helps with airflow and reduces heat transfer from below. The RHS recommends watering during the cooler parts of the day specifically because evaporation losses increase in midday heat, and that advice applies even more forcefully to fabric containers than to clay or plastic pots.
Growing specific crops in fabric grow bags
Vegetables
Tomatoes are the most common grow bag crop, and for good reason: they respond well to the air pruning and drainage that fabric provides. Use at least a 10-gallon bag for most tomato plants, though 15 gallons is the safer call for indeterminate varieties like beefsteak or any large vining type. Support is essential. Run a stake through the bag into the ground, or use a cage that sits independently. Fabric bags won't support a heavy stake planted directly into the bag without some wobble once the mix settles. Peppers and eggplant do well in 5 to 7 gallon bags and need similar support but are generally less demanding.
Potatoes are one of the most satisfying crops to grow in bags because harvest is as easy as tipping the bag over. Fill the bag about one-third full to start, plant your seed potatoes, and add more mix as the shoots emerge (this is hilling without the back-breaking work). A 10 to 15 gallon bag gives you room to hill effectively and still get a decent harvest. Greens, lettuce, and herbs are the low-maintenance end of the spectrum: 3 to 5 gallon bags, shallow medium, and fairly forgiving about watering.
Flowers
Annual flowers like petunias, marigolds, and zinnias grow happily in 3 to 5 gallon fabric bags. The key difference from vegetables is that flowers are often more forgiving of slightly wetter conditions, though the good drainage of fabric bags still keeps root rot at bay. If you want the bags to look more intentional in a patio or front garden setting, there are some easy ways to make grow bags look better without spending much. Perennial flowers or ornamental grasses that you plan to keep from year to year benefit from the larger 15 to 20 gallon sizes so the roots have room to establish properly.
Mushrooms
Mushroom grow bags are a different beast from vegetable bags. They're not filled with potting mix: they contain a sterilized substrate (typically sawdust, straw, or grain) that's been inoculated with mushroom mycelium. The bag itself acts as a controlled environment during colonization. Back to the Roots notes that substrate bags should be kept dormant until you're ready to grow, since the bag can be stored dry and colonization begins in earnest once conditions are right.
Once you're ready, the fruiting stage needs humidity (aim for 85 to 95%), indirect light, and fresh air exchange.
Fine misting is the right approach here: do not pour water directly onto the substrate or the fruiting mushrooms, as standing water encourages bacterial contamination and rot.
Trees and shrubs
Growing trees in fabric bags is a technique used commercially to produce container-grown trees with excellent root structure for transplanting. The air pruning effect is especially valuable here because it prevents the root spiraling that causes long-term structural problems in trees grown in hard containers. For home growers, fabric bags are useful for starting fruit trees, berry bushes, or ornamental shrubs. When it's time to plant a bagged tree in the ground, set the root mass at the natural ground level, never deeper, backfill, stake if needed, and water in thoroughly. The planting depth point is the same whether you're working with a nursery bag or a fabric pot you've been growing in yourself.
Troubleshooting common grow bag problems
Watering: the biggest adjustment
The most common complaint from people switching from plastic pots to fabric bags is that the bags dry out too fast. This is real. Sidewall evaporation is significant, especially in warm, sunny, or windy conditions. A 2024 study from Rootmaker measured substantial evaporative water loss differences between porous fabric containers and conventional black plastic under controlled conditions, with fabric losing considerably more through the sidewalls.
The practical response is to check your bags daily in summer rather than every other day, water in the early morning or evening to reduce evaporation losses, and consider grouping bags together so they shade each other's sidewalls slightly. Watering your container garden in the early morning is typically best because midday watering increases evaporation losses early morning is best.
Overwatering is less of a problem in fabric bags than in plastic, because drainage through the sidewalls and base is hard to cut off entirely. But it's not impossible. If your mix is dense and heavy rather than light and airy, or if the bag is sitting in a saucer that holds water, you can still waterlog roots. The fabric sidewalls and even moisture distribution genuinely help prevent root rot, but they're not magic: a bad mix or a waterlogged base will still cause problems.
Heat stress in hot climates
Dark-colored fabric bags absorb heat, which can raise root zone temperatures uncomfortably in peak summer. If you're in a hot climate and growing heat-sensitive crops, place bags on a surface that doesn't radiate heat (wood, not dark paving), use a light-colored or white fabric bag if possible, and water more frequently in the hottest weeks. Some growers wrap the lower half of their bags in reflective material or shade cloth. Smart Pot explicitly notes that fabric containers generally need slightly more frequent watering and feeding in heat compared with hard pots, so adjust your schedule seasonally.
Root issues and soil compaction
If you've chosen the right size bag and a quality airy mix, root problems are rare. Air pruning prevents circling, and a perlite-rich mix resists compaction. However, over time and especially with long-season crops, the mix can settle and compact somewhat. If you notice water sitting on the surface rather than soaking in quickly, that's a sign of compaction. You can gently loosen the top inch or two with a fork without disturbing the plant's roots significantly.
Pests and disease
Fabric bags don't make your plants immune to pests, but they do reduce some soil-borne disease pressure compared to open ground growing. Fungus gnats are the most common pest in container growing generally: they're attracted to moist surface soil. Letting the top inch of the medium dry out between waterings, which is easier in a well-draining fabric bag, is the most effective prevention. At the end of the season, remove and dispose of any infected plant debris rather than composting it, and rinse your bags before storage to avoid carrying disease inoculum into next year.
Taking care of your fabric bags between seasons
Fabric grow bags are reusable for multiple seasons if you treat them right. At the end of each growing season, dump the old soil out (it can go into your compost or garden beds), and let the bag dry completely before washing or storing it. When it comes to how to properly clean grow bags between uses, the approach is simple: shake out loose debris, rinse with a hose, and if you've had any disease problems, wash the bag with a dilute hydrogen peroxide or OxyClean solution to sanitize it. Smart Pot specifically recommends this approach in their FAQ for customers who want to sterilize between seasons.
The University of Wisconsin Plant Disease Diagnostics Clinic advises that any residual soil clinging to containers can harbor pathogens, so getting the bag as clean as possible before reuse matters, not just for your own plants but for reducing the spread of soil-borne disease year to year. Once the bag is clean and dry, fold it flat and store it indoors or in a shed. Exposure to UV light over winter can degrade the fabric faster than actual use does, so keeping them out of direct sunlight during storage extends their lifespan meaningfully.
Knowing what to do with grow bags at the end of the season goes beyond just storage: it's the right time to evaluate whether a bag has earned another season. Check the fabric for tears, thinning, or any structural weakness. A bag that's starting to break down at the seams or can't hold its shape when filled won't perform well next year. Replace it rather than struggle with it. Good quality bags typically last three to five seasons with proper care, and the investment is modest enough that replacing a worn bag is never a difficult call.
FAQ
How do I know if my grow bag is the right size for my plant?
After planting, check growth within 2 to 4 weeks. If leaves look stressed (wilting even after watering, slower-than-expected growth, or early yellowing), the bag is likely undersized or the medium is too wet and compacting. If growth is strong but the bag dries out in less than a day in summer, consider a larger bag or add a moisture-retaining amendment like more coco (or more compost, if your mix drains well).
Should I put a saucer or tray under a grow bag?
Use a tray only if you can control pooling. Fabric bags still drain, so a saucer that holds water for hours can waterlog roots, especially with denser mixes. If you need runoff control, use a slatted stand or elevate the bag so excess water can escape, then empty the tray promptly after watering.
Do I need drainage holes in the bottom of a fabric grow bag?
Usually no. Most fabric grow bags are designed to drain through the base and sidewall structure, so added holes can actually reduce stability or create uneven drainage. If your specific bag has no base holes and you constantly see water standing after watering, then you can consider a breathable inner liner or switch bags, rather than drilling many random holes.
What is the best way to water a grow bag so the mix soaks evenly?
Water slowly until you see runoff at the bottom and the top surface darkens, then stop and wait 5 to 10 minutes. This pause helps the medium absorb rather than letting water channel off quickly. If the top stays dry while water runs through, your mix may be hydrophobic or compacted, pre-wetting it before planting usually fixes that.
Why does my grow bag still dry out very fast even with good watering habits?
Common causes are windy exposure, dark hot surfaces, and a mix that is too perlite-heavy or low in compost. Try moving the bag off dark pavement, group bags to shade sidewalls, and consider slightly increasing compost content or using a coco-perlite blend with a consistent fertilizer program. Also check whether you are watering midday, evaporation spikes then even for well-aerated fabric bags.
Can I reuse potting mix in a grow bag for the next season?
Yes, but expect reduced nutrients and possible disease residue. Dumping old mix is safer if you had pest or fungal issues, and if you reuse anyway, refresh it by mixing in fresh compost and perlite, then start feeding immediately. For bags that had persistent problems, replacement or thorough sanitizing is the safer path.
What should I do if the medium compacts and water starts to sit on top?
Loosen just the top inch or two with a fork to break the crust, avoid digging deep around the plant roots, and switch to a slower watering approach. If compaction keeps returning, your mix ratio may be too dense for fabric, increase perlite (or coco for lighter retention) next time rather than trying to fix it mid-season.
How often should I fertilize in a grow bag compared with pots?
Because fabric containers tend to lose water faster and often require more frequent watering, nutrients can also wash through more quickly. Plan to fertilize on a consistent schedule, especially if you use an inert medium like coco-perlite, and if you rely on slow-release prills, don’t add extra liquid feed right away until you see how the plants respond.
Is air pruning true for all plants, and will it harm seedlings?
Air pruning occurs whenever roots reach the fabric edge and are exposed to air, it usually benefits most crops by preventing circling. Seedlings generally handle it well if the bag size matches the crop, avoid starting in an oversized bag because excess wet soil can stress young plants. If you see stunted growth right after transplanting, confirm both planting depth and that the root ball is fully covered with the right amount of medium.
How do I prevent fungus gnats in grow bags?
Let the top layer dry slightly between waterings, keep the surface free of fine compost dust that stays constantly damp, and avoid watering late in the day. If you get an outbreak, apply an approved control method early, because larvae develop in moist organic-rich media and can rebound quickly when conditions stay wet.
What should I do with grow bags after harvest if I grew diseased plants?
Don’t just store them with contaminated debris. Remove plant remnants, rinse thoroughly, and sanitize the fabric before storage, then dry completely. Folding flat and storing indoors helps prevent carryover of spores, and replacing bags that are torn or thin is often more effective than repeated sanitizing.
Next Articles

Best Landscape Fabric for Grow Bags: Buy and Install Guide
Choose the best landscape fabric for grow bags with weed-blocking, drainage and aeration tips plus DIY install steps.
Best Soil for Grow Bags: Mix Recipes and How Much to Add
Best soil for grow bags: mix recipes, how much to add by bag size, and vegetable tweaks for strong drainage and yield.
Where to Put Grow Bags: Best Location, Sun, Drainage
Find the best spot for fabric grow bags: sun, wind, drainage, spacing, surfaces, and fixes for heat and root-rot issues.