You can turn old jeans, t-shirts, canvas bags, and even bed sheets into functional grow bags with a pair of scissors, a sewing machine (or strong staples), and about 20 minutes of work. The key is choosing the right fabric, cutting it to a useful volume, building in drainage at the bottom, and laundering everything before any soil touches it. If you want your DIY grow bags to look better in addition to working well, start by keeping the fabric clean, shaping the seams, and adding a neat mulch or decorative top dressing once the soil is in place how to make grow bags look better. Done right, a DIY fabric grow bag works on the same principles as a commercial smart pot: breathable sides encourage air pruning of roots, excess water escapes rather than pooling, and plants generally thrive. If you want the most straightforward results, it helps to know how to use grow bag-style containers the same way across different crops and seasons commercial grow bags. Done carelessly, you end up with soggy, rotting roots and a bag that falls apart by midsummer. This guide covers the whole process so you land in the first camp.
How to Make Grow Bags From Old Clothes: Step-by-Step Guide


Why use DIY fabric grow bags (and when to skip them)
Breathable fabric containers genuinely improve aeration around the root zone and allow excess water to drain, which directly reduces the conditions that lead to root rot. That's not just marketing copy for commercial grow bags, it's the same physics working in your repurposed denim. When roots hit the air at the bag's edge, they stop elongating and the plant produces more lateral feeder roots instead. That's a real growing advantage, especially for vegetables in a short season.
The honest case for DIY bags: they're essentially free if you have old clothes you'd otherwise donate or discard. They're also customizable in size, which matters when you want a very wide shallow bag for strawberries or an unusually tall bag for carrots. If you've already read about how to make a grow bag from scratch using purchased fabric, repurposing clothing is just a cheaper version of the same concept.
When to skip the DIY route: if you're growing crops that will live in the same bag for multiple years (dwarf fruit trees, perennial herbs), a commercial bag with reinforced seams and UV-treated fabric will outlast anything you sew from an old flannel shirt. Similarly, if you're growing mushrooms in bags, you need food-grade, sterile conditions that old clothing simply can't reliably provide without serious preparation. For annuals, tomatoes, peppers, lettuce, flowers, potatoes, DIY fabric bags are a completely reasonable, low-stakes option.
Materials and supplies from old clothes (what fabrics work and what to avoid)
Not every old garment belongs in a garden. Before you start cutting, think about what the fabric is made of, how it was treated, and whether it's structurally sound enough to hold moist soil for a full growing season.
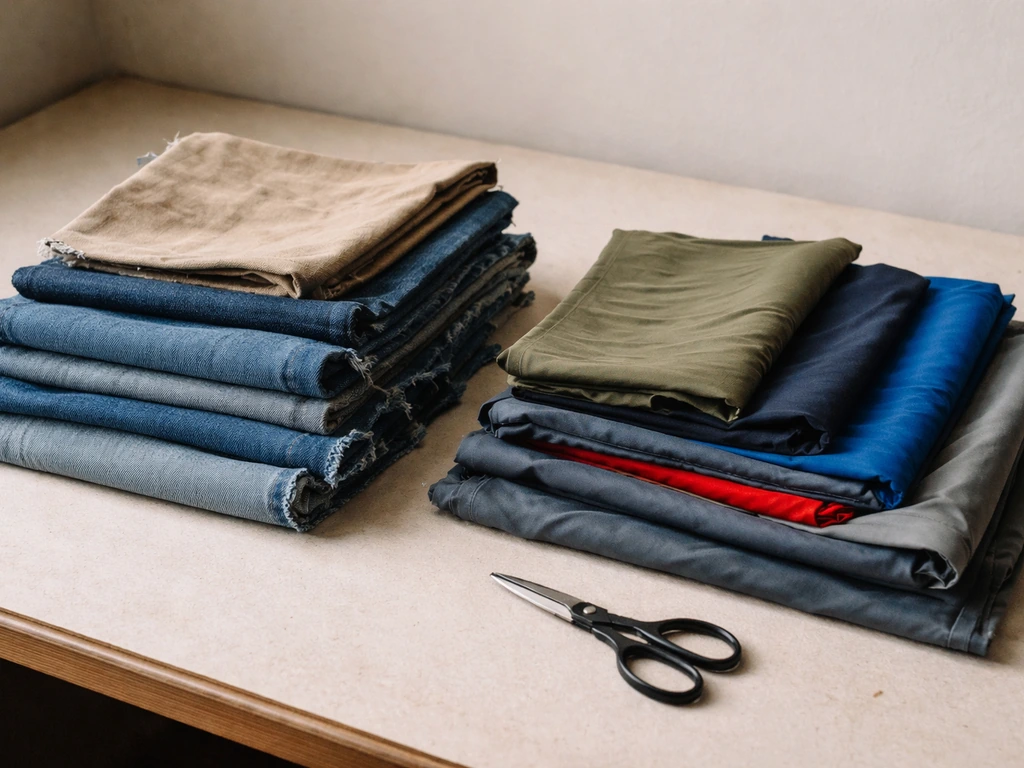
Fabrics that work well
- Denim (jeans, jackets): thick, slow to decompose, holds its shape under the weight of moist soil. One of the best DIY options.
- Canvas and heavy cotton (tote bags, duck cloth pants, canvas jackets): breathable, structurally solid, similar in function to purpose-made fabric pots.
- Fleece and felt (old sweatshirts, blankets): good aeration, won't fray when cut, easy to work with. Slightly faster to break down than denim.
- Natural linen and burlap (linen shirts, jute bags): excellent drainage and airflow, though burlap degrades within a single season so treat it as a one-use liner.
- Cotton bed sheets (folded to double thickness): works for shallow-rooted plants and seedlings; fold and sew or staple the layers together for structure.
Fabrics and garments to avoid
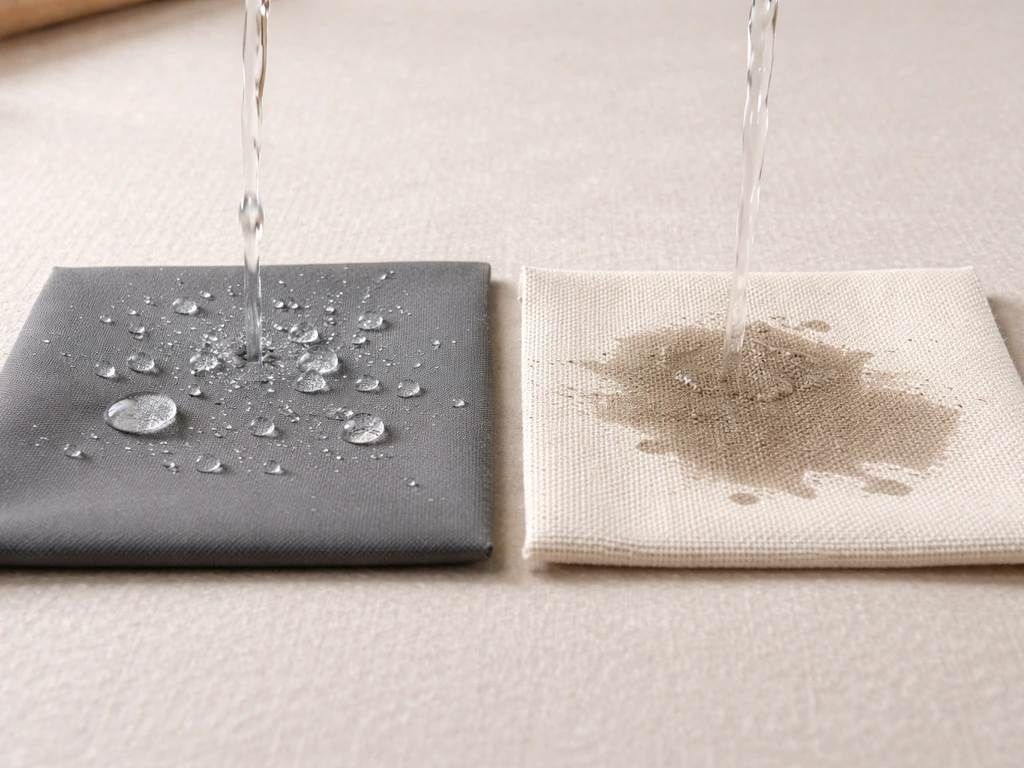
- Synthetic performance fabrics (nylon, polyester sportswear, Gore-Tex): poor water permeability, can trap moisture rather than letting it drain, and some have chemical coatings.
- Flame-retardant treated fabrics: these chemical finishes are a real concern near edible plants. If you're unsure whether a garment was treated, skip it.
- Garments with antimicrobial or odor-control labeling: many of these use silver-based or chemical treatments that you don't want leaching into soil growing food.
- Heavily bleached or dyed synthetic fabrics: the dye risk is lower with natural fibers but higher with synthetic blends, especially if the color is very dark or bright.
- Stretchy knit synthetics (spandex blends, leggings): they stretch under soil weight, lose shape, and don't breathe well enough to matter.
On the safety question: old clothes aren't sterile, and some fabric finishes are genuinely worth avoiding near edible plants. The practical rule is to choose natural fibers with minimal chemical treatment, and always launder the garment thoroughly before use, run it through a full wash cycle with a standard detergent and an extra rinse. This handles most microbial concerns and removes loose residues. Don't just grab a shirt out of the donation pile and fill it with soil the same afternoon.
Tools and supplies you'll need
- Sharp fabric scissors or rotary cutter
- Sewing machine with heavy-duty thread (or a staple gun with galvanized staples as a no-sew alternative)
- A ruler or measuring tape
- Safety pins for marking before cutting
- Optional: iron-on hem tape for quick no-sew edges on fraying fabrics
- A permanent marker for labeling bags by crop or size
Step-by-step: turning old clothes into usable grow bags
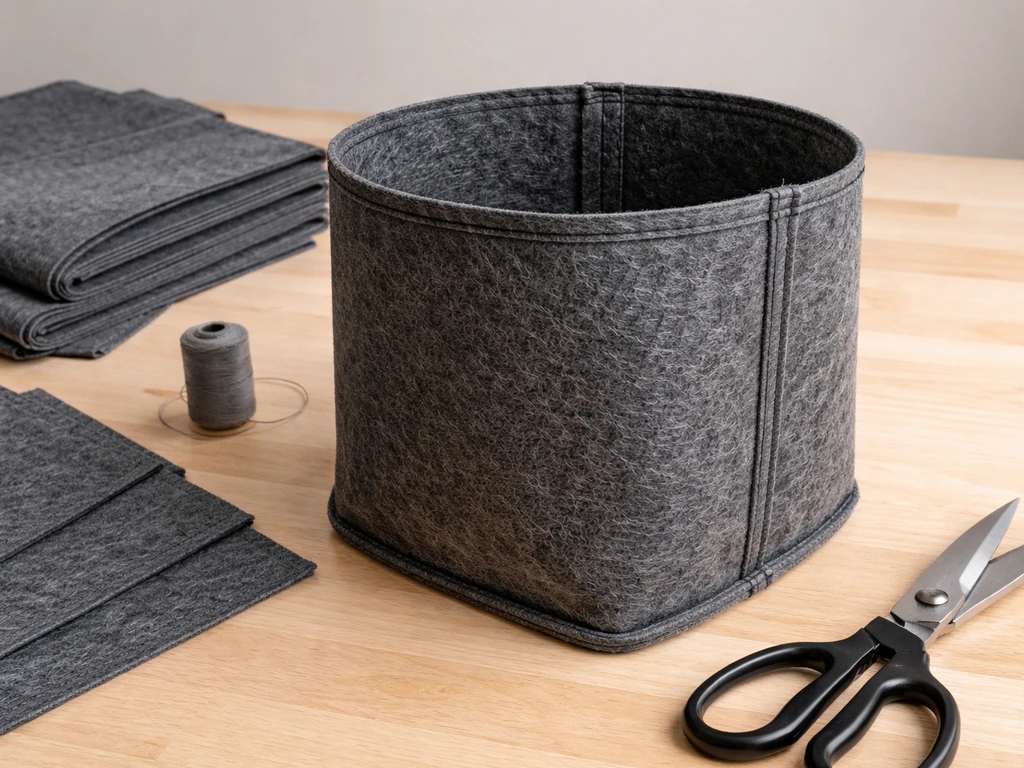
The goal is a bag that holds its shape when full of moist soil, drains freely from the bottom, and allows air to move through the sides. Here's how to get there from different starting garments.
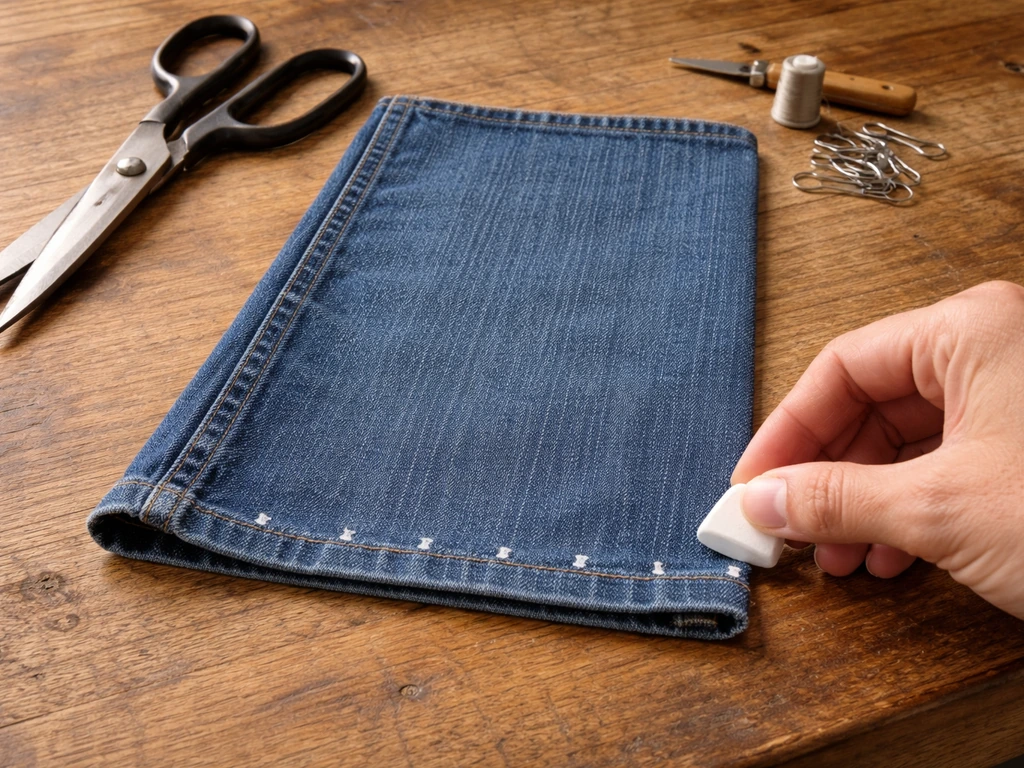
From jeans or pants
- Launder the jeans thoroughly and let them dry completely before starting.
- Cut each leg off at the desired height — for a roughly 5-gallon bag, aim for about 12 to 14 inches of leg length.
- Turn the leg inside out and sew or staple the cut end shut with a flat, reinforced seam. Fold the edge over twice before sewing for extra strength.
- Turn it right-side out. The existing waistband hem becomes the top opening.
- Use scissors or a seam ripper to open a 1-inch gap at the bottom seam corner on each side — these gaps act as drainage ports. Alternatively, punch several small holes with a hole punch or scissors around the bottom 2 inches.
- For a wider, shorter bag (good for potatoes or herbs), cut the jeans at the thigh, leave both legs attached, and sew across the full width at the cut edge. Fold the waistband down to create a stable rim.
From t-shirts or sweatshirts
- Launder and dry the garment first.
- Turn inside out and sew or staple the bottom hem shut with a double seam if the fabric is thin. For thicker sweatshirt material, a single reinforced seam works.
- Cut off the sleeves and set them aside (sleeves make good small herb pots on their own).
- Fold the cut sleeve openings under and sew them closed, or leave them — the extra openings at the shoulders actually add sidewall aeration.
- Turn right-side out. The collar opening is the planting hole. If it's too narrow for a full-sized plant, cut a wider circle at the top.
- Punch or cut several small drainage holes across the bottom. For thin cotton, fold the bottom edge over and sew it flat before adding holes so the fabric doesn't tear outward under soil weight.
From canvas tote bags or bed sheets
- Canvas tote bags can be used almost as-is: launder, then reinforce the bottom seam with extra stitching or a layer of iron-on hem tape, and add drainage holes at the base corners.
- For bed sheets, cut rectangular panels and fold them to double thickness. Sew three sides shut, leaving one long edge open as the top. This creates a pillowcase-style bag — simple, flexible in size, and surprisingly durable for one to two seasons.
- With sheets, size matters a lot: a single folded panel from a queen sheet can make multiple 3 to 5 gallon bags if you plan cuts in advance.
- Fraying edges on woven cotton are the main weakness. Fold all cut edges under at least half an inch before sewing, or apply iron-on hem tape to raw edges before assembly.
Reinforcing weak or thin fabrics
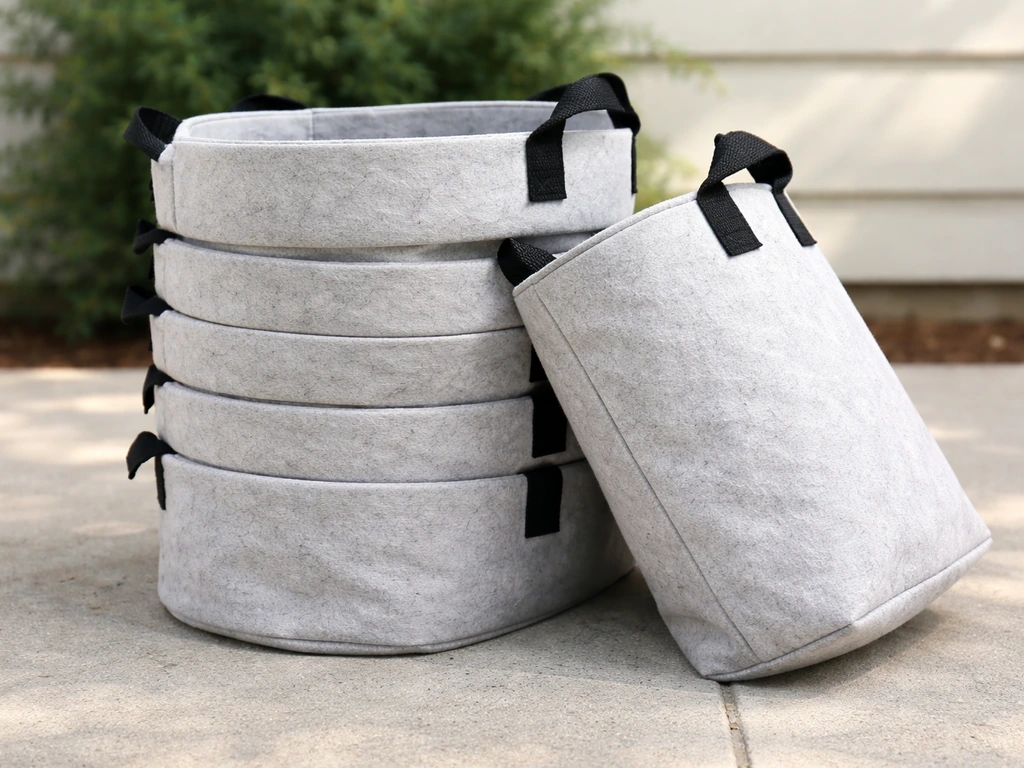
If your fabric feels flimsy when you hold a corner and imagine 10 pounds of moist soil pulling on it, it needs reinforcement. The easiest approach is to sew or staple a second layer of fabric to the outside of the bottom third of the bag, essentially a patch panel that takes the weight load. Old belt webbing or canvas strips sewn vertically up two sides of a t-shirt bag adds significant structural support without blocking airflow.
Sizing, drainage, and soil setup for different plants
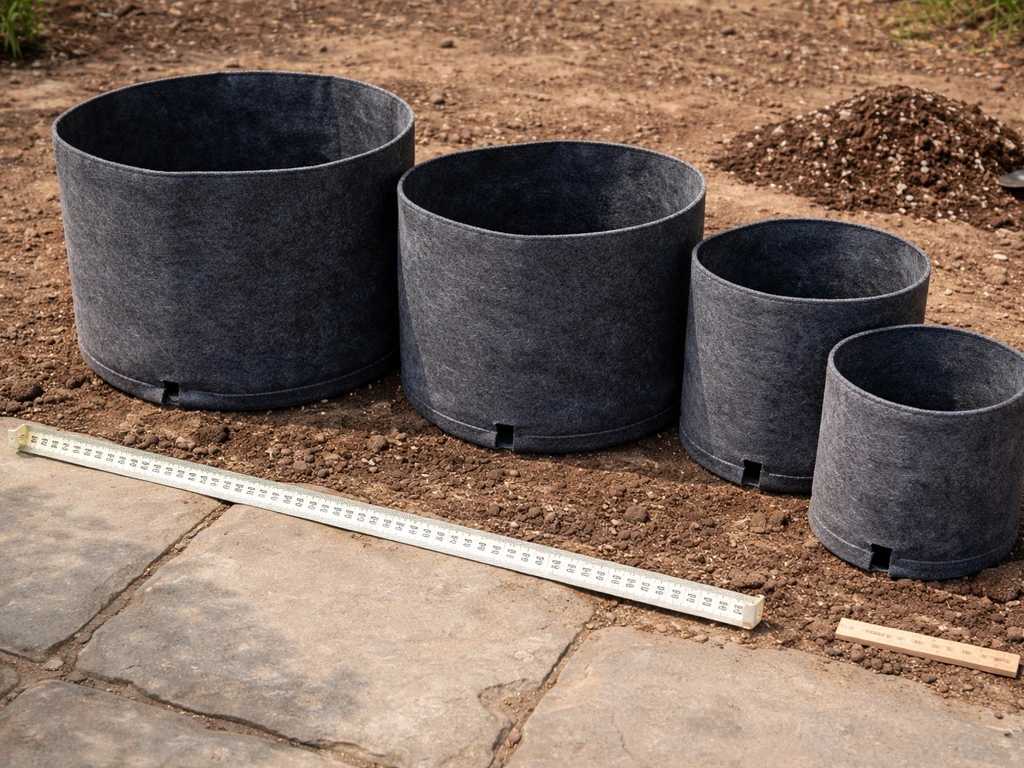
Getting the bag volume right is just as important as getting the fabric right. Too small and roots get bound mid-season; too large and you're lugging around unnecessary soil and wasting water. Oregon State University Extension's guidance is a practical starting point: most vegetables do well in containers holding 2 to 5 gallons and at least 12 inches deep. From there, adjust based on the specific crop.
| Plant type | Minimum bag volume | Minimum depth | Notes |
|---|---|---|---|
| Cherry tomatoes | 2–3 gallons | 12 inches | Determinate small-fruited varieties; needs daily watering in fabric bags |
| Determinate tomatoes | 5 gallons | 12 inches | Larger root mass; consider 7–10 gallon for indeterminate types |
| Peppers and eggplant | 3–5 gallons | 10–12 inches | Deep enough for tap root development |
| Lettuce, spinach, herbs | 1–2 gallons | 6–8 inches | Shallow-rooted; wide and shallow beats tall and narrow |
| Potatoes | 5–10 gallons | 12–15 inches | Wide bags allow hilling; jeans-leg bags work very well here |
| Dwarf flowers (marigolds, pansies) | 1–2 gallons | 6 inches | Good use for sleeve cutoffs from sweatshirts |
| Larger flowering plants (dahlias, zinnias) | 3–5 gallons | 10–12 inches | Need structural stability as plants get top-heavy |
| Strawberries | 1 gallon per plant | 6–8 inches | Wide shallow bags or multi-plant pockets work well |
| Dwarf trees / shrubs | 15–25 gallons | 18+ inches | DIY bags rarely have enough durability for multi-year use here |
Drainage: what actually works
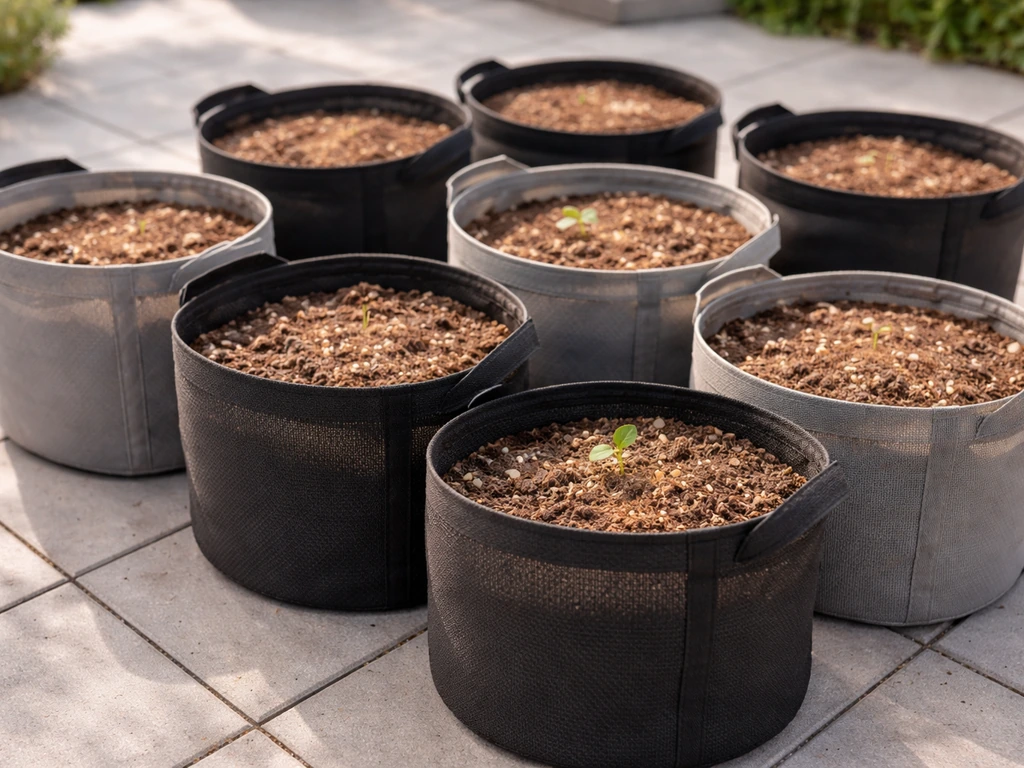
Drainage in a fabric bag happens two ways: through the fabric walls (passive, slow) and through holes or gaps at the base (active, fast). For most crops, you want both. Add at least four to six small holes or gaps across the bottom 2 inches of the bag, not just one central hole, which can clog with root growth or soil. University of Illinois Extension research makes clear that gravel layers at the bottom of containers don't actually improve drainage the way people think, so don't waste space packing stones in the bottom. Just ensure the holes are present and unobstructed, and elevate the bag slightly off a solid surface (a few pebbles or a pallet slat under the bag is enough) so the base doesn't sit in standing water.
Soil mix for fabric bags
Garden soil straight from the ground is too dense and heavy for fabric bag use. It compacts in containers, cuts off airflow through the fabric, and stays soggy. Use a mix of high-quality potting mix (about 60%), compost (30%), and perlite or coarse vermiculite (10%) to keep the medium light and well-draining. This is especially important in DIY bags where the fabric may not be as permeable as a commercial felt pot. Fill the bag to within 2 inches of the top, leaving room to water without overflow carrying away soil.
Planting and growing tips to prevent common fabric-bag problems
Watering correctly
Fabric bags dry out faster than plastic pots because moisture escapes through the walls. In warm weather, this can mean watering daily or even twice daily for smaller bags. The right signal to water is simple: push your finger an inch into the soil at the top. OSU Extension Service recommends checking soil moisture by pushing a finger about 2 inches into the soil; if it feels dry to the fingertip, it’s time to water. If it's dry, water thoroughly until moisture visibly drips from the base holes. If it's still damp, wait. Watering on a schedule rather than by soil feel is the most common mistake with fabric containers, and it leads to both overwatering (soggy roots, damping off) and underwatering (wilting, blossom drop in tomatoes). For larger DIY bags in full sun, consider placing a layer of mulch or wood chips on top of the soil to slow surface evaporation.
Nutrient management
Because fabric bags drain so freely, nutrients leach out of the soil faster than they would in a closed plastic container. Top-dress with compost every three to four weeks, or use a liquid fertilizer (diluted fish emulsion or balanced NPK liquid feed) every two weeks once plants are established. Don't load the bag up with slow-release granules at planting and assume you're done, they'll flush out faster than the label suggests when you're watering daily.
Preventing soil spill and bag collapse
Soil spilling out the top or sides usually means the bag is overfilled, the fabric has weakened at the seams, or the bag is too narrow for its height. Leave at least 2 inches of headspace. Check seams at the beginning and middle of the season, if a stapled seam is pulling apart, reinforce it immediately with additional staples or a few hand stitches before the bag fails completely. Wide, squat bags are structurally more stable than tall narrow ones, which is worth keeping in mind when you're sizing your cuts.
Managing fabric decomposition
Natural fabric bags will degrade over time, especially where they contact moist soil. Denim and canvas generally last two to three seasons. Cotton t-shirts and sheets may only hold up for one season before the bottom weakens. Check the bag bottom at the end of each season. If it's thinning or pulling apart, either replace the bag or transfer the plant to a new container for the following year. This is actually one reason to look at how to clean grow bags at the end of the season, removing soil and drying fabric bags thoroughly dramatically extends their lifespan.
Fungus gnats and moisture pests
Fungus gnats love moist growing media, and if you're consistently overwatering a fabric bag, they'll find it. University of Minnesota Extension's guidance is straightforward: let the top 1 to 2 inches of soil dry out completely between waterings. That environment doesn't support their larvae. Yellow sticky traps placed near the bags help you monitor how bad a problem actually is before deciding on treatment. In fabric bags, this is usually a sign you're watering too often, fixing the watering schedule typically resolves it without any intervention.
Crop-specific guidance and troubleshooting
Vegetables
Tomatoes are the most popular container crop, and fabric bags suit them well. Cherry tomatoes can manage in a 2 to 3 gallon DIY bag, but determinate full-sized varieties need at least 5 gallons and 12 inches of depth. Indeterminate types (beefsteak, heirloom) really want 7 to 10 gallons if you want full production. For jeans-bag growers: one full leg from a pair of regular jeans, cut at about 14 inches, holds roughly 3 to 4 gallons depending on diameter. That's enough for one cherry tomato or a compact pepper. Potatoes do brilliantly in wide fabric bags, a 10-gallon denim bag gives you room to hill soil up as the plant grows, which is exactly how you maximize yield. Lettuce and shallow-rooted herbs are the most forgiving: even a sweatshirt sleeve stuffed with good potting mix works.
Troubleshooting vegetables: yellowing lower leaves usually mean nitrogen has leached out, feed with liquid fertilizer. Wilting despite moist soil suggests root rot from poor drainage; check that base holes are open and the bag isn't sitting in standing water. Illinois Extension explains that when soils remain saturated, roots can’t function properly and plants can experience drowning or root stress that can lead to root failure and root rot. Blossom drop in tomatoes and peppers during heat waves is a watering consistency issue, daily watering in summer is not optional for fabric bags.
Flowers
Annual flowers are some of the most forgiving plants to grow in DIY fabric bags. Marigolds, zinnias, pansies, and petunias all do well in 1 to 3 gallon bags. Dahlias need more room, at least 5 gallons, and their tubers appreciate the excellent drainage that fabric provides. The main issue with flowering plants in DIY bags is top-heaviness: a tall zinnia or dahlia in a narrow t-shirt bag will tip over in any wind. Use wide-bottomed bags for taller flowers, or stake the plant and tie the bag to a fence or railing.
Trees and shrubs
This is where DIY fabric bags hit their limits. Dwarf fruit trees and shrubs need 15 to 25 gallons of soil volume and multi-year structural integrity. A repurposed denim jacket isn't going to hold 20 gallons of moist soil through three winters. If you want to grow a dwarf citrus, fig, or blueberry in a fabric container, invest in a commercial grow bag with reinforced handles and UV-stable fabric. DIY bags can work for first-year seedling trees or for rooting cuttings in small volumes, but they're not the long-term solution for woody plants.
Mushrooms
Growing mushrooms in bags is a different discipline from vegetable container gardening. Mushroom cultivation requires sterile substrate, specific gas exchange properties, and precise moisture management. Old clothing cannot be adequately sterilized for mushroom production using home methods, even thorough laundering leaves behind contamination risks. If you're specifically interested in mushroom bag cultivation, purpose-made polypropylene grow bags that can be pressure-sterilized are the standard tool. DIY fabric bags from old clothes are not appropriate for this application.
Common problems and fixes
| Problem | Likely cause | Fix |
|---|---|---|
| Mushy, discolored roots | Overwatering or blocked drainage | Check and clear base holes; let soil dry between waterings; elevate bag off solid surface |
| Wilting despite moist soil | Root rot from anaerobic conditions | Improve drainage; consider repotting into fresh mix if roots are heavily damaged |
| Soil spilling from bag sides | Seam failure or overfilling | Reinforce seam with staples or stitching; reduce fill level to 2 inches below top |
| Yellowing leaves, slow growth | Nutrient leaching | Apply liquid fertilizer every 2 weeks; top-dress with compost |
| Fungus gnats | Consistently moist topsoil | Let top 1–2 inches dry completely before watering; use yellow sticky traps to monitor |
| Bag collapsing mid-season | Fabric decomposition at bottom | Replace bag; choose heavier fabric (denim, canvas) for next season |
| Damping off in seedlings | Overwatering and poor airflow | Water less frequently; space seedlings; ensure good sidewall aeration |
| Plant drying out too fast | Thin fabric losing moisture too quickly | Double-layer the bag; add mulch to soil surface; water more frequently in heat |
One final note: at the end of the growing season, empty and clean your DIY bags the same way you would a commercial fabric pot. Shake out the root ball, rinse away soil, and dry the fabric completely before storing. This is worth doing even if you plan to compost the bag after a season or two, a clean dry bag stored indoors lasts longer than one that sits outside in a damp pile. Thinking about what to do with grow bags at end of season is a habit worth building early, even with DIY versions.
FAQ
Will old t-shirts or jersey knits hold up if I’m using a lot of soil and watering daily?
Yes, but you need to test the stability of the seam type. If your garment uses knit stretches, consider sewing a second reinforcement layer at the bottom third (or adding belt webbing on the outside), and make sure the fabric does not sag when pulled. After you fill it, give the bag a gentle shake, and check for seam gaps before planting.
What kinds of old clothes should I avoid using because of chemical finishes?
For edibles, avoid clothing that came in contact with pesticides, herbicides, or treated yard waste (especially if it was used for lawn work). When in doubt, choose garments that were only worn normally (cotton denim, unbleached canvas) and launder with the extra rinse routine described in the article, then let the fabric fully dry before cutting.
Should I wash the garment more than once before I make the grow bag?
No. Before cutting, rinse off any loose lint and pre-wash to shrink the fabric so it does not pull out of shape once filled. Then dry completely, cut, and only afterward launder again if the fabric was stored somewhere dusty or musty.
Can I put gravel at the bottom for drainage, or is that unnecessary in DIY fabric grow bags?
It depends on your drainage plan. If you have multiple base holes, you can use potting mix and fill to within 2 inches of the top, then water until you see runoff from the bottom holes. If you are tempted to use a gravel “drain layer,” skip it and focus on keeping the holes unobstructed and the bag elevated.
How should I handle water runoff, can I place a grow bag directly on a tray?
Use saucers or trays only if you keep the bag elevated so runoff can leave the base. The goal is to catch drips without letting water re-enter the fabric. If your setup sits in standing water, roots can still rot even with holes in the bottom.
If my fabric grow bag dries quickly, how do I avoid overwatering or underwatering?
A simple rule is to water based on the top 1 to 2 inches of soil dryness rather than a calendar. In hot weather, smaller DIY bags may need daily watering, but in cooler conditions you should slow down. If you consistently see fungus gnats, that often means the top layer is staying wet too long.
Can I mulch on top of the soil in a fabric grow bag, and will it affect watering?
Yes, but it should be a light top-dress, not a compacting blanket. Spread compost in a thin layer or use mulch to reduce surface evaporation, and keep it from touching the plant stem. Reapply during the season because fabric bags can leach nutrients faster than closed containers.
How do I move a plant into full sun when it’s in a fabric grow bag?
In general, transition plants gradually if they were indoors or in cooler shade. Start with morning sun or part shade for several days, and rotate the bag if you notice one side drying faster. Fabric bags can create uneven moisture and temperature if one side is more exposed to wind.
My tall plant keeps tipping over, what’s the best way to stabilize a DIY grow bag?
If your bag is tipping, size and shape are the first fix, use a wider bottom bag or reduce the plant height by choosing varieties suited to containers. For existing plants, stake early before roots fill the bag, and tie the plant to the support in a way that does not strain the fabric seams.
How can I tell when my DIY grow bag is getting ready to fail?
Look for thinning fabric at the bottom seam and around any punched holes. Denim and canvas often last longer, while thinner cotton can fail sooner, especially if the bag stays outdoors through wet winters. Reinforce seams early and replace the bag at the first sign of bottom weakness.
Can I keep a dwarf fruit tree or perennial herb in a DIY clothing grow bag for multiple years?
For perennial plantings, DIY bags are usually a short-term solution because seams and fabric degrade under repeated wet-dry cycles and UV exposure. If you need multi-year durability, switch to a commercial reinforced option, or plan to transfer the plant at the end of the season.
Can I use DIY fabric grow bags for mushroom growing?
No. Mushroom cultivation needs sterile, controlled conditions that home laundering of old clothing cannot reliably provide. If you want to grow mushrooms, use pressure-sterilizable polypropylene grow bags designed for that purpose, not fabric made from old garments.
What’s the best end-of-season routine to keep DIY grow bags usable next year?
For best results, empty the bag after harvest, rinse out remaining soil, and dry completely before storage. If you store a damp bag, it can develop odors or mold and be harder to reuse later. Drying indoors and keeping it out of direct moisture extends lifespan.
Learn how to make a fabric grow bag at home with materials, sizing, drainage, and step-by-step sewing instructions.
Can you wash grow bags? Clean fabric bags step-by-step, remove soil, avoid odors, dry fully, and reuse safely.
Step-by-step how to use fabric grow bags, from filling and pre-wetting to planting, watering, feeding, and fixes.