Break up the mycelium in your grow bag when it's roughly 20–30% visibly colonized: strong, bright white patches across multiple areas of the bag, but still plenty of uncolonized grain or substrate left. That's your window. Too early and you risk stalling fragile growth; too late and you're not saving yourself much time anyway.
When to Break Up Mycelium in a Grow Bag: Timing Guide

Marcus Holloway
24 May 2026
What breaking up mycelium actually does
When mycelium colonizes a grow bag, it tends to expand outward from the original inoculation point. Left alone, that single patch slowly works its way through the substrate. Breaking it up, often called a 'break and shake,' takes those colonized clumps and redistributes them throughout the bag so you end up with dozens of new starting points instead of one. Think of it like scattering seeds across a field instead of planting them all in one corner.
The practical outcome is faster, more uniform colonization. Each redistributed fragment of active mycelium starts recolonizing the surrounding uncolonized grain or substrate immediately. Done at the right stage, it can meaningfully shorten your total colonization time and prevent the frustrating scenario where half the bag is fully colonized while the other half barely has any white showing.
It's worth being clear about what it is not: breaking up mycelium is not damaging or destroying it. Mycelium is resilient. As long as you handle things cleanly and hit the right stage, the network recovers quickly and the disruption works in your favor.
The timing rules: when to disturb vs. when to leave it alone
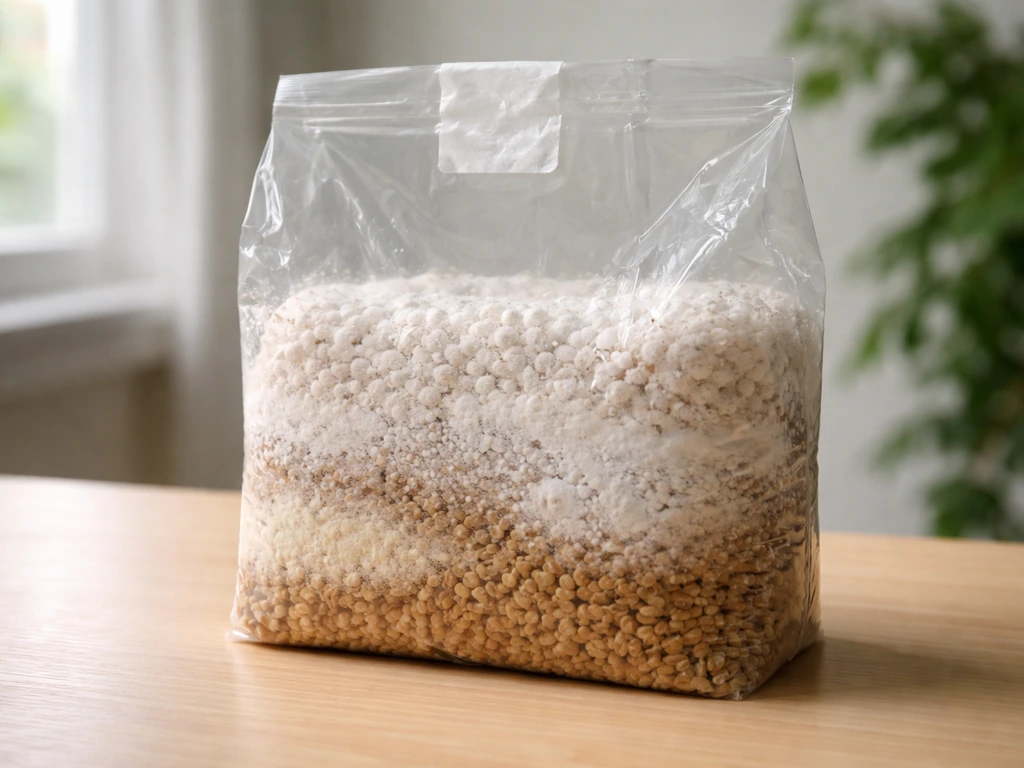
The most consistent guidance across experienced growers lands in the same general zone: 20–30% visible colonization is the sweet spot for a first break and shake. Some guides push it to 30–40%, and a few say wait until at least one-third of the substrate is clearly colonized before touching it. The underlying logic is the same in all cases. You need enough mycelial biomass present that when you redistribute it, each fragment has the vitality to recolonize aggressively. Too little biomass and you're just spreading weakness around.
Below about 15% colonization, breaking up the bag is almost always a mistake. The hyphal network is still fragile and thin, and the disruption does more damage than good. You may stall the whole grow. On the other end, once you're past roughly 70% colonization, a break and shake typically isn't worth it. The bag is going to finish on its own in a reasonable time anyway, and the recovery risk isn't worth the marginal speed gain.
In terms of calendar time, the 20–30% colonization window often falls around 12–18 days after inoculation depending on species, temperature, and substrate. Some all-in-one grow bags average around 22 days to full colonization, which puts the break-and-shake window at roughly one to two weeks in. Don't rely on calendar time alone though. Let the bag tell you by what you can see.
| Colonization Level | What You See | What To Do |
|---|---|---|
| Under 15% | Faint, wispy white threads; mostly uncolonized substrate | Leave it alone. Too early to disturb. |
| 20–30% | Strong white patches in multiple spots; firm-looking clumps forming | Ideal break and shake window. |
| 30–50% | Thick white coverage across a large portion; some areas still bare | Still acceptable to break up if growth is stalled or very uneven. |
| 50–70% | Mostly white; only scattered uncolonized patches remaining | Borderline. Only shake if growth is clearly stalled. |
| 70%+ | Nearly or fully white throughout | Leave it alone. Let it finish and move toward consolidation. |
Reading your bag: what the stages look like and what can go wrong
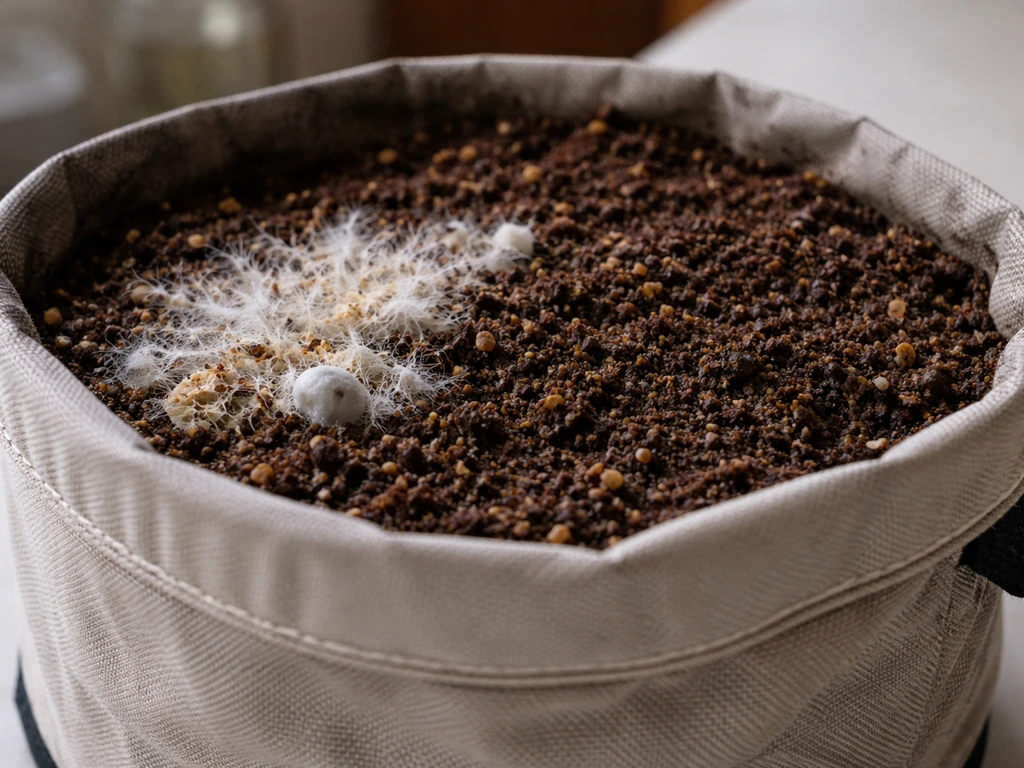
Healthy early colonization looks like bright, cottony white patches that are clearly distinct from the surrounding grain or substrate. The mycelium has a clean, almost luminous white appearance and may form slight clumps where the inoculation point was. That firmness and brightness is what you want to see before attempting a break and shake.
Mid-colonization (your target zone) shows multiple strong white areas, often with some visible consolidation where earlier patches have thickened. The bag will have visible sections of dense white alongside sections that still look mostly like grain. This contrast is actually useful: it confirms there's active colonization happening and enough biomass to redistribute.
Late-stage consolidation looks like a bag that's mostly or fully white, often with the substrate forming a semi-solid block. At this point the mycelium is in the process of digesting nutrients and shifting toward reproductive readiness. Disturbing this stage can disrupt the transition and delay fruiting rather than helping it.
Common problem patterns to watch for
- Stalled growth: Bag was progressing, then seems to have stopped at 30–40%. A break and shake here can restart momentum by exposing fresh substrate to active mycelial fragments.
- Uneven colonization: One corner or side is heavily colonized but the rest is barely touched. Redistributing the colonized clumps gives the stragglers more contact with active mycelium.
- Wispy, slow-spreading growth: Growth is present but looks thin and lazy. This is often a temperature issue first (check your incubation temp), but if conditions are right, a break and shake at 20–25% can help.
- Green, black, or pink patches: Stop. Do not break up the bag. These colors indicate contamination (Trichoderma = green, Aspergillus or Mucor = black, Neurospora = pink). More on this in the 'when not to break it up' section below.
- Sour or fermented smell when you handle the bag: Another contamination red flag. Set the bag aside rather than shaking it.
How to break up mycelium in a grow bag safely
The good news with fabric grow bags is that blank" rel="noopener noreferrer">many break-and-shake steps can be done without opening the bag at all, which significantly reduces contamination risk. For all-in-one style bags especially, the standard recommendation is to work through the bag wall by massaging and compressing it from the outside. This keeps the sterile environment intact while still breaking up and redistributing the colonized clumps.
- Set up a clean workspace. Wipe down the surface with isopropyl alcohol. Turn off any fans or air circulation in the room. Moving air is your enemy during this process because it carries spores and contaminants.
- Wash your hands thoroughly and put on clean nitrile gloves. If you need to open the bag for any reason, work as quickly as possible.
- Inspect the bag before touching it. Hold it up to a light source and look for any colored patches (green, black, pink, orange) or areas that look wet and slimy. Check for unusual smells. If anything looks off, skip the shake and read the contamination section below.
- Confirm you're in the right colonization window. You should see firm, bright white patches covering roughly 20–30% of the visible substrate with plenty of uncolonized material remaining.
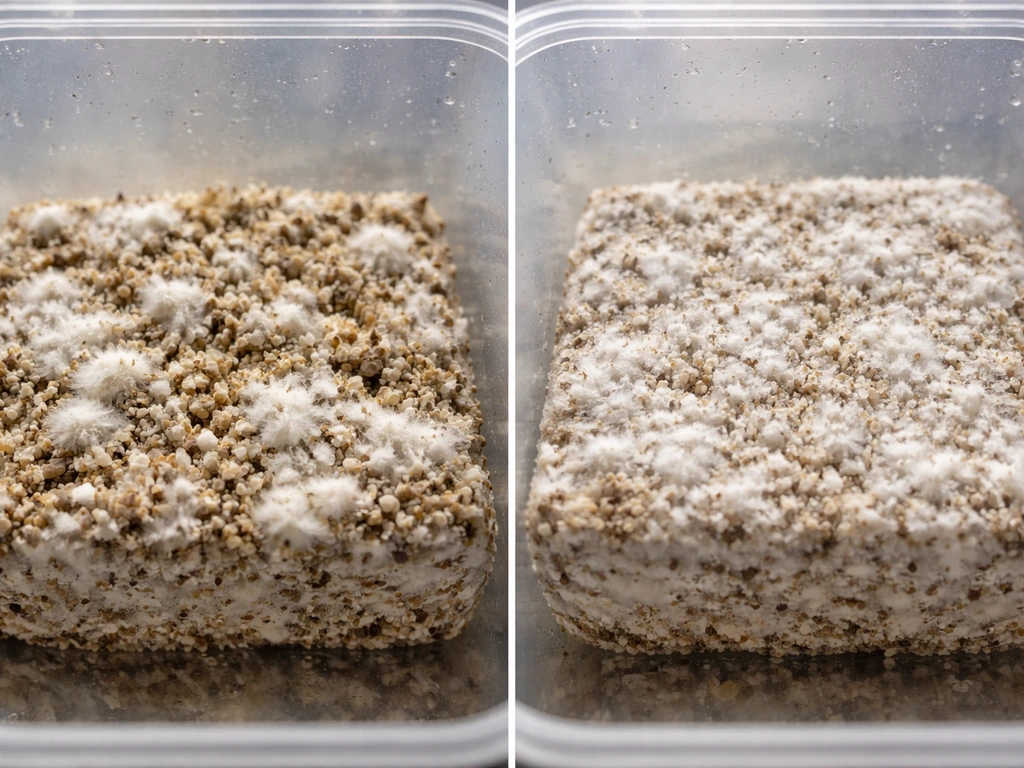
- Gently massage the outside of the bag with both hands. Work the colonized clumps loose by pressing and rotating. The goal is to break the firm colonized chunks into smaller pieces, not to pulverize everything into powder.
- Once the clumps are loosened, shake and rotate the bag to redistribute the broken-up material so it mixes with the uncolonized substrate. You want the white fragments spread throughout rather than sitting in one zone.
- Re-seal or re-secure the bag if it was loosened at all. Return it to your incubation space in the same orientation and conditions as before.
- Mark the date so you know when the shake happened and can track recovery.
How aggressively you break it up matters. Light flaking and redistribution are enough in most cases. You don't need to turn the colonized substrate into dust. The aim is fragmentation into pieces that can each act as new growth nuclei, not complete destruction of the mycelial structure. If your bag has very firm, dense clumps, a slightly firmer squeeze through the bag wall is fine, but avoid tearing or puncturing the bag itself. A spawn-bag style guide also emphasizes handling gently and only to the extent needed to mix and redistribute colonized material, rather than tearing or opening extensively avoid tearing or puncturing the bag itself.
What to expect after breaking up (recovery timeline and signs it worked)
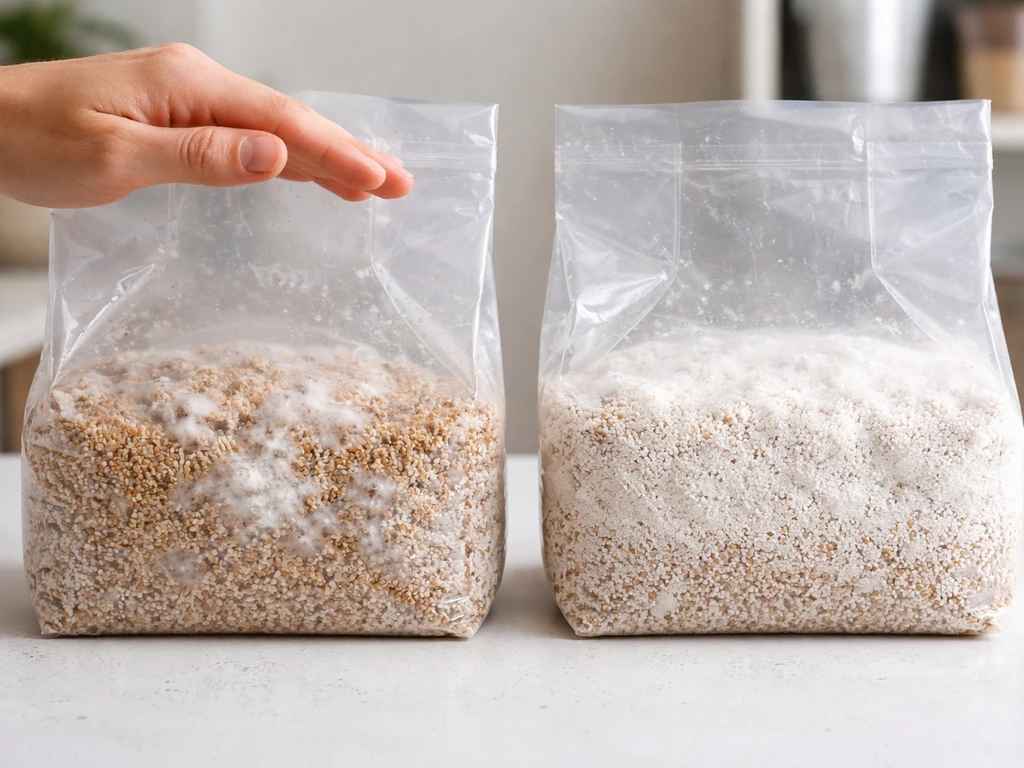
After a break and shake, the bag will look significantly less colonized than before. That's normal. You've redistributed the white patches and they'll appear more spread out and thinner. Don't panic. Within a few days, you should start to see the white network re-establishing and spreading from multiple points simultaneously. This multi-point growth is exactly what you were going for.
Expect visible recovery signs within about 3–5 days under good incubation conditions. Within 7–10 days, many bags that were at 20–30% colonization before the shake will be pushing 60–80% or higher. The acceleration is real and noticeable when timed correctly.
Signs it worked: the white growth is appearing in new areas that were previously uncolonized, the spread looks even and multi-directional, and the mycelium looks bright and healthy (not yellowing or discolored). Signs it didn't work: growth has completely stalled for more than 10 days with no visible change, or you're now seeing colored contamination that wasn't visible before the shake (which likely means contamination was already present and the shake exposed it).
Once the bag reaches full colonization after a shake, it will enter a consolidation phase where the mycelium solidifies and digests available nutrients before shifting toward reproductive growth. This phase can look like the bag has 'stopped doing anything' but it's a normal transition. Don't shake it again at this point. Just leave it alone and follow your fruiting initiation steps when the time comes. If you're working with all-in-one grow bags, this connects directly to when and how to trigger fruiting, which is its own process. For more on timing and cues, see guidance on when to fruit in one all-in-one grow bag when and how to trigger fruiting.
When NOT to break up your grow bag
There are clear situations where breaking up the mycelium will make things worse, not better, and it's important to recognize them before you touch the bag.
Contamination is present or suspected
If you see any green, black, pink, or orange patches in the bag, do not shake it. Shaking a contaminated bag will spread whatever mold or bacteria is growing throughout the entire substrate and almost certainly kill the grow. Worse, it increases the risk of spreading contamination to other bags in your space. Isolate the bag immediately, seal it in a plastic bag, and dispose of it away from your grow area. A sour or fermented smell is also a sign of bacterial contamination and the same rule applies: isolate, don't shake.
The bag is already fully or nearly fully colonized
Once you're at 70% colonization or higher, a break and shake offers very little benefit and carries real risk. The mycelium is close to done and likely moving into consolidation. Disturbing it at this stage can delay the transition to pinning and fruiting. Just let it finish.
Growth stalled but you're very early in colonization
If growth has stalled at under 15% and you're tempted to shake things up, resist. The most likely causes are temperature or humidity issues, not something a shake will fix. Check your incubation conditions first. A bag sitting at 15°C isn't going to respond well to a shake; it needs warmth. Breaking up fragile early-stage mycelium at this point is more likely to cause further stalling.
You've already shaken the bag recently
Repeated disturbance during colonization is counterproductive. If you broke up the bag 5 days ago and it's still recovering, leave it alone. Unnecessary handling is one of the more common beginner mistakes, and the mycelium needs uninterrupted time to re-establish after any disturbance. One well-timed break and shake is usually all you need for a given colonization run.
Quick troubleshooting checklist: what to do today
Use this checklist to make a decision right now about your specific bag:
- Look at the bag. What percentage of the substrate looks visibly white and colonized? Under 15%: leave it alone. 20–30%: break and shake window is open. Over 70%: leave it alone and move toward fruiting prep.
- Check for contamination. Any green, black, pink, or orange patches? Sour or off smell? If yes: isolate the bag. Do not shake. Dispose of it away from your other bags.
- Check your incubation conditions before assuming a shake is needed. Is the temperature in the right range for your species (most species prefer 21–24°C)? Is there adequate darkness and stable humidity? Fix conditions first if they're off.
- If you're in the 20–30% window with no contamination signs and healthy white growth: proceed with a clean break and shake using the steps above.
- After shaking, note the date and give the bag at least 5–7 days before evaluating progress. Expect multi-point regrowth and faster spread.
- If growth is still stalled 10+ days after a shake with no signs of regrowth: reassess for contamination or environmental issues. A shake that doesn't work usually means the conditions are wrong or contamination was already present.
- Do not shake again once the bag is past 70% colonized or in the consolidation phase. Focus on fruiting initiation steps from this point forward.
The whole break-and-shake process is genuinely simple once you know the visual cues. Most failed attempts come down to either acting too early (fragile mycelium, not enough biomass to redistribute) or missing a contamination sign before shaking. Nail the timing, keep things clean, and the technique works reliably. If you're also working through questions about when to mix an all-in-one bag, how to inoculate your bag initially, or when to move toward fruiting, those stages connect directly to what you're doing here and it helps to think of them as one continuous process rather than isolated steps. If you are wondering how to inject spores into grow bag, that initial inoculation step determines how cleanly the first colonization starts.
FAQ
How can I tell if I’m really in the 20–30% range and not just looking at one clump?
Don’t judge only by “how much white you see.” Aim for the 20 to 30% window where multiple distinct white patches exist across the bag, not one large clump. If you can only see colonization near the inoculation spot, you are usually still under the biomass needed for an effective redistribution.
If my bag looks slow, should I break it up earlier to “catch up”?
Yes, temperature can make the timing window feel off. A colder bag can look behind schedule, but shaking at low activity often causes a stall that lasts longer than the natural recovery would have taken. If your bag is cool to the touch (or room temps are unstable), correct the incubation first, then re-check visuals before you break it up.
Can I do a second break and shake if the first one didn’t fully colonize?
For most grows, one break and shake is enough. If you still see large uncolonized areas after recovery (for example, after 7 to 10 days), don’t automatically shake again. Wait until you clearly reach the next viable biomass stage, and check for issues like poor temperature, low moisture, or hidden contamination before disturbing it.
What if my bag looks like it’s recovering but the color turns yellow or the smell changes after I shake it?
If it starts yellowing, developing a sour or fermented smell, or showing colored spots you did not have before, treat it as a contamination or stress event, not a normal recovery step. In that situation, isolate the bag and do not perform additional shaking or fruiting attempts with the same compromised block.
Is it ever necessary to open the grow bag to break up mycelium?
Don’t open the bag unless you have a clear reason, and avoid exposing fresh substrate. If you are using an all-in-one fabric style bag, the outside massage approach keeps the inner environment intact. If your bag is not all-in-one, you still want minimal opening time and clean gloves or a clean workspace to reduce the chance you introduce contaminants during handling.
How forcefully should I break up the mycelium through a fabric bag wall?
Lightly re-spreading the clumps is the goal. Avoid aggressive tearing or pulverizing, because it can damage the integrity of the colonized network and create uneven fragmentation. If the bag wall is thin enough to cause tearing, switch to gentle compression through the wall rather than forcing larger disruptions.
What does “normal recovery” look like versus a failed shake?
If the bag seems to recover but the colonization becomes more “patchy” instead of spreading multi-directionally, you may have fragmented too little biomass or handled it too early. Re-check incubation conditions (especially temperature) and wait the full recovery window before deciding anything, since short delays are common right after the shake.
Can I break and shake when I’m not confident about stable temperature and humidity?
Yes, but only if you can keep conditions stable during the shake. If your bag is cold or you’re repeatedly opening the area, you can extend recovery beyond the typical 3 to 5 days. Plan the shake when you can maintain warmth and keep handling quick and clean, then leave the bag alone.
If I didn’t see contamination before, but I notice it after shaking, what should I do?
Don’t shake a bag with any visible green, black, pink, or orange, and don’t shake one that smells sour or fermented. If you see discoloration only after shaking, treat that as a sign contamination was likely already present and got exposed, then isolate the bag rather than trying again.
Once the bag is fully colonized, should I shake again to prevent consolidation delays?
If it has reached full colonization after the shake and starts consolidating, you should not shake again. Consolidation can look like nothing is happening while the substrate digests nutrients and transitions. At that point, focus on fruiting triggers and environmental parameters instead of further redistribution.
What if the bag is 2 weeks old but I’m not at 20–30% colonization yet?
Calendar days are useful, but don’t rely on them alone. If visuals are outside the recommended stage (under 15% or over 70%), use visual cues over day counts. Different species and substrate will shift the day range, so the “percentage colonization” check is the safer decision aid.
I’m tempted to shake again five days after the last shake, should I?
Most beginner failures come from either disturbing too frequently or trying to fix early stalling with shaking. If you already broke it up recently (for example, within the last few days), leave it alone and first verify incubation conditions like temperature and airflow. Shaking again before full recovery often makes the situation worse.
If I’m around 10–15% colonization, is there any scenario where breaking it up could still help?
Use a decision rule: if it’s below 15%, shaking is usually a net loss because the hyphae are fragile. If you’re uncertain, err on the side of waiting, because a short delay is often recoverable by correcting incubation conditions, while premature shaking can cause a longer stall.
Next Articles
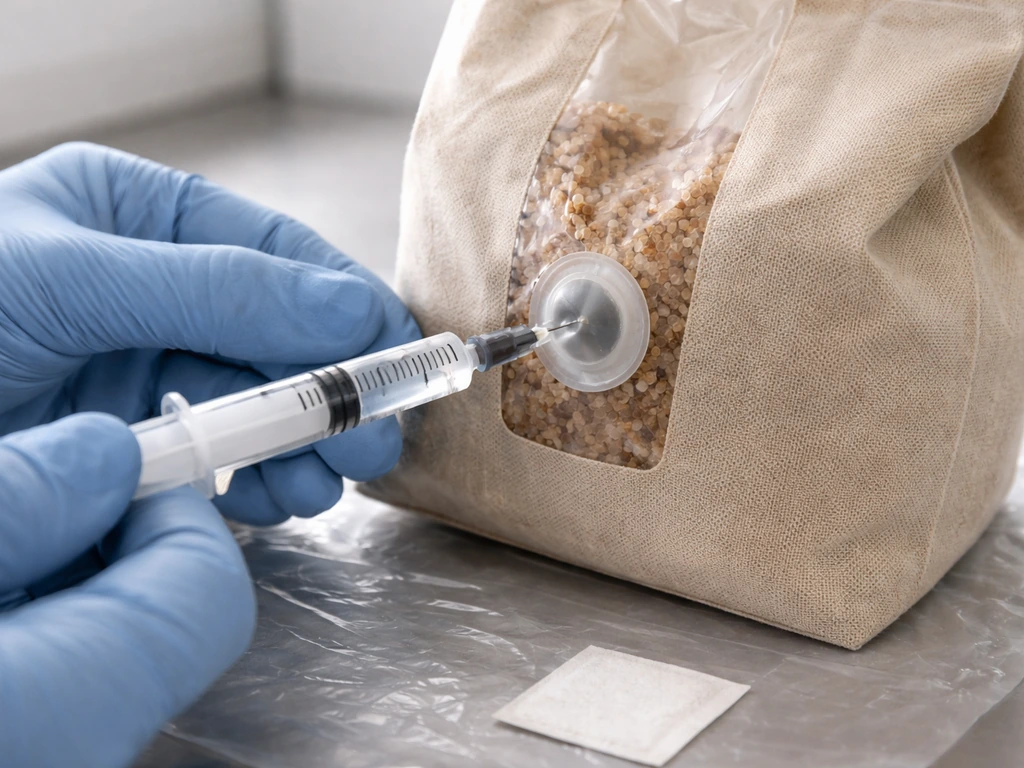
How to Inject Spores Into a Grow Bag Step by Step
Step-by-step how to inject mushroom spores into fabric grow bags, avoid contamination, verify colonization, then move to

Best Landscape Fabric for Grow Bags: Buy and Install Guide
Choose the best landscape fabric for grow bags with weed-blocking, drainage and aeration tips plus DIY install steps.
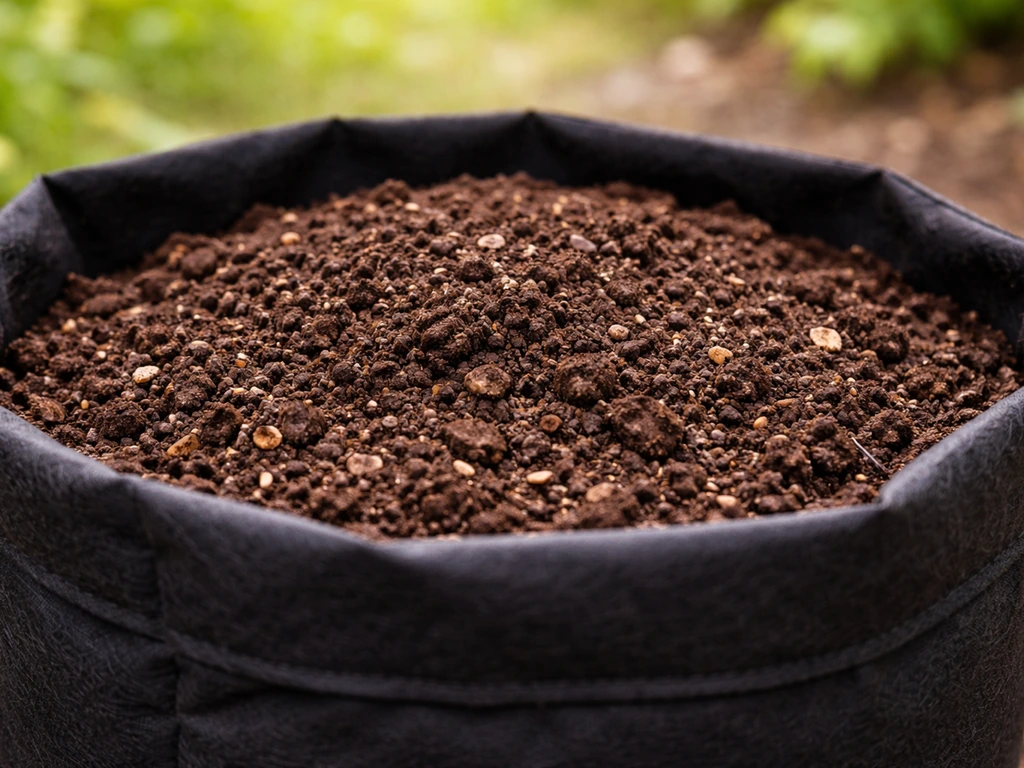
Best Soil for Grow Bags: Mix Recipes and How Much to Add
Best soil for grow bags: mix recipes, how much to add by bag size, and vegetable tweaks for strong drainage and yield.