To inject spores into a grow bag, you push a sterile needle through the bag's self-healing injection port, insert it about 1 to 2 inches deep into the grain or substrate inside, and slowly dispense roughly 1cc of spore or liquid culture solution per half pound of grain. Then you seal everything up, keep the bag at 72–76°F in a dark spot, and wait. That's the core of it. Everything else is about keeping contamination out and giving the mycelium the right conditions to run.
How to Inject Spores Into a Grow Bag Step by Step

Marcus Holloway
11 May 2026
First: are we talking mushroom spores or something else?
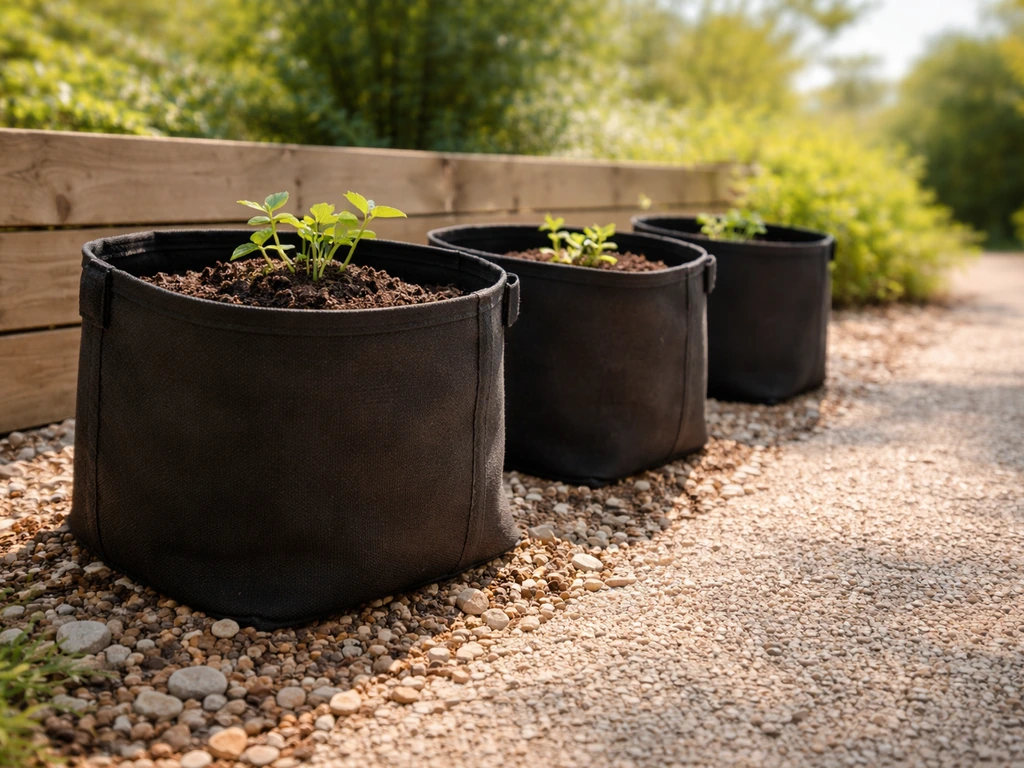
"Inject spores into a grow bag" almost always means mushroom cultivation. Mushroom spores are microscopic fungal reproductive cells, typically suspended in sterile water inside a syringe. This is completely different from planting vegetable or flower seeds in a fabric grow bag, which you'd just sow directly into potting mix. If you're growing mushrooms, you're in the right place. If you landed here because you're trying to start tomatoes or herbs, the process is much simpler and doesn't involve syringes.
For mushrooms, the grow bag you need is a purpose-built all-in-one (or "inject-and-forget") mushroom grow bag. These are heat-sealed plastic bags, not the open-top fabric grow bags used for vegetables. They come pre-loaded with sterilized grain, bulk substrate, or both, and they have two key features: a 0.2-micron filter patch for clean gas exchange, and a self-healing injection port (usually a small black rubber disc) where you inject your spores or liquid culture. The filter lets CO2 out and oxygen in without letting contaminants in. The injection port seals itself around the needle and closes back up when you pull it out.
What you need before you start
Getting this right is mostly about preparation. The actual injection takes about 60 seconds. The setup around it is what separates a successful colonization from a bag full of green mold.
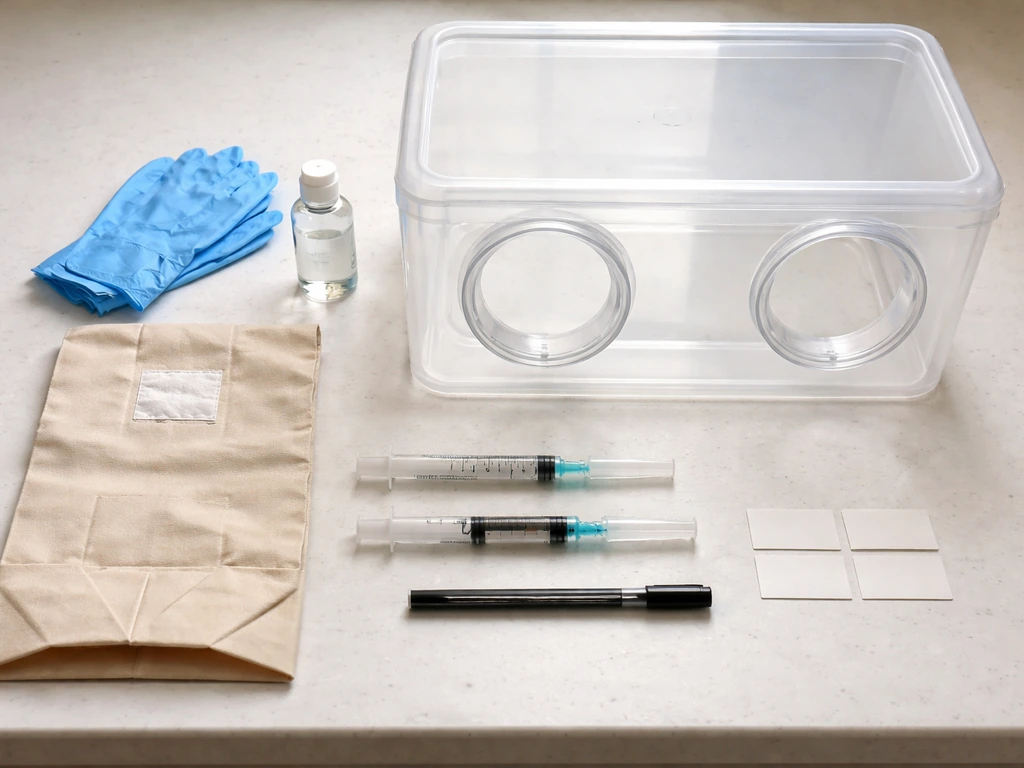
- A spore syringe or liquid culture syringe: this is your inoculant, typically 10–12cc of spores or fungal culture suspended in sterile water. Buy from a reputable supplier and check the expiry or batch date.
- A sterile needle: use a fresh, unused needle for each bag. An 18-gauge needle works well for most syringes.
- An all-in-one mushroom grow bag with a self-healing injection port and filter patch, pre-loaded with sterilized grain or grain-plus-substrate.
- 70% isopropyl alcohol and alcohol wipes.
- Nitrile gloves.
- A still air box (SAB) or laminar flow hood: a SAB is a simple DIY option, just a clear plastic tote with arm holes cut in the side. Wipe the interior with 70% isopropyl alcohol and let it dry before working inside it.
- A lighter or alcohol lamp if you plan to flame-sterilize your needle (optional but recommended for extra caution).
One thing people skip: make sure your grow bag's grain has cooled to room temperature before you inoculate. If the bag was recently sterilized or autoclaved, residual heat will kill your spores on contact. The bag should feel completely room-temperature to the touch.
How to inject spores into your grow bag, step by step
- Set up your still air box or work area. Wipe all surfaces with 70% isopropyl alcohol and let everything dry. Put on your nitrile gloves.
- Shake your spore syringe gently but thoroughly to distribute the spores evenly throughout the solution. If you're using liquid culture, swirl it gently.
- Attach a fresh sterile needle to your syringe. If you want extra security, heat the needle tip over a flame until it glows red, then let it cool completely for 30–60 seconds before use.
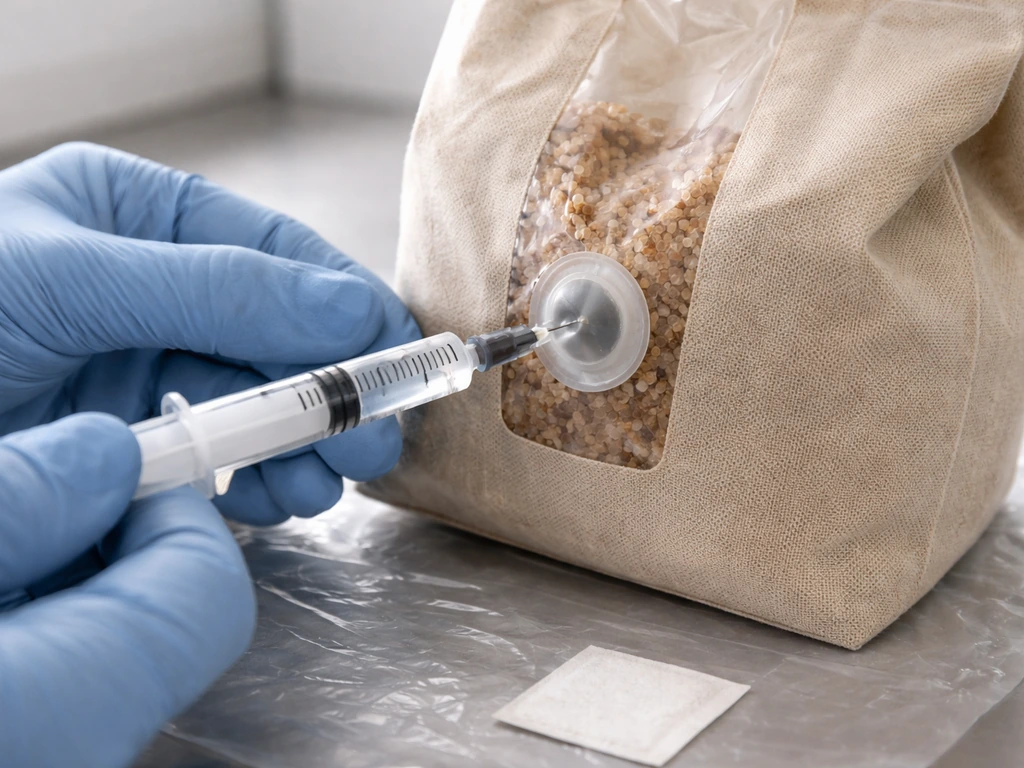
- Locate the self-healing injection port on your grow bag. It's usually a small black rubber disc, often positioned toward the lower portion of the bag near the grain. Wipe it firmly with an alcohol wipe for 15–20 seconds and let it air dry for a few seconds.
- Push the needle straight through the center of the injection port, inserting it about 1 to 2 inches deep into the grain or substrate.
- Angle the needle slightly upward and slowly dispense a portion of your solution. Then pull back slightly, reangle, and inject into a different area. Distributing inoculant across multiple points speeds up colonization by giving mycelium multiple starting points. A total of about 5cc per standard spawn bag is a good benchmark, or roughly 1cc per half pound of grain if you're calculating by bag weight.
- Pull the needle out smoothly. The self-healing port will close behind it.
- Give the bag a gentle squeeze from the outside to loosely distribute any inoculant that may have pooled. Don't shake it vigorously.
- Label the bag with the species and inoculation date, then move it to your incubation spot.
Colonization: what it looks like and how to keep it on track

For the first 7–14 days, don't expect to see much. Green Rooster Gourmets’ all-in-one grow bag instructions likewise describe a colonization period where growth begins within about 1, 2 weeks a colonization period where growth begins within about 1–2 weeks. Mycelium often starts growing from inside the grain block outward, so the bag can look unchanged for a couple of weeks even when everything is going fine. This is normal. Keep the bag at 72–76°F (around 22–24°C), in a dark spot with stable temperatures. Avoid direct sunlight and temperature swings.
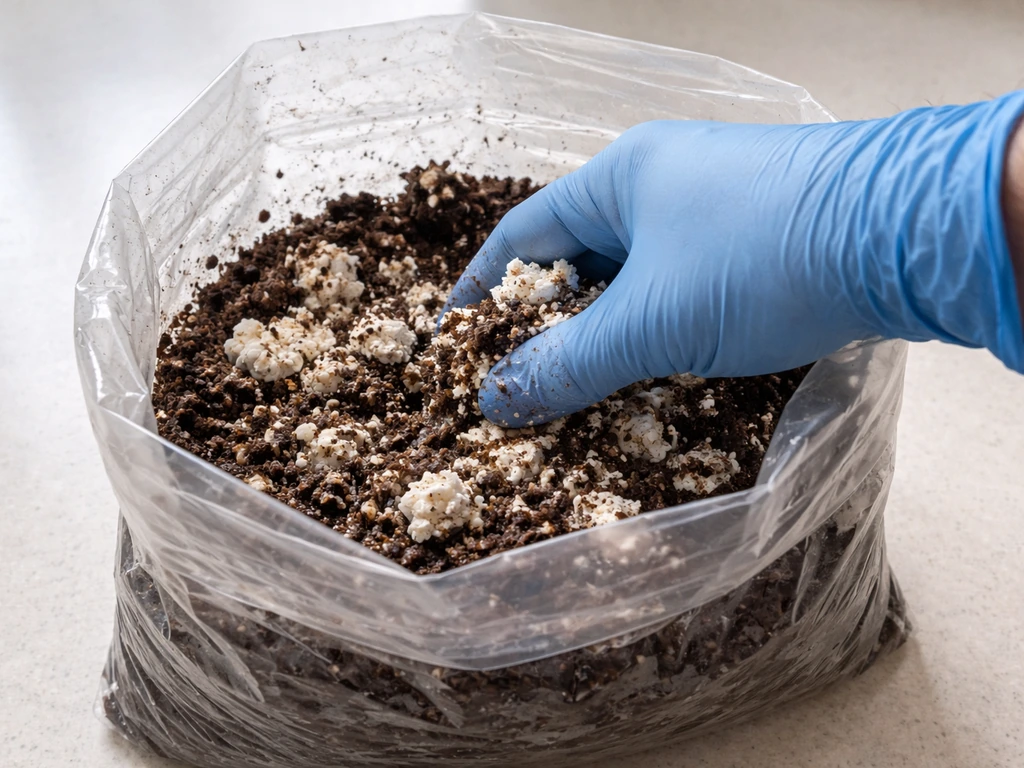
After 7–14 days, you should start to see white, fluffy or rope-like growth spreading through the grain. Healthy mycelium looks bright white and often has a slightly fuzzy or aerial quality. blank" rel="noopener noreferrer">Full colonization of the grain layer typically takes 3–6 weeks depending on species, temperature, and how well the inoculant was distributed.
Around 6–7 days after inoculation, some growers gently unroll the top of the bag and allow a small amount of fresh air to enter through the filter patch by briefly holding the top open so gravity slowly inflates it, then rerolling it. This provides a light air exchange without exposing the contents to open air. The filter patch handles most gas exchange on its own during colonization, so this step is optional.
The clearest sign that colonization is complete: the entire visible surface of the grain block has turned uniformly white. At that point, the mycelium has fully run through the substrate and the block is ready for the next phase.
Troubleshooting: when things go wrong
| Problem | What you see | What to do |
|---|---|---|
| No growth after 4 weeks | Grain looks unchanged, no white growth anywhere | Spores were likely non-viable. Discard the bag. Try again with a fresh syringe from a different batch or supplier. |
| Stalled colonization | White growth appeared, then stopped for 2+ weeks with no progress | Temperature is probably too low. Move the bag somewhere warmer, ideally above 70°F (21°C), targeting 72–76°F. If temperature is fine, spore viability may be marginal. |
| Green, black, or orange growth near injection point | Colored patches radiating from where you injected | Contamination, not recoverable. Seal the bag in a trash bag before removing from your space. Do not open a contaminated bag indoors. |
| Wet rot: sour smell, mushy grain, liquid pooling | Grey or brown discoloration, bag feels wet and smells off | Bacterial contamination, not recoverable. Dispose of immediately, sealed in a bag. |
| Slow but steady colonization | White growth progressing but slower than expected | Usually fine. Check temperature is in the 72–76°F range. Give it more time before worrying. |
Contamination almost always traces back to one of three things: a non-sterile needle, skipping the alcohol wipe on the injection port, or working in a drafty or high-traffic environment instead of a still air box. If you're getting repeated contamination, tighten up your technique before assuming the bags or spores are the problem.
What to do after colonization
If you're using an all-in-one bag that contains both grain and bulk substrate, the process after full grain colonization involves breaking and mixing. When you fruit all in one grow bag, you follow the same basic timeline but adjust the mixing and fruiting steps to match the bag type all-in-one bag. You generally break up mycelium in a grow bag once the grain layer is fully colonized and uniformly white breaking and mixing.
Once the grain layer is fully white, you gently break up the colonized grain through the outside of the bag and mix it into the substrate layer. This distributes colonized grain throughout the bulk substrate, which then needs 1–2 more weeks to fully recolonize before you trigger fruiting. This step is closely related to the process of knowing when and how to mix and break your all-in-one grow bag, which is its own technique worth understanding before you start.
That is exactly the timing and method behind when to mix all in one grow bag knowing when and how to mix and break your all-in-one grow bag.
Once the entire bag, grain and substrate, is uniformly white and fully colonized, you're ready to trigger fruiting. For most species, fruiting is initiated by dropping the temperature slightly (around 68°F / 20°C for oyster mushrooms), introducing indirect light, and increasing fresh air exchange. To fruit directly from the bag, cut a few small holes or open the top of the bag. Maintain humidity around 85–90% and ensure good air circulation to prevent CO2 buildup, which stunts pin development and distorts mushroom growth.
Alternatively, you can transfer the fully colonized block out of the bag and into a fruiting chamber or monotub for better control over humidity and airflow. Either method works. Fruiting directly from the bag is simpler for beginners. The monotub gives more surface area and can support larger flushes.
Basic ongoing care during fruiting
- Mist the inside walls of your fruiting space (not directly on pins) to maintain humidity around 85–90%.
- Fan the bag or fruiting chamber 2–3 times daily for 30–60 seconds each to exchange CO2 for fresh air.
- Harvest mushrooms just before or as the caps flatten and the veil underneath begins to tear. Don't wait for the caps to fully open or you'll get significant spore drop.
- After each flush, remove any dead pins or leftover mushroom bases, mist lightly, and allow the block to rest for 5–10 days before the next flush typically appears.
- Expect 2–4 flushes from a well-colonized block before yields drop off significantly.
The injection itself is genuinely straightforward once you've done it once. If you want the full walkthrough for inoculating an all-in-one grow bag from start to finish, focus on sterile prep, correct injection depth, and clean gas exchange The injection itself is genuinely straightforward once you've done it once.. The real learning curve is in the sterile technique before the needle touches the bag, and in reading the bag correctly during colonization. Get those two things right, and the rest of the process follows naturally.
FAQ
Can I use a regular plant potting bag and just inject spores into it like a mushroom grow bag?
No. Vegetable or herb grow bags are not designed for sterile inoculation and usually do not include a filter patch and self-sealing injection port. For mushroom work you generally need an all-in-one or inject-and-forget grow bag that’s heat-sealed and built for clean gas exchange.
What if my grow bag grain is still warm when I go to inoculate?
Wait until it’s truly room temperature. Even short residual heat can reduce viability, especially if the bag was recently sterilized. A practical check is that the bag feels fully cool to the touch, not just “not hot.”
Is it better to inject more than 1cc per half pound to speed up colonization?
Usually no. Over-injecting can increase nutrient load and competition from contaminants, and it doesn’t reliably make mycelium run faster. Stick to a consistent dose, and focus on even distribution rather than higher volume.
How do I know I injected into grain versus just into the bag material?
You want the needle tip to travel into the internal grain layer (about 1 to 2 inches, depending on bag design) and not just punch the port and hit plastic or near-surface areas. If you see clumps forming only near the port or nothing spreads inward, distribution may be uneven.
What should I do if my needle tip touches the inside of the injection port too many times?
Minimize contact. Each time you re-enter, you increase the chance of introducing microbes along the needle path. If you think sterility was compromised, replace with a fresh sterile needle/syringe and restart your clean workflow.
Can I reuse the same syringe or needle for multiple grow bags?
Don’t. Even if the syringe still looks clean, sterility is not guaranteed after contact with one bag’s port. Use a new sterile needle (and ideally a fresh syringe) for each bag to prevent cross-contamination.
What do I do if the bag smells sour or like chemicals during colonization?
Treat it as suspect. A strong off-odor often indicates bacterial contamination or a failed culture. Separate the bag from healthy ones immediately and avoid opening it around other inoculated bags, because you can spread contamination via aerosols.
Why does my bag look fine for two weeks, then suddenly stall?
Stalling after an initial quiet period can happen from temperature swings, low viability inoculant, or uneven injection. Confirm the bag is staying in the target temperature range consistently, and check whether growth is uniformly spreading or only starting from one area.
Is opening the bag at day 6 to 7 always necessary?
No, it’s optional. Many growers rely on the filter patch during colonization, especially if the bag is staying at stable conditions. If you do open, keep it brief and avoid working in drafts or high-traffic areas.
Should I cut holes for fruiting before the grain is fully colonized?
No, you generally should wait until the grain layer is uniformly white and fully colonized. Premature fruiting attempts can interrupt colonization, increase contamination risk, and lead to weak or deformed pin sets.
Can I fruit directly from the bag if I see some uncolonized grain patches?
It’s risky. For most species, fruiting is best triggered when colonization is complete across the visible surface, because incomplete areas can harbor slower or failing mycelium and can become contamination hotspots later.
Do I need to break and mix all-in-one bags immediately after the grain turns white?
Not always immediately, but timing matters. Mix once the grain is fully colonized and uniformly white, then give the mixed bulk substrate additional time (often 1 to 2 weeks) to recolonize before triggering fruiting.
What’s the most common reason for repeated contamination even when I follow the steps?
The biggest pattern is handling and environment rather than the injection itself. Drafty areas, frequent movement around the work area, and inconsistent wiping on the injection port commonly cause repeat failures. If contamination repeats across batches, tighten the workflow and reduce exposure to air movement.
How should I store unused spore syringe or liquid culture before injecting?
Store it per the supplier’s guidance, and keep it cool and sealed. Spores and liquid cultures degrade over time, so delayed use can reduce colonization success even if the injection method is perfect.
Next Articles
Best Soil for Grow Bags: Mix Recipes and How Much to Add
Best soil for grow bags: mix recipes, how much to add by bag size, and vegetable tweaks for strong drainage and yield.
Where to Put Grow Bags: Best Location, Sun, Drainage
Find the best spot for fabric grow bags: sun, wind, drainage, spacing, surfaces, and fixes for heat and root-rot issues.
Pros and Cons of Grow Bags for Vegetables and Flowers
Grow bag pros and cons for veg, flowers, trees, and mushrooms: aeration, mobility, and watering plus fixes for common is