For most vegetables and herbs, a fabric grow bag is the better container. It drains faster, keeps roots healthier through air pruning, and runs cooler in summer heat. A 5-gallon bucket works fine too, especially if you already have one, but you need to drill proper drainage holes and accept that roots will eventually circle the walls. The right choice really comes down to what you're growing, how often you want to water, and what your setup looks like.
Grow Bag vs 5 Gallon Bucket: Which Is Better for Plants

Marcus Holloway
23 May 2026
What's the difference between a grow bag and a 5-gallon bucket
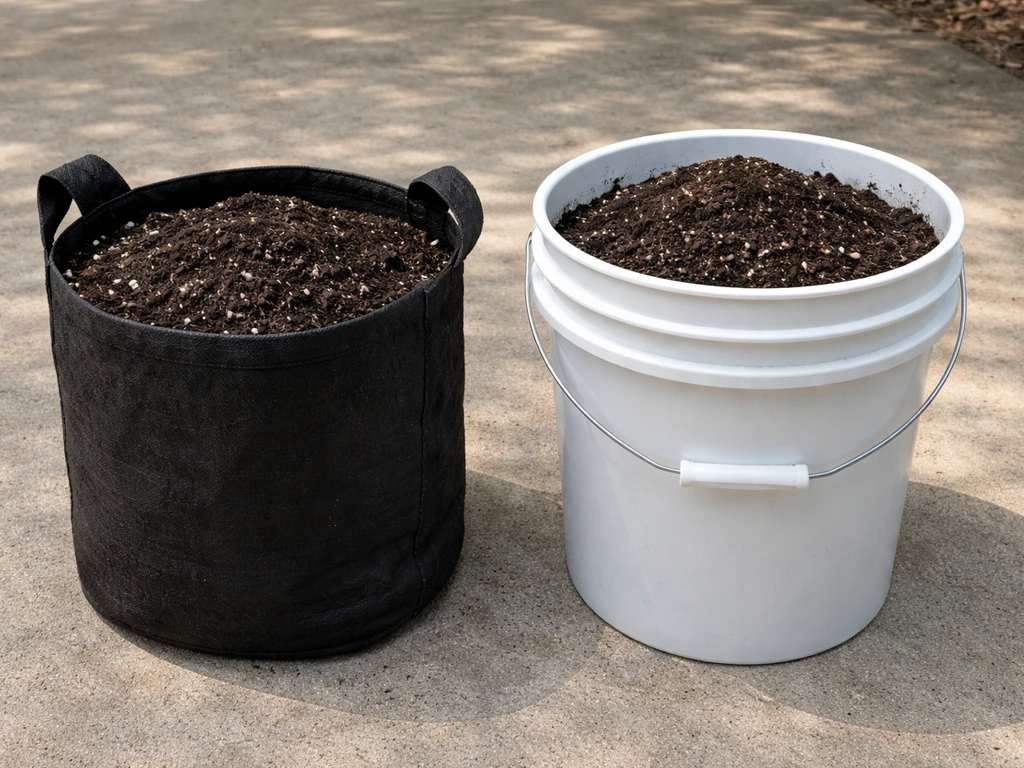
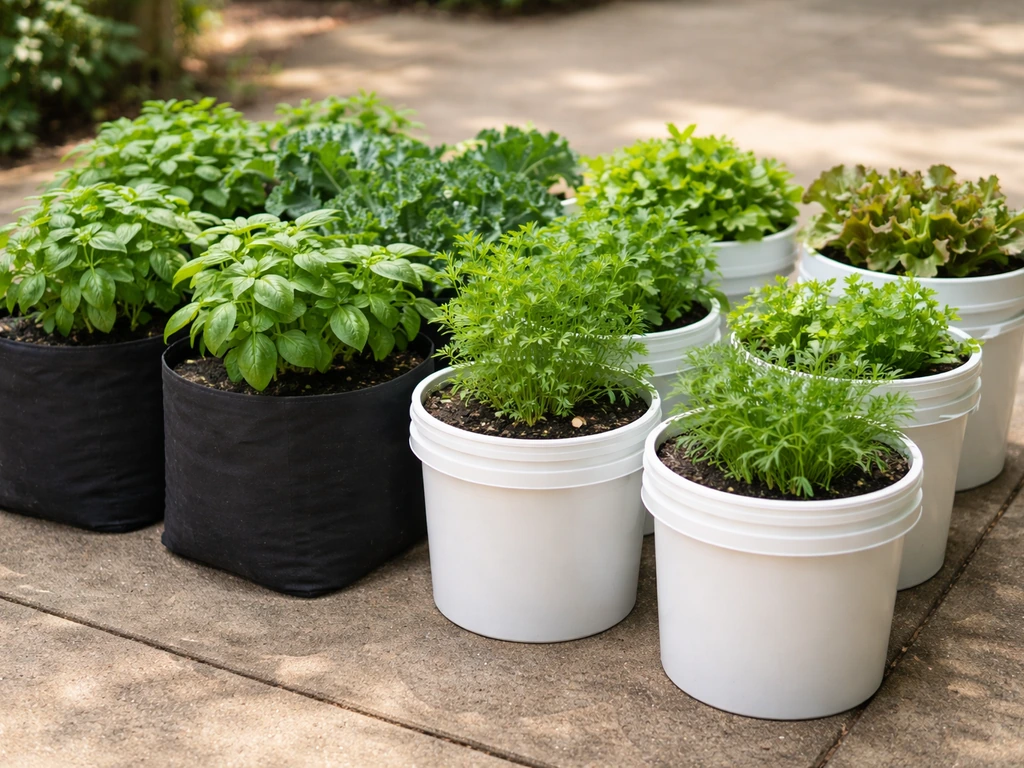
A fabric grow bag is made from breathable geotextile material, usually polypropylene or polyester. Grow bags vs buckets is also a useful way to compare how moisture, heat, and watering schedules differ across seasons. Air moves through all sides and the bottom, which means moisture escapes from every surface, not just the drainage holes. The whole container breathes. A standard 5-gallon bucket is a rigid food-grade plastic container. It's completely solid except for whatever holes you put in the bottom. Water only exits through those holes, and the sides hold heat and trap moisture like any plastic container would.
That difference in breathability is the core of the whole comparison. It affects drainage speed, root behavior, soil temperature, watering frequency, and ultimately how well your plants perform. Both hold roughly the same volume of soil (a standard 5-gallon grow bag is about the same size as a 5-gallon bucket), but they behave very differently once you fill them and start growing.
Buckets have real advantages too: they're rigid and stable, they stack when empty, they cost almost nothing if you source them from bakeries or restaurants, and they last for many years. Grow bags fold flat, are lightweight, and are increasingly affordable (a pack of ten 5-gallon fabric pots runs around $15 to $25 depending on material quality). Neither is a gimmick. Both work. But they're not interchangeable.
Drainage, aeration, and root behavior
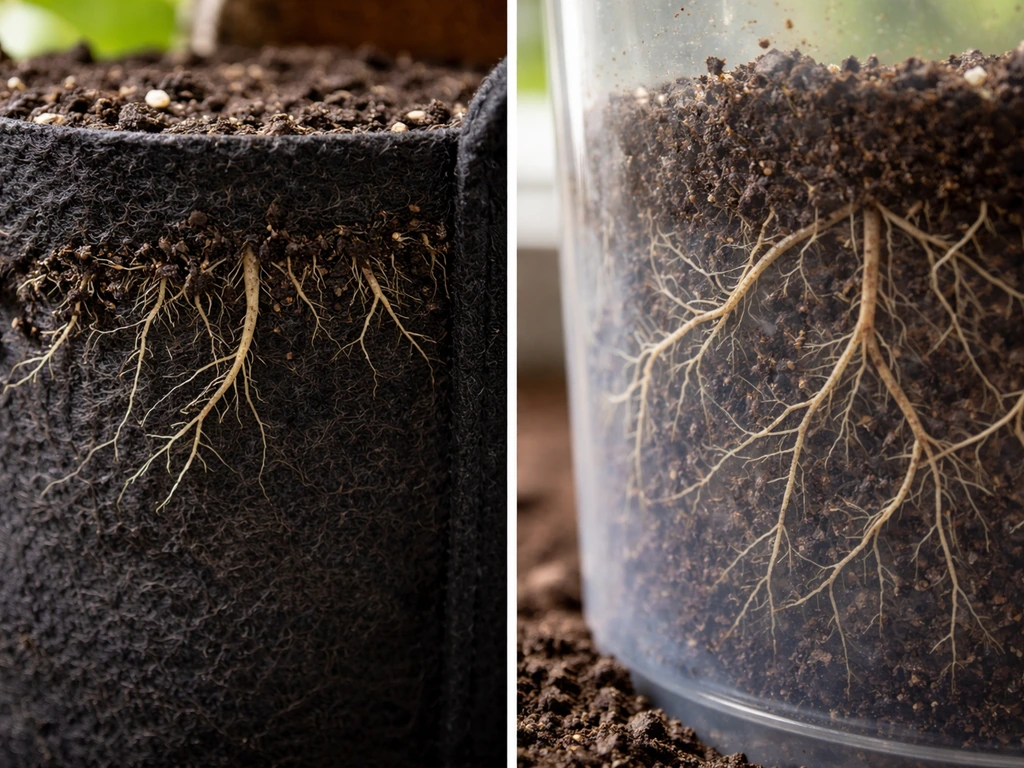
This is where grow bags pull ahead by the most. Because the fabric walls allow airflow through all sides, roots that reach the edge don't circle around the container wall looking for somewhere to go. Instead, the air at the fabric surface desiccates the root tip, stopping its growth. The plant responds by branching out new, shorter lateral roots closer to the center of the pot. Over time, this creates a dense, fibrous root system with far more surface area than you'd get in a bucket. More root surface area means better nutrient and water uptake, which translates directly into faster growth and bigger yields.
In a 5-gallon bucket, roots hit the solid plastic wall and have no choice but to follow it. Root circling is almost inevitable if plants stay in the bucket for a full growing season. Circling roots strangle themselves as the plant grows, restricting water and nutrient flow and reducing overall plant health. You can slow this down by moving plants to larger containers before they get rootbound, but you can't prevent it the way fabric air pruning does.
Drainage speed is also different. A properly drilled bucket with holes every 3 inches across the bottom drains reasonably well, but water still lingers in the lower portion of the soil longer than in a fabric bag, where moisture is wicking out through the sides simultaneously. Overwatering is a much more common problem with buckets than with grow bags, especially for beginners who are still learning when to water.
Moisture and temperature: watering frequency and heat/cold swings
Grow bags dry out faster. That's both their biggest strength and their most demanding characteristic. In hot summer weather, a 5-gallon fabric bag growing tomatoes might need water every day or even twice a day. A 5-gallon bucket in the same conditions might only need water every two to three days. If you travel, forget to water, or just don't want to be tied to daily watering, a bucket's moisture retention is genuinely useful.
On temperature, fabric bags win clearly. The evaporative cooling effect from the fabric walls keeps the root zone significantly cooler than black plastic buckets sitting in full sun. Fabric grow bags let air flow through the sides and bottom, which allows evaporative drying from multiple surfaces evaporative cooling effect from the fabric walls. Root zone temperatures above 85°F (29°C) start damaging roots and reducing nutrient uptake. Black plastic buckets in direct summer sun can push soil temps well past that threshold. If you're on a south-facing patio or balcony in July and August, that heat stress is a real problem that grow bags largely sidestep.
In cooler weather or early spring, the equation flips slightly. Fabric bags cool down faster at night than buckets do, which can stress cold-sensitive seedlings. If you're starting heat-loving plants early in spring, buckets actually hold daytime heat better into the evening. Some growers use buckets in spring and grow bags in summer for exactly this reason, though for most people that's more complexity than it's worth.
Best choice by plant type and growing setup
Here's how I'd match container to plant and situation:
| Plant / Situation | Best Container | Why |
|---|---|---|
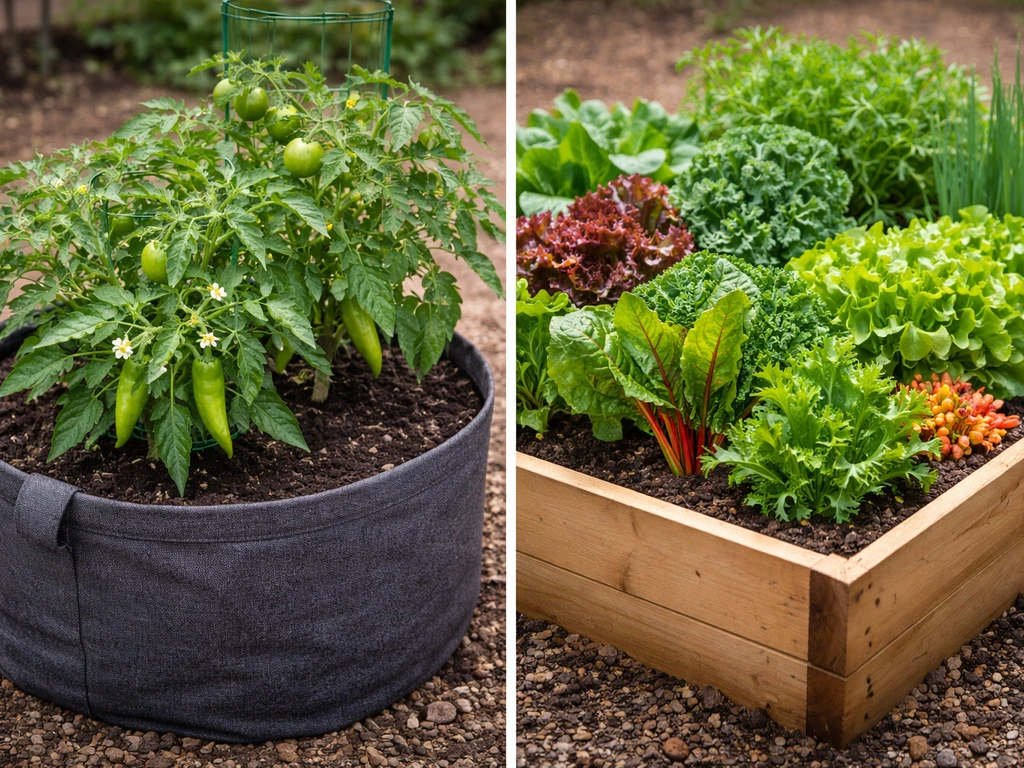
| Tomatoes (indeterminate) | Grow bag (10-15 gal) | Deep root system benefits from air pruning; heat stress in buckets reduces yield |
| Tomatoes (determinate/bush) | Either (5 gal) | Smaller root mass fits both; bucket works if drainage is good |
| Peppers | Grow bag (5-7 gal) | Heat sensitive roots; air pruning keeps plant productive longer |
| Potatoes | Grow bag (10-15 gal) | Easy harvest by tipping the bag; more hilling room; no circling |
| Herbs (basil, parsley, cilantro) | Either (3-5 gal) | Both work well; bucket is fine if you don't overwater |
| Lettuce and leafy greens | Either (3-5 gal) | Short season crops; root circling not a major concern |
| Cucumbers / squash | Grow bag (5-10 gal) | Aggressive roots circle fast in buckets; need good drainage |
| Balcony / rooftop setup | Grow bag | Lighter weight; easier to move; less heat buildup on hot surfaces |
| Budget build / reused containers | 5-gallon bucket | Free or very cheap; works well with proper drilling |
| In-ground transfer planned | Either | Grow bags make root ball easier to maintain; bucket roots may need untangling |
Potatoes are one crop where fabric bags have a genuinely large advantage. Harvesting from a bag means you just tip it over or cut it open rather than digging. The loose soil and flexible walls also make hilling (adding soil as plants grow) much easier than in a rigid bucket. For herb gardens on a windowsill or small balcony where heat stress isn't an issue, buckets are perfectly fine and cost almost nothing.
How to set each up correctly
Setting up a 5-gallon bucket

Drainage is everything with buckets. blank" rel="noopener noreferrer">Drill or punch holes every 3 inches across the entire bottom of the bucket, not just a few holes in the center. Some growers also add two or three holes near the very bottom of the sides to prevent the small amount of standing water that can collect at the base even with bottom holes. Use a 1/2-inch drill bit as a minimum. If you're reusing food-service buckets (totally fine), check that they're food-grade (look for the recycling symbol 2 or HDPE on the bottom) and give them a good wash. Avoid buckets that previously held chemicals, paint, or solvents.
For soil, use a mix with good drainage: a standard potting mix (not garden soil, which compacts too hard in containers) combined with 20 to 30 percent perlite. Fill to about 2 inches from the top to prevent water from washing soil over the edge. Place buckets on risers, bricks, or a milk crate so the bottom holes aren't blocked by the surface underneath.
Setting up a fabric grow bag
Grow bags don't need any modification before use. Fold the top edge down a few inches to help the bag hold its shape until it's filled and to expose fresh soil to the sides. Fill with the same well-draining potting mix plus perlite. Because water and nutrients leach out more quickly through the sides, grow bags actually benefit from a slightly richer starting mix. Adding 10 to 15 percent compost to the base mix helps buffer fertility between feedings.
Place grow bags on a hard, level surface where drainage water can run off freely. On balconies, a saucer or tray helps manage runoff, though you want to empty saucers after watering so roots don't sit in standing water. Spacing-wise, leave at least 12 inches between bags for tomatoes and peppers, more for sprawling crops, both for airflow and to make watering less awkward.
Care differences: watering, fertilizing, and transplant timing
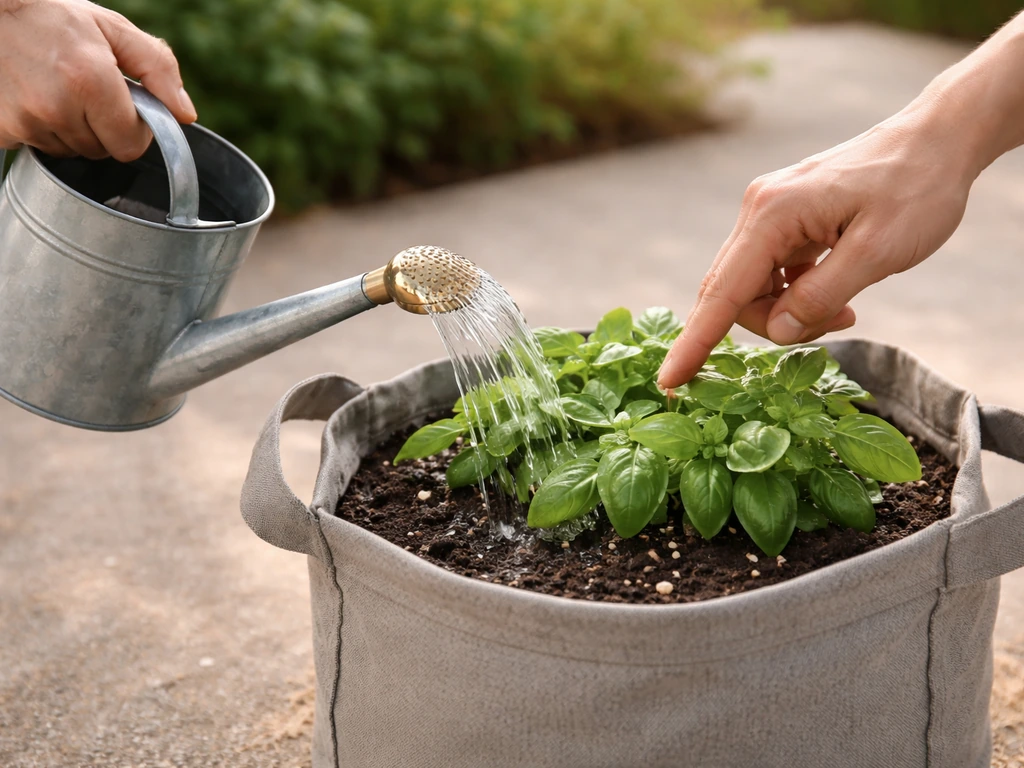
Watering is the biggest day-to-day difference. Buckets: water when the top inch of soil is dry, which in summer usually means every two to three days. Grow bags: check daily in hot weather. The finger test works for both (stick a finger 2 inches into the soil), but grow bags will go dry faster than you expect. Lifting the container is an even better gauge since a dry 5-gallon bag feels noticeably lighter than a watered one.
Because grow bags flush nutrients out faster, they need more frequent fertilizing. A liquid fertilizer like fish emulsion or a balanced liquid feed every 7 to 10 days works well during active growth. With buckets, you can get away with a slow-release granular fertilizer worked into the soil at planting and a liquid top-up every two to three weeks. Grow bag growers who don't keep up with feeding often wonder why their plants look pale or stop producing mid-season. That's almost always a nitrogen deficiency from leaching, not a watering problem.
Transplant timing is similar for both. For most summer vegetables, transplant seedlings after last frost when nighttime temperatures are consistently above 50°F (10°C). One practical note: when transplanting from a grow bag into the ground, the root ball usually holds together beautifully because air pruning produces a compact, fibrous mass. When transplanting from a bucket, inspect the roots and gently untangle any circling roots before placing in the ground. Left circling, they can eventually girdle the plant even after transplant.
Troubleshooting common problems for each container
Problems you'll see with buckets
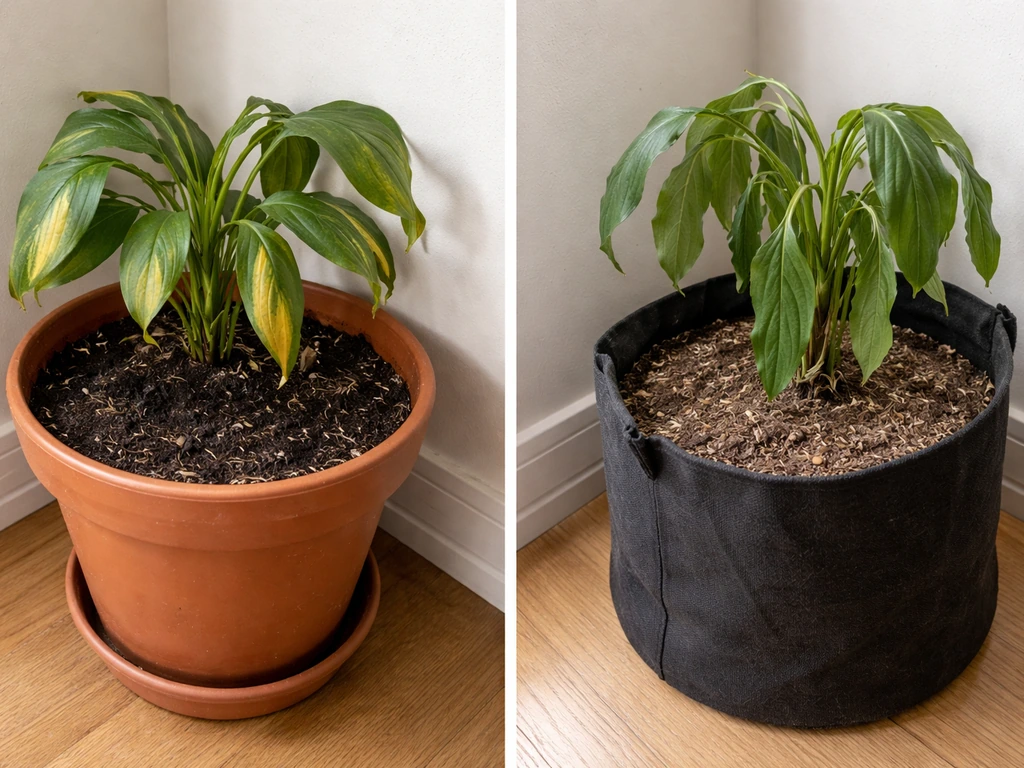
- Overwatering and root rot: The most common bucket problem. Symptoms are yellowing lower leaves, wilting despite wet soil, and a sour smell from the growing medium. Fix it by improving drainage (add more holes, use more perlite), reducing watering frequency, and letting the soil dry out more between waterings.
- Root circling and rootbound plants: Stunted growth, plants wilting quickly after watering, and roots visibly emerging from drainage holes. Best fix is to repot into a larger container or transplant to the ground. Gently loosen circling roots before transplanting.
- Heat stress: Leaves curling, blossom drop, or fruit not setting in midsummer despite healthy-looking plants. Move dark-colored buckets to partial shade during peak afternoon heat or wrap them with reflective material to reduce root zone temperature.
- Waterlogged soil from blocked holes: Check that drainage holes aren't sealed by debris or sitting flush against a surface. Elevate on bricks or a wooden pallet.
Problems you'll see with grow bags
- Drying out too fast: The most common grow bag complaint. Plants wilting mid-afternoon even after a morning watering usually means the bag dried out. Switch to watering twice daily in peak summer, add a layer of mulch on the soil surface to slow evaporation, or move bags to a slightly shadier spot.
- Nutrient deficiency mid-season: Pale leaves, reduced flowering, or slow growth in an otherwise healthy plant often means nutrients have leached out. Start a weekly liquid feeding schedule and don't skip it once plants are in active growth.
- Algae and mold on the bag exterior: A cosmetic issue more than a plant problem, but worth noting. It happens in humid climates or when bags stay wet for long periods. Improve airflow around the bags and let them dry between waterings. Not harmful to the plant.
- Bags losing shape or tipping: Lightweight bags with loose soil can tip over in wind. Use a saucer, place bags against a wall or fence, or fill more firmly. Some bags have handles that allow staking to a support.
- Fabric degrading over time: Cheap polypropylene bags can break down in UV light after one to two seasons. Higher-quality bags with UV stabilization last four to five years. If the fabric starts tearing or crumbling, replace the bag rather than risk roots growing through the walls unevenly.
So which one should you use?
If you're growing warm-season vegetables (tomatoes, peppers, cucumbers, potatoes) and you have the option to choose, go with fabric grow bags. The air pruning alone is worth it, and the heat management in summer makes a real difference in yield. If you're on a tight budget, already have buckets on hand, or you're growing herbs and leafy greens where root health and heat stress are less critical, a properly drilled 5-gallon bucket does the job without spending anything extra.
The simple rule: grow bags for heat-sensitive, long-season crops on hot patios and balconies. Buckets for budget builds, cooler climates, short-season crops, or any situation where you want to water less often. Many growers end up using both depending on the crop, which is honestly the best approach once you've tried each and know what you're working with. If you are deciding between two common container options, this grow bag vs raised bed comparison can help you choose what fits your space and watering habits.
FAQ
Can I reuse a 5-gallon bucket or grow bag from a previous season, and what should I check first?
Yes, but inspect for residue and odors. For buckets, confirm the plastic is food-grade (often HDPE) and thoroughly wash, especially if it previously held any fertilizer, chemicals, or paint. For grow bags, check for tears at the seam and remove any clumped, muddy biofilm before refilling, since leftover compacted soil can block airflow.
How do I know if my bucket has enough drainage holes?
Don’t just add a few holes in the center. A practical guideline is holes across the entire bottom area at roughly 3-inch spacing, then optionally add a couple of very low side holes to reduce trapped water at the base. After watering, look for water to stop pooling within about a few minutes; if it keeps sitting, add more holes or raise the container on risers.
Is it normal for a grow bag to dry out faster even when the top inch of soil feels moist?
Yes. In hot weather, moisture can wick and evaporate from the sides while the top surface temporarily looks damp. Use a deeper check (about 2 inches) and consider lifting the container as a cue, since the weight difference between wet and dry fabric pots is usually noticeable.
Will a grow bag ever become too hot or damage roots in summer?
Grow bags usually run cooler than plastic buckets, but they are not immune to heat stress if placed in intense, enclosed conditions (like a wall planter with poor airflow). If your roots repeatedly show slow growth in peak heat, move the bag to a spot with better air movement and use a deeper shade strategy (afternoon shade) rather than assuming the fabric fully solves the problem.
Do I need to change my soil mix between a bucket and a grow bag?
You should aim for the same drainage principle, but the targets can differ. Buckets often need more consistent watering because they retain water longer, while grow bags benefit from a slightly richer mix because nutrients leach through faster. If you switch containers, watch plant color for 1 to 2 weeks and adjust fertilizer frequency rather than only changing water.
What fertilizer schedule actually prevents pale, slow growth in grow bags?
Because leaching is faster, rely on more frequent, smaller feedings. If plants turn pale mid-season, increase liquid feeding frequency (for example, moving closer to every 7 to 10 days during active growth). Avoid long gaps, since the issue often is nutrient washout, not underwatering.
Should I water differently for the same plant grown in both containers?
Yes. Use the “top inch dry” rule for buckets, but for grow bags treat daily checking as normal in summer. Also water more thoroughly when you do water, since grow bags distribute moisture through the sides and partial watering can leave lower zones dry even if the surface looks wet.
Can I use a bucket for long-season crops without dealing with root circling?
You can reduce the problem but not fully eliminate it. The most effective approach is to use a larger container or plan earlier upgrades before plants become rootbound. If you do keep the same bucket for a full season, inspect roots at transplant or harvest time, and expect circling to be more common than with air-pruning fabrics.
On balconies, do I need a saucer with grow bags, and how should I manage runoff?
A saucer can help prevent mess, but don’t let it sit full of water. Empty the runoff after watering so roots are not absorbing standing water from below. Also, ensure the container itself is level and the fabric bottom is not consistently smothered by pooled water.
Which is better for potatoes, and is there a specific planting or hilling approach to use?
Grow bags are often easier for potatoes because you can harvest by tipping or opening the bag rather than digging. They also make hilling simpler since the flexible fabric walls let you add soil gradually without wrestling rigid sides. For either container, avoid compacting soil when you hill, and keep the mix loose so tubers develop well.
If I’m transplanting from a bucket, how do I handle circling roots safely?
Before planting, inspect the root ball and gently untangle circling roots. If roots are densely braided, loosen them enough to encourage outward growth, then set the plant at the right depth. If you delay untangling until after planting, roots can continue spiraling and reduce plant vigor.
Next Articles
Grow Bags vs Buckets: Which Is Better for Root Health?
Grow bags vs buckets: compare root health, drainage, watering, stability, and cost, with crop-specific buying guidance.
Grow Bag vs Raised Bed: Which Is Better for You?
Compare grow bags vs raised beds for cost, setup, soil, watering, drainage, roots, and plant performance with choosing t

Grow Bags vs Pots: Which Is Better for Your Plants?
Grow bags vs pots comparison for vegetables, flowers, trees: drainage, aeration, watering, heat, size tips and best choi