The short answer: buy mushroom grow bags online from dedicated mycology suppliers like North Spore, Midwest Grow Kits, or Redwood Mushroom Supply. They carry the right bags for home cultivation, ship fast, and their products are designed specifically for mushrooms rather than repurposed food-grade packaging. Local options are rare unless you live near a grow supply shop or a homebrew store that stocks mycology gear. Once the bags arrive, keep unused ones at room temperature and out of direct sunlight, and keep your colonizing or fruiting bags at 65–75°F with high humidity (80–95%) and good air exchange. The details below will make sure you don't waste a single bag.
Where to Buy Mushroom Grow Bags and How to Store Them
Marcus Holloway
24 Mar 2026
What mushroom grow bags actually are (and which type you need)
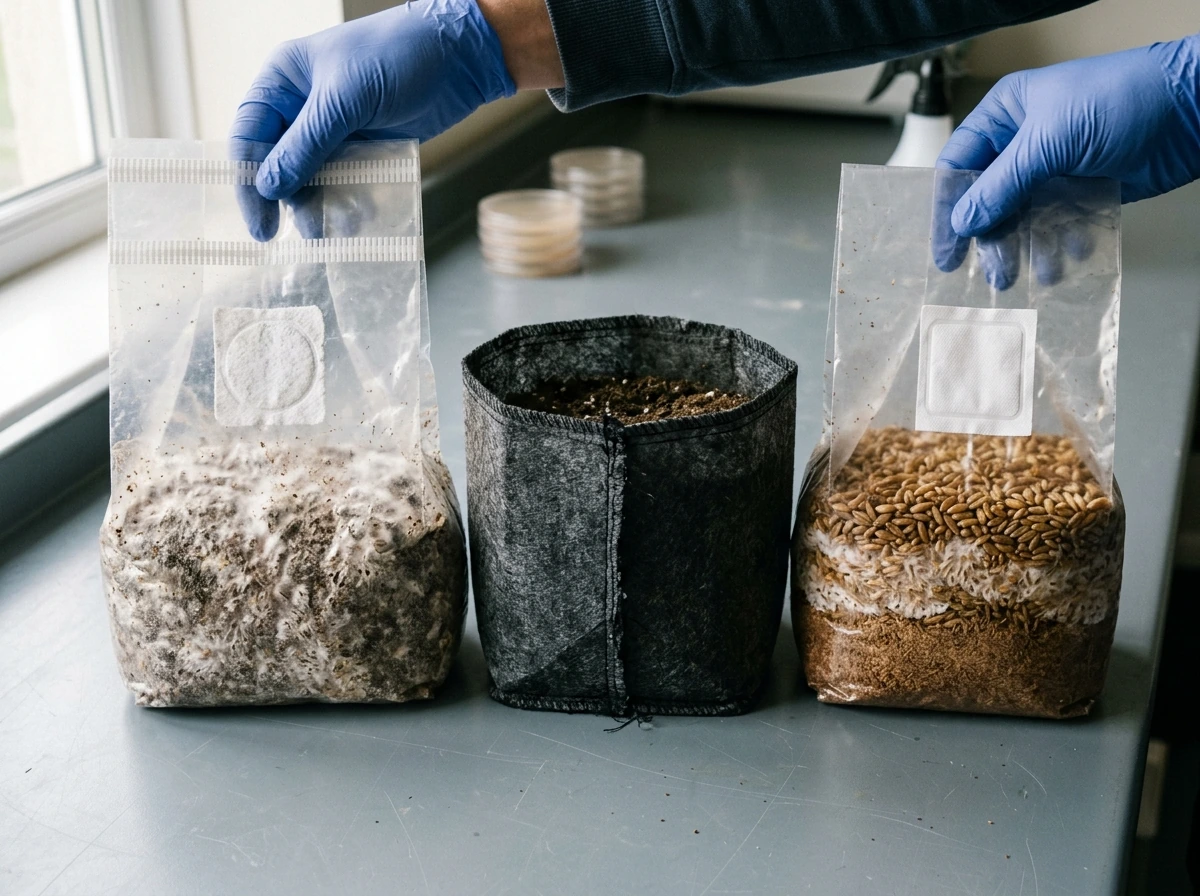
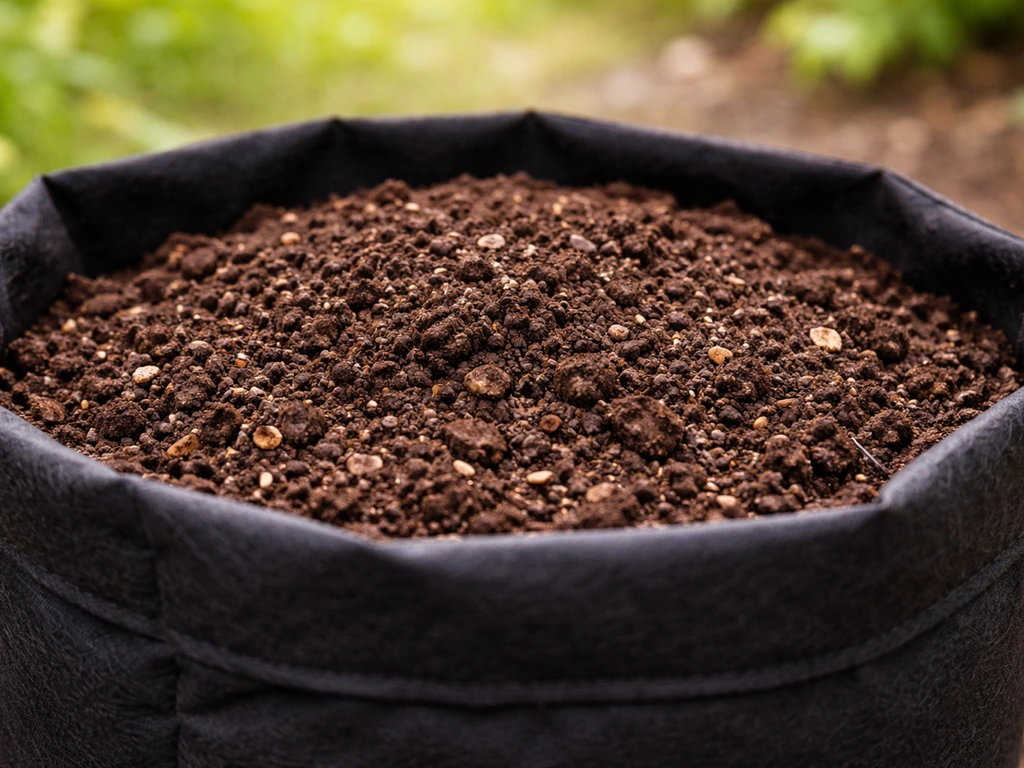
Mushroom grow bags are not the same as fabric grow bags you'd use for tomatoes or potatoes. They're typically made from polypropylene film, not fabric, and they're designed to be sterilized at high heat so the substrate inside stays contaminant-free until you're ready to inoculate. The key distinguishing feature is a self-healing injection port and/or a filter patch, which allows gas exchange while keeping contaminants out. If you see a bag without either of these, it's probably not made for mushroom cultivation.
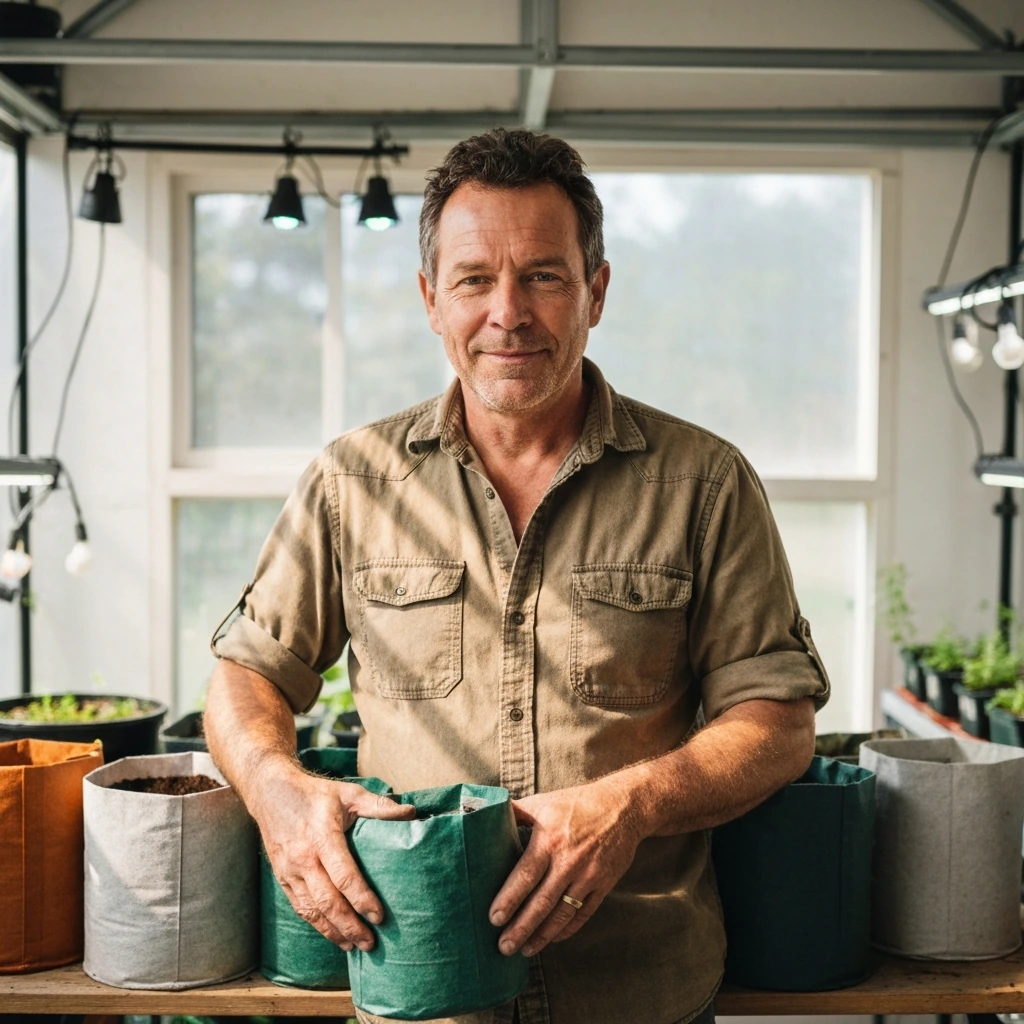
There are two main formats you'll encounter as a home grower. The first is an empty sterilized bag, which you fill yourself with grain, sawdust, or a substrate mix, then sterilize and inoculate. The second, and more beginner-friendly option, is the all-in-one grow bag. If you start comparing methods beyond the all-in-one approach, a monotub vs grow bag breakdown can help you choose a setup that fits your space and experience level. If you want to compare options, the best all-in-one mushroom grow bag picks are covered in a dedicated guide on this site. Products like North Spore's ShroomTek All-In-One Grow Bag come pre-loaded with sterilized grain and a nutrient-rich substrate, ready for you to inject a spore syringe or liquid culture directly into the bag through the self-healing port. The whole grow happens inside that single bag from inoculation through colonization to your first flush. For anyone just starting out, the all-in-one format removes most of the hard parts.
When it comes to species, the bag you need depends on what you're growing. Oyster mushrooms do well on straw or hardwood substrate bags. Shiitake, lion's mane, and other wood-lovers prefer hardwood supplemented substrate. All-in-one bags are usually labeled by the species or species group they support, so check the product listing carefully. If you're comparing all-in-one bags in more detail, there's a full breakdown of the best all-in-one mushroom grow bags elsewhere on this site that's worth reading alongside this guide.
Choosing where to buy mushroom grow bags
For most home growers in 2026, online is the right call. The selection is better, the products are purpose-built, and reputable suppliers stand behind what they sell. North Spore, for instance, offers free replacements within 30 days of receipt for any damaged, contaminated, or unusable product. That kind of guarantee matters when you're dealing with sterile products that can fail in transit. Here's how the main buying options compare:
| Source | Best For | Pros | Watch Out For |
|---|---|---|---|
| North Spore | All-in-one bags, beginner kits | Strong return policy, well-documented products, fast shipping | Premium pricing compared to bulk suppliers |
| Midwest Grow Kits | Empty sterilized bags, bulk supplies | Good value on bulk orders, wide selection of bag sizes | Less beginner hand-holding than kit-focused shops |
| Redwood Mushroom Supply | Pre-inoculated blocks and bags, beginner kits | Detailed cultivation manuals included, species-specific guidance | Smaller product range than larger retailers |
| Green Rooster Gourmets | All-in-one bags with step-by-step instructions | Includes printed instructions, good for first-timers | Smaller operation, limited availability |
| Amazon / eBay | Budget bags and basic supplies | Convenient, fast Prime shipping | Quality is inconsistent; filter patches and ports vary widely |
| Local homebrew/grow shop | Last-minute supplies, basic bags | No shipping wait, can inspect before buying | Limited stock, often no all-in-one options |
My honest recommendation: start with a dedicated mycology supplier for your first purchase. The quality control is far more reliable than generic marketplace sellers, and most of the reputable shops include cultivation instructions or link to detailed guides. Once you know what you're doing and want to buy in bulk, branching out to lower-cost options makes more sense.
One thing worth checking before you buy: whether the supplier's product page lists the substrate composition, sterilization method, filter patch micron rating, and shelf life. Reputable sellers publish this information. If the listing is vague about what's inside the bag or how it was sterilized, move on.
Where to store mushroom grow bags before use
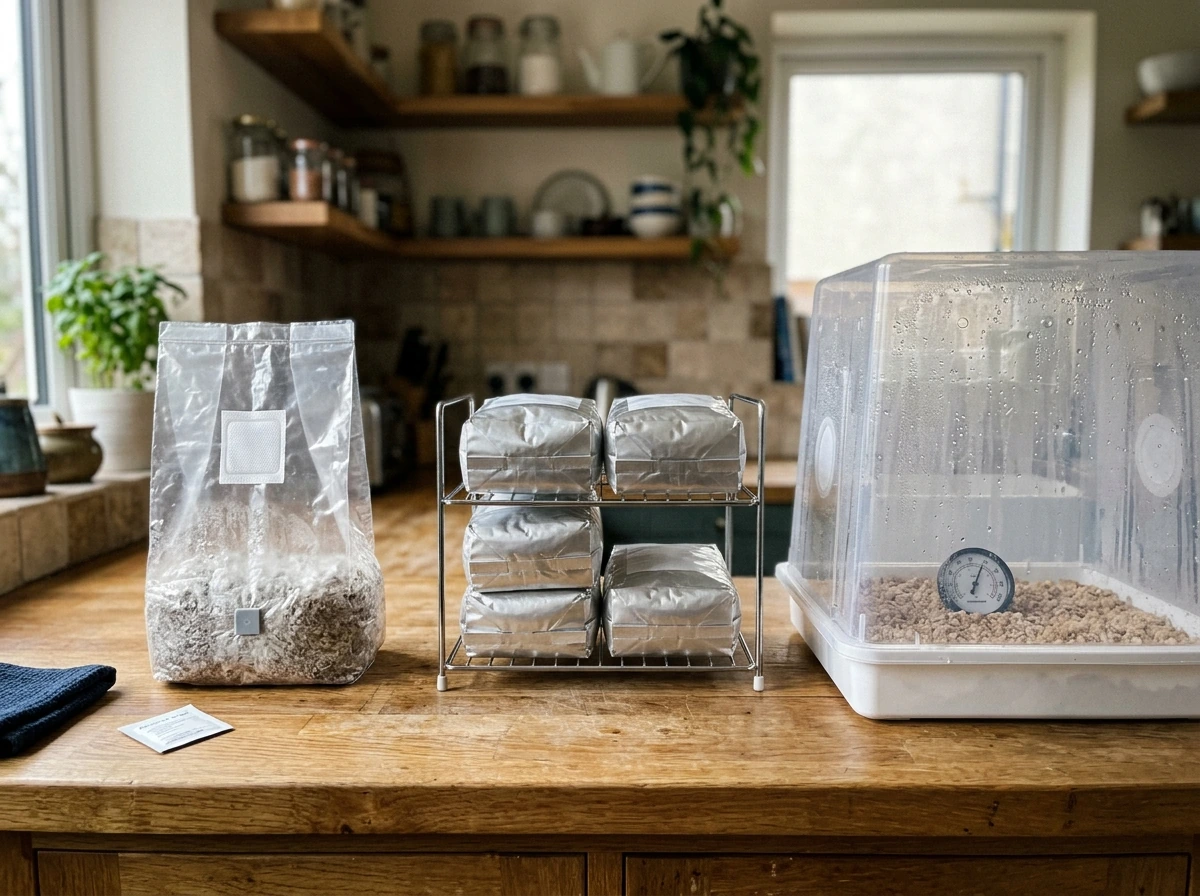
When your bags arrive, you probably won't use them all immediately, so storage matters from day one. North Spore notes that their ShroomTek all-in-one bags are shelf stable for up to a year after manufacture, but for best results you should use them within 30 days of receipt. That's the practical window you should be planning around, not the theoretical maximum. The longer you wait, the more the substrate can degrade or lose its sterility integrity.
For short-term storage (under 30 days), keep unopened bags at room temperature, roughly 65–75°F, in a location that gets no direct sunlight. A cabinet, closet shelf, or pantry all work well. The goal is stable, moderate temperature without UV exposure. Direct sunlight degrades the polypropylene and can raise internal temperatures unevenly. Avoid storing them near heat sources like water heaters, ovens, or anything that radiates warmth, as elevated temps can encourage dormant contamination to wake up.
Keep bags off the floor. This isn't just tidiness advice. Floor-level storage increases the risk of pest contact, moisture wicking from concrete, and accidental contamination from foot traffic and dust. A shelf at least a foot off the ground is a simple, effective safeguard. Also keep them away from cleaning chemicals, paints, or anything with strong fumes. Polypropylene bags are not fully vapor-proof, and chemical exposure can affect the substrate inside.
For shiitake-specific blocks or bags, there's one additional caveat worth knowing: North Spore flags that shiitake blocks can only be stored until the block turns dark brown, at which point they must be used immediately. Don't assume all pre-inoculated or substrate-loaded bags have the same storage timeline as general all-in-one bags.
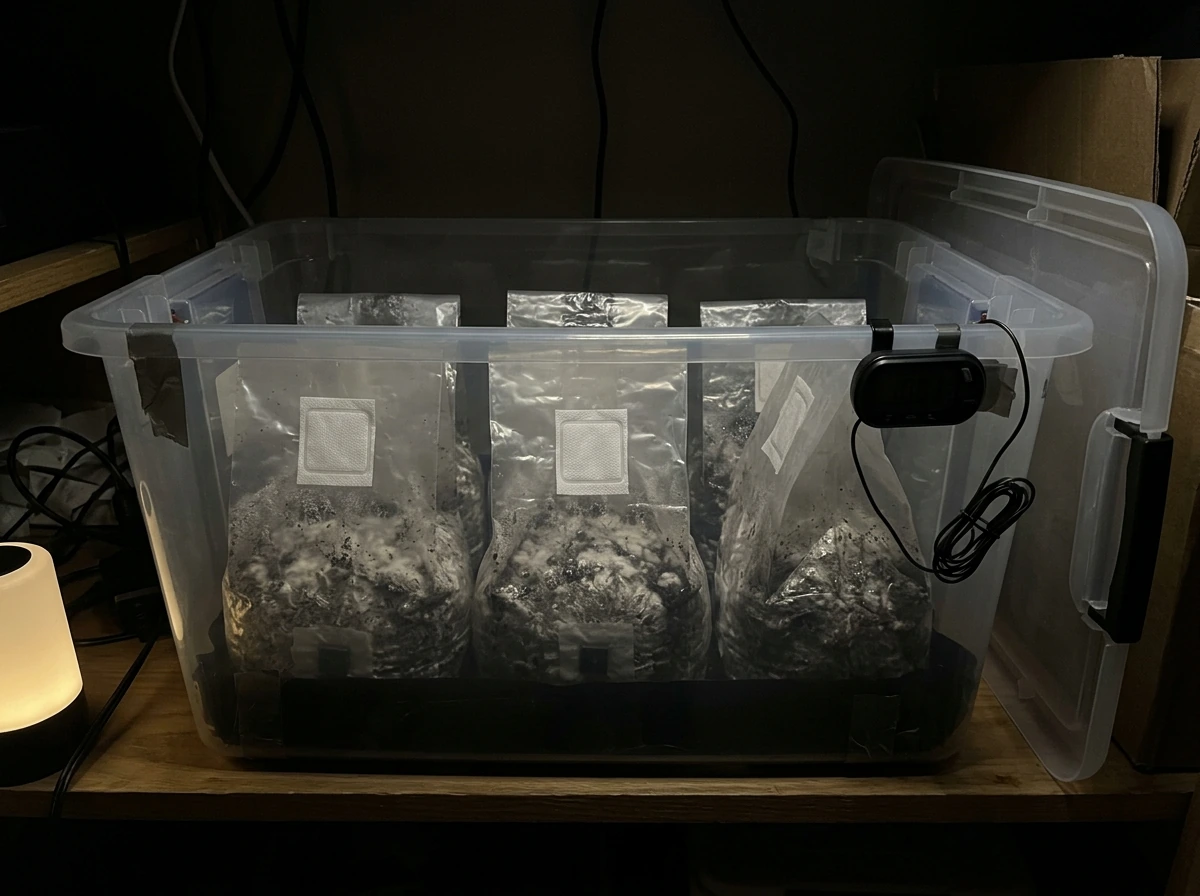
Where to store mushroom grow bags during fruiting
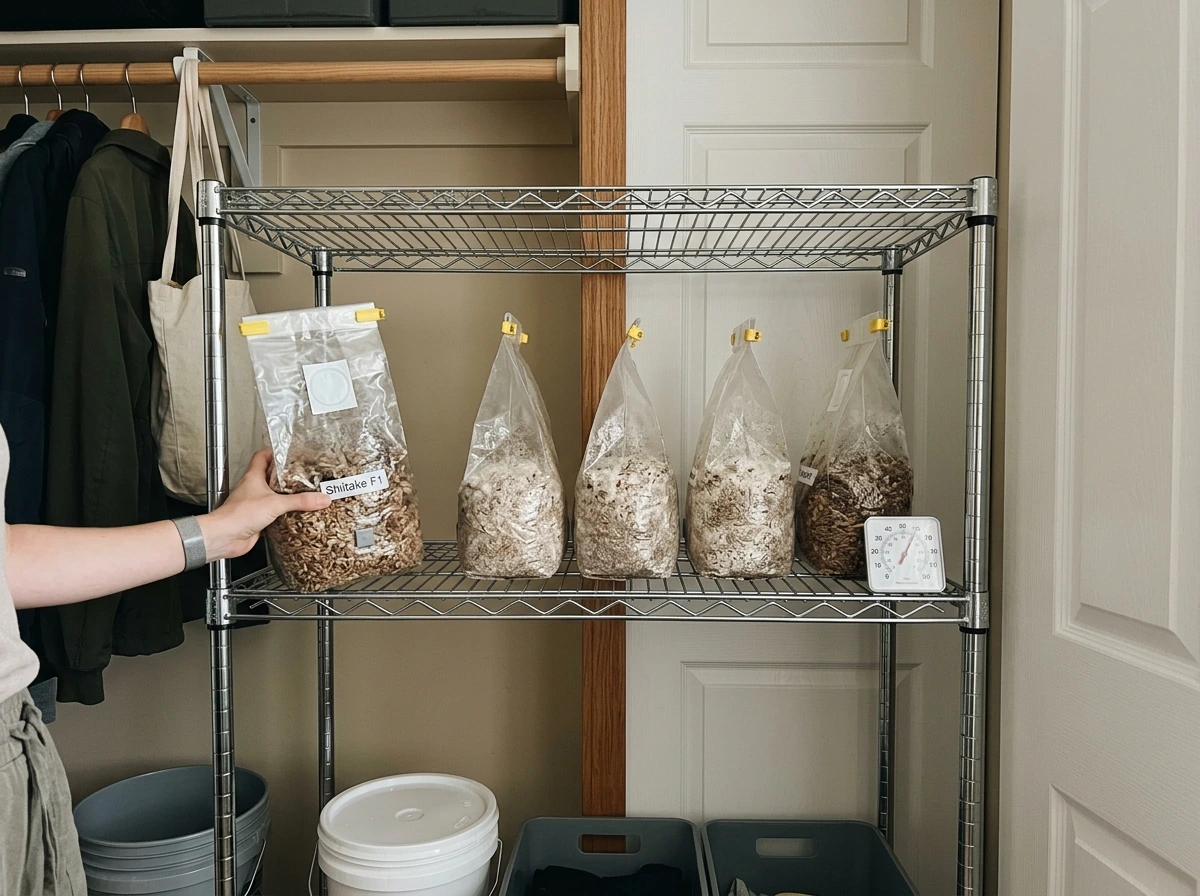
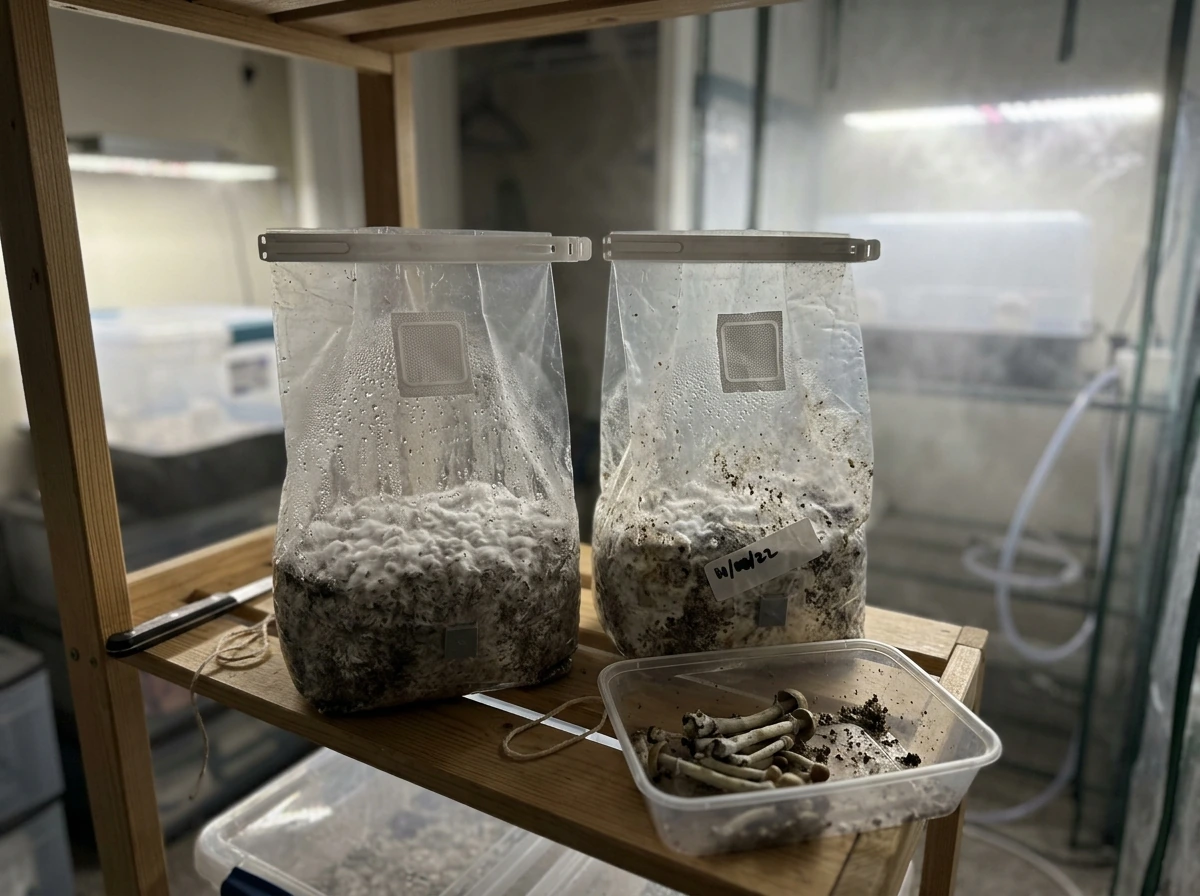
Once your bag is inoculated and colonizing, storage becomes a much more active conversation. The environment you put the bag in during incubation and fruiting directly determines whether you get a healthy flush or a bag full of green mold. There are two distinct phases here: incubation (when mycelium is colonizing the substrate) and fruiting (when mushrooms are actually forming).
During incubation
After inoculation, place the bag somewhere dark and stable at around 70–75°F. Mycelium doesn't need light to grow, and consistent temperature without fluctuation is what speeds up colonization. Green Rooster Gourmets' all-in-one instructions actually recommend placing the inoculated bag back inside the open box it came in, which is a practical trick because the box provides minor insulation, keeps the bag upright, and reduces handling. p21s2: Green Rooster Gourmets' all-in-one instructions actually recommend placing the inoculated bag back inside the open box it came in, which is a practical trick because the box provides minor insulation, keeps the bag upright, and reduces handling, and it also helps explain why a careful transfer matters if you later learn how to transfer mushroom grow bag to monotub. A closet shelf, a spare cabinet, or even a dedicated incubation space all work. Avoid areas with strong air movement that could cause temperature swings.
During fruiting
When colonization is complete and you're transitioning to fruiting, the environmental targets shift. Redwood Mushroom Supply's guidance for most wood-loving species sets the target at 65–75°F and 90–95% relative humidity. That's a specific, high-humidity window that's difficult to achieve passively in most homes, especially in heated or air-conditioned spaces. You'll need to actively manage this.
The most accessible fruiting setup for home growers is a humidity tent, essentially a clear plastic bag or tote with holes cut in it that goes over or around the grow bag. NAMA recommends this approach specifically because it traps moisture around the fruiting surface while the holes allow fresh air exchange. If you go the tote route, USU Extension suggests cutting four holes about 1 inch in diameter, placed two per side and roughly 3 inches from the bottom, which lets heavier CO2 exhaust while fresh air enters higher up.
Placement during fruiting matters too. Indirect light (or even just room ambient light from a window or overhead fixture) is enough to orient pin development. Mushrooms can grow in complete darkness, but a small amount of indirect light helps direct where they push out. Avoid placing fruiting bags in direct sunlight since the heat and dryness will damage forming pins. A kitchen counter or a shelf in a room-temperature space with decent ambient light is a practical default.
Species-specific notes matter here. Redwood Mushroom Supply specifically recommends fruiting lion's mane from the side of the bag rather than the top, which affects how you cut the bag and where you position it. Always check the supplier instructions for the species you're growing rather than assuming a one-size setup applies to everything.
Hygiene and moisture control for storage
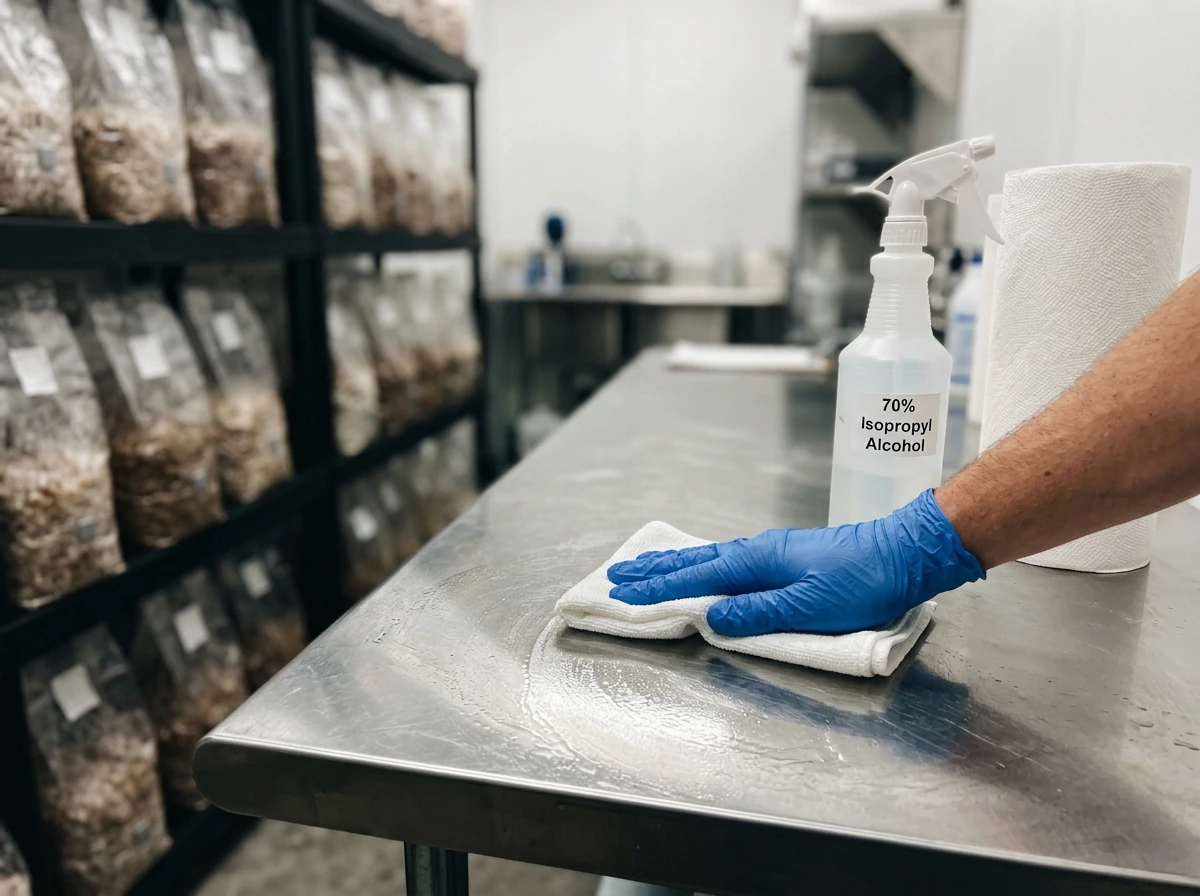
USU Extension puts it plainly: cleanliness is the key to successful mushroom cultivation. Mushroom growing is, at its core, a constant competition between your mycelium and every other mold, bacteria, and fungus in the environment. Good hygiene doesn't just help, it's what separates successful grows from contaminated ones.
Before you handle any grow bag, wipe down your work surface with isopropyl alcohol (70% is more effective than 91% for surface sanitation because it penetrates cell walls better), wash your hands thoroughly, and ideally work in a low-traffic area with minimal air movement. When you're inoculating, work quickly and close to a still-air environment or use a still air box if you have one. The less time the bag is open, the lower the contamination risk.
Condensation inside the bag is normal during colonization, but pooling liquid at the bottom is a warning sign of excess moisture that can lead to bacterial wet rot. If you see significant standing liquid, carefully tip the bag to redistribute or, if using a bag with a filter patch, make sure the filter isn't blocked. Bags stored in spaces with high ambient humidity may develop condensation on the outside, which is fine, but make sure air can still circulate around the bag so it doesn't sit in a puddle.
During fruiting, misting is usually necessary to maintain the 80–95% humidity target. Use clean, filtered or distilled water if you can, and mist the inside surfaces of your humidity tent or fruiting chamber rather than directly blasting the mushrooms. Wet surfaces plus poor air flow is the combination that breeds contamination. Always follow misting with a brief period of fresh air exchange to prevent stagnant conditions.
Space your bags. If you're running multiple grows, give each bag a few inches of clearance from its neighbors. Airflow between bags reduces surface moisture buildup and limits cross-contamination if one bag starts to show problems.
Common storage mistakes and how to fix them
Most failed grows trace back to a small number of consistent errors. Here are the ones that come up most often and what to do about them:
- Substrate drying out: This happens when the bag is stored somewhere too warm or in an area with low ambient humidity, or when the filter patch dries the interior over a long incubation. Fix it by ensuring your incubation space is 65–75°F with moderate humidity, and consider wrapping the bag loosely in a clean plastic bag (not sealed) to reduce moisture loss through the filter. During fruiting, increase misting frequency and check that your humidity tent is retaining moisture.
- Bacterial contamination (wet rot or sour smell): Usually caused by excess moisture pooling at the bottom of the bag, too-high temperatures (above 80°F accelerates bacterial growth), or a contaminated inoculation. Fix it by ensuring temperature stays in range and that no liquid is pooling. If you catch it early and the contaminated area is small and localized, some growers remove the affected section and continue, but if it's spreading, discard the bag promptly and away from your other bags.
- Green, black, pink, or orange patches (mold contamination): These are the colors USU Extension flags as clear contamination signs. Green is most commonly Trichoderma, which is aggressive and spreads fast. There is no saving a bag with active green mold. Seal it in a plastic bag immediately and remove it from your grow space before it releases spores onto your other bags.
- Overheating during colonization: Mycelium generates its own heat as it colonizes, and a bag in a warm closet can exceed safe temps if airflow is poor. Target 70–75°F ambient and check that the bag isn't surrounded by insulating materials. A small thermometer near your incubation space is worth having.
- Pinning failure or poor fruiting: Often caused by inadequate fresh air exchange or humidity that's too low. Purdue Extension emphasizes FAE using a fan plus air replacement as critical when mushrooms begin to pin. Bump up misting frequency, ensure your holes or vents are not blocked, and add a small fan on an intermittent timer if CO2 levels seem to be accumulating (a sign is leggy, elongated pins rather than compact, healthy ones).
- Waiting too long to use bags: If you bought all-in-one bags and left them sitting for more than 30 days, the substrate quality declines and contamination risk rises significantly. Use them promptly, and if you can't, store them exactly as directed and check them carefully before inoculating.
Next steps: buying checklist and setup plan
Here's everything pulled together into a practical checklist you can run through before and after you order your bags:
Before you buy
- Decide on your species (oyster, shiitake, lion's mane, etc.) and choose a bag or kit rated for that species.
- Choose an all-in-one bag if you're a beginner, or empty sterilized bags if you want to mix your own substrate.
- Buy from a dedicated mycology supplier (North Spore, Midwest Grow Kits, Redwood Mushroom Supply) rather than a generic marketplace.
- Confirm the product listing includes sterilization method, substrate composition, and shelf life.
- Check the supplier's return or replacement policy before ordering.
- Order only what you plan to use within 30 days for all-in-one bags.
When bags arrive
- Inspect bags immediately for any visible damage, leaks, or contamination signs (discoloration, unusual smells).
- Store unused bags on a shelf at 65–75°F, away from sunlight, heat sources, chemical fumes, and the floor.
- Plan to inoculate within 30 days of receipt for best results.
- For shiitake-specific bags, monitor color closely and use before the substrate darkens significantly.
Setup and grow plan
- Clean your inoculation workspace thoroughly with 70% isopropyl alcohol, wash your hands, and minimize air movement during inoculation.
- After inoculating, place the bag in a dark space at 70–75°F. Use the original box as a holder if available.
- Check on the bag daily but avoid unnecessary handling. Watch for healthy white mycelium spreading through the substrate.
- Watch for contamination colors (green, black, pink, orange) and remove any affected bag from the space immediately.
- Once fully colonized, set up your fruiting environment: 65–75°F, 80–95% relative humidity, indirect light, and good fresh air exchange.
- Build a simple humidity tent with a clear plastic bag or tote with 1-inch ventilation holes, and mist lightly once or twice daily.
- Follow species-specific fruiting guidance from your supplier (e.g., side-fruiting for lion's mane).
- After your first flush, the bag can often yield additional flushes. Rehydrate by soaking or misting and return to fruiting conditions.
Once you're comfortable with the all-in-one bag process, it's worth exploring whether you can reuse mushroom grow bags and how grow bags compare to jars and <a data-article-id="D6CC2B81-8409-453F-A43E-02A7B3920A10">mushroom grow bag vs monotub</a> as your setup scales up. mushroom grow bag vs monotub Those comparisons are covered elsewhere on this site, but for most beginners, one or two good-quality all-in-one bags from a reputable supplier, stored and managed with the steps above, is the fastest path to a successful first harvest.
FAQ
How can I tell if a grow bag is actually made for mushrooms and not repurposed packaging?
Look for a supplier listing that explicitly mentions a self-healing injection port and/or a filter patch. If the page just says “sterilized bag” without those features, assume it may not be designed for mushroom gas exchange and contamination control.
What info should I check on the product page before I buy grow bags?
If the listing provides substrate composition, sterilization details, filter patch micron rating, and a manufacture date or clear shelf life, that is usually a good sign. If those details are missing or the product is described vaguely, it is a common reason people end up with faster contamination.
Are all-in-one mushroom grow bags worth it if I want to reuse my setup later?
Yes, but only if you can match the incubation and fruiting controls the bag is meant to support. For example, all-in-one bags are designed to go from inoculation to first flush inside the same system, so storage and handling after arrival matter even more than with “empty bag” formats.
Do mushroom grow bags really go bad before the stated shelf life?
For fresh delivery, buy enough to use within the supplier’s recommended window. The article notes many all-in-one bags are best within about 30 days of receipt, even if they are shelf stable longer, because substrate can degrade in quality over time.
What’s the safest way to store bags if my home temperature fluctuates a lot?
For unopened bags, room-temperature storage is the default, but avoid places that cycle hot and cold. If the bag repeatedly experiences temperature swings, condensation patterns can change and you may increase the risk of contamination during inoculation.
Can I store shiitake bags the same way as oyster bags?
If you ordered shiitake-specific bags, follow the “use when dark brown” guidance for storage. Unlike general all-in-one bags, shiitake blocks have a narrower usable storage window and should not be treated as interchangeable.
What should I do if the filter patch area seems blocked or getting too wet?
Many contamination problems come from blocked or wet filter areas. During fruiting, check that the filter patch is not pressed against the humidity tent walls and that excess condensation is not pooling around the filter zone.
Is it okay to keep grow bags in a garage or near household chemicals if it is cool?
Don’t store grow bags directly on the floor, and also avoid storing near cleaning chemicals, paints, or strong fumes. Even if temperature is fine, vapor exposure can interfere with the substrate and compromise performance.
What does it mean if there is standing liquid inside the bag?
If you see standing liquid pooling at the bottom, it often indicates excess moisture or inadequate evaporation during incubation. Carefully tip to redistribute, improve airflow, and reduce misting frequency rather than increasing humidity further.
Do I need grow lights for fruiting, or will room light be enough?
Indirect ambient light is enough for orientation, and you should avoid direct sun. Strong light plus heat can dry forming pins and cause uneven development, even if humidity targets are otherwise met.
How do I handle bag positioning if the supplier says fruiting should be from the side (not the top)?
If you are fruiting from the side for species like lion’s mane, position the bag so you can support the cut and expose the correct surface without letting it dry out. Plan your humidity tent and openings so that the “fruiting face” stays consistently humid.
Can I fruit multiple bags close together to save space?
Yes, and spacing helps. Giving each bag a few inches of clearance reduces surface moisture buildup and limits cross-contamination if one bag starts to show symptoms.
If my first grow fails, what are the best next changes to make before buying new bags?
Start by improving your process rather than immediately replacing everything. Review storage conditions, confirm the bag features were correct (port/filter), and then adjust cleanliness and airflow, because most repeated failures come from a small set of controllable mistakes.
Next Articles
Best Psilocybe Cubensis Grow Bag: Reviews and Selection Guide
Reviews and selection guide for the best Psilocybe cubensis grow bag, with criteria, setup steps, and troubleshooting.
Can You Reuse Mushroom Grow Bags Safely After Harvest?
Learn if you can reuse mushroom grow bags safely, how to assess contamination, and the steps to clean, dry, and rerun bl
Best Soil for Grow Bags: Mix Recipes and How Much to Add
Best soil for grow bags: mix recipes, how much to add by bag size, and vegetable tweaks for strong drainage and yield.