If you're choosing between a mushroom grow bag and a monotub, here's the short answer: grow bags (especially all-in-one inoculated bags) are the better starting point if you want something low-setup, low-risk, and self-contained. If you're choosing between a mushroom grow bag and a monotub, here's the short answer: grow bags (especially all-in-one inoculated bags) are the better starting point if you want something low-setup, low-risk, and self-contained. Monotubs are better once you want more control, higher throughput, and multiple consistent flushes from a bulk substrate. Both systems work. The real question is which one fits your space, budget, and current skill level right now. Both systems work. The real question is which one fits your space, budget, and current skill level right now.
Mushroom Grow Bag vs Monotub: Which Setup Wins?
What each system actually is
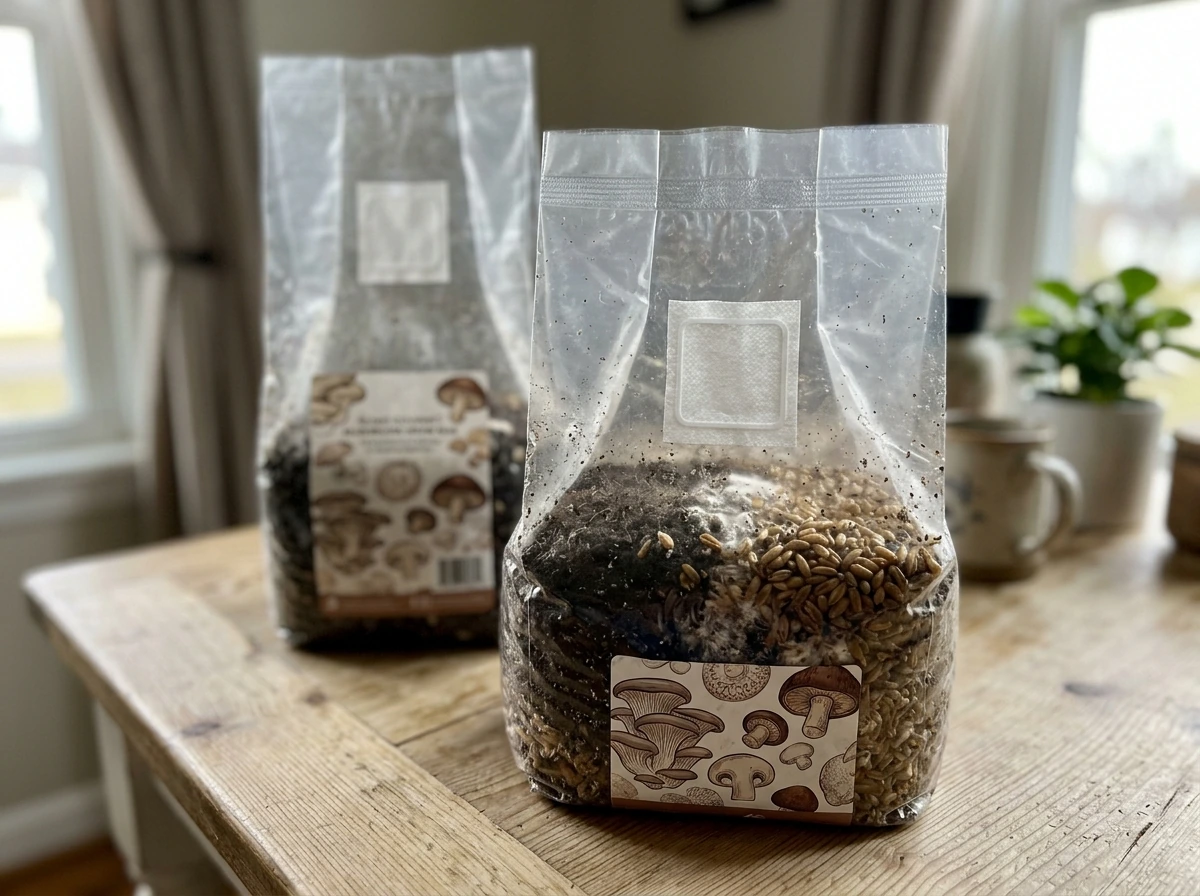
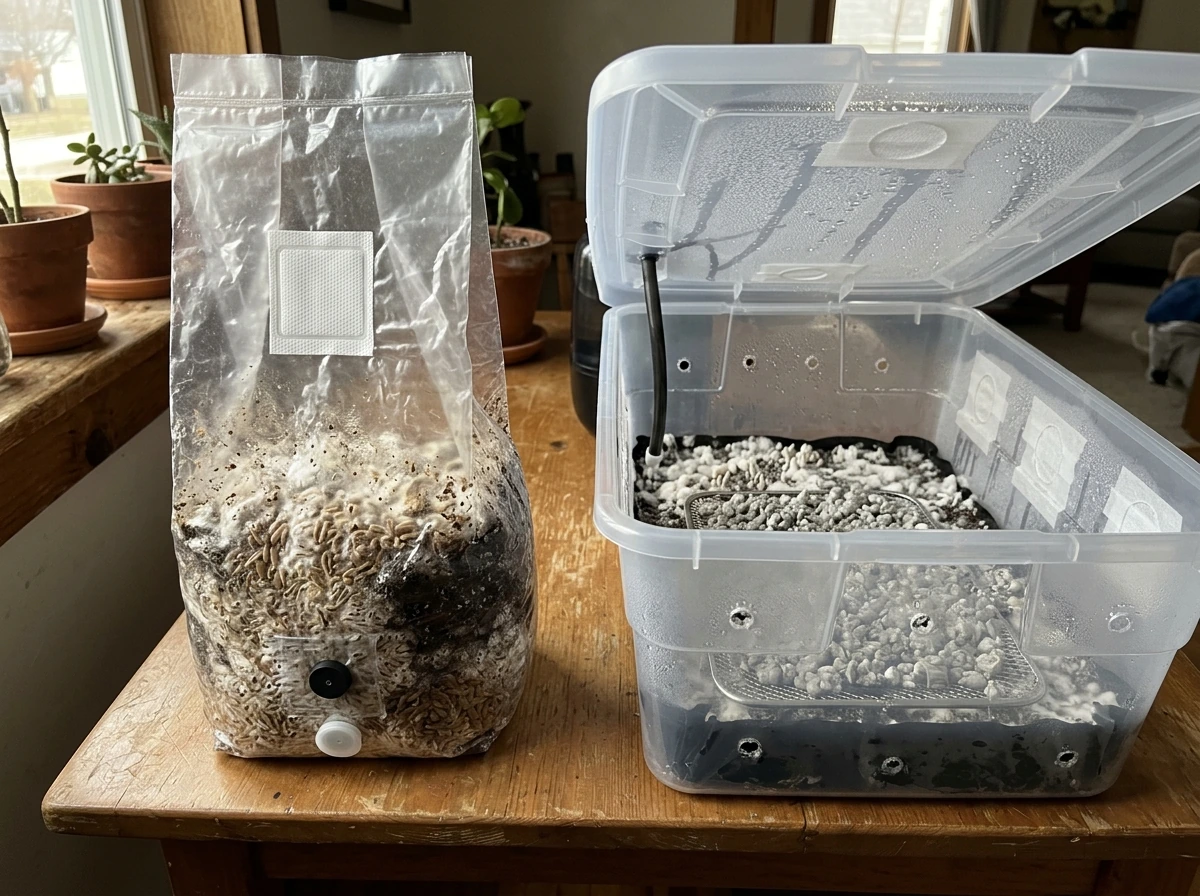
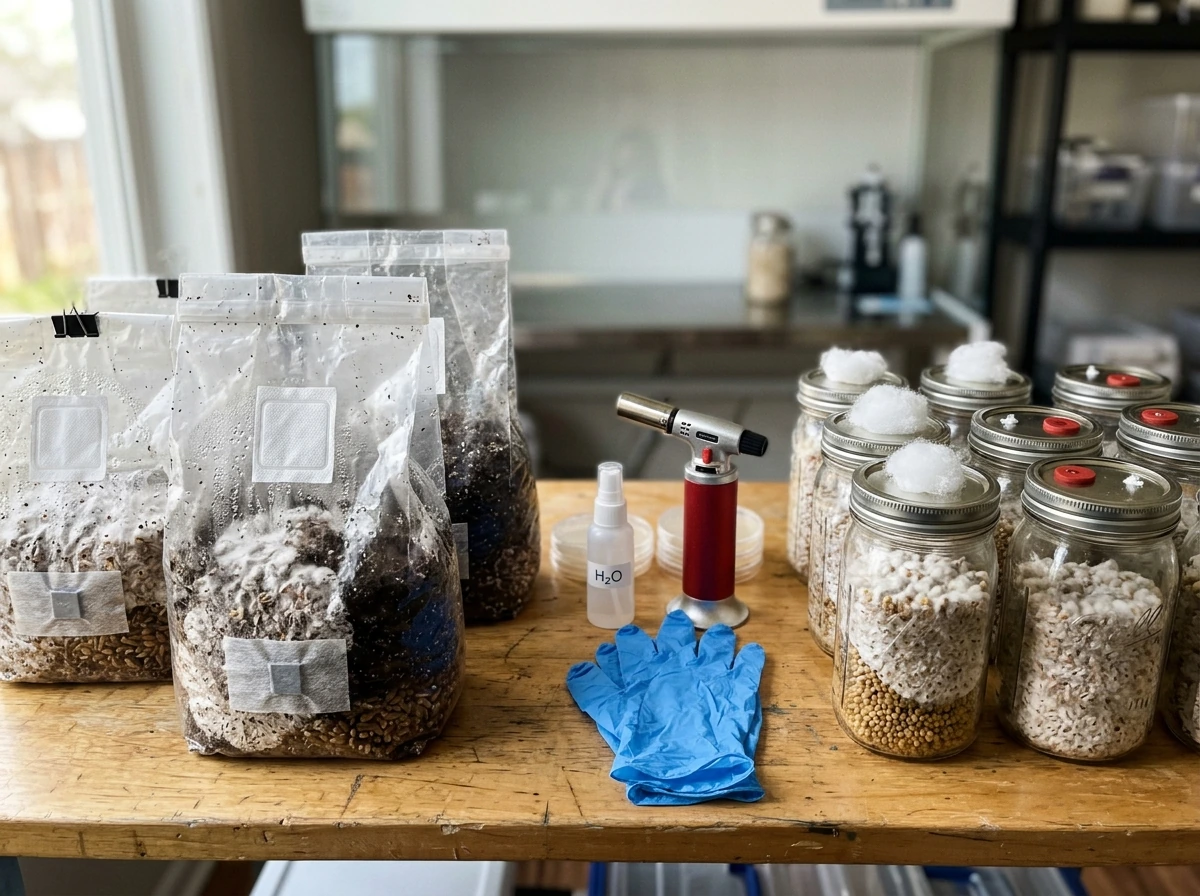
A mushroom grow bag, in the context most people searching this topic mean, is a sealed, self-contained unit that comes with substrate and mycelium already inside. You don't mix anything or do bulk prep. The bag is designed to be kept sealed through colonization, and when it's time to fruit, you modify the bag itself, usually by cutting the top section, to shift the microclimate and trigger pinning. The whole grow happens in one unit, which is why these are often called all-in-one (AIO) bags. There are also simpler, non-inoculated grow bags used just to hold bulk substrate, but when growers compare bags vs. monotubs, they're almost always talking about the all-in-one (AIO) bags style.
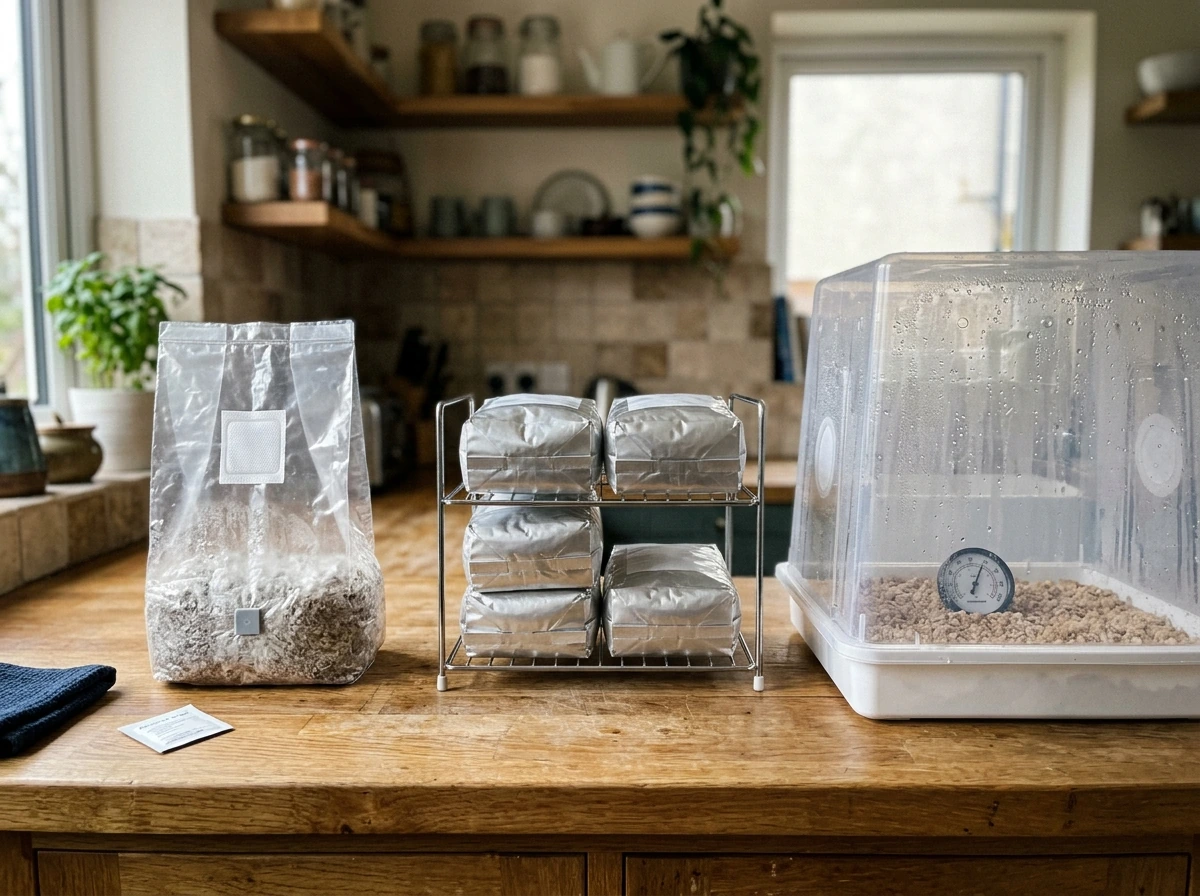
A monotub is a large lidded storage bin (typically 50 to 66 quarts) that holds bulk substrate and doubles as your fruiting chamber. The tub has purpose-built holes with filter patches or micropore tape to manage fresh air exchange (FAE). Colonization and fruiting happen in the same tub, but with different hole configurations for each stage: holes are usually covered or sealed during incubation to limit contamination exposure, then opened and filtered during fruiting to drive proper airflow. Many growers also use liners inside the tub to keep things clean between flushes.
When to choose grow bags vs. a monotub
The clearest way to think about this is by what you're optimizing for. Here's how each setup tends to win.
Go with an all-in-one grow bag if...
- You're doing your first grow and want to minimize prep steps and contamination variables
- You have limited counter or shelf space (one bag vs. a full-size storage bin setup)
- You don't want to invest in bulk substrate prep equipment right away
- You want a grow that is nearly hands-off through colonization
- You're testing a species before committing to a larger bulk setup
Go with a monotub if...
- You want more yield per cycle and are comfortable with bulk substrate handling
- You plan to run multiple cycles and want a reusable fruiting chamber
- You want finer control over fruiting conditions (FAE, humidity, temperature)
- You're ready to invest in a small equipment stack (tub, liner, filter patches, humidity source)
- You're scaling up and want consistent throughput rather than one-off harvests
North Spore, one of the more well-known mushroom supply vendors, frames this exact decision around space availability, experience level, and personal preference. That framing is accurate. It's not that one system is better, it's that they serve different grower situations.
Setup requirements: what you actually need to get started
All-in-one grow bag setup
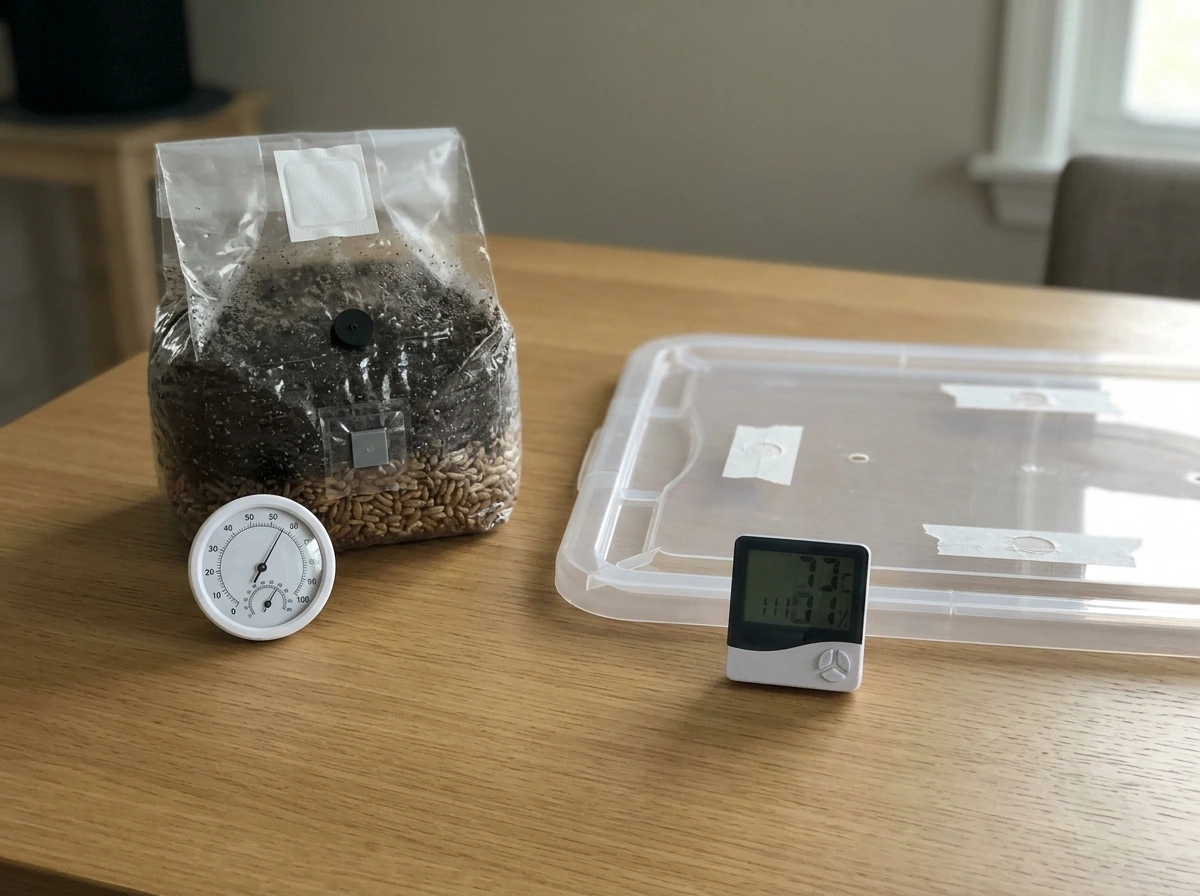
The appeal here is that the bag ships ready to go. Your main jobs are maintaining ambient temperature and humidity around the bag during colonization, then modifying the bag at the right moment to trigger fruiting. You don't need a pressure cooker, bulk substrate, or a separate fruiting chamber. A warm, reasonably clean space with indirect light is enough to get started. You will want some way to maintain humidity during fruiting, even if it's just misting the air around the bag once or twice a day, because the bag's microclimate changes once you cut it open.
Monotub setup
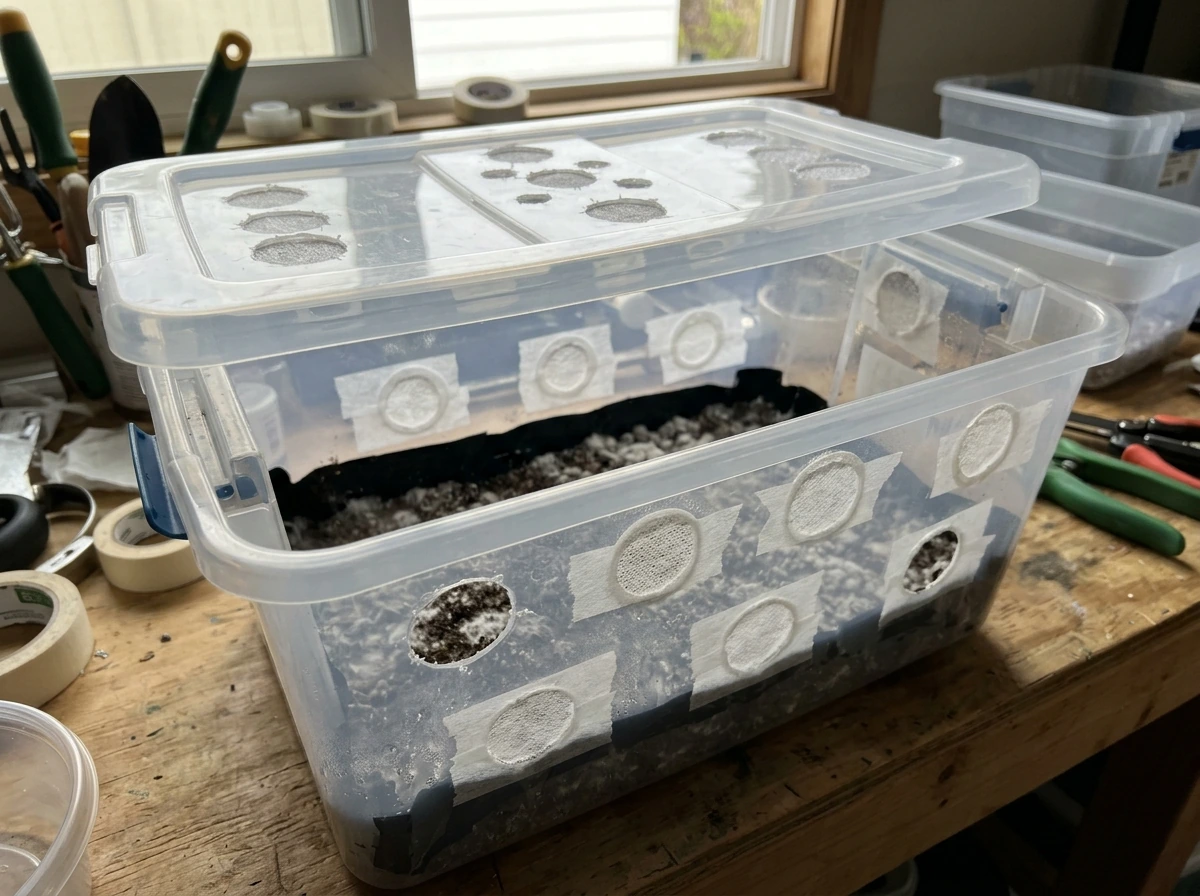
A monotub requires more upfront preparation. You need the bin itself (a 50 to 66 quart latching-style storage bin is typical), holes drilled or cut at specific positions and diameters for FAE, and filter material like micropore tape or filter discs. You'll also want a liner to keep the tub clean between flushes. During fruiting, you need to manage humidity more actively: a perlite tray on the bottom, a reservoir, or a simple humidifier in the grow space can all work. The USU Extension's beginner grow guide specifically describes FAE hole geometry and placement as a critical fruiting-stage configuration, so you're not just punching random holes, placement and coverage actually matter.
North Spore's Boomr Bin system is an example of modern monotub hardware that takes this further with modular design and optional automation for humidity and air exchange. That level of setup isn't required to start, but it shows where monotubs can go when you want to push consistency.
Cost, throughput, and labor: the honest comparison
| Factor | AIO Grow Bag | Monotub |
|---|---|---|
| Starting cost | Low ($20–$40 per bag with substrate + mycelium) | Moderate ($30–$60 for tub, liner, filter hardware, substrate) |
| Ongoing cost | Per-bag purchase each cycle | Liners (~$9.99 per 3-pack, single-use recommended), substrate materials |
| Equipment needed | Minimal (just a clean space + humidity) | Tub, liner, drill/filter patches, humidity source |
| Labor per cycle | Very low (no bulk mixing or transfers) | Moderate (substrate prep, bulk mixing, tub cleaning between flushes) |
| Yield per cycle | Lower (single-bag volume) | Higher (bulk substrate volume, 50–66 qt capacity) |
| Reusability | Single use per bag | Tub is reusable; liners are replaced each cycle |
| Scalability | Buy more bags to scale | Run larger bulk batches; upgrade to automation |
The cost math here is pretty straightforward. Grow bags shift your spending toward convenience, each bag includes substrate and mycelium, so you're paying for the prep that was done for you. Monotubs shift your spending toward equipment and raw materials, which costs more upfront but gets cheaper per cycle over time. If you're running two or more cycles a month, the monotub economics make sense. For one-off or occasional grows, bags are genuinely more practical.
Colonization speed, yield, and what to realistically expect
Colonization timelines depend heavily on species, substrate, and temperature, not just the method you're using. Research on oyster mushrooms shows colonization completing in roughly 18 to 20 days under controlled conditions, with time to first primordia, days between flushes, and flush yield all varying by substrate and environment. First-flush yield data from cultivation studies shows ranges as wide as 16% to 23% biological efficiency, depending on treatment. The point is that neither system magically speeds up or slows down mycelium growth. What changes is how much control you have over the variables.
With an AIO bag, you have less control but also fewer failure points. The substrate is already prepared and inoculated correctly, so your job is mostly to keep temperatures stable and not disturb the bag. With a monotub, you control substrate composition, moisture content, inoculation rate, and fruiting conditions, which means you can optimize for better yields but also have more variables to get wrong. Beginners often get better first-cycle results from bags precisely because there's less to mess up.
On throughput: a single monotub loaded with 50 to 66 quarts of bulk substrate will generally out-yield a single grow bag. If yield per cycle is a priority, the monotub wins. If consistency across many low-effort cycles is the goal, rotating through AIO bags is actually a reasonable strategy, especially while you're learning.
Contamination risk: where things go wrong and how to fix them
Contamination is probably the number one reason people search 'grow bag vs monotub,' because one of the two setups feels safer. Here's what actually drives contamination risk in each system.
Risk factors in AIO grow bags
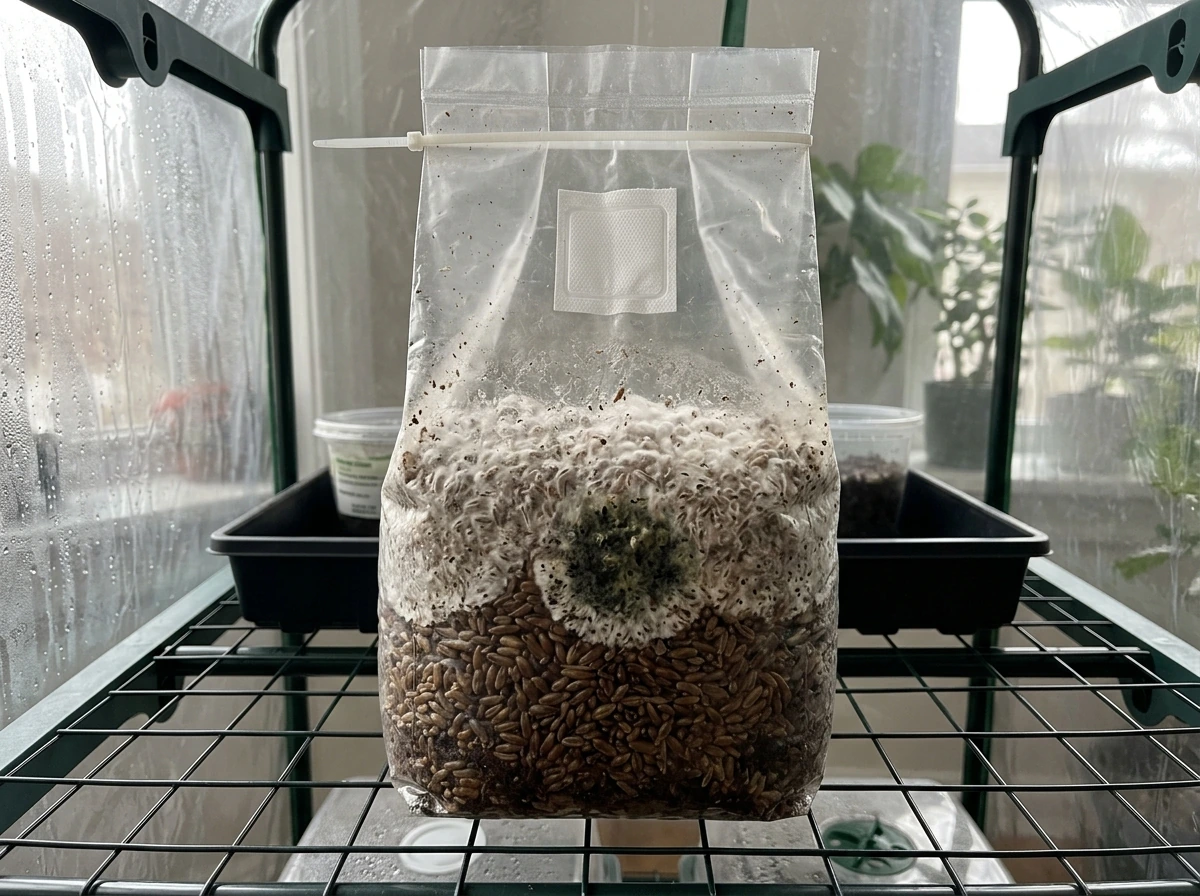
The biggest contamination risk with AIO bags is also the easiest to avoid: opening the bag too early. Bag instructions are explicit about this. Don't open the bag before mushroom pins appear. The sealed design is intentional. It keeps contaminants out during colonization without you having to maintain sterile conditions yourself. If you cut or poke the bag prematurely, you expose colonizing mycelium before it has a chance to establish dominance over any contamination, and that's when green mold (trichoderma) and other invaders move in fast. Other risk factors include storing the bag somewhere too warm during incubation (high temperatures favor contaminants), or getting the fruiting environment too wet without adequate air movement after opening.
Risk factors in monotubs
Monotubs have more contamination exposure points: substrate preparation, inoculation, and the transition from incubation to fruiting. Poor hygiene during inoculation is one of the most common failure drivers. Over-wet substrate is another, because waterlogged bulk substrate is an ideal environment for bacterial contamination and mold. During incubation, holes should be covered to limit contaminant exposure. During fruiting, you need proper FAE to prevent the kind of stagnant, over-humid microclimate that promotes surface mold.
Troubleshooting steps for each system
- AIO bag: Green or black mold visible through the bag during colonization. Isolate the bag immediately, do not open it in your grow space. Discard it. Contamination at this stage is usually due to a bag that was damaged before purchase or a compromised filter patch.
- AIO bag: No pins after expected colonization time. Check ambient temperature (too cold slows everything), make sure you've transitioned to fruiting conditions (cutting the top, introducing FAE and light), and confirm humidity around the bag is adequate.
- AIO bag: Mold after cutting the top. Usually caused by too-high humidity with insufficient airflow. Add gentle FAE (a small fan nearby helps) and reduce misting frequency.
- Monotub: Green mold during incubation. Usually over-wet substrate or a contaminated inoculation. Discard and rebuild with drier substrate and cleaner inoculation technique.
- Monotub: No pinning after colonization. Check FAE hole positioning, confirm holes are open and filtered (not sealed with tape), and verify humidity is at 90%+ with appropriate temperature for your species.
- Monotub: Stalled growth or mold between flushes. Remove the liner and any spent substrate, clean the tub, and reset with a fresh liner before reloading. Trichoderma spreads quickly once established, so do not try to grow through visible green contamination.
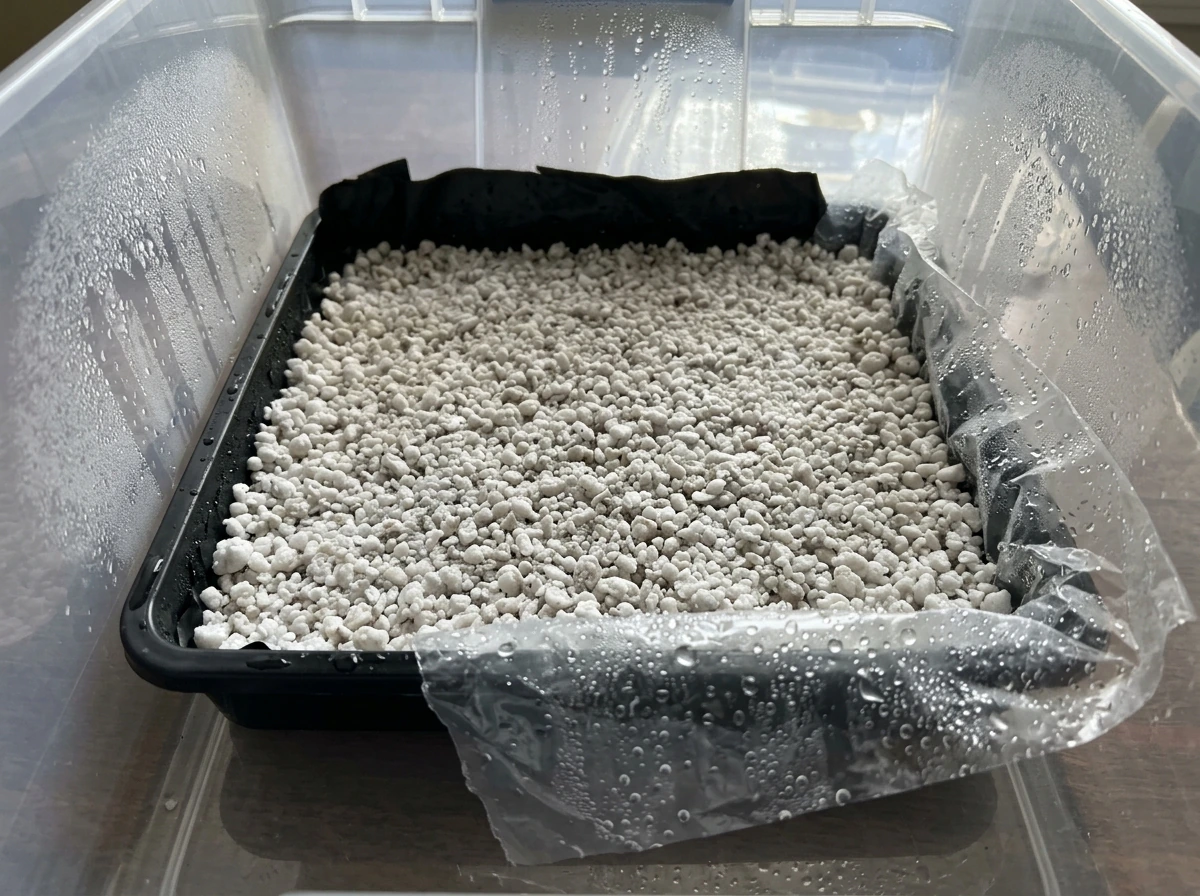
One useful tool for monotub humidity management is a perlite tray on the bottom of the chamber with water added. It passively maintains 90%+ relative humidity without constant misting, which reduces the wet-surface conditions that invite mold.
Harvesting, between-flush maintenance, and keeping performance up
Grow bags: harvesting and what comes next
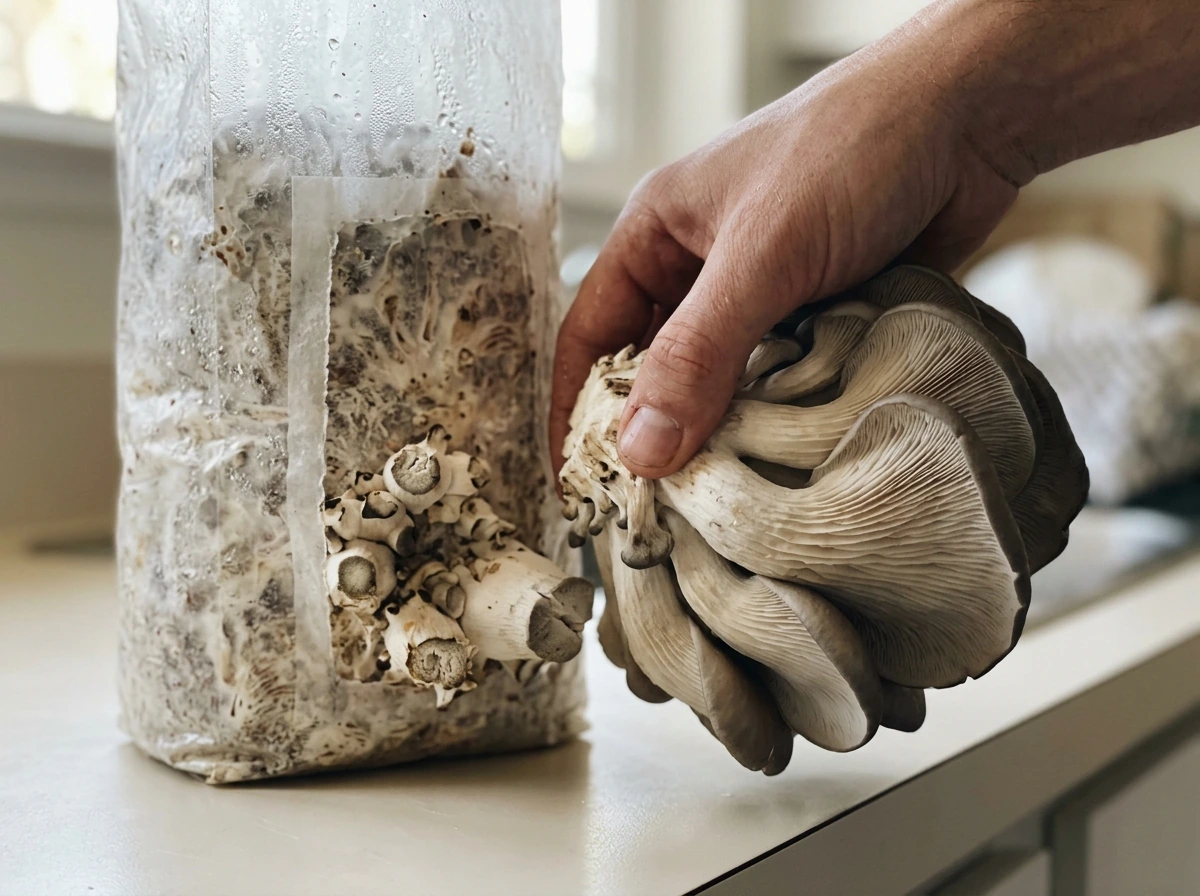
Harvesting from a grow bag is straightforward. Twist-and-pull at the base of the cluster, clean up any remaining stumps, and let the bag rest before expecting a second flush. For most species, a rest period followed by rehydration (some instruction sets recommend soaking or resting the substrate in cold water overnight) helps trigger subsequent flushes. AIO bags typically deliver one to three flushes before the substrate is exhausted. After that, the bag is done and you start fresh. This is actually a contamination advantage: there's no cleanup, no scrubbing, and no risk of carrying contamination from one cycle into the next because you're just replacing the whole unit.
Monotubs: harvesting and between-flush resets
Monotub harvesting is similar in technique but the between-flush process is more involved. After harvesting, you need to clean the tub surface, which is where liners earn their value. A liner lets you peel out the fruiting zone debris without scrubbing the tub itself. Vendors like Redwood Mushroom Supply specifically describe their liners as a quick-reset tool that reduces side mess and cross-flush contamination buildup. After cleanup, you add moisture back, re-cover or adjust the FAE holes as needed, and let the substrate rest before the next flush. Monotubs in good condition can produce three or more flushes, but performance typically drops after each one, and contamination risk accumulates. Knowing when to retire a monotub is as important as knowing how to set one up.
Make your decision: a simple checklist
Work through these questions and your answer will be clear.
- Is this your first mushroom grow? Start with an AIO grow bag. The sealed design removes the highest-risk steps and gives you a successful first cycle to build on.
- Do you have less than 2 square feet of dedicated grow space? A single AIO bag fits almost anywhere. A monotub setup needs a stable environment and dedicated shelf space.
- Are you comfortable with pressure cookers, bulk substrate mixing, and sterile technique? If yes, a monotub is within reach. If no, start with bags.
- Do you want more than 2 to 3 pounds of mushrooms per cycle? A monotub gives you the volume to get there. AIO bags are better suited to smaller, personal-scale harvests.
- Are you growing more than once a month? The economics and logistics of a monotub start making sense at that frequency. Below that, AIO bags are cheaper and simpler.
- Do you want to transfer a colonized bag into a fruiting chamber later? That's a hybrid approach that many growers use as a bridge between the two systems, and it's worth exploring as a next step once you've run a bag cycle.
Start today: concrete next steps for each path
Starting with a grow bag
- Order an all-in-one inoculated mushroom grow bag from a reputable vendor. Look for bags with visible mycelium development already underway and a clear filter patch on the bag.
- Set it in a clean, warm location out of direct sunlight. Typical colonization temperatures range by species, so check the bag's instructions and match your environment.
- Do not open the bag. Resist the urge to check, poke, or adjust anything until you see pins forming.
- When pins appear, follow the bag's instructions for transitioning to fruiting, usually cutting the top section of the bag to allow FAE and light exposure.
- Maintain humidity around the open bag by misting the surrounding air (not directly into the substrate) once or twice daily.
- Harvest by twisting clusters at the base before caps flatten out fully. Let the bag rest and add moisture before expecting a second flush.
Starting with a monotub
- Get a 50 to 66 quart latching storage bin. Drill or cut FAE holes at the right placement (bottom sides for intake, upper sides or lid for exhaust) and fit with filter patches or micropore tape.
- Pick up a set of monotub liners sized for your bin before you run your first batch.
- Prepare or purchase bulk substrate appropriate for your species. Target correct field capacity moisture: the substrate should hold together when squeezed but release only a few drops of water.
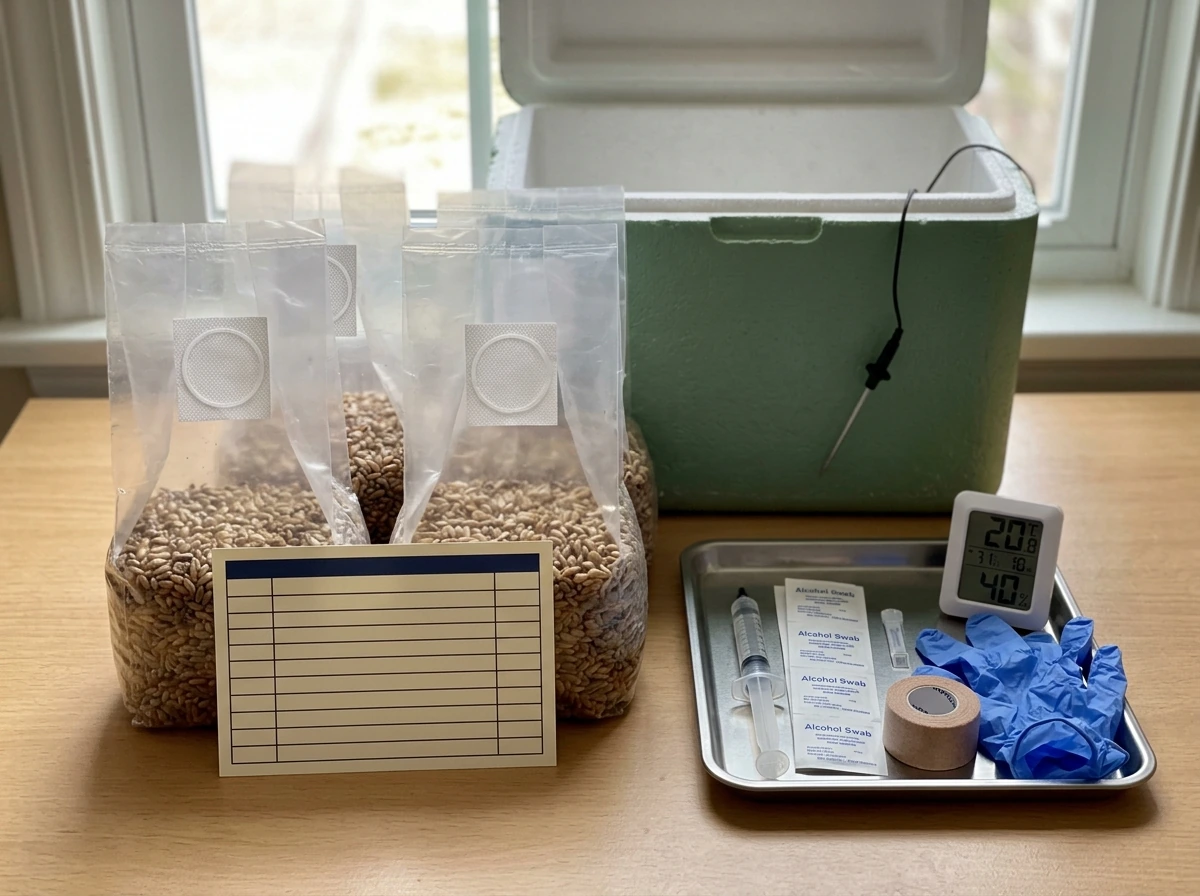
- Inoculate with clean technique. Wipe down your workspace, use gloves, and work quickly to minimize exposure time.
- Seal FAE holes with tape during incubation. Once colonization is complete, open and filter holes to begin fruiting conditions.
- Add a perlite tray to the bottom of the fruiting area to passively maintain 90%+ humidity.
- After your first harvest, use the liner to clean up the tub, rest the substrate, re-add moisture, and set up for the next flush.
One path worth considering as you get comfortable is using an AIO grow bag for colonization and then transferring the colonized substrate into a monotub to fruit. It combines the low-contamination-risk colonization of a sealed bag with the higher yield potential of a bulk fruiting chamber. If that idea appeals to you, it's worth looking into how those transfers work before your first cycle, since the timing and technique matter quite a bit for keeping contamination out.
Both systems are legitimate, and both will grow mushrooms when you run them right. The biggest mistake most new growers make isn't picking the wrong system, it's handling the substrate too much, opening things too early, or trying to 'fix' a grow before giving it enough time. If you’re shopping for the best <a data-article-id="B24E7A03-6C85-4056-AC1F-91C94B5E0970">psilocybe cubensis grow bag</a>, start by choosing a bag style that matches your space and patience. If you are shopping specifically for the best psilocybe cubensis grow bag, start by comparing different all-in-one styles versus bulk fruiting options so you know what level of control you want. where to buy mushroom grow bags Whichever setup you go with, let the mycelium do its job, keep conditions stable, and your first cycle will teach you more than any guide can. best all in one mushroom grow bag reddit. can you reuse mushroom grow bags
FAQ
Can I reuse or modify an all-in-one grow bag the same way I would a monotub substrate?
Not necessarily. If a bag is labeled all-in-one (already inoculated) then you generally should not pressure-cook, rehydrate, or add anything, you only manage temperature and humidity until it shows pinning. If you buy non-inoculated bags meant for holding substrate, you must inoculate and you lose the main low-risk advantage.
What happens if I cut open an all-in-one bag early, before it shows pins?
Yes, but it depends on how “sealed” you keep the bag during incubation. In general, only start fruiting modifications after you see pins (or the bag’s specific readiness signal). If you open or cut early, you increase contamination and also can trigger aborted or malformed pins because the bag microclimate changes too soon.
How many flushes should I expect from a monotub, and when should I retire it?
If you cut holes for airflow, use liners, and manage humidity, a monotub can produce multiple flushes, but the limiting factor becomes cleanup and surface contamination between cycles. Many growers see diminishing returns after several flushes because buildup and micro-damage on the substrate surface accumulate, even with good hygiene.
In a monotub, how do I avoid over-misting and causing mold?
A common failure is relying on misting to create humidity in a monotub. Over-wetting surfaces can cause bacterial or fungal blooms. Perlite trays or a simple humidifier that keeps humidity stable usually reduces wet, pooling conditions, and you still need correct fresh air exchange during fruiting.
Is the “bag then transfer to monotub” method worth it, and what’s the biggest timing mistake?
Sometimes. Some setups use an all-in-one bag for incubation, then transfer colonized material into a monotub for fruiting. The key edge case is timing, you want to transfer when the substrate is ready and minimize how long it sits exposed. Also, keep transfers clean and avoid excessive handling, because every extra disturbance increases contamination risk.
Which system is more sensitive to temperature swings during colonization and fruiting?
If you’re using an all-in-one bag, your temperature targets are often more forgiving than monotubs because there are fewer open preparation steps. For monotubs, temperature swings during incubation and fruiting can directly affect colonization speed, pin timing, and bacterial growth. Use a thermometer in the growing space, not just ambient room readings.
How do I know I’ve got the right fresh air exchange settings for each stage in a monotub?
Fresh air exchange requirements change the moment you shift from incubation to fruiting. A typical mistake is leaving incubation-style hole coverage on too long, then wondering why pins stall or surface growth turns fuzzy and wet. Another mistake is going too aggressive with FAE so humidity drops and pins abort.
Can I substitute different hole sizes or filter materials on a monotub without affecting results?
You usually can’t. A monotub’s holes, filter material, and bin size create a specific airflow and humidity behavior. If you swap in a different lid, change hole size, or use a different filter method, results can drift. Treat hole geometry and filter material as part of the system, not optional tweaks.
When should I try to rehydrate for another flush, and when should I just restart?
For bags, the safest default is to let it complete its intended flush cycle, then replace the unit rather than trying to “revive” exhausted substrate. For monotubs, you can sometimes extend output by rehydrating and adjusting humidity, but if you see persistent surface contamination or sour smell, retiring early is typically the better call than repeated resets.
Is contamination mostly an issue of how I handle the grow, or can storage and environment before setup cause problems too?
No, because contamination often starts before you notice visual symptoms. The main edge case is storing sealed units too warm or too humid, which can increase contaminant growth rates even while everything is still “closed.” Store bags or bins within the vendor’s recommended range and keep the grow area clean and draft-controlled.
Compare mushroom grow bags vs jars for home growing: costs, contamination risk, speed, yields, setup, troubleshooting, a
Find reliable places to buy mushroom grow bags plus exact storage steps to prevent drying, mold, and contamination.
Reviews and selection guide for the best Psilocybe cubensis grow bag, with criteria, setup steps, and troubleshooting.