Yes, you can absolutely use tomato grow bags for other vegetables, and for herbs and flowers too. The label on the bag is a marketing choice, not a biological restriction. What actually matters is whether the bag's volume, depth, and drainage match what your chosen crop needs. A standard 20-litre (5-gallon) tomato grow bag suits peppers, eggplant, leafy greens, most herbs, and compact dwarf beans just as well as it suits a tomato plant. It will struggle with full-size root crops, sprawling cucurbits, or large brassicas. Know the specs of your specific bag, match them to the root depth and volume requirements of your crop, and you'll get good results from most of what you want to grow.
Can You Use Tomato Grow Bags for Other Veg? Practical Guide
Marcus Holloway
22 Jul 2026
Quick verdict: can you use tomato grow bags for other veg?
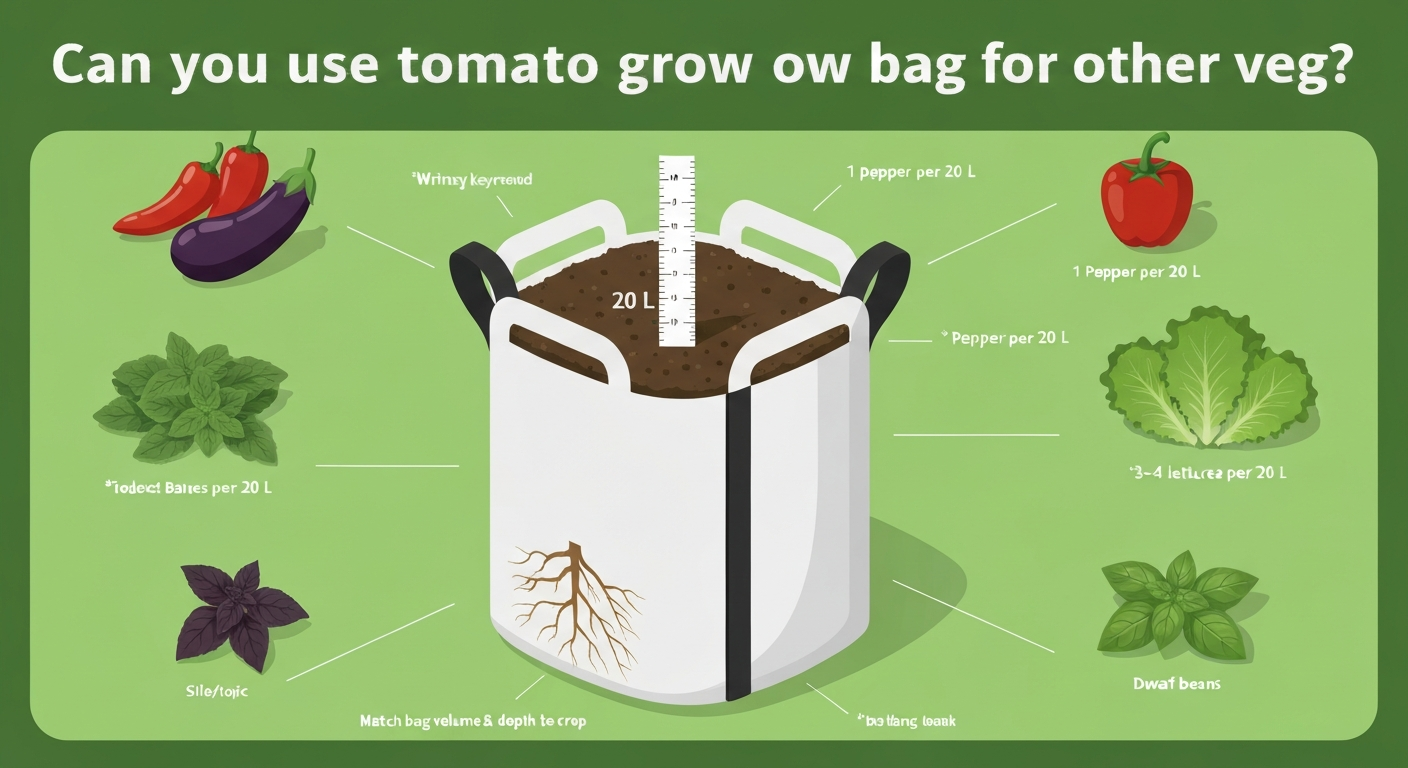
The short version: yes, with conditions. Tomato grow bags are designed around the needs of a mid-sized, moderately deep-rooted fruiting plant. That profile overlaps significantly with peppers, eggplant, compact beans, leafy greens, and herbs, all of which will do well. It overlaps partially with short-rooted root vegetables like radishes and short-variety carrots. It doesn't overlap well with large cucurbits (pumpkins, full-size courgettes), oversized root crops, full-size brassicas, or anything that genuinely needs more than 30–35 cm of rooting depth and more than 20–25 litres of compost per plant. The moment a crop's roots hit the sides and bottom of the bag and there's nowhere to go, growth stalls and quality drops. That's the hard limit. Stay inside it and a 'tomato' grow bag is a genuinely versatile container.
What actually makes a 'tomato' grow bag, specs and what they mean for other crops
The term 'tomato grow bag' covers two quite different product types, and knowing which one you have matters a lot when repurposing it.
The first type is the flat coir or peat-based bag sold by the pallet in garden centres. These are typically 15–18 litres, expand to roughly 100×15×10 cm when filled, and are essentially a disposable growing medium wrapped in plastic. Drainage is provided by cut slits or holes. The growing depth is shallow, around 10 cm, which limits this format to shallow-rooted crops: lettuce, radishes, strawberries, herbs, and cut-and-come-again salad leaves. You can grow a reasonable tomato in one, but the margin for error on watering is tiny and they're not designed for reuse.
The second type, and the one most worth repurposing, is the fabric or non-woven polypropylene (PP) grow bag. These are sold in US gallon sizes (5, 7, 10, 15, 20 gallon) or in litres (20–75 L). A popular 5-gallon / 20 L version typically measures around 30 cm (12 in.) diameter by 27 cm (10.5 in.) tall. A 7-gallon Smart Pot, for example, is approximately 35 cm (14 in.) diameter by 24 cm (9.5 in.) tall and holds about 26 litres. Some branded kit versions come larger, the Panacea tomato grow bag is a 20-gallon bag at roughly 51 cm (20 in.) diameter by 37 cm (14.5 in.) tall, often sold with a folding cage. Fabric bags drain passively through the porous walls and base, meaning drainage is excellent but the medium dries faster than in a plastic pot. Multiple gardening guides note that air‑pruning fabric grow bags dry out faster than equivalent plastic pots and typically require more frequent irrigation. The porous fabric also causes 'air pruning': when root tips reach the bag wall, they're desiccated by air, which stops them circling and encourages lateral root branching. That's a genuine advantage for root health regardless of what you're growing.
The practical rules of thumb: depth determines which root crops are viable; volume determines how many plants you can fit and how big they'll grow; drainage quality (fabric versus plastic-with-holes) determines how quickly you need to water and how forgiving the bag is in wet weather. Most fabric tomato bags in the 15–25 litre range give you around 25–30 cm of usable root depth, enough for the majority of culinary crops that aren't deep tap-rooted. Irrigation Guide (root depth table adapted from USDA‑NRCS), DID Manual Vol.5 (root depth appendix) lists typical root‑depth ranges for many vegetables (e.g., lettuce ≈0.15 m; carrots ≈0.2–0.4 m; peppers/tomato ≈0.6–1.2 m), which supports these usable-depth guidelines Irrigation Guide (root depth table adapted from USDA‑NRCS) — DID Manual Vol.5 (root depth appendix).
How to decide whether your specific bag will suit another crop
Before you fill a bag with something other than tomatoes, run through this quick checklist. It takes about two minutes and saves a lot of frustration later.
- Measure the bag's depth when filled: a fabric bag compresses slightly, so fill it and measure the internal depth of growing medium. Under 20 cm limits you to shallow-rooted crops. 25–30 cm works for most herbs, leafy greens, peppers, and short root varieties. 35 cm-plus opens up longer carrots and beets.
- Check the volume in litres: most product listings give this. Under 10 L means one small plant maximum. 15–20 L is suitable for one medium plant or several smaller ones. 20–25 L per plant is the sweet spot for peppers, eggplant, and compact fruiting crops.
- Assess the drainage type: fabric walls drain everywhere, which is good. Plastic bags with pre-cut holes or slits drain only at those points — check they aren't blocked and consider adding extra holes for non-tomato use.
- Think about sunlight exposure: grow bags placed on paving heat up quickly in full sun, which stresses roots and increases drying speed. Pale-coloured fabric bags moderate this better than dark ones for heat-sensitive crops.
- Consider stability: taller crops like staked peppers and climbing beans create more leverage than tomatoes in a wire cage. The bag needs to sit flat and be heavy enough when filled to resist tipping — add weight with a handful of gravel at the base if needed.
The Grow Bags Guide size charts give exact volume-to-crop recommendations if you want to cross-reference your bag's litre capacity against a specific plant.
Crops that work very well in standard tomato grow bags
These are the crops I'd reach for first when repurposing a 15–25 L tomato bag. They share a root profile that suits the typical bag dimensions and produce reliably without needing any major adaptations.
Leafy greens and salad crops
Lettuce, spinach, chard, rocket, kale (compact varieties), and Asian greens are the easiest wins. Extension guidance consistently puts lettuce at around 2 US gallons (7–8 L) per plant, and shallow-rooted annuals at as little as 15–20 cm depth. That means a 20 L bag comfortably holds three to four lettuce plants spaced about 20 cm apart, or a dense cut-and-come-again mix. Baby chard and spinach can go even tighter, 10–12 cm spacing, for a continuous harvest. These crops are also more forgiving of slight underwatering in a fabric bag because they're harvested before they ever get rootbound.
Herbs
Basil, parsley, chives, coriander, dill, and flat-leaf herbs all do brilliantly. A 10–15 L bag supports a generous herb planting; a 20 L bag can hold a mixed herb selection, basil and parsley together work well as both prefer similar moisture levels. Avoid planting drought-tolerant Mediterranean herbs (thyme, rosemary, oregano) with moisture-hungry crops in the same bag; they want less water and will eventually suffer in company with thirsty plants. Those herbs are better on their own in a smaller bag.
Peppers and eggplant (aubergine)
These are arguably the best alternative crop for a standard tomato bag. Their root and volume requirements are very similar to tomatoes: most extension guidance puts container peppers at 5 gallons (roughly 19–20 L) per plant, which is exactly what a standard tomato bag offers. A 20 L bag supports one pepper plant comfortably; a 25 L bag can take two compact sweet peppers. Eggplant/aubergine behaves similarly, one plant per 20 L bag, with 30 cm depth being adequate for the feeder root zone. Both crops benefit from the same cage-and-stake setup you'd use for tomatoes, so any existing support infrastructure transfers directly.
Dwarf and compact beans
Dwarf French beans (bush beans) and compact climbing beans grown on a short trellis work well. Dwarf varieties root shallowly and produce well in 15–20 cm depth. Plant three to four dwarf bean seeds around the perimeter of a 20 L bag for a decent harvest. Full-size climbing beans need more depth and root volume, they'll grow but yields will be modest in a standard tomato bag.
Root crops and tubers, where tomato bags reach their limits
Root crops are where the conversation gets more nuanced. The challenge is depth: tap-rooted vegetables need vertical space, and most standard tomato bags don't provide enough of it for full-size varieties.
Radishes and spring onions
These are the easy ones. Radishes are ready in 25–30 days and root to only about 10–15 cm, well within the capacity of even a flat coir bag. Scatter sow into a 20 L fabric bag and you'll get a harvest before most other crops are even established. Spring onions (scallions) root similarly shallowly and respond well to the air-pruning effect of fabric walls. Both are excellent gap-fillers between main-crop plantings.
Carrots and beets
Carrots are depth-dependent. NC State Extension guidance puts carrots at needing 10–12 inches (25–30 cm) of potting mix, which is right at the upper limit of a typical 20–25 L tomato bag. Short-rooted varieties, Chantenay, Paris Market (round), or Thumbelina, are specifically bred for container growing and will produce well in a 25 cm depth. Standard Nantes or Imperator types will be forked, stunted, or misshapen. Always pick a short-root variety if using a standard tomato bag. Beetroot is more forgiving: 20–25 cm depth suits golf-ball and baby beet varieties, and the leaves are edible too. One beet per 2 litres of growing medium is a reasonable spacing guide.
Potatoes
Potatoes are the trickiest. The traditional bag method requires progressively 'hilling', adding compost as the foliage grows to encourage more tubers, which means you need significant vertical depth to build into. University of Maryland Extension guidance recommends starting with 10–15 cm of compost, planting seed pieces, then adding compost in stages as shoots emerge. Purpose-built potato grow bags (sold in 12–15 US gallon / ~45–57 L sizes) are designed for this exactly. A standard 20 L tomato bag is borderline: it can grow first earlies or a few salad potatoes from one seed piece, but you won't get a full harvest and the hilling technique is severely curtailed by the bag height. If you want meaningful potato yields, a dedicated potato bag is worth the investment, it's a low-cost upgrade that makes a significant difference.
Crops that struggle in standard tomato bags, and what to do instead
Being honest about what doesn't work well saves wasted effort and compost. These crops will technically grow in a standard tomato bag, but results will be consistently disappointing compared to using a better-suited container.
Full-size cucurbits (courgettes, pumpkins, large squash)
Full-size courgette and pumpkin plants have an aggressive root system and need both high soil volume and substantial feeding. A single courgette in vigorous growth effectively wants 30–40 litres to itself with access to deep moisture reserves. In a 20 L tomato bag you'll get the plant started, but it will stall in midsummer when the roots fill the bag, watering demand spikes, and the plant can't access enough nutrients to sustain fruit production. Compact or 'bush' courgette varieties (Patio Star, Eight Ball) are a partial exception, they'll struggle less in a 25 L bag, but you'll still be watering twice daily in hot spells. Better option: a 40–50 L fabric bag or a raised bed.
Large brassicas (broccoli, cauliflower, Brussels sprouts)
Full-size broccoli, cauliflower, and Brussels sprouts are large plants with root systems that spread wide and deep. They also have a long growing season, which means months of intensive watering and feeding in a constrained volume. They can be started in tomato bags for early growth, but need to go into the ground or a large 25–40 L container before they hit their main growth phase. Compact or mini cauliflower varieties (Aalsmeer, Di Sicilia Violetto) are more realistic options in a larger tomato bag, but standard types are not recommended.
Long-rooted root varieties
Standard Nantes, Imperator, or Autumn King carrots, full-size parsnips, and large-variety beetroot all need more depth than a standard tomato bag can provide. Fork and splitting are almost certain. Use short-variety substitutes or upgrade to a deep-root fabric bag with at least 40 cm of growing depth.
Flowers and mixed ornamental combos in tomato grow bags
Tomato grow bags, particularly the reusable fabric type, make excellent flower containers, and some mixed herb-and-flower combos are both productive and visually impressive. The same volume and depth rules apply: compact, shallow-rooted flowering plants are the best fit.
Marigolds, nasturtiums, calibrachoa, petunias, and compact zinnias all perform excellently in a 20 L bag. Marigolds are particularly useful in the kitchen garden because they repel aphids and whitefly when planted near peppers and tomatoes, a single tomato bag of French marigolds placed near your vegetable bags earns its keep in pest deterrence alone. Nasturtiums fill a bag quickly, cascade attractively over the sides, and the flowers and leaves are edible. Compact dahlias (dwarf or patio varieties) work well in a 20–25 L bag and add height and colour across summer and autumn. Avoid tall dahlias, standard chrysanthemums, or any cutting-garden variety that naturally grows over 60 cm, the bag won't anchor them securely enough in exposed positions.
Mixed combos worth trying in a single 20–25 L bag: basil and marigolds (both pest-deterring and culinary), trailing nasturtiums with dwarf bush basil, or compact lavender with thyme and a single small calibrachoa trailing over the edge. If you want to go further into flowers in grow bags, the Grow Bags Guide has a dedicated page on using tomato grow bags for flowers with per-variety depth and spacing guidance.
Step-by-step planting adaptations when using a tomato bag for another crop
Changing the crop in the bag is mostly about adjusting the growing medium and plant layout. Here's the process I use.
- Choose the right growing medium: never use garden soil in a grow bag. It compacts, drains poorly, and brings pathogens. Use a soilless mix: one part coir or peat-based compost, one part perlite for drainage and aeration, one part good-quality multipurpose compost or well-aged organic matter. This 1:1:1 ratio is a reliable starting point for most vegetable crops. For root crops, increase perlite to improve drainage and looseness.
- Calculate volume per plant: for fruiting crops (peppers, eggplant), allow 18–25 L per plant. For leafy greens, allow 2–3 L per plant. For herbs, 1–2 L per plant is sufficient. Don't overcrowd — fewer plants in more medium consistently outperforms cramming plants in.
- Add drainage where needed: fabric bags drain well already. For plastic-lined tomato bags, check existing slits and add additional 1 cm drainage holes around the base edge if you're growing moisture-sensitive crops.
- Work out a spacing plan before filling: lay out a rough circle or grid on paper based on your bag diameter and plant spacing requirements. A 30 cm diameter bag centre-planted with one pepper leaves 15 cm of medium around the root ball — that's ideal. A 50 cm diameter bag can hold a central pepper and a ring of basil at 15 cm from the edge.
- Fill in stages: add the base third of medium first, firm lightly, then position your transplants at the correct depth. Fill around roots, firm again, and water in thoroughly before the first regular watering schedule begins.
- Label the bag: sounds obvious, but if you're using multiple tomato bags for different crops, a waterproof label saves confusion at harvest time.
Planting checklist
- Bag volume confirmed and matched to crop requirements
- Depth measured and verified as suitable for chosen variety
- Soilless mix prepared at appropriate ratio (not garden soil)
- Drainage checked and additional holes added if needed
- Spacing plan confirmed before filling
- Transplants or seeds positioned at correct depth
- Medium firmed to remove air pockets
- Watered in thoroughly after planting
- Bag labelled with crop, variety, and planting date
Support and staking options for non-tomato crops in grow bags
Support works differently in a grow bag than in open ground. You can't drive a long stake directly into soil, the bag base limits depth and stakes pushed through the bag bottom will tear the fabric. The practical solutions are anchor-and-lean (placing the stake against the bag exterior and tying the plant through the bag wall fabric), or using a cage that sits over and around the bag rather than inside it.
For peppers and eggplant, a simple bamboo cane (60–90 cm) pushed 20 cm into the growing medium is usually sufficient, the root ball and medium weight holds it steady. A wire ring cage placed around the bag exterior also works for these medium-height crops. For compact beans on a short trellis, three bamboo canes tied at the top as a wigwam inside a 20 L bag gives a surprisingly stable structure once the root ball develops. For taller or heavier plants, weigh the bag down by placing it in a slightly larger outer container or on a heavy saucer, and use guy-wire loops around the cage legs tied to tent pegs pushed into adjacent ground or a low structure.
If you already have tomato cage hardware, collapsible folding cages, spiral stakes, or ring supports, most of it transfers directly to peppers and eggplant without modification. The Grow Bags Guide covers specific cage options and anchoring methods in detail for anyone wanting to go further on this topic.
Watering and feeding for varied crops in grow bags
This is where many repurposed grow bags go wrong. Fabric bags dry faster than plastic pots because moisture evaporates through the walls as well as the surface. In a warm, sunny position you should expect to water at least once daily for fruiting crops and possibly twice in midsummer heat. This is roughly double the frequency you'd need for an equivalent plastic pot. Shallow-rooted crops like lettuce and herbs dry fastest in relative terms, a small herb bag in full sun can go bone dry in under 24 hours.
The finger test remains the most reliable watering guide regardless of what you're growing: push your index finger 2–3 cm into the medium. If it's dry at that depth, water now. If it's still moist, wait. Extension guidance commonly uses the '1 inch per week' rule for garden beds, but that baseline significantly underestimates what fabric grow bags need in hot weather, I'd treat it as a minimum floor rather than a target.
For feeding, there are two practical approaches. Slow-release granular fertiliser (such as a balanced 6-month pelleted feed) mixed into the growing medium at planting gives a baseline nutrient supply without weekly intervention, useful for lower-maintenance crops like herbs and flowers. For fruiting crops (peppers, eggplant, beans), a liquid tomato or high-potassium feed applied weekly from first flower onwards is more responsive and better suited to the intensive cropping cycle. Leafy greens want a higher nitrogen feed, use a general liquid feed until you switch to harvesting, then you won't need to worry about potassium timing.
Simple irrigation solutions for grow bags
Daily hand-watering is fine for a small number of bags, but as soon as you're managing five or more, some form of passive or automated irrigation pays for itself in time saved and in avoiding the wet-dry stress cycles that damage fruit quality.
The most accessible options are wicking reservoirs (a water-filled tray or saucer under the bag, through which the fabric wicks moisture upwards, works well for herbs and leafy greens, less reliably for deep-rooted fruiting crops), drip line kits (a simple timer-controlled drip irrigator with individual emitters per bag, available for under £30/$35 for a basic kit), and dedicated grow-bag waterer inserts. These inserts sit inside or alongside the bag and deliver water directly to the root zone rather than washing through the surface, particularly useful for the flat coir-bag format. The Hozelock grow bag waterer is one of the better-known examples and is worth looking at if you're running multiple tomato or pepper bags. For buying and current pricing, search for 'hozelock grow bag waterer best price'.
Whichever system you use, the goal is consistent moisture without waterlogging. In fabric bags, waterlogging is rare because the drainage is so effective, but nutrient leaching from heavy watering is a genuine concern, it's part of why weekly liquid feeding matters for long-season crops.
Troubleshooting common problems when repurposing tomato bags
Rootbound plants
Signs: stunted growth, wilting that doesn't recover after watering, roots visibly escaping through fabric walls. Immediate fix: if the crop has a season left, pot up to a larger bag or container; pack additional compost around the bag exterior as a buffer. Prevention: use the correct volume-per-plant from the start and don't extend a season-long crop into a bag that was clearly undersized.
Overwatering and underwatering
Overwatering symptoms in fabric bags: yellowing lower leaves, moss or algae on the bag surface, slow root growth, sour-smelling medium. The fix is usually to skip a watering, check drainage holes (in plastic-lined bags), and reduce shade around the bag to increase evaporation. Underwatering symptoms: wilting mid-day that doesn't recover by evening, dry medium below the surface, premature flower drop in peppers and eggplant, bitter lettuce. The fix is immediate deep watering followed by a more consistent schedule, use a drip irrigation setup or a self-watering reservoir if hand watering is unreliable.
Nutrient deficiencies
The most common deficiency in grow bags is nitrogen depletion mid-season, showing as pale yellowing that starts with older leaves and works inward. Apply a high-nitrogen liquid feed immediately and switch to a weekly balanced or crop-specific feed going forward. Iron deficiency (yellowing between leaf veins on young growth) sometimes occurs in bags where pH has drifted high, add a dilute sequestered iron feed and check your water source if mains water in your area is very alkaline.
Pests and diseases
Aphids, whitefly, and red spider mite are the main pest threats for grow-bag vegetables, particularly in sheltered spots. Blast aphid colonies off with water, introduce or encourage natural predators (ladybirds, lacewings), and use a neem oil or insecticidal soap spray for persistent infestations. Fungal diseases (powdery mildew, damping off in seedlings) are often linked to poor air circulation and overwatering, the air-pruning effect of fabric bags actually helps by keeping the root zone drier, but overhead moisture on foliage is the real culprit. Improve spacing between bags, avoid overhead watering on foliage, and remove affected leaves promptly.
Sanitation and crop rotation between bag uses
If you're using grow bags across multiple seasons, especially if you switch from tomatoes (or from one solanaceous crop like eggplant or pepper) to another, sanitation is genuinely important. Soil-borne diseases including late blight and Fusarium can persist in residual medium and infect next-season plants in the same bag. The practical rule is: don't reuse the same medium in the same bag for the same crop family two years running. Remove all spent medium, shake out loose residue, and follow the cleaning process below before replanting.
A useful rotation logic for grow bags: Year 1, fruiting crops (tomatoes, peppers, eggplant); Year 2, leafy greens or brassicas; Year 3, legumes or root crops; then cycle back. This mirrors the principles of ground-based rotation and reduces disease buildup. It also benefits soil biology since legumes fix nitrogen that benefits the next season's plants.
Reusable bag care and expected lifespan
Cleaning a fabric grow bag after use: empty all growing medium, shake off residual soil, and turn the bag inside out if possible. Rinse with a hose, then soak in a dilute solution of horticultural disinfectant (Jeyes Fluid or similar) at the manufacturer's recommended concentration for 10–15 minutes to kill residual fungal spores and pest eggs. Rinse clean and allow to dry completely in sunlight before storage, UV exposure during drying helps break down remaining pathogens. Store bags flat or loosely rolled in a dry location out of prolonged UV exposure when not in use.
Lifespan varies significantly by fabric quality. Lightweight non-woven PP bags (around 100–150 gsm) typically last 1–2 seasons before the fabric weakens at stress points (handles, base corners). Heavier bags rated at 200+ gsm with UV-stabilised fibres will run 3–5 seasons with reasonable care. Handles are the first failure point, inspect them before each season and reinforce with a cable tie or clip before they tear completely. A torn base is generally a retirement trigger; a torn handle can often be repaired. If the fabric is friable, shedding fibres, or has visible stress cracking, retire the bag rather than risk medium falling through mid-season.
Choosing the right bag for different crop groups, a quick guide
If you're buying bags specifically to grow a non-tomato crop, the 'tomato' bag may not actually be the best fit. Here's a direct comparison of bag types versus crop groups to help you decide.
| Crop group | Recommended volume | Minimum depth | Best bag type | Use a standard tomato bag? |
|---|---|---|---|---|
| Leafy greens, salad | 2–3 L per plant | 15–20 cm | Any fabric bag, flat coir bag | Yes — easy fit |
| Herbs (moisture-loving) | 1–2 L per plant | 15 cm | Small fabric bag or flat coir bag | Yes — even overkill at 20 L |
| Mediterranean herbs (dry-preferring) | 1–2 L per plant | 15 cm | Small fabric bag, terracotta | Yes, but plant alone — not with thirsty crops |
| Peppers, eggplant | 18–25 L per plant | 25–30 cm | Standard tomato fabric bag | Yes — ideal fit |
| Dwarf/bush beans | 15–20 L for 3–4 plants | 20–25 cm | Standard tomato fabric bag | Yes |
| Compact root crops (short carrots, radish, round beet) | 15–20 L bag | 25–30 cm | Deeper fabric bag | Yes, if depth is 25+ cm |
| Standard carrots, parsnips | 25+ L, 35+ cm depth | 35–40 cm | Deep-root fabric bag | Not recommended |
| Potatoes | 45–60 L | 40+ cm | Dedicated potato grow bag | No — upgrade needed |
| Compact/bush courgette | 30–40 L | 30 cm | Large fabric bag | Marginal — prefer larger |
| Full-size courgette/pumpkin | 40+ L | 35+ cm | Large fabric bag or raised bed | No |
| Large brassicas | 25–40 L | 30–35 cm | Large fabric bag or ground | Not recommended |
| Compact flowers (marigold, nasturtium, petunia) | 10–20 L | 15–20 cm | Standard tomato fabric bag | Yes — excellent fit |
| Compact dahlia (dwarf/patio) | 20–25 L per plant | 25 cm | Standard tomato fabric bag | Yes |
When to upgrade from a tomato bag to a crop-specific container
There are four clear triggers that tell you a standard tomato bag isn't the right tool for the job. First: the crop needs more than 30 cm of root depth and you can't find a tomato bag in your range that provides it, move to a deep-root fabric bag. Second: you want a meaningful potato harvest, not just a handful of salad spuds, purpose-built potato sacks with a harvest window at the base are meaningfully better and typically cost only a few pounds more. Third: you're growing a plant that will produce heavily over a long season (standard courgettes, large aubergine varieties in full production), the limiting factor becomes volume and sustained nutrient supply, not just root depth, and a 40–50 L bag or a raised bed is simply more efficient. Fourth: you're growing a crop that benefits strongly from a specific container shape, deep-root bags for parsnips, wide-and-shallow trays for strawberries, or tall hessian-style sacks for exotic root crops. In each case, the right bag is inexpensive and the gains in harvest quality are proportional.
Accessories that make repurposing easier
A few low-cost additions genuinely improve results when running mixed crops in repurposed tomato bags. If you're comparing accessories and costs, search for Tomorite grow bags best price to quickly compare sizes, features and value across retailers.
- Fabric saucers or drip trays: catch excess water and slow surface drying — useful under herb and leafy green bags in hot weather
- Grow bag waterer inserts: deliver water directly to the root zone, reducing surface runoff and evaporation. The Hozelock grow bag waterer is a popular option worth comparing on the Grow Bags Guide
- Perlite or vermiculite top-dressing: a 1–2 cm layer on the surface reduces moisture loss and adds a small amount of thermal insulation for root protection
- Slow-release granular feed: pre-mix into the growing medium for lower-maintenance crops; saves weekly liquid feeding for the first couple of months
- Bamboo canes and soft tie: the basic support kit for peppers, beans, and taller herbs — inexpensive and reusable across seasons
- Biodegradable liner bags: useful inside fabric bags if you want to switch medium quickly between crops without cleaning the bag itself — pull out the liner, dispose of the medium, clean the liner in fresh versions, refill
- Waterproof crop labels: simple but important when running several bags of different crops side by side
Quick size and depth cheat sheet by crop group
| Crop | Min root depth | Bag volume (per plant) | Plants per 20 L bag | Spacing in bag |
|---|---|---|---|---|
| Lettuce | 15 cm | 2–3 L | 4–6 | 20 cm apart |
| Spinach / rocket | 15 cm | 1–2 L | 6–8 (cut-and-come-again) | 10–12 cm |
| Basil / parsley | 15 cm | 1–2 L | 3–4 | 15 cm apart |
| Mediterranean herbs | 15 cm | 1–2 L | 2–3 | 20 cm apart |
| Radishes | 10–15 cm | 0.5 L | Scatter sow | 5 cm apart |
| Spring onions | 10–15 cm | 0.5 L | Scatter sow | 5 cm apart |
| Short-variety carrots | 25–30 cm | 1–2 L | 8–10 per 20 L | 5 cm apart |
| Beetroot (baby) | 20–25 cm | 2 L | 4–6 | 10–12 cm |
| Dwarf French beans | 20–25 cm | 3–4 L | 3–4 | 15 cm apart |
| Sweet pepper | 25–30 cm | 18–20 L | 1 | One per bag |
| Eggplant / aubergine | 25–30 cm | 18–25 L | 1 | One per bag |
| Compact dahlia | 25 cm | 20 L | 1 | One per bag |
| Marigold (French) | 15 cm | 1–2 L | 4–6 | 15 cm apart |
| Nasturtium | 15 cm | 2–3 L | 2–3 (trailing) | 20 cm apart |
For a complete volume-by-crop breakdown covering less common vegetables, the Grow Bags Guide size charts page gives full tables with variety-specific notes.
Seasonal checklist and next steps
If you own tomato grow bags and want to start using them for other crops, here's a simple seasonal action plan to get organised and avoid the most common mistakes.
Before the season starts (late winter to early spring)
- Inspect bags from last season: check handles, base integrity, and fabric condition — retire any that are failing
- Clean and disinfect reusable bags from previous crops before storing or refilling
- Decide on crop rotation: don't repeat the same crop family in the same bag without refreshing the medium
- Order or mix your soilless growing medium using the 1: 1:1 coir/perlite/compost ratio
- Check your support hardware: do cage and stake dimensions suit your new crops?
- Consider a grow bag waterer or drip system if you're running five or more bags
At planting time (spring)
- Match each bag's confirmed volume and depth to a specific crop using the cheat sheet above
- Mix slow-release fertiliser into the medium for lower-maintenance crops before filling
- Plant at the correct spacing — don't be tempted to squeeze in extra plants
- Set up support structures before plants need them, not after
- Water in thoroughly and establish your watering schedule from day one
During the growing season
- Check moisture daily in hot weather using the finger test
- Begin liquid feeding fruiting crops from first flower — weekly with a high-potassium feed
- Monitor for signs of nutrient deficiency and respond promptly
- Inspect for pests weekly and act early — aphid and whitefly colonies grow fast
- Watch for rootbound signs in long-season crops and pot up if needed
End of season
- Remove all spent medium and compost it (unless diseased — in that case, bin it)
- Wash, disinfect, and dry all fabric bags before storage
- Note which crops performed well in which bag sizes — it makes planning next year much faster
- Identify any bags that need upgrading: if you struggled with depth for root crops or volume for fruiting plants, invest in crop-specific bags for those particular crops before next season
The Grow Bags Guide has crop-specific care pages, fabric comparison guides, and accessory recommendations if you want to go deeper on any of the topics above, including dedicated guides for tomato grow bag reviews, grow bag waterer options, and choosing the right cage or support for bags of different sizes.
FAQ
Quick answer: can you use tomato grow bags for other vegetables, flowers and herbs?
Yes — with limits. 'Tomato' grow bags (fabric or coir/plastic styles sized and sold for tomatoes) work well for many other vegetables, herbs and flowers, especially shallow-to-moderate rooters (leafy greens, herbs, peppers, many dwarf/compact crops). They are less suitable for deep-rooted or high-volume crops (full-size carrots, large cucurbits, full-size indeterminate tomatoes/patty pans, and some brassicas) unless you use larger/deeper bags or modify planting. Use the crop-specific guidance below to match bag volume and depth to plant needs; when a crop needs much more root volume than the bag provides, choose a larger bag or a crop-specific container.
What specifically makes a 'tomato grow bag' different from other containers?
Tomato grow bags vary by size, depth, drainage and material: typical retail sizes range from ~5 US gallons (≈20 L, ~12" diameter × 10–11" high) up to 15–20+ gallons (≈50–75 L; 14–20" diameter × 12–15" tall). Materials include lightweight non‑woven polypropylene/fabric (air‑pruning, breathable), coir/peat grow-bags, or plastic-lined/stitched bags. Fabric bags drain across the sides and bottom and air‑prune roots (less circling) but dry faster; coir/peat bags hold moisture differently. Many tomato kits include plant-supports or reinforced drain holes. Bag wall thickness/UV protection determines lifespan (thin bags last 1 season; heavier, UV‑stabilised bags can last multiple seasons).
Which vegetables, herbs and flowers work well in typical tomato grow bags?
Good fits (work reliably in 5–20 gal tomato bags depending on variety): leafy greens (lettuce, arugula, spinach), most herbs (basil, parsley, cilantro, thyme in clusters), peppers (compact or 1–2 plants in 5–10 gal; larger peppers need 10+ gal), eggplant (compact varieties: 7–15 gal), dwarf/bush beans (bush varieties), many annual flowers (petunias, marigolds, nasturtiums). Small or container-adapted cucurbits (bush cucumbers, compact squash) can work in larger tomato bags (10–20+ gal) with careful watering. Overall, short-to-moderate root depth and compact habit plants are best.
Which crops don't do well in standard tomato grow bags or need special steps?
Poor or marginal fits: long-rooted roots that need deep, loose soil (full-size carrots, parsnips, large beets) unless the bag is deep (≥12" root depth). Full-size indeterminate tomatoes typically need larger containers (15–20+ gal) or purpose-built tomato bags/cages. Potatoes do well but are best in taller 'potato' bags (12–15+ gal) with progressive hilling. Large cucurbits (full-size watermelon, vining winter squash) generally need much larger volume or ground beds. Brassicas (cabbage, broccoli) can be grown but prefer larger volume (10+ gal) to avoid nutrient stress.
Simple crop-by-crop size/depth rules of thumb
Use root depth and volume rules of thumb: leafy greens & small herbs — 1–3 gal (6–8" depth); most culinary herbs & small annuals — 2–5 gal (8–10" depth); peppers, small eggplant, bush beans — 5–10 gal (10–12" depth); tomatoes (determinate/bush) & larger peppers — 10–15+ gal (12–18" depth); potatoes — 10–15+ gal with hilling; carrots/beets — at least 8–12" depth for medium varieties (use deep bags or long narrow troughs for long carrots); cucurbits & larger squash — 15–20+ gal or planted in ground. Match bag height to root depth rather than only advertised 'tomato' label.
How should you adapt soil mix and volume when reusing tomato grow bags for other crops?
Use a soilless, well-draining potting mix: peat or coir + perlite/vermiculite + a small portion of compost (roughly 1:1:1 or a commercial container mix). For nutrient-hungry crops add slow-release fertilizer at planting or a starter liquid feed. Fill bags fully unless using hilling (potatoes). For multiple small plants (salad mix, herbs) divide recommended volume per plant (e.g., 2–3 lettuce per 5 gal is crowded — better 1–2 per 5 gal). Avoid garden soil that compacts; ensure ample volume per plant as in the size rules above.
Next Articles
Tomato Grow Bag Review: Best Options, Setup, Care Tips
Tomato grow bag review with top picks, setup steps, care schedule, and fixes for dry, nutrient, and yield issues.
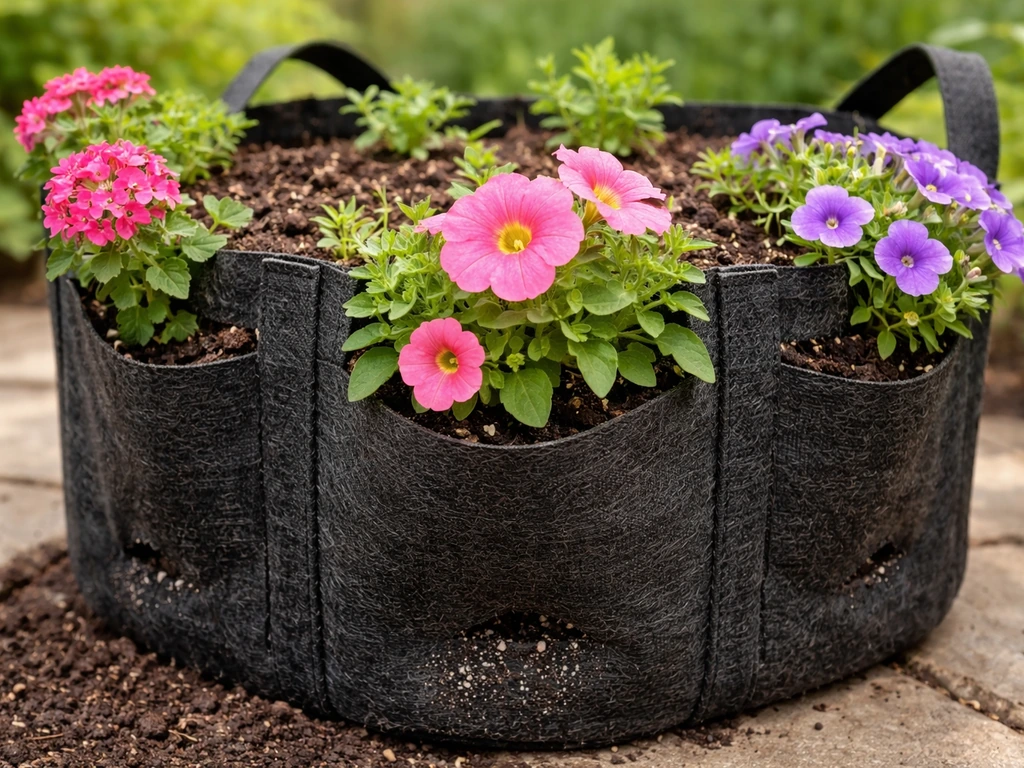
Can You Use Tomato Grow Bags for Flowers? Tips
Yes, use tomato grow bags for flowers. Get soil, drainage, watering, feeding, and sizing tips for healthy blooms.
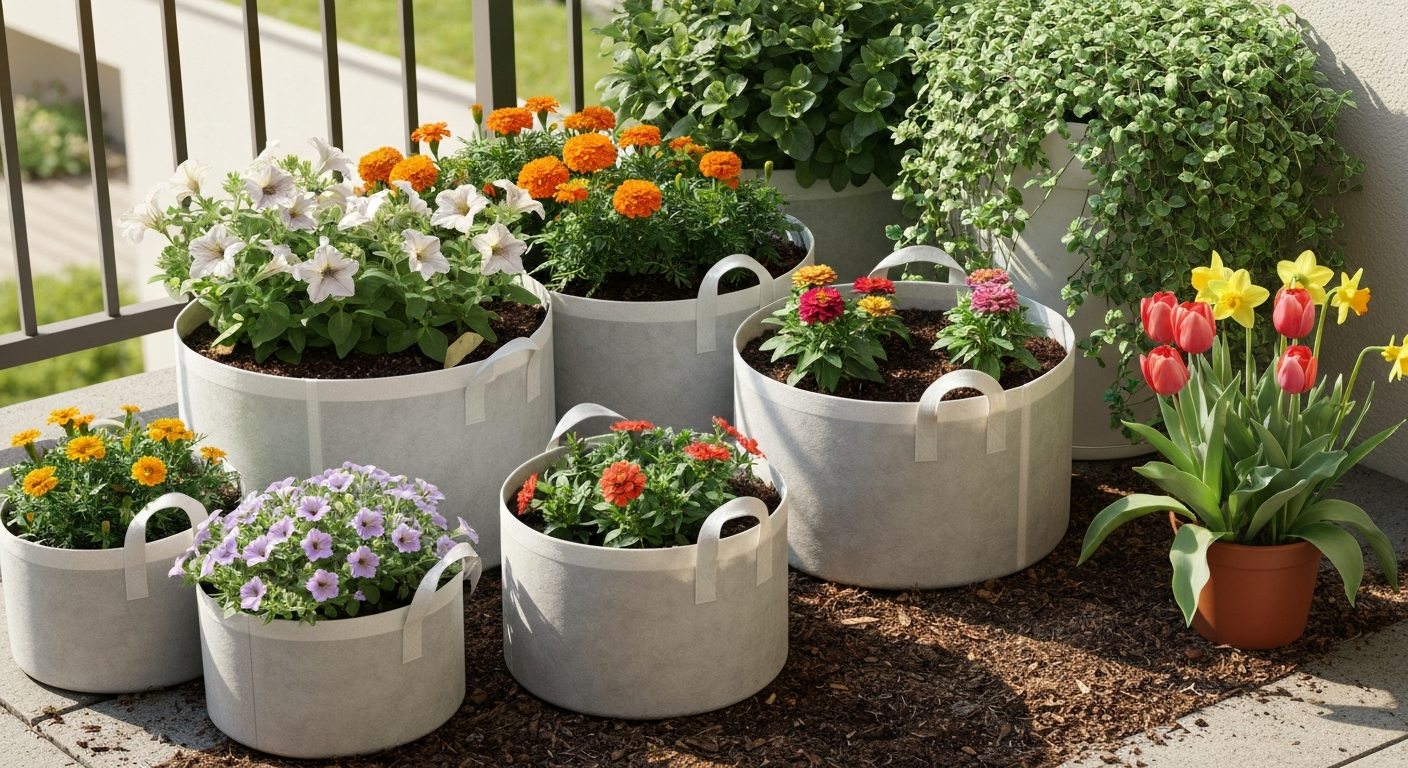
Best Flowers for Grow Bags: Top Picks, Soil & Care Guide DIY
Best flowers for grow bags: top annuals, perennials, bulbs & trailers; soil, fertilizer, planting and care checklists.