The short answer: place your fabric grow bags on a surface that drains freely, raise them slightly off that surface if you can, and never let them sit in pooled water. That single principle covers about 80% of what you need to know. The details below explain how to apply it to different surfaces, what materials to put underneath, and how to avoid the mistakes that quietly kill vegetable crops every season.
What to Put Under Grow Bags for Vegetables

Marcus Holloway
17 Apr 2026
Best surfaces to place fabric grow bags on
Not all surfaces are equal when it comes to grow bag performance. The surface underneath affects drainage, air circulation to the bag's base, temperature, and whether weeds or pests can work their way up from below.
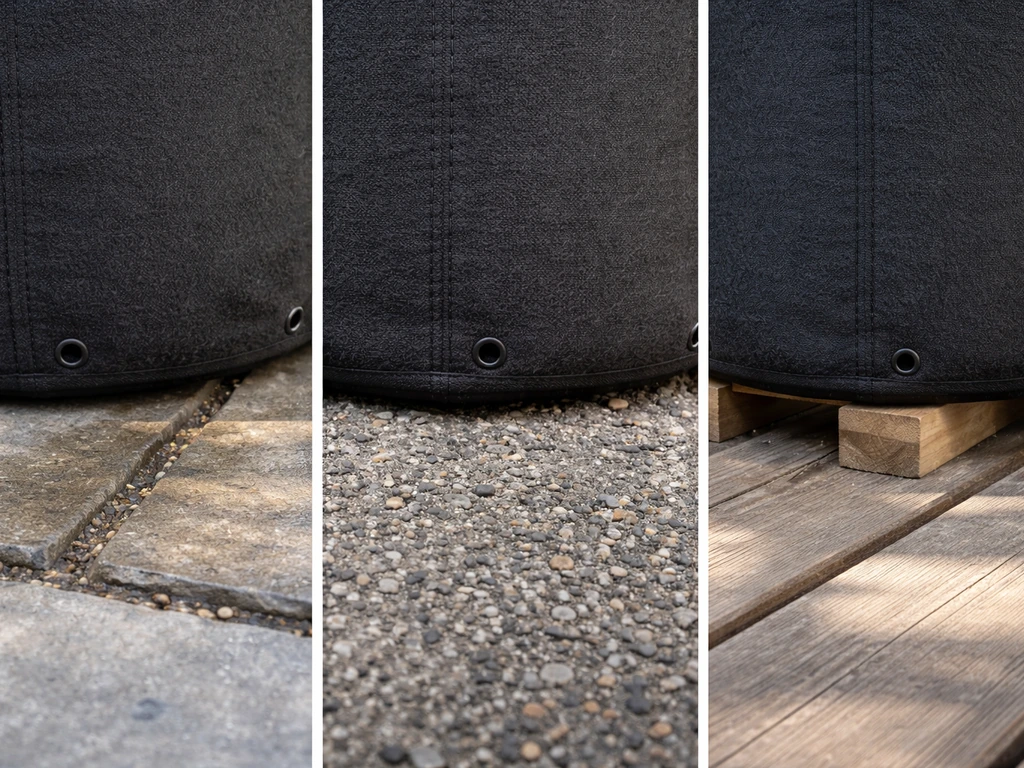
Patio slabs, concrete, and decking are the most common spots for grow bags, and they work well as long as you manage runoff. Hard surfaces don't absorb water, so whatever drains out of the bag just sits there unless it can run off to the side. That's actually manageable, and we'll cover how in the tray and base section below. The bigger issue is heat: concrete and dark pavers can get very hot in summer, which transfers into the bag and stresses roots. Raising the bag even an inch or two helps considerably.
Gravel or pea gravel is genuinely one of the best surfaces for grow bags. It lets water drain straight through, keeps the bag base off any moisture that pools, and doesn't get as heat-saturated as solid pavers. If you're setting up a dedicated growing area in the garden, laying down a few inches of gravel first is a worthwhile investment.
Grass and bare soil are options, but they come with trade-offs. On soil, the bag will slowly push itself into the ground as it gets watered and weighted down, which can restrict air movement at the base. On grass, moisture stays trapped underneath and you're essentially creating ideal slug and rot conditions. If this is your only option, raise the bag off the surface using a base or feet (more on that below) and check underneath regularly.
Wood decking works, but be aware that consistent wet runoff will eventually damage untreated wood. Using a tray to catch runoff and emptying it promptly is the responsible move here, both for the plants and for your deck.
What to put underneath grow bags (materials that help drainage)
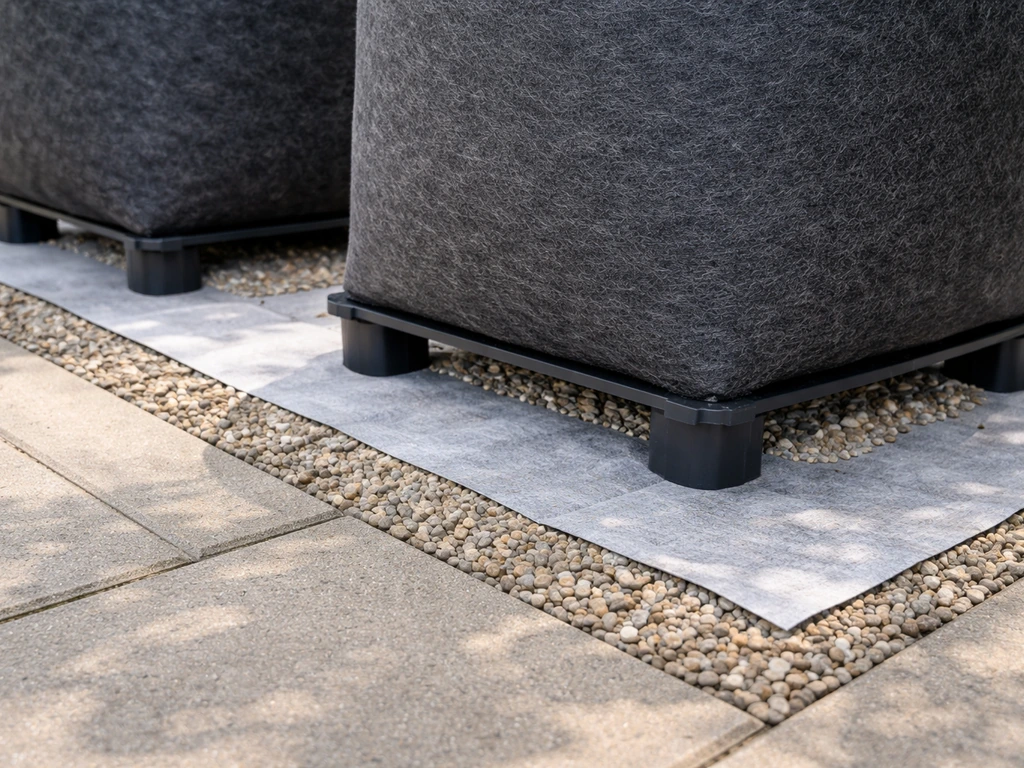
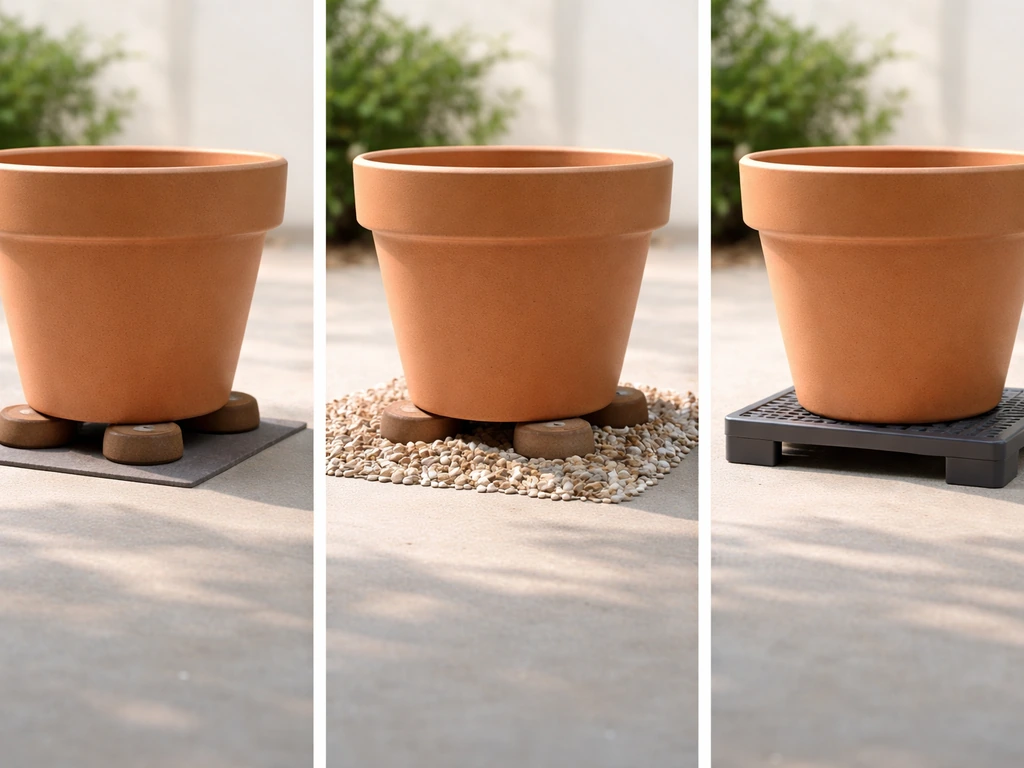
The single most useful thing you can put under a grow bag is a small air gap. Raising the bag even one to two inches off the surface dramatically improves airflow to the base of the fabric, which is one of the core advantages of fabric grow bags in the first place. The University of Maryland Extension specifically recommends commercially available "pot feet" for this, and they work exactly as described: lift the bag slightly, allow drainage to escape freely, and keep the fabric from sitting in its own runoff.
Pot feet are cheap, widely available, and reusable. Three or four per bag is plenty. If you don't want to spend anything, use small blocks of wood, flat stones, or even a few pieces of broken terracotta arranged to create a stable, raised platform. The key is that the bag sits level and stable, and there's a clear escape route for water.
Gravel or small stones placed directly underneath the bag (not inside it) also work well as a drainage-enhancing layer. A 2-to-3-inch bed of pea gravel under a grow bag allows water to drain through and not pool. Worth clarifying here: putting gravel inside the bag at the bottom does not improve drainage. The University of Maryland Extension is clear on this point, and the physics backs it up. The gravel layer works when it's beneath the bag, not inside it.
Sand is a reasonable underlayer on dirt or grass, providing a more stable and slightly better-draining base than bare soil. It's not as effective as gravel but beats setting a bag directly on compacted clay.
What you should not put under grow bags are impermeable materials: solid plastic sheeting, landscape fabric, or anything that blocks water movement. Studies from Colorado State University Extension warn that woven plastic weed barriers reduce oxygen delivery to roots and soil microbes. Oklahoma Master Gardener publications note the same issue: weed-barrier-type materials impede water and oxygen movement when installed under growing areas. For a fabric grow bag specifically, this is counterproductive because you're negating the breathability that makes the bag worth using in the first place.
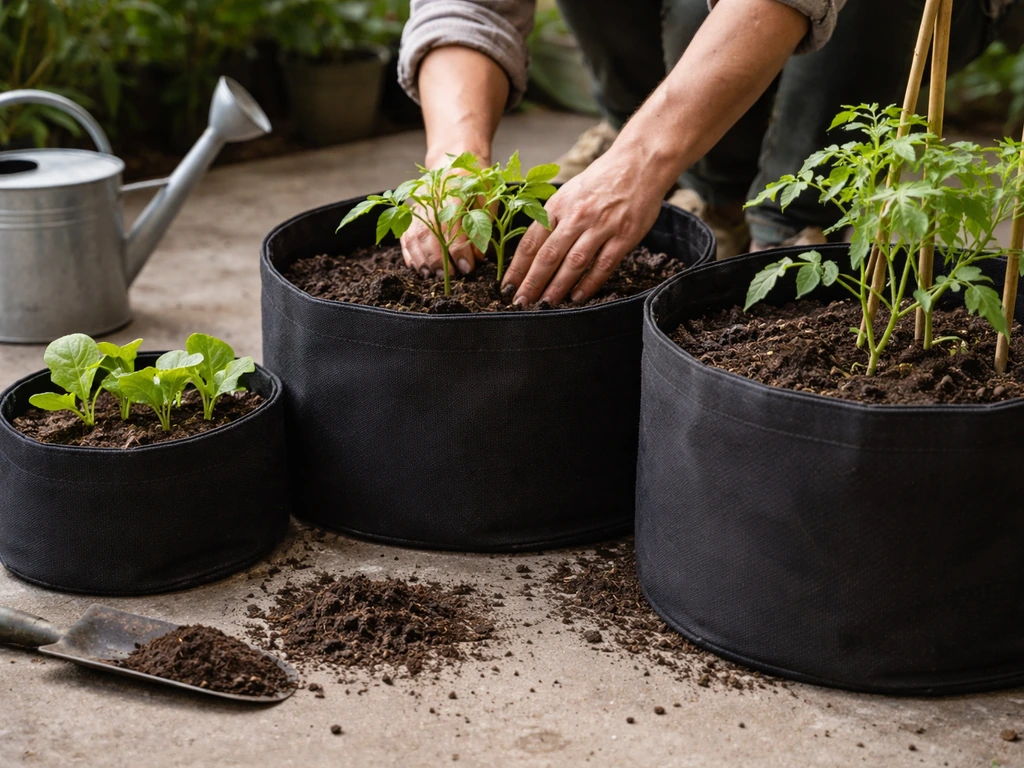
Setting up for vegetables in grow bags (height, spacing, soil contact)
Vegetable growing in fabric bags has some specific setup considerations that go beyond just what's underneath the bag. Getting this right from the start saves a lot of troubleshooting later. Before you even think about placement, it's worth making sure you've made good decisions about what to fill grow bags with, because the growing medium affects how much water drains through and how quickly the base layer gets saturated.
For vegetables, the goal underneath is maximum drainage and airflow. Roots need to access oxygen, and when the base of the bag stays wet, root rot follows. Raise the bag off any solid surface, and if you're growing on a patio or deck, position bags so runoff can escape to the side rather than pooling beneath.
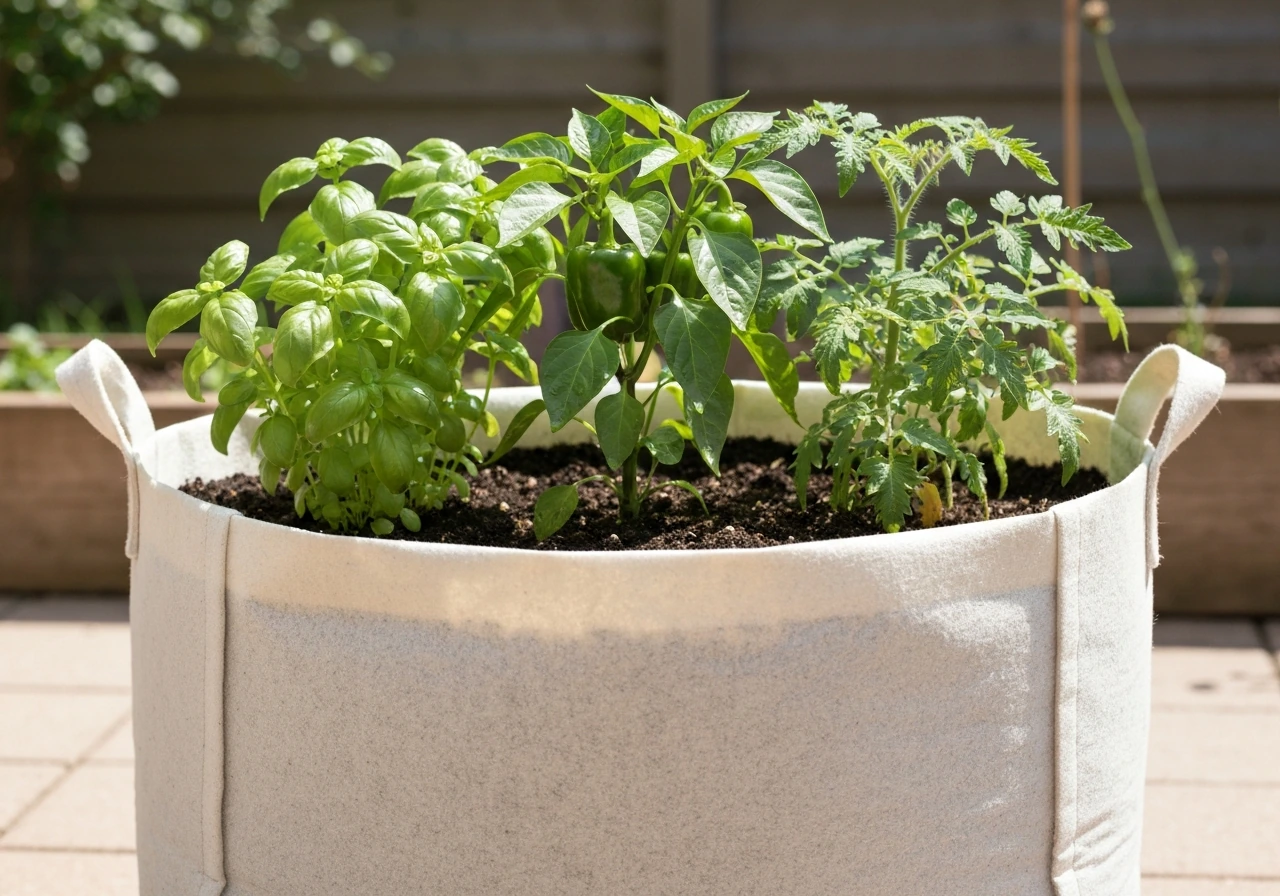
Spacing matters too. Leave at least 6 to 12 inches between bags to allow airflow around the sides and base, especially in warm, humid conditions where fungal disease pressure is higher. Cramming bags together traps humidity and invites problems. This is especially relevant if you're growing tomatoes, peppers, or other crops prone to foliar diseases.
Height off the ground has a secondary benefit for taller crops: it makes harvesting easier and reduces the chance of soil splash-back (which carries fungal spores) hitting lower leaves. A simple wooden pallet or a low grow bag stand can serve this purpose while simultaneously handling the drainage and airflow needs.
If you're placing bags directly on soil or in a garden bed, be aware that roots will eventually grow out through the fabric and into the ground. This is fine for short-season crops but can complicate moving or repositioning the bag mid-season. On hard surfaces, this isn't an issue. Thinking through what to plant in grow bags before you set up your surface and underlayer lets you plan the right spacing and elevation for each crop from the start.
Using trays, liners, and bases to manage water and mess
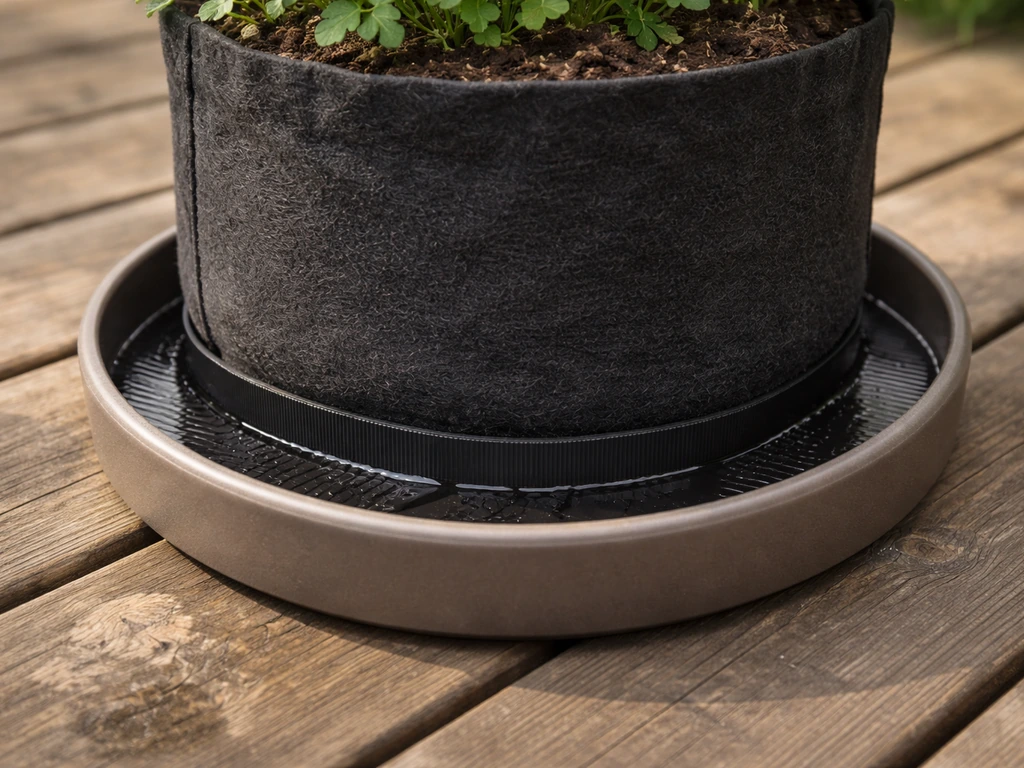
Trays and saucers under grow bags are a legitimate tool for managing runoff on patios and decks. The catch is that they require active management. UC ANR and Iowa State Extension both make the same point: plants should not sit in standing water for extended periods. The Idaho Master Gardener Handbook cautions against letting pots sit with their bases in pooled water and emphasizes practices that prevent standing water Idaho Master Gardener Handbook cautions against letting pots sit with bases in pooled water. Roots need the soil to dry down enough between waterings to get access to oxygen. A tray full of water keeps the base of the bag saturated, which is the opposite of what you want.
The practical solution is to use a tray to catch runoff so it doesn't stain your deck or flood your patio, but empty it after each watering session. If you're watering daily in peak summer, that means emptying the tray daily. Idaho Extension's guidance reinforces this: lift the bag above the saucer if you can (using pot feet inside the tray) so the base of the bag isn't in direct contact with pooled water even if you're a little late emptying it.
Here's a practical layered setup that works well on a hard surface:
- Place a wide, shallow tray (plant saucer or drip tray) on the surface.
- Put three or four pot feet or small flat stones inside the tray.
- Set the grow bag on top of the feet so its base sits 1 to 2 inches above the tray floor.
- Water normally and let excess drain into the tray.
- Empty the tray within a few hours of watering, or the same day at latest.
For mesh or slatted bases (like a wooden pallet or a purpose-built grow bag stand), you don't necessarily need a tray unless you're protecting a surface. The drainage just falls through, which is ideal. On grass or gravel, runoff is absorbed naturally and trays are optional.
Liner materials between the bag and the tray are generally not necessary and can cause problems. A solid rubber mat or plastic liner placed flat under the bag traps moisture and restricts airflow to the bag's base, defeating the breathability advantage. If you want to protect a surface, use the tray-with-feet approach above rather than a flat impermeable liner directly under the bag.
Common mistakes and troubleshooting under grow bags (standing water, weeds, rot)
Standing water under the bag
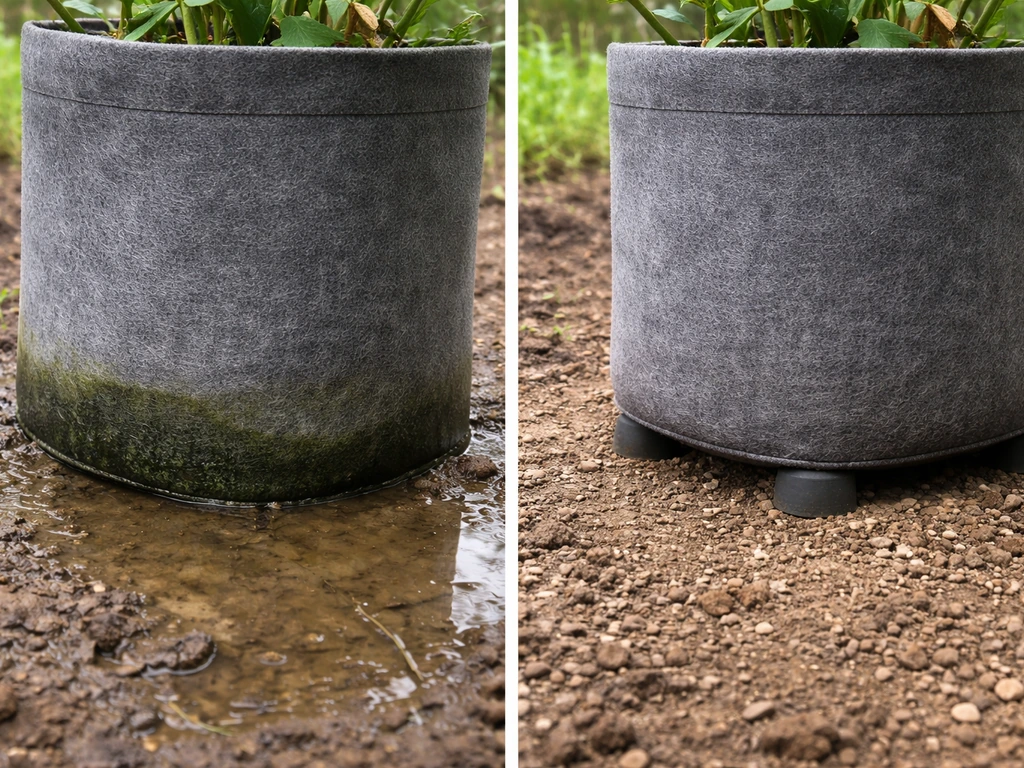
This is the most common and damaging issue. If you notice the base of your grow bag stays wet for more than a day after watering, or if you see algae or mold growing on the fabric at the base, standing water is the likely culprit. Check whether the surface underneath is actually draining. On hard surfaces, look for whether the tray is being emptied. On soil, check whether the area is compacted or sits in a low spot that collects water.
Fix: raise the bag using pot feet, reposition it to better-draining ground, or switch to a gravel underlayer. If using a tray, empty it consistently.
Rot at the base of the bag
Fabric grow bags can degrade at the base if they're constantly in contact with moisture. More importantly, root rot can develop in the growing medium itself when the base never dries out. If plants are wilting despite being watered (the classic overwatering paradox), or if you notice a sour smell when you check the bottom of the bag, rot is likely in progress.
Fix: lift the bag, let it dry out for a day or two if the plant can handle it, improve elevation and drainage under the bag, and reduce watering frequency. In severe cases, repot into fresh medium.
Weeds growing underneath or around the bag
On soil or grass, weeds will grow around and sometimes under your bags. Some growers try to solve this by placing landscape fabric down first, but as noted earlier, this creates more problems than it solves by restricting oxygen and water movement. A better approach is gravel or a patio surface, which naturally suppresses weed growth without the downsides of landscape fabric.
If weeds are a persistent issue where you're growing, consider whether the placement itself is the problem. Moving bags to a paved or gravel area is usually simpler and more effective than fighting weeds season after season.
Blocked drainage holes or compressed bag base
When a heavy grow bag sits directly on a solid surface, the fabric at the bottom can compress and partially block drainage. This is especially likely with heavier mixes. North Carolina State Extension notes that containers sitting flat on solid surfaces can develop drainage problems because the surface itself plugs the drainage points. For fabric bags, raising them off the surface solves this entirely.
Bags tipping or becoming unstable
Taller bags with top-heavy plants (like tomatoes or corn) can tip on smooth surfaces, especially when the growing medium is dry and light. A wide, stable base matters here. Using a tray with pot feet inside it actually helps with stability by giving the bag a defined platform. For large plants, consider also how the specific crop behaves at maturity. For example, if you're growing tall crops, understanding whether you can grow corn in a grow bag and how to support it helps you plan the right setup from day one.
Quick comparison: common underlayer options
| Underlayer | Drainage | Airflow to bag base | Weed suppression | Best for |
|---|---|---|---|---|
| Pot feet on hard surface | Excellent | Excellent | N/A | Patios, decks, concrete |
| Gravel bed (2-3 inches) | Excellent | Good | Good | Dedicated growing areas, garden paths |
| Pallet or slatted stand | Excellent | Excellent | N/A | Any surface, especially decks |
| Tray with pot feet inside | Good (needs emptying) | Good | N/A | Patios, decks, indoors |
| Bare concrete/paving | Moderate (can pool) | Poor | N/A | Workable with elevation |
| Bare soil or grass | Variable | Poor | None | Short-term only, with elevation |
| Landscape fabric | Poor | Poor | Limited long-term | Not recommended |
| Solid plastic liner (flat) | None | None | Yes | Not recommended for grow bags |
Putting it all together for a vegetable setup
If you're growing vegetables, your priority list under the grow bag should be: drainage first, airflow second, mess control third. Every decision should serve those goals in that order. A bag that drains well and breathes at the base will grow healthier vegetables than one that's perfectly tidy but constantly wet.
The most reliable general setup is a firm, well-draining surface (concrete, paving, or gravel), pot feet to raise the bag 1 to 2 inches, and if you need mess control, a tray that you empty after every watering. That's genuinely all most home growers need. Spending more than that on elaborate underlayers is usually unnecessary.
Once you've got the physical setup sorted, it's worth thinking about which vegetables you're actually growing, since different crops have different water and space needs that interact with how often you'll be draining that tray. Checking out the best veg to grow in grow bags can help you match crop selection to your specific setup and climate. And if you're newer to grow bags generally and still exploring options, a broader look at what to grow in a grow bag can help you narrow down which plants will work best in the space and surface you've prepared.
The setup underneath your bag is one of those details that experienced growers often take for granted, but it makes a real difference, especially in wetter climates or through a long growing season. Get the base right once and your bags will perform better all season without constant troubleshooting.
FAQ
Can I put a grow bag on a tray or saucer under it?
Yes, but only if the fabric has air space and the tray is managed. Use pot feet inside the tray (or another rigid riser) so the bag base is not sitting in runoff. Empty the tray after each watering, and in hot weather where you water frequently, treat “emptied” as a non-negotiable daily task.
What’s wrong with putting plastic or rubber under the grow bag to protect my patio?
Avoid putting any “water barrier” between the bag and the air. Solid plastic liners, rubber mats, and flat impermeable sheets under the whole bag trap moisture and reduce airflow at the base, which defeats the main benefit of fabric grow bags. If you need surface protection, use a tray approach (with feet to lift the bag), not a flat barrier.
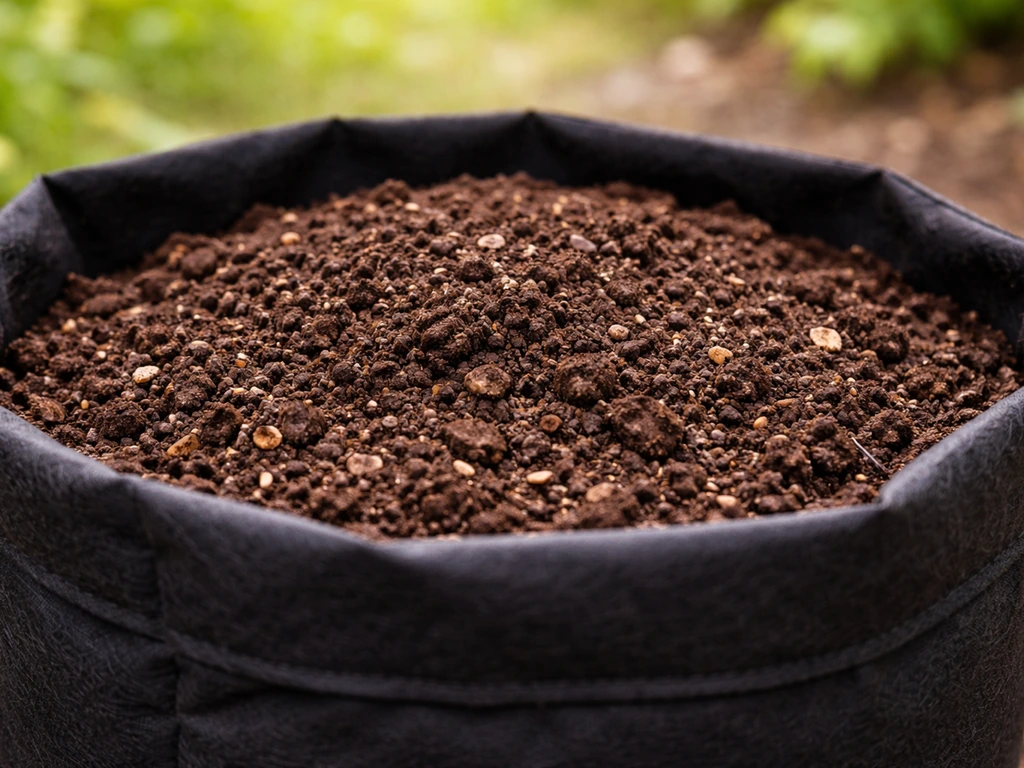
Should I put gravel inside the bottom of the grow bag?
Gravel should go under the bag as a drainage layer, not inside the grow bag at the bottom. Internal gravel can create extra saturated layers in the growing medium and does not reliably increase drainage. Keep gravel 2 to 3 inches thick beneath the bag if you are building a dedicated gravel pad.
Can I use wood planks or pallets as the surface under grow bags?
You can use reclaimed wood or scrap boards, but make sure the wood is raised (not a solid flat damp surface under the bag for long periods) and that runoff can drain away. Untreated wood can rot or warp if it stays wet. The safest method is to use pot feet on a tray, then empty the tray so the wood does not remain damp.
What if I only have bare soil or grass available under the grow bags?
Bare soil can work, but plan for compaction and slug or rot risk because water stays underneath longer than on gravel. If that’s your only option, raise the bag with feet, keep the area around the bags unobstructed for drying, and inspect the underside regularly for persistent wetness or algae growth.
How much space should I leave between grow bags when they’re elevated on feet?
Space them farther than you think, especially in humid or rainy weather, because airflow under the bag matters too. A practical target is 6 to 12 inches between bags, then re-check that water drains away from the base rather than re-wetting neighboring bags.
How do I know if my “underlayer” is causing drainage problems?
Check by feel and timing, not just appearance. After watering, the base area should not look visibly wet or smell sour for more than about a day. If algae, mold, or a constant damp band forms at the bottom seam, your underlayer is trapping moisture and you should raise the bag more or switch to a gravel pad.
Do pot feet or trays make grow bags more stable for tall vegetables?
For tall or top-heavy crops, stability is as important as drainage. Use a wide, stable base (for example, a tray placed on a level surface with pot feet inside) and ensure the bag is level. If your grow bag stand is narrow, it can tip more easily when the mix is dry and lighter.
Will grow bag roots grow into the soil if I’m placing the bag on dirt?
If roots grow into the ground, you can still move the bag later, but you may have to cut roots or accept damage. If you think you might reposition mid-season, avoid letting the bag base fully settle into soil. Gravel pads are better for repositioning because they discourage root penetration into the ground.
When should I use a tray versus relying on the surface drainage?
Generally, a shallow “mess control” tray is fine as long as you never let it become a reservoir. The risk is not the tray itself, it’s standing water staying in the tray after watering. If you want low-effort management, choose a gravel or patio surface where runoff drains away, and reserve trays for decks or stained surfaces.
Next Articles
What to Plant in Grow Bags: Best Plants by Size
Best plants for grow bags by size, plus bag choice, setup tips, and troubleshooting for watering, feeding, and root heal
What to Grow in a Grow Bag: Best Crops by Category
Best crops for grow bags by category plus bag size, soil, depth, watering, feeding, and fixes for common problems.
Best Soil for Grow Bags: Mix Recipes and How Much to Add
Best soil for grow bags: mix recipes, how much to add by bag size, and vegetable tweaks for strong drainage and yield.