Yes, you can put grow bags on concrete, and they work well there with a small amount of setup. Fabric grow bags drain freely by design, so a hard, non-absorbent surface like concrete is actually one of the cleaner spots to use them. The main things to watch are excess water pooling under the bag, heat transfer from sun-baked concrete in summer, and cold transfer in winter. Solve those three things and a concrete surface is as good as any patio or deck.
Can You Put Grow Bags on Concrete? Safe Setup Guide

Marcus Holloway
20 May 2026
Can grow bags touch concrete? The real-world issue
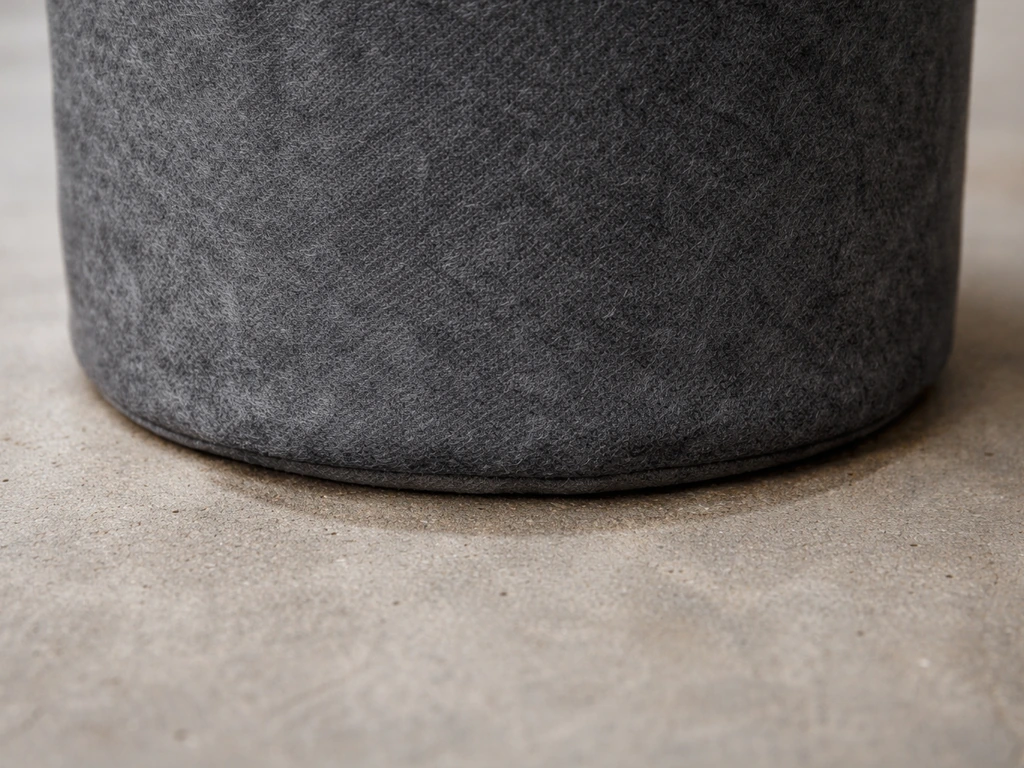
Fabric grow bags are porous on every surface, including the bottom. That's the whole point: excess water drains out freely and air reaches the root zone through the sidewalls, which triggers air-pruning instead of root circling. When the bag sits flat on concrete, that bottom fabric is pressed against a surface that doesn't absorb anything. Water that drains through the soil and fabric has nowhere to go quickly, so it pools in the weave and can stay there. That standing moisture in the fabric creates three problems: it slows drainage from the root zone, it keeps the bottom inch of soil wetter than it should be, and over time it encourages algae and mold growth on the bag fabric itself.
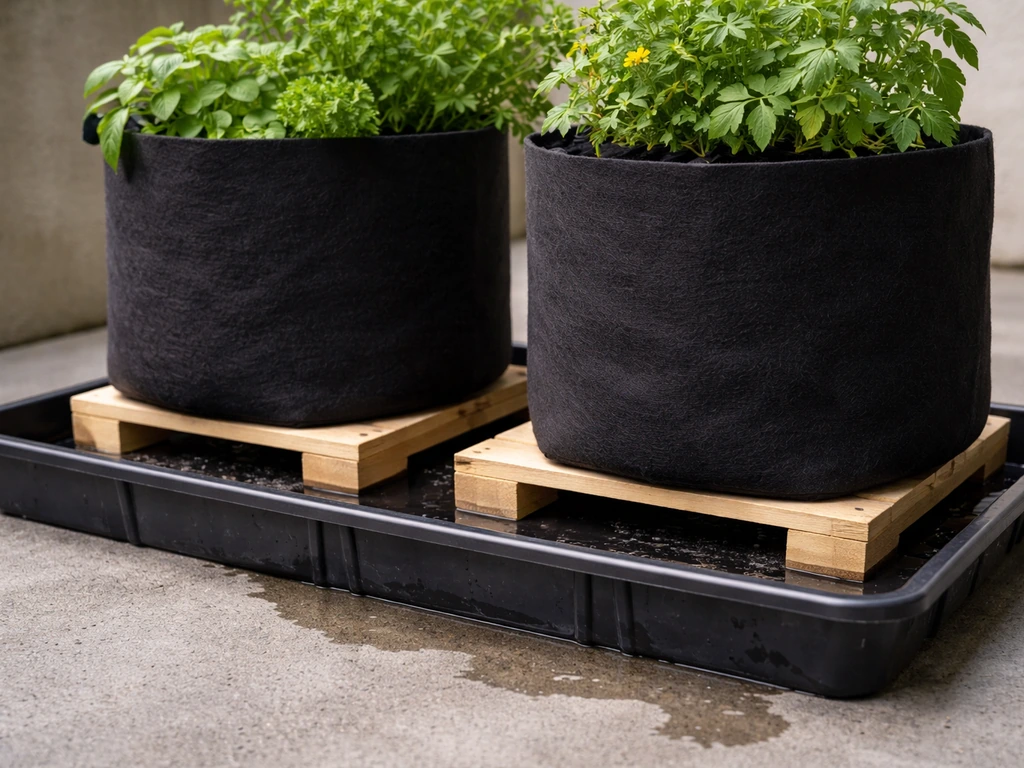
Smart Pot's own FAQ notes that their fabric planters perform great on cement and landscape fabric, and specifically calls out blank" rel="noopener noreferrer">wooden pallets for large containers because pallets increase drainage, aeration, and air-pruning. That's the clearest signal that direct contact isn't a disaster, but lifting the bag slightly off the surface is always the better move. If you are also asking can you put grow bags in pots, the same idea applies: keep the bag slightly raised so drainage and air-pruning are not blocked by a flat surface. Think of it as the difference between fine and great.
How concrete affects drainage, roots, and moisture balance
Concrete has a few specific properties that affect a grow bag differently than soil, gravel, or grass would. First, it's non-absorbent, so every drop that drains from your bag stays on the surface until it evaporates or runs off. Second, bare concrete absorbs and radiates heat aggressively. On a sunny day in July, a south-facing concrete slab can reach surface temperatures of 130°F or more, and that heat transfers directly into the bottom of the bag, stressing roots and accelerating moisture evaporation from the soil. Third, in spring and fall, cold concrete pulls heat out of the root zone, which matters most for warm-season crops like tomatoes and peppers that need soil temperatures above 60°F to thrive.
On the drainage side, the fabric bottom pressed against flat concrete restricts the outflow you'd normally get from air-pruning. Roots that reach the bottom of the bag and find themselves sitting in slightly saturated soil can get waterlogged rather than pruned. You won't see root rot overnight, but over a full season it degrades the healthy, fibrous root structure that makes fabric growing so effective. Lifting the bag even half an inch breaks that suction effect and restores the drainage behavior the bag was designed to provide.
Best ways to set grow bags on concrete (barrier + drainage)
You don't need anything fancy. The goal is to lift the bag slightly so water can flow away from the bottom fabric, and to insulate the root zone from extreme concrete temperatures. Here are the options ranked from simplest to most thorough.
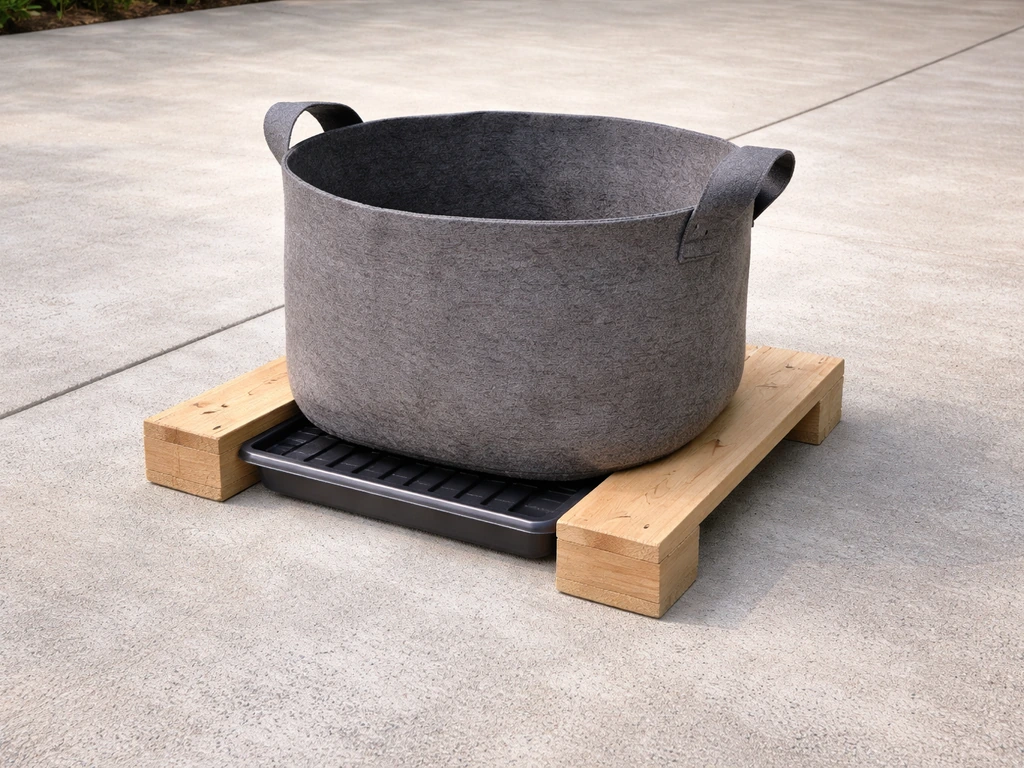
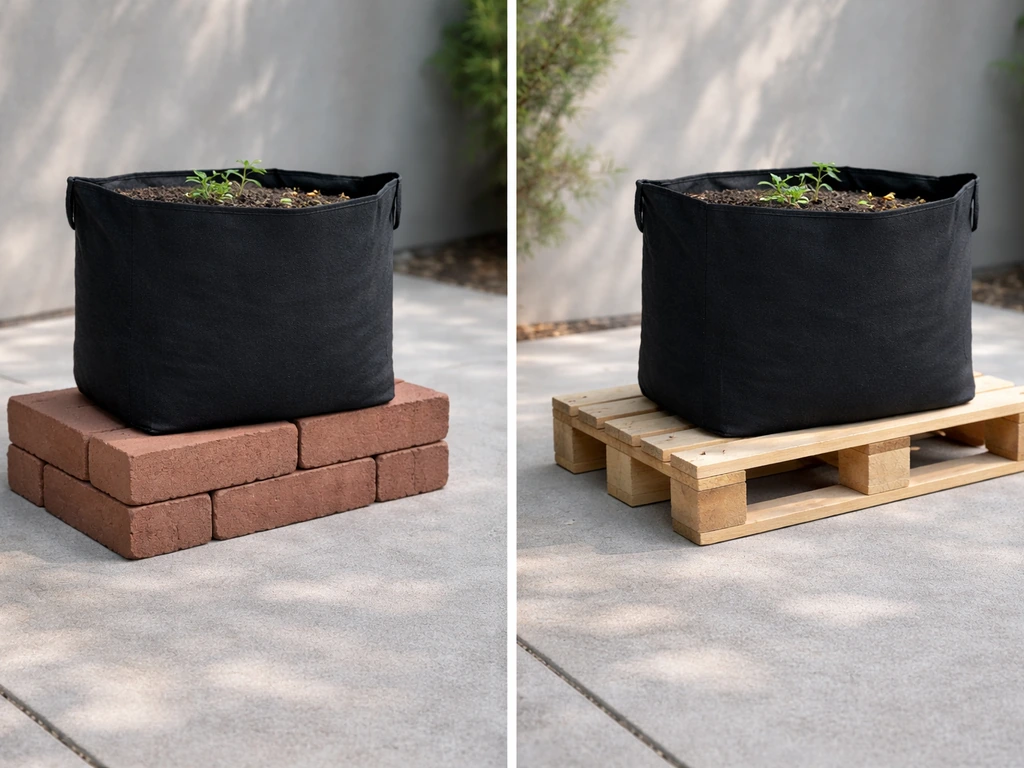
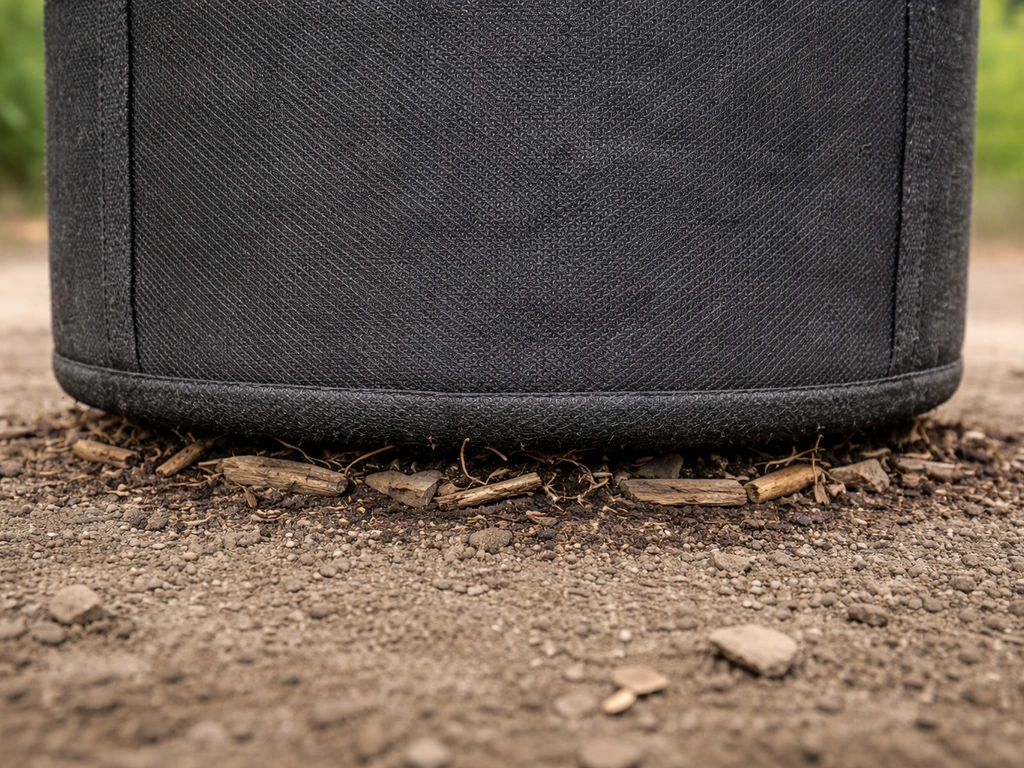
- Wooden pallet or pallet boards: The easiest large-scale solution. Set a pallet flat on the concrete and place bags on top. This gives you roughly 4 to 5 inches of air gap, free drainage in every direction, and good insulation from both heat and cold. Works especially well for 15-gallon bags and larger.
- Brick or block risers: Stack two or three bricks and set the bag on top. For a 5-gallon bag this is all you need. It lifts the fabric off the surface and lets water run freely underneath. Space two bricks roughly 8 to 10 inches apart so the bag base is supported but not sealed.
- Plastic saucer or tray with drainage holes: Cheap and widely available. Drill a few holes in the bottom of a plastic saucer before use, place the bag inside, and the bag sits slightly above the pooled water level. Without holes, a saucer turns into a reservoir and defeats the purpose, so either drill them or skip the saucer and use risers instead.
- Gravel layer: Spread 1 to 2 inches of pea gravel on the concrete and set the bag directly on it. Gravel breaks the suction, allows water to drain around the bag, and acts as a partial thermal buffer. This is a good middle-ground option for a permanent setup where you don't want to stack bricks.
- Landscape fabric barrier: Laying a sheet of landscape fabric under the bag doesn't provide drainage lift, but it does keep the bag fabric from direct contact with abrasive or staining concrete. Combine it with a riser if you want both protection and drainage. On its own, landscape fabric is better than nothing but isn't a drainage solution.
Simple setup vs advanced troubleshooting by plant type
Simple setup for beginners
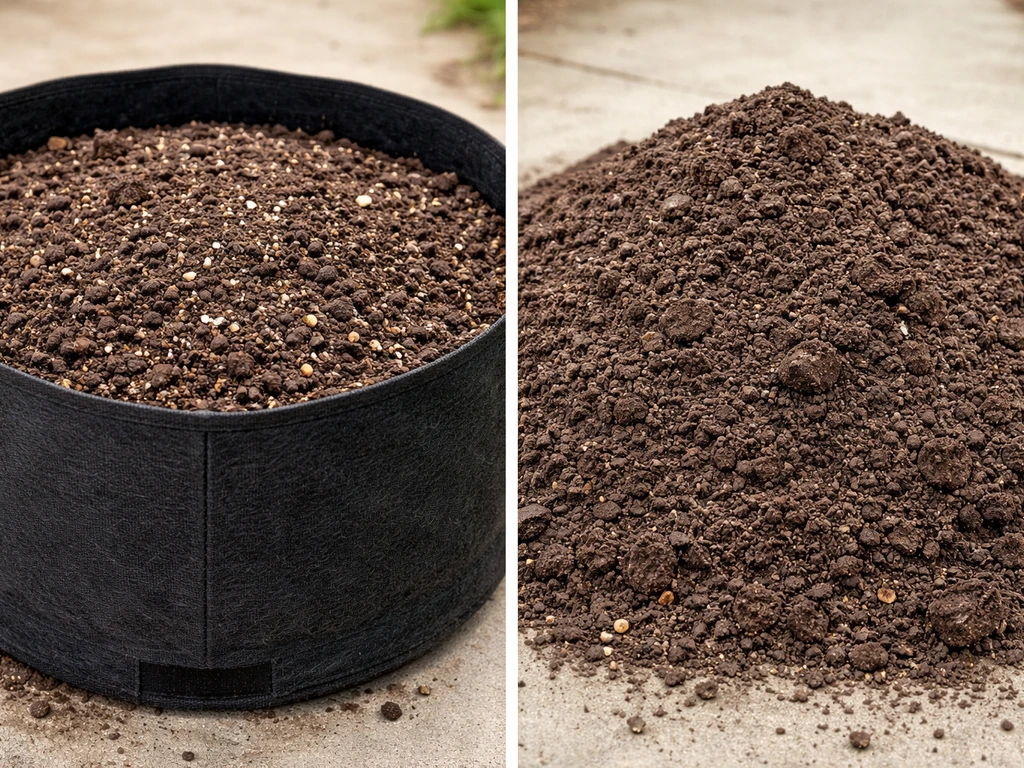
If you're just starting out, pick one riser method (bricks or a pallet) and move on. Use a well-draining potting mix or a mix specifically blended for containers, water when the top inch or two of soil feels dry, and check drainage is flowing freely after watering. If you are also reusing raised bed soil in grow bags, focus on container-ready potting mix and adjust moisture and drainage to match the bag’s faster drying and airflow. That's genuinely 90 percent of what you need for herbs, salad greens, flowers, and smaller vegetable crops like peppers and bush beans.
Plant-specific considerations
| Plant type | Bag size on concrete | Key concern | Best riser/setup |
|---|---|---|---|
| Tomatoes | 15–25 gallon | Heat at root zone in summer | Pallet or 3+ bricks; shade the bag sidewalls if possible |
| Potatoes | 10–15 gallon | Consistent moisture; avoid saturation | Gravel layer or pallet; water carefully in rainy spells |
| Peppers / Eggplant | 7–10 gallon | Cold concrete stress in spring | Brick risers + insulating bag wrap until temps stabilize |
| Herbs (basil, mint) | 3–7 gallon | Overwatering risk on non-draining surface | Saucer with drain holes or small brick risers |
| Small trees / shrubs | 25–45 gallon | Bag movement in wind; heat stress | Pallet for stability; consider windbreak positioning |
| Mushrooms | 3–5 gallon | Moisture retention; avoid concrete heat | Shaded location, landscape fabric underneath, mist frequently |
Mushroom grow bags deserve a specific note: they need stable, higher moisture levels and don't want the heat fluctuations that sun-exposed concrete delivers. If you're fruiting mushrooms in bags on concrete, pick a shaded section, lay landscape fabric under the bags, and keep them away from any concrete that gets direct afternoon sun.
Watering and runoff management on hard surfaces
Watering on concrete is actually more forgiving than watering over soil or grass in one sense: you can see exactly where the water goes. Runoff from a fabric grow bag on concrete flows out visibly from under the bag. That's useful feedback. If you water and see immediate runoff within a few seconds, the soil may be hydrophobic (pulling away from the bag walls after drying out too much). If water takes a full minute to start flowing, you have good moisture retention.
The concrete-specific watering routine to follow: water slowly and evenly until you see steady runoff from the bottom of the bag, then stop. This slow-pour method ensures the whole root zone gets wet rather than water channeling down one side. On hot concrete in summer, you may need to water once in the morning and once in the early evening for large bags with heat-hungry crops like tomatoes. Smaller bags (3 to 5 gallon) on sun-baked concrete can dry out within 24 hours in peak summer.
For runoff management, a slight slope helps a lot. If your concrete area is flat, a small wedge under one side of a pallet or one extra brick on one side of the bag tips the drainage in a consistent direction, preventing water from pooling and staining the concrete or sitting under the bag. If you're on a covered patio or balcony, check whether your building has rules about runoff before setting up a large multi-bag garden: a dozen 15-gallon bags watered daily produces a significant amount of drainage.
Concrete-specific considerations (sealed/painted, level vs sloped)
Bare concrete, sealed concrete, and painted concrete each behave a little differently under a grow bag. Bare concrete is the most porous of the three and wicks a small amount of moisture from the bag over time, which is generally harmless but can leave mineral staining. Sealed or epoxy-coated concrete (common in garages and newer patios) is completely non-porous, so drainage water has no escape route at all and pools aggressively. On sealed surfaces, risers are not optional: they're essential. Painted concrete sits in between, and weathering matters. Old flaking paint can contaminate soil through the bag fabric, so inspect the surface before placing bags directly on it or use a plastic barrier under the bag.
Level concrete is easier to work with but makes runoff management more deliberate. Sloped driveways and ramps solve the pooling problem automatically but introduce bag stability issues, especially for tall bags with tomatoes or trees. On a slope, always put a pallet or a flat board under the bag to keep the soil level inside, otherwise roots develop unevenly and the bag can tip in wind or when the soil shifts after watering.
Outdoor concrete exposed to rain adds another variable. In heavy rainfall, a flat impermeable surface channels water toward your bags from surrounding areas, essentially flooding them from below even if your watering habits are perfect. Positioning bags slightly elevated (pallets work great here) keeps them from sitting in pooled rainwater. If you get extended rainy periods, monitor soil moisture with your finger rather than watering on a fixed schedule: the bags may need no supplemental water for several days.
Quick maintenance and common mistakes to avoid
Keeping a concrete grow-bag setup healthy comes down to a few consistent habits. Lift and move bags every few weeks to check what's happening on the underside of the bag and on the concrete surface. If you see green or black algae growth on the fabric, the bottom of that bag is staying too wet and your riser height or watering frequency needs adjusting. Rinse the underside of the bag with clean water and let it dry before repositioning.
- Don't skip the riser on sealed or painted concrete: it's the single biggest mistake and leads to root zone saturation within a few weeks.
- Don't use a solid saucer without drain holes: it turns your setup into a standing-water trap and undoes all the drainage benefits of fabric.
- Don't place bags directly on concrete that gets full sun for 8+ hours without insulating the sidewalls: a burlap wrap or reflective sleeve around dark bags dramatically reduces root-zone heat stress.
- Don't overwater because the concrete looks dry: the surface dries fast, but the bag may still hold adequate moisture. Check the soil itself, not the surroundings.
- Do rotate bags a quarter turn every few weeks to ensure even light distribution and even air-pruning on all sides of the root ball.
- Do check the bag fabric for signs of mold or algae each time you water: catching it early means a quick rinse fixes it, rather than needing to repot.
One thing worth mentioning: if you're already thinking about adjacent questions like placing grow bags indoors on hard floors, putting grow bags inside pots for extra support, or burying them partially in the ground, the same drainage and barrier principles apply with slight adjustments for each scenario. If you want to know whether you can plant grow bags in the ground, the key is keeping drainage and airflow at the bottom burying them partially in the ground. Concrete is one of the more forgiving hard surfaces for grow bags precisely because it's flat and stable. Get the riser and watering routine right here and you'll find the setup transferable almost anywhere else you want to place fabric bags.
FAQ
Can I use grow bags on concrete indoors?
Yes, but treat them as a separate risk than outdoor use. Indoors, you must prevent water from escaping the risers, so place a waterproof tray under the riser or use a saucer sized for the bag. Also remember that concrete indoors can still swing temperature if it is near an exterior wall, so consider foam or an insulating board as the riser to reduce heat and cold transfer.
What should I look for if a grow bag is staying too wet on concrete?
Don’t rely on “letting it dry” if the bottom fabric stays pressed flat. If you see algae, a musty smell, or consistently wet potting mix at the bottom when you feel 1 to 2 inches down, raise the bag sooner (more than half an inch if needed) and reduce watering frequency until the bottom dries between waterings.
How do I know I’m watering correctly when the bag is on concrete?
For most plants, aim for a stable steady runoff during watering, then stop once flow is consistent. If water comes out immediately every time, you may be flooding rather than soaking the whole root zone, so slow down and water in smaller increments. If runoff never starts, check for blocked drainage and confirm the riser is not compressing the bottom fabric.
Will grow bags stain or damage concrete?
It depends on the concrete type and how wet it gets. Bare concrete can wick moisture and leave mineral staining, while sealed or epoxy-coated surfaces pool water aggressively. If you are using sealed concrete, always use risers plus a barrier tray plan so drainage has a place to go.
How high should I lift a fabric grow bag off concrete?
If you want consistent airflow and drainage, keep risers between 1/2 inch and 1 inch for typical outdoor bags, and more if you routinely water heavily or use large bags. The key is preventing the bottom fabric from sealing against the surface, because that blocks outflow and air pruning.
Can I put grow bags on a garage floor or other sealed concrete?
You usually can, but it’s safer to keep the bag off the concrete for the plant’s sake and use a drip tray system for the structure’s sake. If you do use bare contact, runoff has nowhere to go cleanly and can increase slip and staining, so use a slope aid (wedge brick or angled board) and a tray.
What changes if my concrete pad is sloped?
Yes, but you need extra stability and a level root zone. On a slope, place a flat board or pallet under the bag so the soil stays level inside the bag, then secure tall bags against tipping. Otherwise, the potting mix can shift downhill and create uneven moisture and root growth.
Should I still follow the same watering schedule during extended rain?
Use your finger test. In rainy stretches, the bag may need little or no supplemental watering, because surrounding water can saturate the area or rain can intrude under the bag edges. Check 1 to 2 inches down, and only water when it is drying there, not based on a calendar schedule.
Do I need to space multiple grow bags differently on concrete?
With concrete, the common failure is inconsistent underside airflow and runoff paths. If you have multiple bags close together, ensure each has its own drainage path, and don’t stack risers in a way that connects bottoms and traps water between bags. A small gap between bags helps them dry more evenly.
Can I place grow bags on painted concrete or concrete with residue?
If the surface is contaminated (old paint, spills, or algae residue), use a barrier layer. Flaking paint can transfer through the fabric, and contaminants can leach as water runs. A durable plastic sheet or landscape barrier under the risers can prevent contact while still allowing drainage away from the bag bottom.
How do I protect plants in grow bags on concrete during cold weather?
For winter, the main issue is heat loss from the concrete pulling cold into the root zone, especially for warm-season crops. Use insulation under risers (for example, a board plus insulation layer) to reduce cold transfer, and protect from wind exposure that speeds drying and temperature drops.
Can I grow mushrooms in grow bags directly on concrete?
Mushrooms often do better with more stable moisture and less direct sun exposure. If you grow them on concrete, keep them in shade, create a moisture-stable setup (for example, a landscape fabric under the bags as you would for direct sun control), and avoid placing bags where afternoon sun hits the concrete.
Next Articles
Can You Use Grow Bags Indoors? Setup Guide and Tips
Yes. Learn how to use fabric grow bags indoors with placement, drainage, light, watering, nutrients, and fixes for mold
Can I Use Raised Bed Soil in Grow Bags? How-To Guide
Yes, with changes: how to mix raised bed or garden soil for grow bags, improve drainage, and manage faster drying.
Can You Plant Grow Bags in the Ground? Best Setup Tips
Learn if fabric grow bags can touch soil, how to prevent waterlogging, weeds, pests, and fabric damage.