Yes, you can absolutely place fabric grow bags directly on the ground, whether that's bare soil, grass, gravel, or a paved surface. They work well in all of these situations. The more useful question is whether your bag should sit on top of the ground or literally be sunk into it, because those are two very different setups with different outcomes. For the vast majority of home growers, the right answer is: sit the bag on top of the ground (ideally on a weed barrier or breathable base), not buried in a hole. That's how fabric containers are designed to perform. If you just want to set your grow bag on the lawn or a garden bed and start growing, go ahead. A few simple precautions will keep your plants thriving and your bags lasting longer.
Can You Plant Grow Bags in the Ground? Best Setup Tips

Marcus Holloway
23 Apr 2026
On the ground vs. in the ground: what's the real difference?

When people search for "planting grow bags in the ground," they usually mean one of two things. Either they want to set a grow bag on top of soil or grass (on the ground), or they're wondering if they can dig a hole and sink the bag into it (in the ground). These aren't the same, and the distinction matters.
Sitting a grow bag on top of the ground is the standard, intended use. Smart Pot, one of the original fabric container manufacturers, specifically confirms their containers perform great on dirt, grass, cement, landscape fabric, wood, and similar surfaces. You're not doing anything wrong by placing a grow bag directly on soil or grass.
Sinking a grow bag into a dug hole is a different matter. Some specialty products, like RediRoot's In-Ground Fabric Bags, are purpose-built for exactly this use case, particularly in nursery settings where air pruning needs to happen underground with limited air movement. Standard fabric grow bags you'd buy for vegetables or flowers are not designed for that. Buried in soil, a regular fabric bag loses the air pruning effect that makes it special, the fabric can degrade faster, and drainage becomes a real problem. The Xerces Society (Pollinator.org) PDF also warns that landscape fabric used for weed control can create issues like drainage problems, depending on how it’s installed and where water is directed drainage becomes a real problem. Stick with placing your bag on top of the ground unless you're using a product explicitly rated for in-ground burial.
How ground contact changes drainage, airflow, and root health
Fabric grow bags work because they breathe. The porous walls allow excess moisture to escape, oxygen to reach the root zone, and roots that hit the wall to be air-pruned rather than circling endlessly like they would in a plastic pot. HORTSCIENCE (2024) discusses air-pruning or air root pruning in fabric containers as a way to help prevent root circling and support favorable root responses in containers air-pruned rather than circling endlessly. When a bag sits directly on bare soil, a few things change in ways worth understanding.
Drainage from the bottom can slow down. On a hard surface like concrete or a patio, excess water drains freely below the bag. On soft ground, especially clay-heavy or compacted soil, the bag can settle slightly and the bottom layer of growing medium can stay wetter longer than you want. This isn't usually a disaster, but it can be a problem for plants that hate wet feet, like peppers or lavender.
Airflow under the bag matters more than most people expect. That small gap of air circulation under the bag helps wick moisture away and keeps the bottom roots from sitting in a puddle. On flat, soft ground with no gap, you lose some of that benefit. Raising the bag even a centimeter or two on gravel or a mesh platform makes a noticeable difference.
Root escape is the other key issue. Fabric bags don't have a solid bottom, and roots will eventually push through the fabric and reach whatever surface is below. On bare soil, those escaped roots will happily dive into the ground. For most annual vegetables that's not a big deal, but for trees or perennials you're trying to keep container-bound, it's a problem. The air-pruning benefit only happens where the root meets air, not where it meets damp soil.
Risks to watch for: weeds, pests, disease, and fabric wear
Ground contact introduces a handful of problems that don't show up when you put a grow bag on a table or patio. None of them are dealbreakers, but they're worth planning around before you set up.
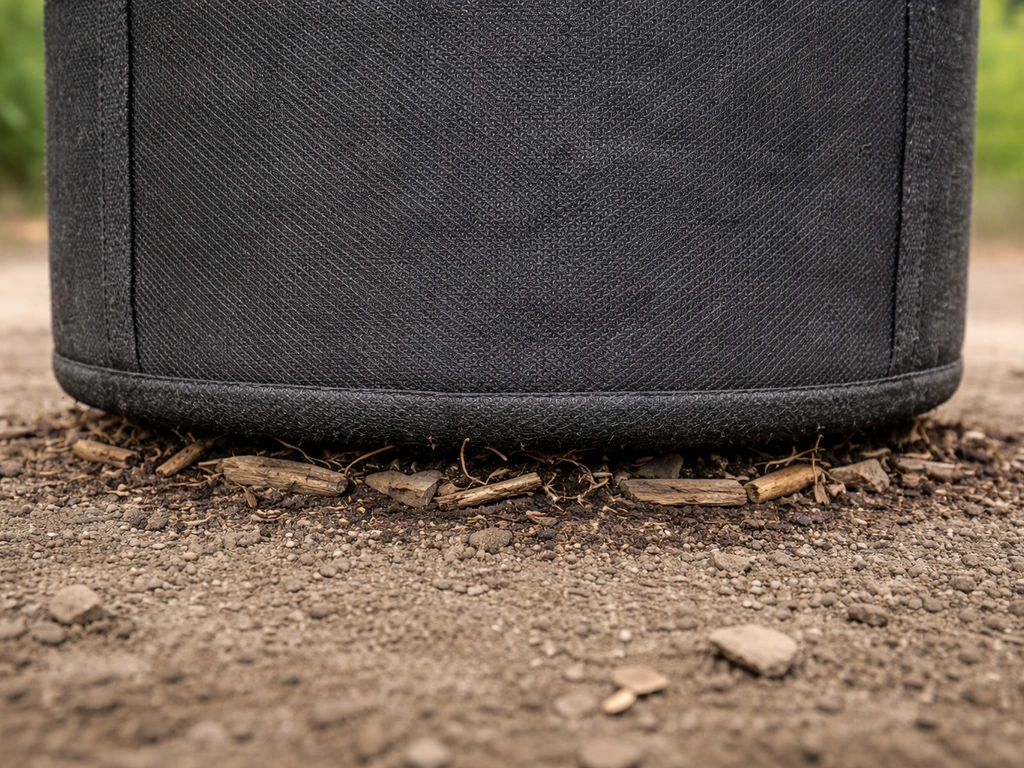
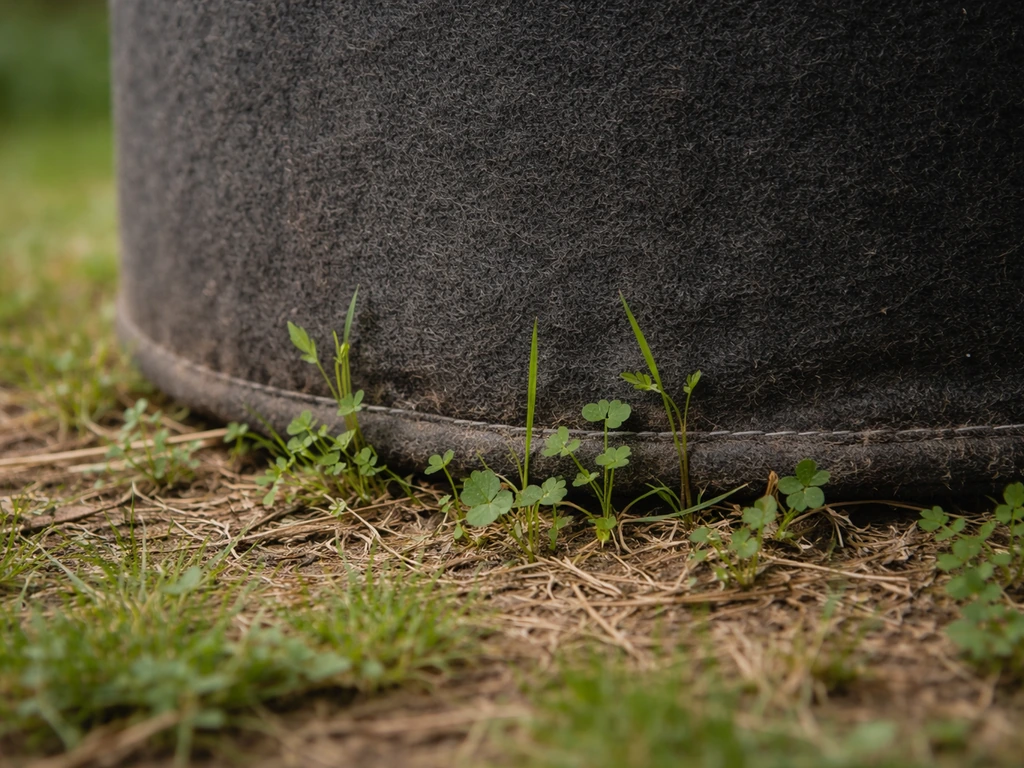
- Weeds: If your bag sits directly on soil or grass, weeds will grow up through the fabric from below. This is especially common in the first few weeks before your plants establish a canopy. You'll find weeds emerging inside the bag that feel like they're coming from nowhere.
- Pests and critters: Ground-level bags are easier for slugs, snails, ants, and soil-dwelling pests to access. Slugs in particular love to shelter under the warm, damp base of a grow bag sitting on grass.
- Soilborne disease: When a bag sits directly on garden soil, there's potential for fungal spores and pathogens from the ground to splash up onto the bag during watering or rain. This is a low risk for most growers but worth knowing about if you've had fungal problems in your garden beds before.
- Fabric wear: The bottom and lower sidewalls of a grow bag take the most abrasion from ground contact. Rough gravel, sharp edges on pavers, or even dry soil can wear fabric over time, especially if you move the bag around. Sitting on a smooth surface or weed barrier reduces this significantly.
- Moisture wicking: Damp soil in direct contact with the bag's base can wick moisture upward through the fabric, keeping the growing mix wetter at the bottom than you'd expect. In wet climates or rainy seasons, this can contribute to root rot.
The best setup methods for placing grow bags on the ground
The goal is to get the bag stable, well-drained, and protected from weeds and pests while still taking advantage of the fabric's breathability. You have several good options depending on your setup.
Use a weed barrier
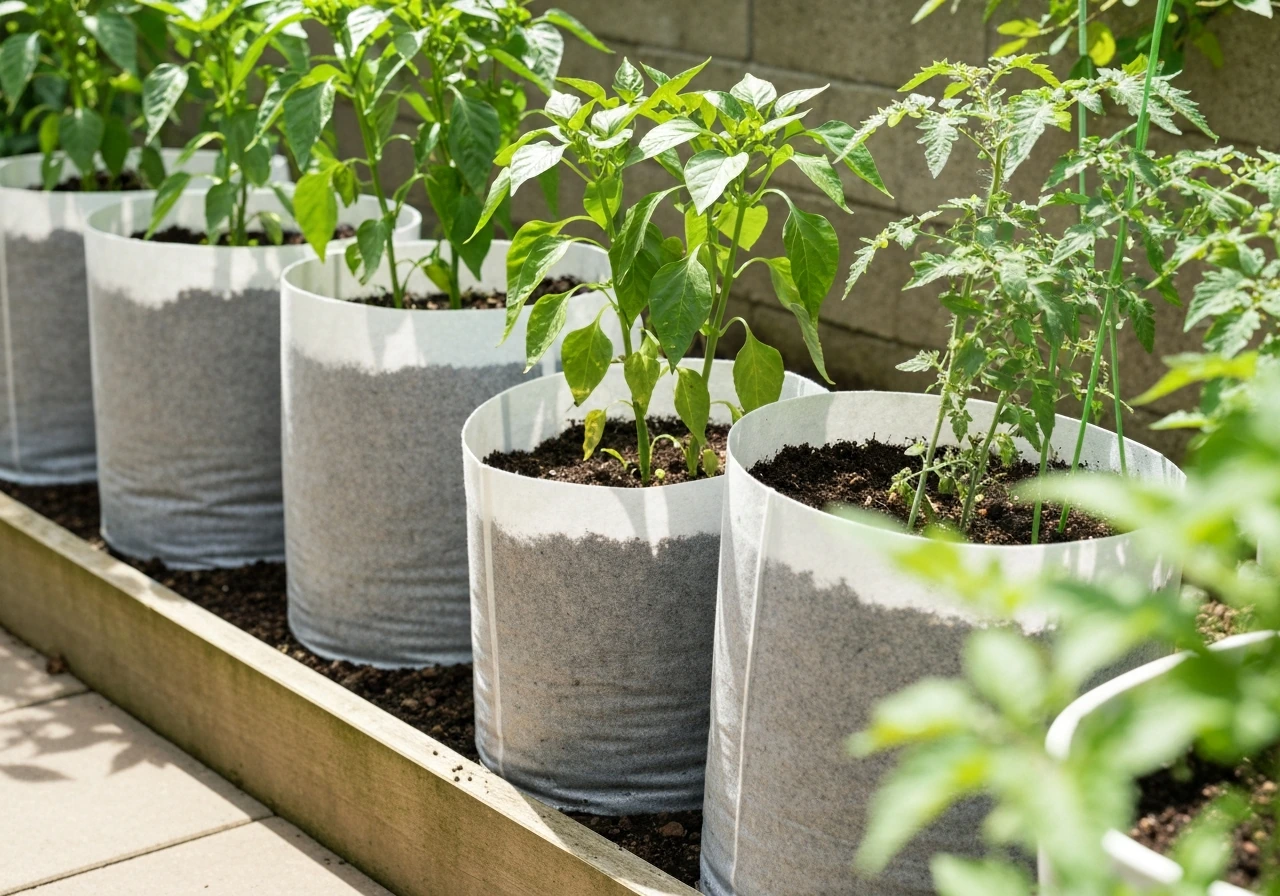
This is the most common recommended approach, and it's what nursery professionals do with fabric containers in production settings. Lay a layer of woven landscape fabric or horticultural weed barrier over your ground surface, then place your grow bags on top. If you are wondering whether raised bed soil works under a grow bag, treat it the same way as any other soil surface and focus on drainage and weed control. This blocks weeds from pushing up through the bag, reduces moisture wicking from the soil below, and keeps the bag base cleaner. Use a breathable woven fabric rather than plastic sheeting, which would trap water and heat.
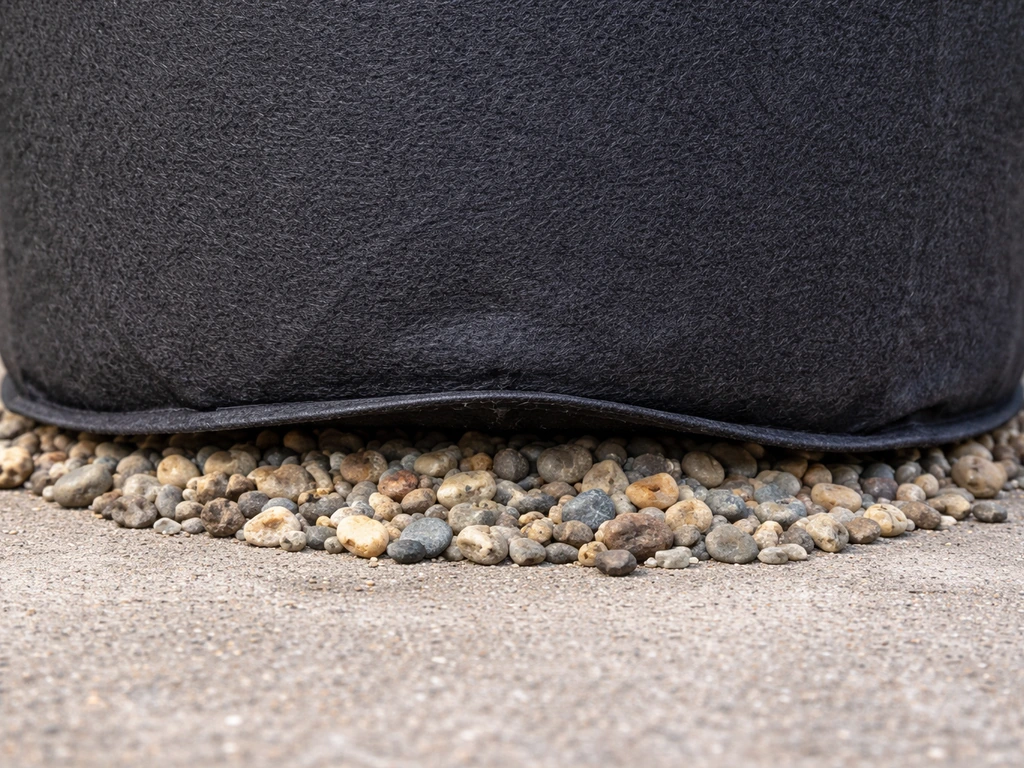
Use a gravel or pebble base
A 5 to 10 cm layer of coarse gravel under the bag does two things well: it creates excellent drainage and gives you that important air gap at the base. This is one of the best options if you're dealing with a heavy or clay-heavy soil surface, or if you're in a high-rainfall area. You can lay gravel over a weed barrier for even better weed control.
Elevate on a platform or saucer
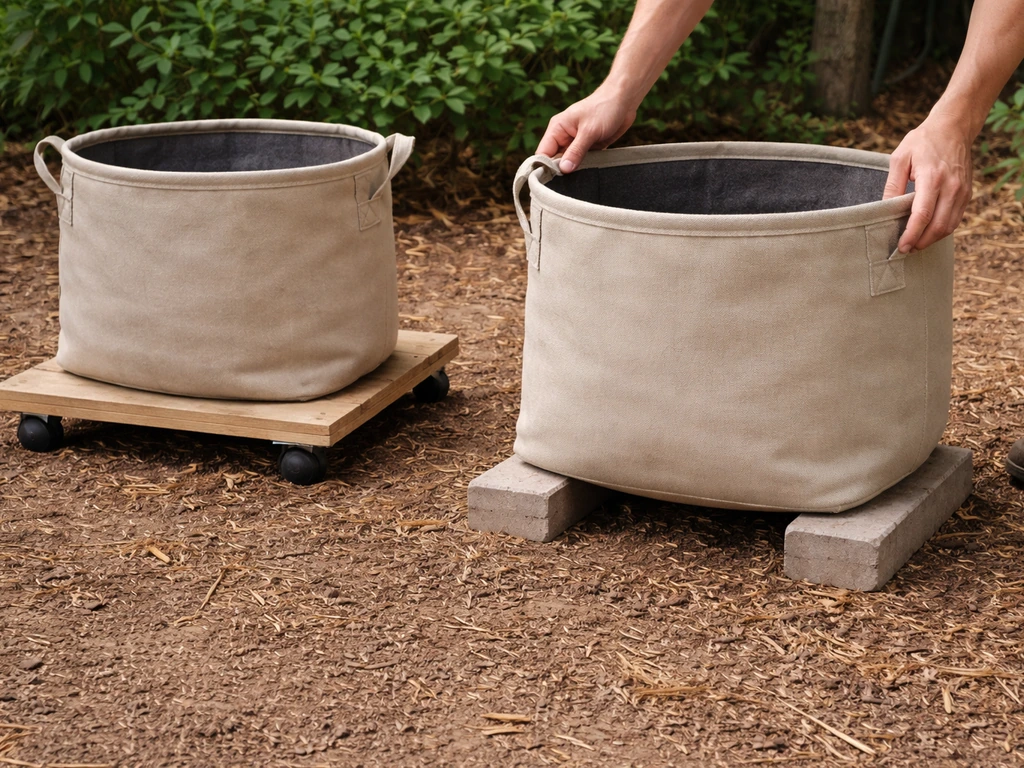
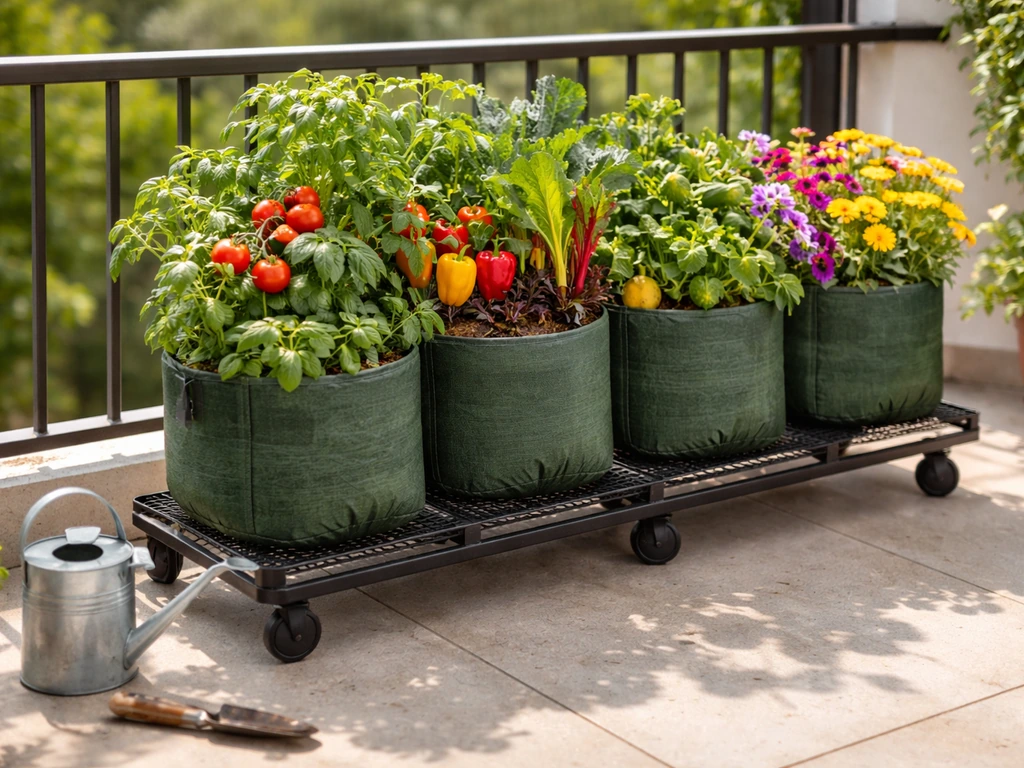
A simple wooden pallet, a plant caddy with casters, or even a few bricks under the bag gives you immediate airflow underneath and makes moving the bag easier. This is particularly useful for larger bags (30 litre and up) that get heavy once filled and watered. If drainage is your biggest concern, this is the most effective option.
Spacing
Don't crowd bags together on the ground. Leave at least 15 to 20 cm between bags so air can circulate around the sides. Bags squeezed together stay damp, which encourages mold on the fabric and can stress plant roots. If you're growing something bushy like tomatoes or squash, the plants themselves will need space too, so factor that in early.
Step-by-step: how to place a grow bag on soil safely
- Choose your spot. Pick a location with the right sun exposure for your crop and relatively level ground. Avoid areas where water visibly pools after rain.
- Prep the ground surface. Clear any tall grass or debris. If you're placing the bag directly on a garden bed, cut the grass or weeds as low as possible first.
- Lay your weed barrier or base layer. Roll out woven landscape fabric, or spread a 5 to 10 cm layer of coarse gravel. This is the most important step for preventing weeds and improving drainage.
- Position the bag. Place the empty grow bag on your prepared surface. If you're using handles, position them so you can access them later without disturbing nearby bags.
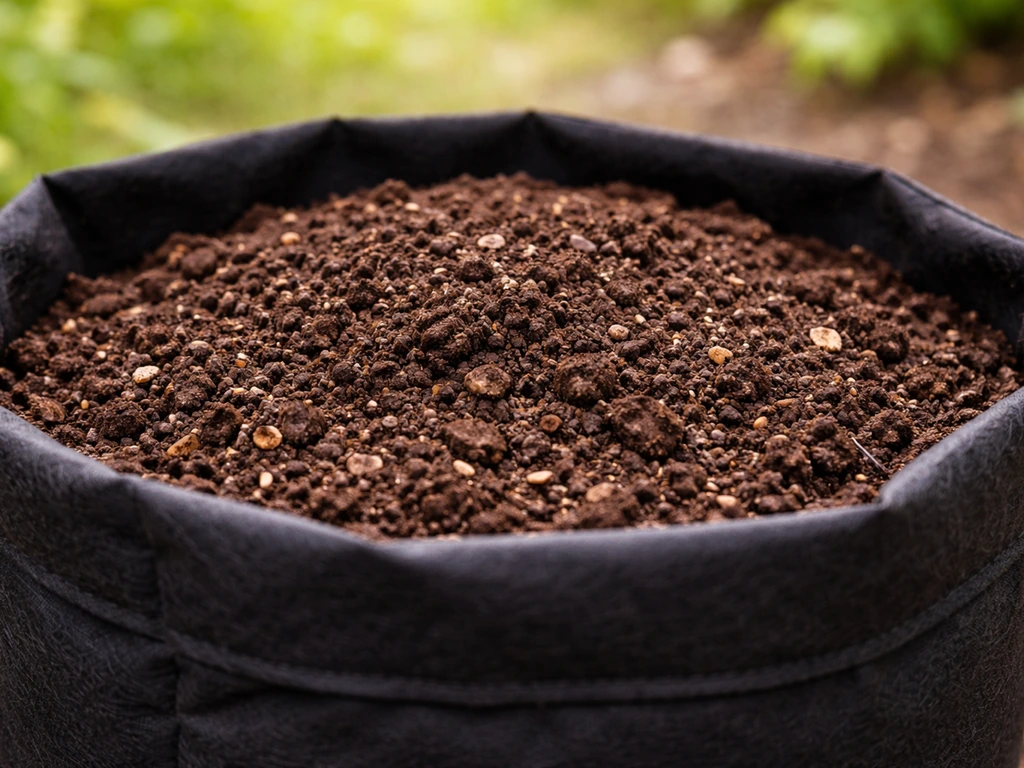
- Fill with growing mix. Use a quality container mix, not straight garden soil, which compacts too much in bags. Fill to about 5 cm below the top to allow for watering without overflow.
- Plant your crop and water in. Water thoroughly at first to settle the mix. Check that water drains freely through the bag sides and bottom. If water pools and doesn't drain within a few minutes, your base layer may need adjustment.
- Mulch the surface. A thin layer of straw or bark mulch on top of the growing mix helps retain moisture and keeps the surface from crusting, especially important outdoors where wind and sun can dry the top layer fast.
- Space bags apart and monitor. Check bags daily in the first week, especially after rain, to make sure drainage is working and no weeds are emerging through the base.
When things go wrong: troubleshooting common ground-placement problems
Waterlogging and poor drainage
If your plants look yellowed and wilted even when the soil feels wet, or if the base of the bag stays soggy for more than a day after watering, you have a drainage problem. First check whether the bag is sitting in a low spot where water collects. Move it if so. Second, lift the bag slightly and check whether the bottom layer of mix is compacted or waterlogged. If yes, adding a gravel layer underneath is the fastest fix. For immediate relief, tilt the bag very gently to one side to let excess water drain, then elevate it on bricks or a pallet while you set up a better base.
Slow growth and poor plant health
Slow growth in a ground-placed bag usually comes down to one of three things: the roots have escaped into the ground below and the plant is drawing nutrients from the soil instead of your curated mix (making the bag growing environment irrelevant), there's not enough airflow and the roots are suffocating, or nutrients are leaching too quickly through the bag walls. If roots have escaped, you have two options: sever them by sliding a spade under the bag, or accept that the plant is now partially in-ground and manage it accordingly. For nutrient leaching, switch to a slow-release fertilizer or feed more frequently with a liquid feed.
Weeds appearing inside the bag
If weeds are pushing up from below, your weed barrier either wasn't installed or didn't cover the full footprint of the bag. Lift the bag, lay a proper weed barrier, and replace the bag. You can also cut a piece of cardboard to fit the base of the bag as a temporary fix. Pull any weeds you find quickly because they compete aggressively for nutrients in the limited growing mix.
Pest problems at ground level
Slugs and snails sheltering under bags at ground level are a very common issue. Scatter iron phosphate pellets around the base of your bags, or use a copper tape barrier around the perimeter of your growing area. Elevating the bag on a platform also removes the sheltered hiding spot that slugs love. For ant infestations in the bag, check that the soil isn't too dry (ants prefer to nest in dry media) and keep the moisture level consistent.
Overheating or cold stress
Fabric bags on bare soil can overheat in midsummer because dark fabric absorbs heat and the soil below radiates it back. This is more of an issue on gravel or concrete than on grass or bare soil, but it happens anywhere. A light-coloured fabric bag, a layer of straw mulch on top of the growing mix, and keeping the bag out of direct afternoon sun in peak summer all help. In cold weather, the opposite problem occurs: bags on the ground lose heat through the base. Insulating the bottom with a thick layer of straw or wrapping the lower portion of the bag in horticultural fleece can protect roots when temperatures drop.
Picking the right grow bag for ground placement
Not all fabric grow bags are equal when it comes to ground use. Here's what to look for if you know your bag will be sitting on soil or grass long-term.
| Feature | What to Look For | Why It Matters for Ground Use |
|---|---|---|
| Fabric weight | 300 gsm or heavier | Heavier fabric resists abrasion from rough ground surfaces and lasts longer season to season |
| Material | BPA-free polypropylene or felt | These hold up to moisture contact better than thinner non-woven fabrics that degrade quickly outdoors |
| Base design | Reinforced or double-layered base | The bottom takes the most wear from ground contact; a reinforced base extends bag life significantly |
| Handles | Sturdy sewn handles rated for bag weight when full | You'll need to lift and move bags for cleaning, repositioning, or winter storage |
| Size | Matched to crop: 15–20L for herbs/flowers, 30–45L for tomatoes/peppers, 75L+ for trees | Bigger bags dry out more slowly on the ground, which can be an advantage in summer but a risk in wet seasons |
| Colour | Light tan, white, or grey rather than black | Lighter colours absorb less heat, which protects roots during summer ground placement |
For trees or large shrubs you're planning to keep in a bag for multiple seasons on the ground, look specifically at heavy-duty options in the 75 litre to 400 litre range, and seriously consider a woven landscape barrier under the bag from day one. Root escape into the ground becomes a bigger issue the longer a tree bag sits in one place.
If you're figuring out the best placement strategy for your grow bags, the decision about what goes under or around them connects to other setup choices: what type of growing mix to use, whether to try them indoors, on concrete, or in pots are all variations on the same practical question. If you’re asking, can you use grow bags indoors, the same focus on airflow, drainage, and a clean base will help you avoid soggy roots try them indoors. The core principle stays the same regardless of surface: fabric grow bags need airflow, drainage, and a clean base to do what they're designed to do. Get those three things right and you'll have healthy plants no matter where you set up.
FAQ
Can you plant grow bags in the ground, or is it only okay to set them on top of soil?
Yes, you can, but you should treat “in the ground” as two different setups. A regular fabric grow bag is meant to sit on top, while a bag specifically rated for burial (in-ground fabric bags) is the only safe option if you truly plan to sink it into a hole.
Will planting a grow bag directly on soil cause roots to escape and spread into my garden?
If you want roots to stay mostly in the bag, avoid bare-ground contact. Put the bag on a weed barrier or a gravel base, and consider periodically checking the underside after a few months for root escape.
Is it better to place fabric grow bags on grass or on gravel if my soil stays wet?
It depends on the surface. On gravel, the bag usually dries more predictably and stays less waterlogged. On clay-heavy or compacted soil, the bottom can stay wet longer, even if the top looks fine, so a gravel layer or raised platform helps.
Can I put plastic under a grow bag to stop weeds and keep things clean?
You generally should not use plastic sheeting under a fabric grow bag. Plastic reduces the breathing and drainage benefit and can trap heat and moisture. Use breathable woven weed barrier or other porous materials.
Can you place grow bags on a wooden deck or patio instead of digging into the ground?
Yes, but only if you can maintain drainage and airflow. If the deck boards are tightly sealed or rainwater collects underneath, you may need spacers, a pallet, or a small gravel base so the bag stays elevated and the bottom can breathe.
How much space should I leave between multiple grow bags sitting on the ground?
Yes. The article’s spacing guidance applies to ground placement too. Crowded bags keep air from circulating around the fabric sides, which can increase mildew risk and slow drying, especially in humid weather.
My grow bag on the ground stays wet, what should I do first?
If your bag stays soggy for more than a day after watering, first check for a low spot, then add a coarse gravel layer underneath. Also make sure the bag is not pressed directly into compacted soil where there is little or no air gap.
Will fabric grow bags overheat if they’re placed directly on the ground?
Not always. In hot sun, dark fabric can heat strongly, and ground contact can worsen the effect if the base reflects heat like concrete or dark gravel. Use lighter-colored bags, add top mulch (straw is often used), and shade the bags during peak afternoon.
If I’m putting grow bags in the ground, should I change my fertilizer routine?
You can, but you’ll need a consistent feeding approach. If roots escape, your plant may pull nutrients from the soil below, which can reduce how well your bag’s mix supports growth.
What’s the quickest way to improve drainage or reduce slugs for a ground-placed grow bag?
Yes. Elevating the bag on bricks, a pallet, or a caddy is one of the fastest fixes for bottom wetness and also reduces slug hiding spots at ground level.
Next Articles
Best Soil for Grow Bags: Mix Recipes and How Much to Add
Best soil for grow bags: mix recipes, how much to add by bag size, and vegetable tweaks for strong drainage and yield.
Pros and Cons of Grow Bags for Vegetables and Flowers
Grow bag pros and cons for veg, flowers, trees, and mushrooms: aeration, mobility, and watering plus fixes for common is
Benefits of Grow Bags: A Practical Guide for Home Growing
Discover the benefits of grow bags: better drainage and aeration, healthier roots, easier plant care, and how to choose