The fabric grow bags that consistently get recommended on Reddit are standard non-woven polypropylene bags in the 5 to 15 gallon range, with a fabric weight between 300 and 400 GSM, no plastic liner, and no drainage tray sitting under them collecting standing water. For most vegetables, 7 to 10 gallons hits the sweet spot. For trees and large tomatoes, 15 to 25 gallons. For peppers, herbs, and flowers, 3 to 5 gallons is plenty. That's the core of it. Everything below helps you dial in the right size and setup for your specific crop and avoid the problems that trip people up.
Best Grow Bags Reddit Guide: How to Choose, Use, and Avoid Issues

Marcus Holloway
30 Apr 2026

What people actually mean when they say 'best grow bags' on Reddit
When someone posts asking for grow bag recommendations on r/containergardening, r/tomatoes, or r/vegetablegardening, they're usually not asking about brand loyalty. They're trying to solve a specific problem: bags that dry out too fast, roots poking out the sides, tomatoes that aren't thriving, or figuring out what size to order without wasting money. The 'best' bag in those threads almost always means the right combination of size, fabric thickness, and watering setup for a particular crop, not just the cheapest or most popular brand on Amazon.
A few recurring themes come up constantly. Drying speed is the biggest complaint. People buying bags for the first time underestimate how much faster fabric containers lose moisture compared to plastic pots, especially in summer heat. The second theme is sizing confusion, because there's no universal rule that translates to every plant. The third is the 'all-in-one' or self-watering grow bag question, which usually comes up after someone's bag has dried out twice in one day. Understanding those three pain points is how you actually interpret Reddit's advice usefully.
Choosing the right grow bag type: fabric, sizes, and shapes
The vast majority of fabric grow bags sold today are made from non-woven polypropylene felt. This material is breathable, promotes air pruning at the root zone, and drains freely. blank" rel="noopener noreferrer">When roots reach the bag wall, they stop growing in circles and instead branch back inward, which is genuinely better for plant health than what happens in a plastic container. That's not marketing, it's why citrus growers and pepper enthusiasts specifically switch to fabric bags and report real improvement.
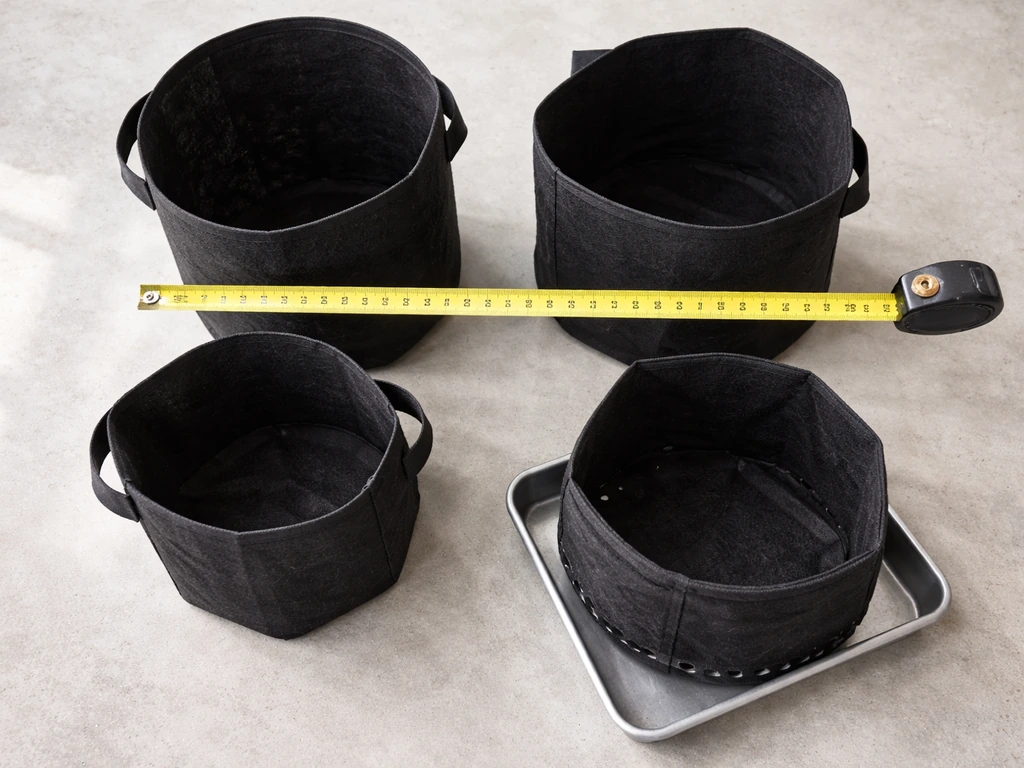
Fabric weight matters more than most people realize. Bags in the 200 GSM range feel thin and flimsy, dry out extremely fast, and tend to degrade faster outdoors. 300 to 400 GSM is the practical sweet spot: sturdy enough to hold shape when full and wet, durable through multiple seasons, and still breathable enough to give you the air pruning benefit. You'll occasionally see heavier options above 400 GSM marketed as 'premium,' but the added cost rarely translates to noticeably better plant outcomes for most home growers.
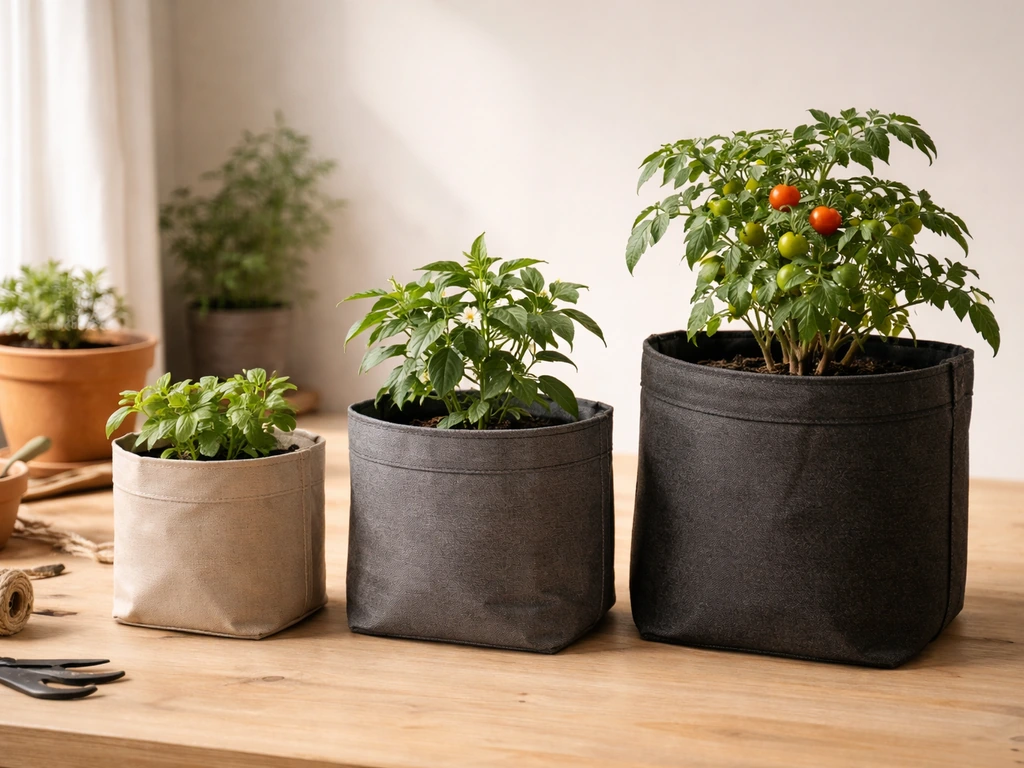
On shape: wider is genuinely better than deeper for most crops, especially peppers and tomatoes. A wider bag dries more slowly at the center, giving roots more consistent moisture access. A deep, narrow bag dries from the outside walls inward and can stress roots near the edges during hot weather. If you're choosing between a bag that's 12 inches wide by 12 inches tall versus one that's 10 inches wide by 14 inches tall, go wider. The exception is root vegetables like carrots or parsnips, which need depth more than width.
A practical size guide by plant type
| Plant Type | Recommended Bag Size | Notes |
|---|---|---|
| Herbs (basil, parsley, mint) | 1–3 gallons | Mint in its own bag to prevent spreading |
| Peppers (hot and sweet) | 3–5 gallons | Wider profile preferred; 3 gal works for compact varieties |
| Determinate tomatoes | 5–7 gallons | Don't go below 5 gal; 7 gal preferred for reliable yields |
| Indeterminate/large tomatoes | 10–15 gallons | More root space = more consistent fruiting through summer |
| Flowers (annuals) | 2–5 gallons | Most do fine in 3 gal; larger for statement plants |
| Dwarf fruit trees / citrus | 15–25 gallons | Air pruning benefits trees significantly; size up as tree matures |
| Potatoes | 10–15 gallons | Taller bag useful here; rolling down sides as you hill works well |
| Mushrooms (substrate bags) | 1–5 lbs substrate weight | Completely different product category — see mushroom section |
All-in-one grow bags: what's actually in the box and whether they're worth it
The phrase 'all-in-one grow bag' gets used in a few different ways, so it's worth being specific about what you're actually buying. The most common version is a self-watering grow bag, which usually means a fabric outer container paired with a built-in or attached water reservoir at the bottom. The idea is that the reservoir wicks moisture up into the soil through capillary action, reducing how often you have to water manually. An instruction sheet from Sullivan County explains that self-watering systems use capillary action with a wick or twine to move water from a reservoir to the plant media.
These setups can work well, but they have real limitations that Reddit users are pretty honest about. The reservoir needs to be sized appropriately for the container. A small integrated reservoir might last a day or two in summer heat, not the week you were hoping for. The systems that genuinely extend time between watering (up to 10 to 14 days in moderate summer conditions, according to some reports) use larger external reservoirs, like sitting a grow bag on a 25-gallon tote filled with water. That's effective but bulky and not practical for a balcony or deck setup.
Purpose-built self-watering autopots cost $80 to $100 or more per unit. For most home vegetable growers, that's hard to justify when a quality 10-gallon fabric bag costs $5 to $15 and a timer-based drip system covers multiple containers for roughly the same total cost. The self-watering premium makes more sense if you travel frequently, have a small number of high-value plants, or are dealing with a location where daily watering is genuinely difficult.
One thing to avoid: fabric planters with a built-in plastic liner and no drainage holes. These negate the entire benefit of fabric growing. The breathability and air pruning that make fabric bags worth using require unobstructed airflow through the walls. A plastic liner traps moisture, kills airflow, and creates root rot conditions. If you accidentally bought one of these, either puncture the liner thoroughly or just replace the bag.
How to pick size, fabric weight, and drainage: a practical decision checklist
Before you order anything, run through these questions. They'll cut through the noise quickly.
- What am I growing? Check the size guide above. If you're not sure, err on the side of larger, because undersized containers are a harder problem to fix mid-season than slightly oversized ones.
- Where is the bag going? Outdoors in full sun dries bags faster than a shaded patio or indoors under grow lights. Full-sun outdoor setups should lean toward heavier GSM fabric (300–400) and wider shapes to slow moisture loss.
- How often can I realistically water? If daily watering isn't feasible, factor in a drip timer or a sub-irrigation tray. Don't rely on an integrated reservoir unless it's large enough to make a real difference.
- Am I setting the bag directly on soil or concrete? If on soil or a surface where pests can enter, elevate on paver stones or a wooden board. A 12x12 paver works well for a 5-gallon bag and keeps slugs, pillbugs, and ants from migrating into the bag from below.
- Do I need the bag to move? If you'll be rotating plants for sun or bringing them inside during frosts, make sure the bag has sturdy handles. Heavier-weight fabric handles hold up far better than thin sewn-on straps under a fully loaded 15-gallon bag.
- What's my budget? For a single-season annual vegetable crop, a basic non-woven polypropylene bag in the right size is completely sufficient. You don't need to spend more unless you're growing trees or perennials where multi-year durability actually matters.
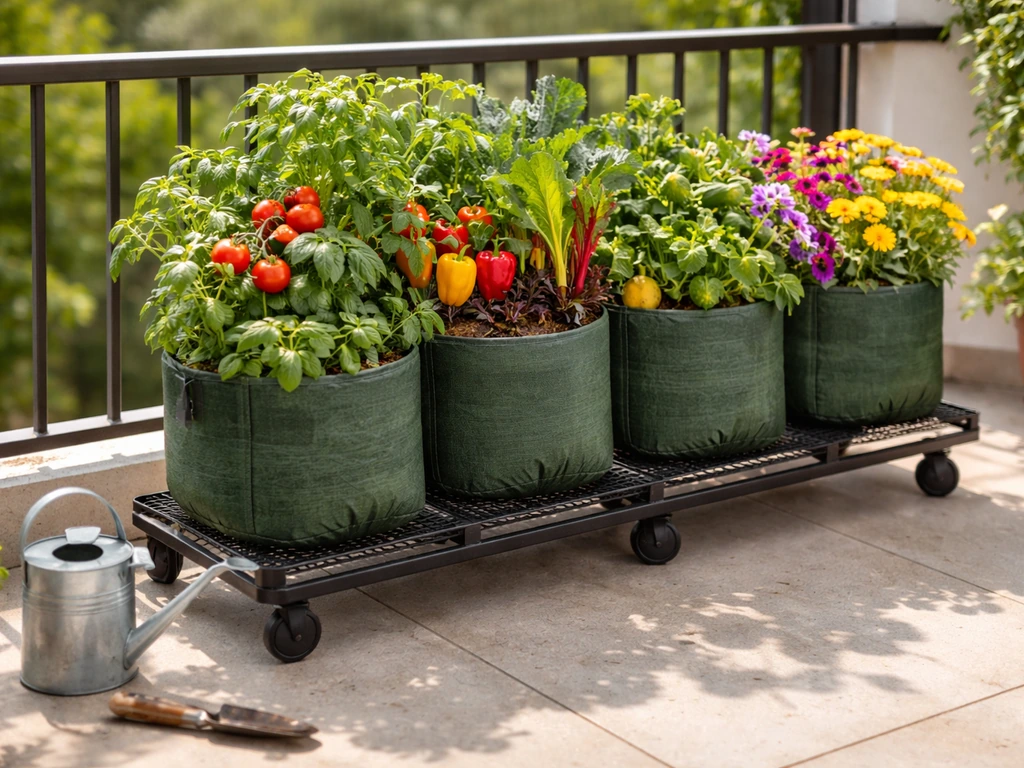
Best grow bag setups for specific crops
Vegetables
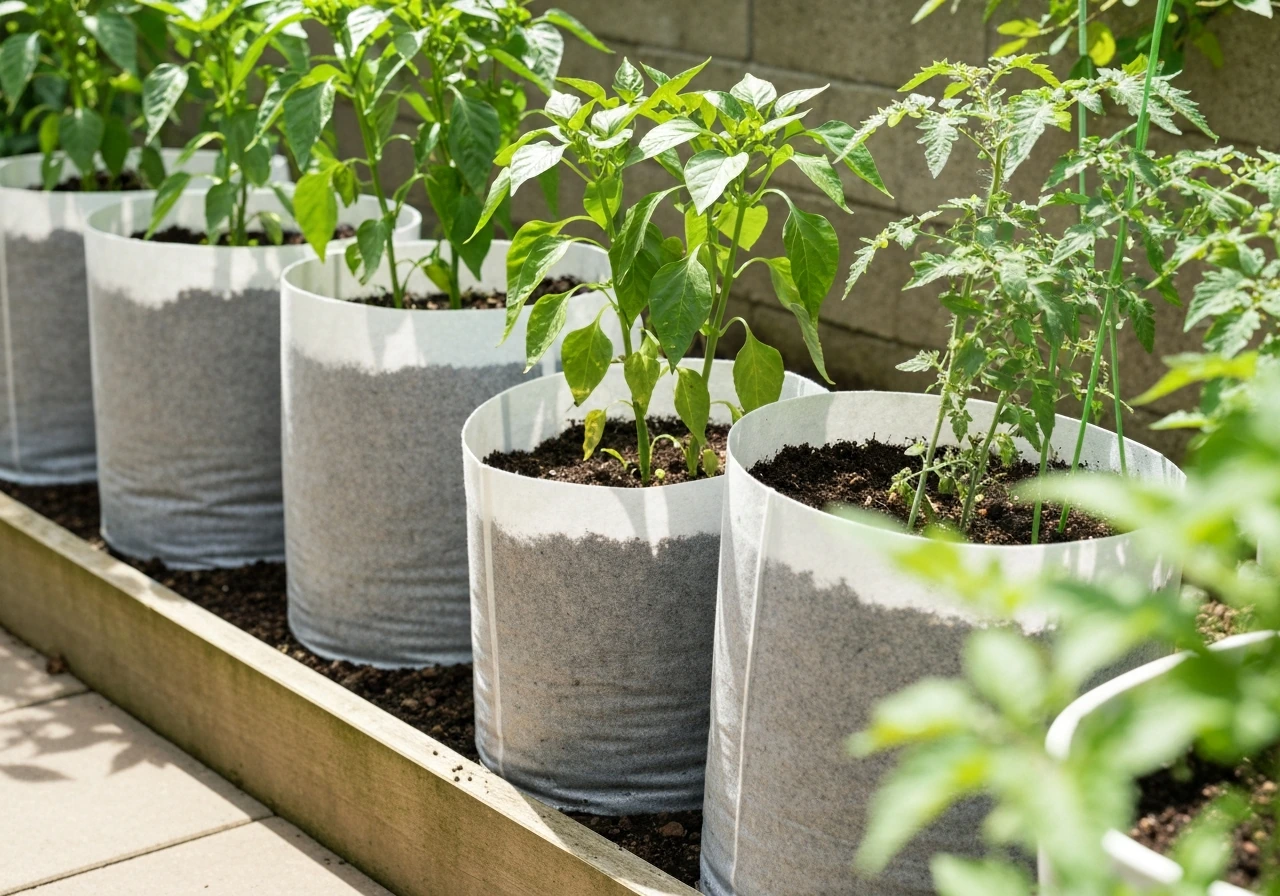
Tomatoes and peppers are the two crops that generate the most grow bag discussion on Reddit, and they have different needs. Tomatoes want as much root space as you can give them. A 7-gallon bag is the realistic minimum for a compact or determinate variety; indeterminate types genuinely benefit from 10 to 15 gallons. Under-potted tomatoes in fabric bags will dry out multiple times per day in hot weather, and that cycle of stress and recovery tanks your yield.
The watering solution that actually works is a drip timer set to run two short sessions (one in mid-morning, one late afternoon) so the bag dries before dark and you're not overwatering. Some growers do 20 minutes in the morning and 10 minutes around 5 PM with good results.
Peppers are more forgiving. A 3 to 5 gallon bag with a wider profile works well for most varieties. They don't need the root depth that tomatoes do, and they actually respond well to slightly drier conditions between waterings. Smaller bags dry faster, so watch your watering frequency more closely in July and August.
Potatoes are one of the best use cases for fabric bags because you can roll the bag down while planting and roll it up as you hill the plant. A 10 to 15 gallon bag gives you enough depth. Fill it about a third full to start, plant your seed potato, and add soil as the plant grows up.
Flowers
Most annual flowers thrive in 3 to 5 gallon bags. Marigolds, zinnias, petunias, and similar bedding plants don't need a ton of root space, and the air pruning in fabric bags actually encourages more fibrous root growth, which supports better flowering. Larger ornamentals or plants you want to overwinter should go into 5 to 7 gallon bags so the root mass has enough insulation during cool weather. Drainage in a flower setup is usually less of a concern than with heavy-fruiting vegetables, but the same elevation rule applies for pest prevention.
Trees and large shrubs
Citrus, dwarf apple, fig, and similar container-friendly trees are genuinely well-suited to fabric bags. The air pruning advantage is especially meaningful for trees because root circling in a plastic pot is a long-term problem that eventually restricts growth significantly. Moving a citrus tree from a plastic nursery container into a 15 to 25 gallon fabric bag and seeing fresh, healthy root growth within a few weeks is a real and commonly reported outcome. For young trees, start at 15 gallons and size up as the tree establishes. Use a quality well-draining potting mix with added perlite (around 20 to 30% by volume) to prevent compaction and waterlogging at the root base.
Mushrooms
Mushroom grow bags are a completely different product category. They're not fabric containers for soil growing; they're typically autoclavable polypropylene bags used to sterilize and colonize substrate (grain, straw, or supplemented sawdust) for species like oyster or shiitake mushrooms. If you searched for 'best grow bags' in a mushroom context, you want bags with a 0.2 micron filter patch and a thickness around 2 to 4 mil. These aren't for outdoor planting; they're for the sterilization and colonization phase before fruiting blocks are transferred to a fruiting chamber. Don't buy standard fabric garden grow bags expecting to fruit mushrooms in them.
Common problems and how to fix them
Bags drying out too fast
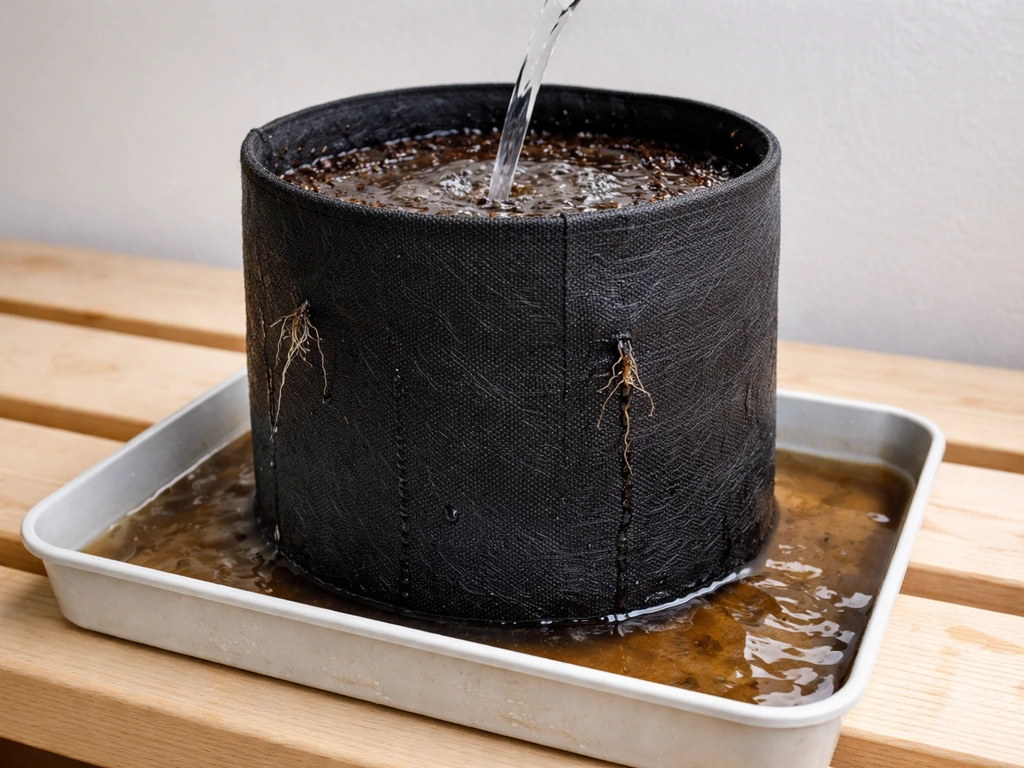
This is the number one complaint, and it's mostly a combination of bag size being too small and watering frequency being set up for plastic containers. The fix is usually one or more of: sizing up your bag, switching to a drip timer, using a reservoir tray (keeping only the bottom inch of the bag in contact with water to prevent root drowning), or choosing a heavier fabric weight. Mulching the top of the bag with a thin layer of straw or bark chips also meaningfully slows evaporation from the soil surface.
Roots coming out the sides of the bag
This looks alarming but is mostly fine. Roots that poke through the fabric walls get air pruned, which stops them from growing further and triggers the plant to produce more fibrous feeder roots inside the bag. You don't need to do anything. If it bothers you aesthetically, you can trim protruding roots with clean scissors. What you should not do is try to push them back in or worry that the plant is becoming root-bound. The whole point of the fabric bag is that it prevents root binding through this exact mechanism.
Nutrient leaching
Fabric bags drain freely with every watering, which means nutrients move through the soil faster than in a closed plastic container. This is especially noticeable with heavy-feeding crops like tomatoes. The fix is simple: use a slow-release granular fertilizer mixed into the soil at planting, and supplement with a liquid feed every one to two weeks during the growing season. If your plants are showing yellowing between leaf veins or pale new growth mid-season, nutrient deficiency is almost always the cause.
Pests getting in from below

Slugs, pillbugs, ants, and fungus gnats can all enter through the bag walls or drainage area when bags sit directly on soil or mulch. Elevating on paver stones or a wooden board cuts this off almost entirely. A 12x12 inch concrete paver works well for bags up to 7 gallons. For larger bags, two pavers side by side work fine. If fungus gnats are the issue specifically, the cause is almost always overwatering, and the fix is letting the top 2 inches of soil dry out before watering again.
Bags tipping over in wind
Fabric bags are lighter than comparably sized plastic or ceramic pots, which makes them more prone to tipping when the soil is dry. The practical fix is placing bags inside a wire cage, grouping several bags together so they support each other, or setting the bag inside a slightly wider decorative container that adds stability without blocking airflow. Heavy-duty bags with reinforced handles can also be staked or tied to a railing or fence in very windy spots.
Soil mix problems
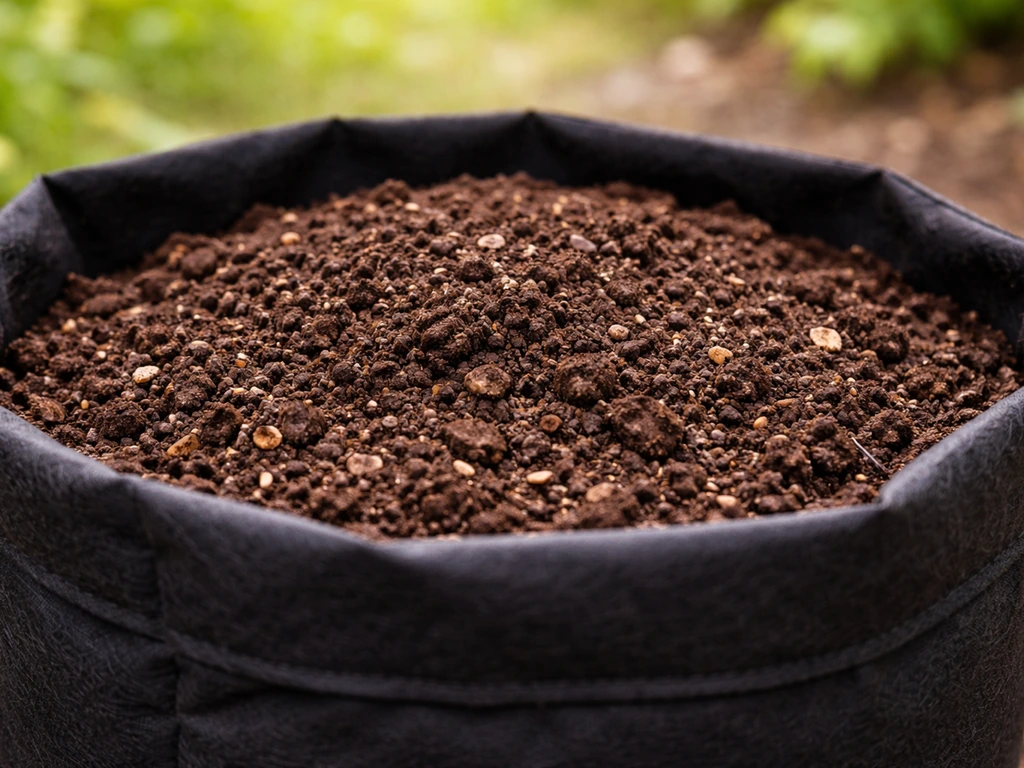
Plain garden soil is a bad choice for any container, and especially for fabric bags. It compacts quickly, drains poorly, and suffocates roots. Use a quality potting mix as your base and add 20 to 30% perlite to improve drainage and prevent compaction over the course of a season. For trees and long-term plantings, a mix with bark fines or coarse coconut coir adds structure and keeps the mix from collapsing. For heavy feeders like tomatoes, blend in a slow-release vegetable fertilizer at the recommended rate before planting.
Where to start today: recommended picks and next steps
If you're a first-time grow bag buyer, here's how to move from reading to actually doing something useful in the next hour.
- Decide your crop first, then pick your size. Use the table earlier in this article. Don't let a good deal on a bag in the wrong size talk you into it.
- Buy 300–400 GSM non-woven polypropylene bags with no liner. Skip anything marketed as 'fabric pot with plastic inner liner' unless you're sure it has adequate drainage holes punched through.
- Order a bag of quality potting mix and a bag of perlite at the same time. Mix roughly 3 parts potting mix to 1 part perlite before filling your bags.
- Plan your watering before your seeds or transplants go in. If you can't water daily in summer, set up a basic drip timer on your hose. It costs $20 to $40 for a timer and basic emitter kit and will do more for your results than any premium bag upgrade.
- Elevate your bags off the ground from day one. A paver stone or wooden board under each bag is a five-minute setup that prevents a whole category of pest problems.
- In the first two weeks, water when the top inch of soil is dry and watch for wilting in the late afternoon. Afternoon wilting that recovers by morning is normal in heat; wilting that persists into the morning means the plant is genuinely stressed and needs more water or a larger bag.
- At week two, start a liquid fertilizer routine if you're using a standard (non-pre-fertilized) potting mix. A balanced NPK liquid feed every 7 to 14 days keeps heavy feeders productive through the season.
The Reddit consensus on grow bags, stripped of the back-and-forth, is actually pretty consistent: fabric bags work well when you match the size to the crop, use a good soil mix, and solve the watering frequency challenge upfront. The growers who love them figured those things out. The ones who complain about them usually sized down to save money or expected them to behave like plastic pots. Get those basics right and you'll be in the group that recommends them.
FAQ
How do I figure out the right grow bag size if I’m between two sizes for my crop?
Use a simple rule of thumb, go up for tomatoes and any indeterminate varieties, and go up if your summers are consistently hot or windy. Go down only for peppers and flowers if you can reliably water at least every day in peak heat. When in doubt, wider over deeper for most crops, carrots and similar root veggies are the exception.
What’s the best way to water a fabric grow bag without overwatering or underwatering?
Water to runoff, then wait until the top 2 inches dry before watering again, this prevents the cycle of “wet, then stressed, then root issues” that drives many Reddit complaints. If you use a timer, run short sessions earlier in the day, and avoid long continuous watering that keeps the bag saturated into the evening.
Do fabric grow bags need fertilizer differently than plastic pots?
Yes. Because the fabric container drains freely, nutrients can wash through faster. Start with a slow-release fertilizer at planting for heavy feeders like tomatoes, then plan on supplemental liquid feeding roughly every 1 to 2 weeks during the growing season and adjust based on leaf color.
My plant is wilting even though the soil feels damp sometimes, what should I check first?
Check whether the bag is drying unevenly, fabric bags can be dry at the top while wetter deeper down. Also verify you are not accidentally using a liner that traps moisture, and make sure the bag is elevated so runoff is not sitting under the fabric and causing root-zone instability.
Can I reuse grow bags from last year, or do they need to be replaced?
You can often reuse them, but inspect for thinning at seams and any persistent odor, discoloration, or visible rot. If you had serious pest issues or fungal problems, prioritize replacing the bag because the material can harbor residues in the fibers even if you sterilize your soil.
What potting mix should I use to avoid compaction in fabric bags?
Use a quality container potting mix, not garden soil. Plan on mixing in 20 to 30% perlite for drainage and to slow compaction over the season. For trees or long-term plantings, add something structural like bark fines or coarse coconut coir so the mix doesn’t collapse and stay soggy.
Should I mulch the top of a fabric grow bag, and what kind of mulch works best?
Yes, top mulching helps slow evaporation and reduces the “dries out twice a day” problem. Keep mulch thin and breathable, straw or bark chips work well, and avoid burying the plant stem base where it can stay too wet.
Are self-watering grow bags worth it, or should I stick to a normal fabric bag plus drip?
For most home setups, a normal fabric bag with a drip timer is usually more practical. Self-watering systems only make sense if the reservoir volume matches your heat conditions or you need to travel. If you go self-watering, confirm the reservoir is large enough for more than a day in summer and doesn’t leave the fabric constantly waterlogged.
What should I do if roots are poking out of the sides and it looks bad?
It’s normal. Those roots get air pruned, which is the intended benefit, and the plant will make more fibrous feeder roots inside. Trim protruding roots only if you dislike the look, do not try to force them back in or you defeat the air-pruning effect.
How can I prevent slugs, pillbugs, ants, and fungus gnats in fabric bag setups?
Elevate the bags, setting them on pavers or a board blocks many pests from reaching the drainage zone. If fungus gnats are the issue, the main lever is watering schedule, let the top 2 inches dry before watering again to break the breeding conditions.
My fabric grow bag tips over when it dries out, is that normal and how do I fix it?
It happens because dry soil and a lighter bag lose stability. Fix it by placing the grow bag inside a wire cage, grouping multiple bags so they support each other, or setting it inside a wider decorative container that doesn’t block airflow. In very windy areas, stake or tie the bag to a railing.
Can I use fabric grow bags outdoors during winter, and what changes should I make for that?
You can, but plan for freeze-thaw stress and root temperature swings. Larger bags (often 5 to 7 gallons for ornamentals, 15 to 25 for container trees) insulate roots better, and you should keep the planting medium from staying waterlogged during thaw cycles by ensuring it drains well.
Are mushroom grow bags the same as soil-growing fabric grow bags?
No. Mushroom grow bags are typically specialized sterilization and colonization packaging, usually with specific filter requirements and thickness. Don’t buy “best grow bag” garden fabric bags expecting mushrooms to fruit, they are used for different phases and different conditions.
Next Articles
Best Soil for Grow Bags: Mix Recipes and How Much to Add
Best soil for grow bags: mix recipes, how much to add by bag size, and vegetable tweaks for strong drainage and yield.
Pros and Cons of Grow Bags for Vegetables and Flowers
Grow bag pros and cons for veg, flowers, trees, and mushrooms: aeration, mobility, and watering plus fixes for common is
Benefits of Grow Bags: A Practical Guide for Home Growing
Discover the benefits of grow bags: better drainage and aeration, healthier roots, easier plant care, and how to choose